This post contains affiliate links, please read our disclosure policy.
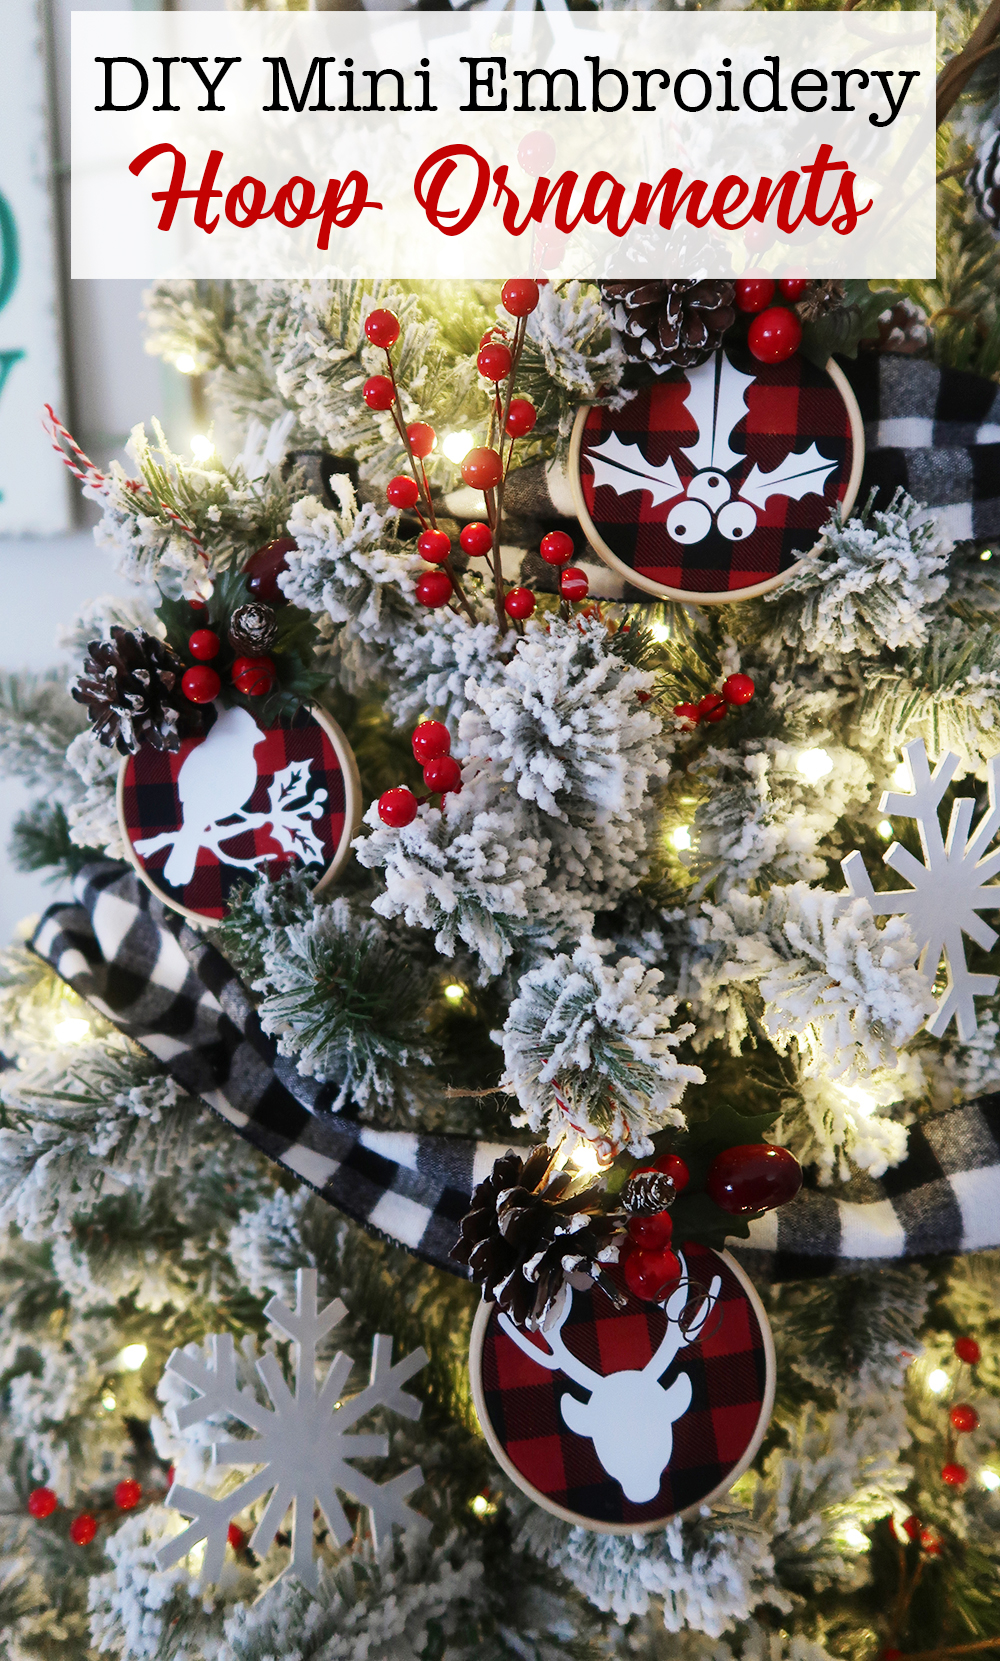
Make your own ornaments with mini embroidery hoops, iron-on vinyl and your Cricut. Perfect DIY for your Christmas tree.

Embroidery hoops aren’t just for embroidering anymore. They make the perfect base for unconventional wreaths and ornaments. After making my Christmas embroidery hoop wreath I decided to find some smaller embroidery hoops to make ornaments.
Now it’s actually the same exact process you just make everything smaller! Why reinvent the wheel. I am using my new Cricut Maker, a Cricut Explore would work too, and iron-on vinyl and my new EasyPress2, an iron would also work.
This post contains affiliate links.
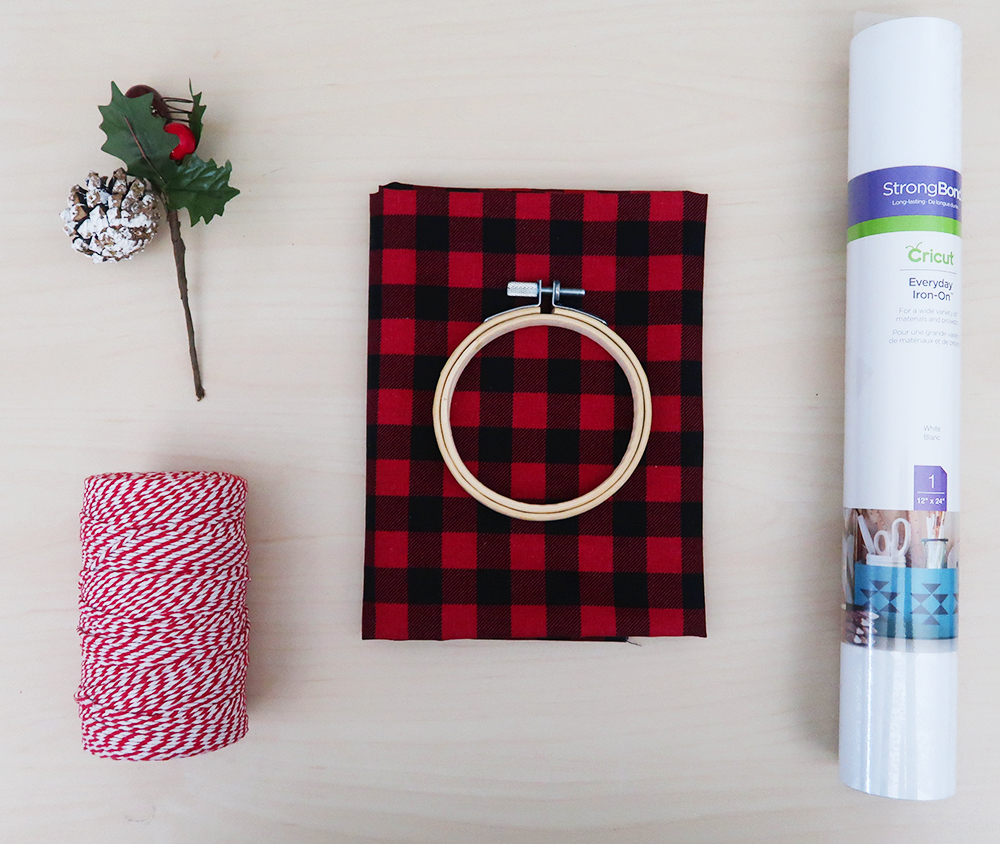
What you’ll need
-
Buffalo Check Fabric
-
Christmas floral
Watch how I made it below
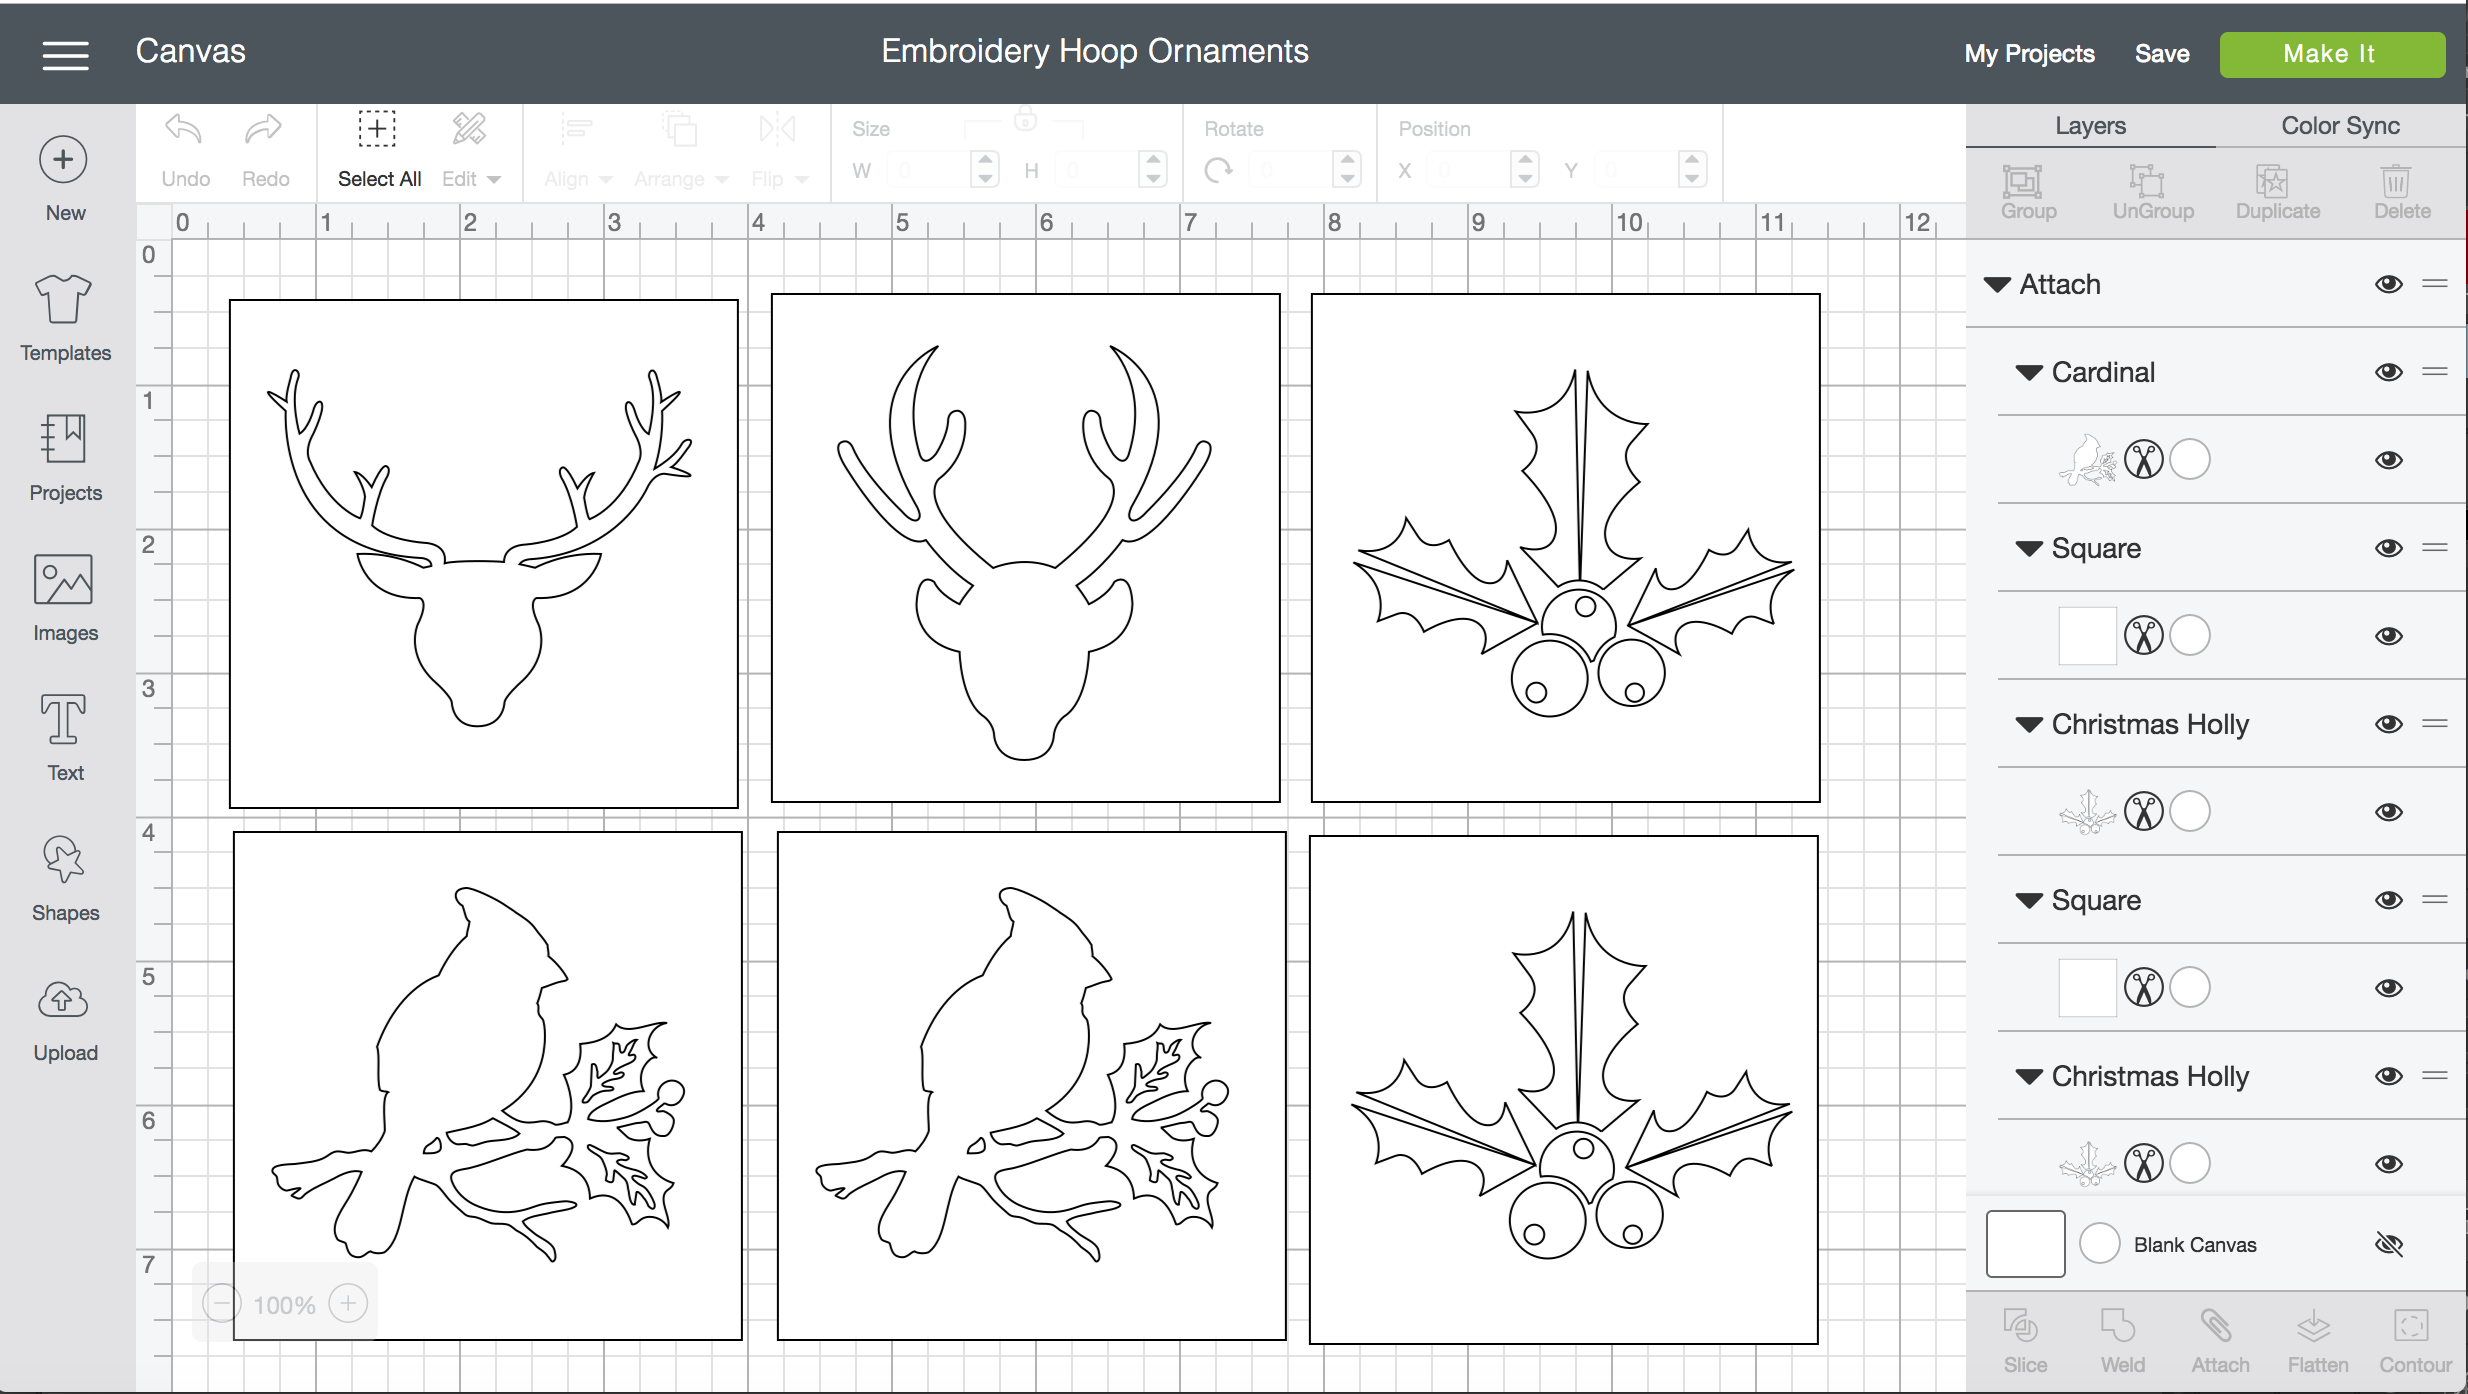
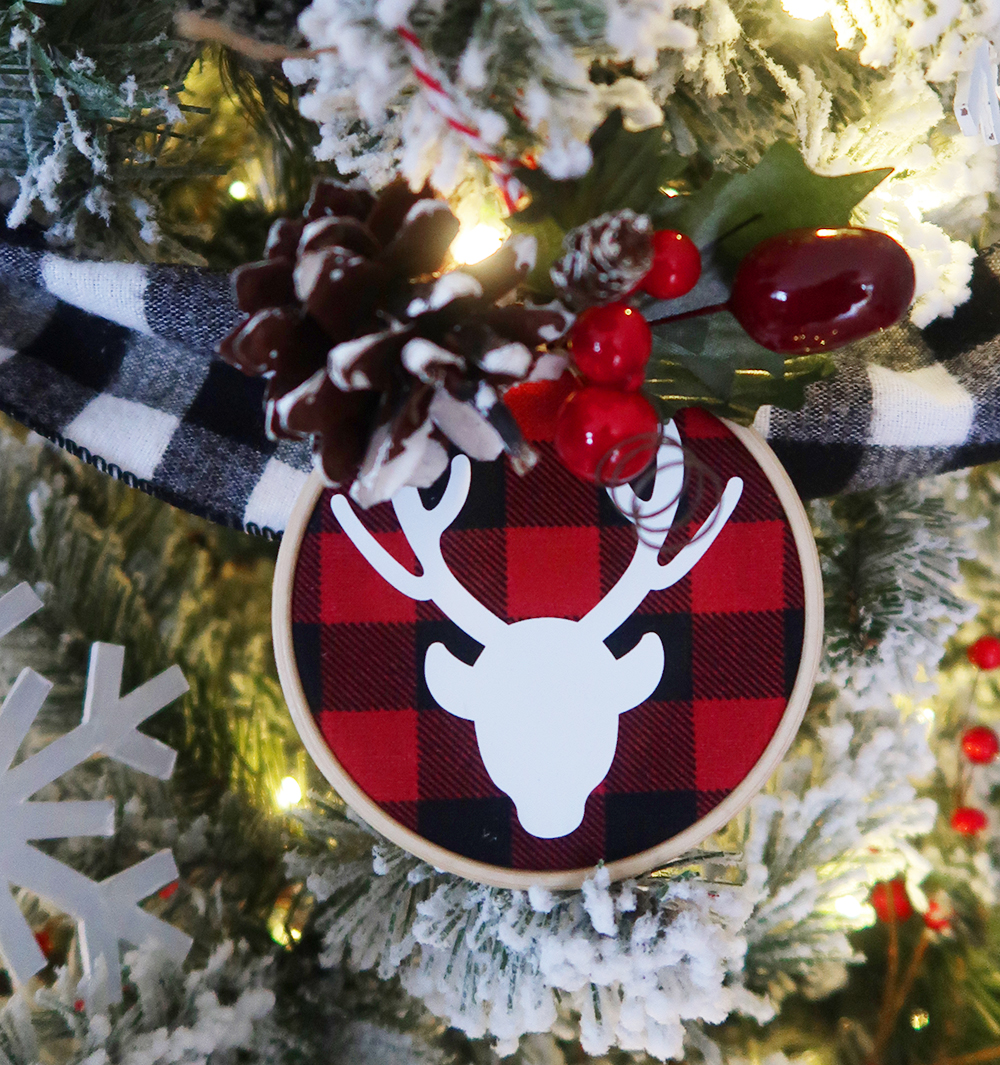
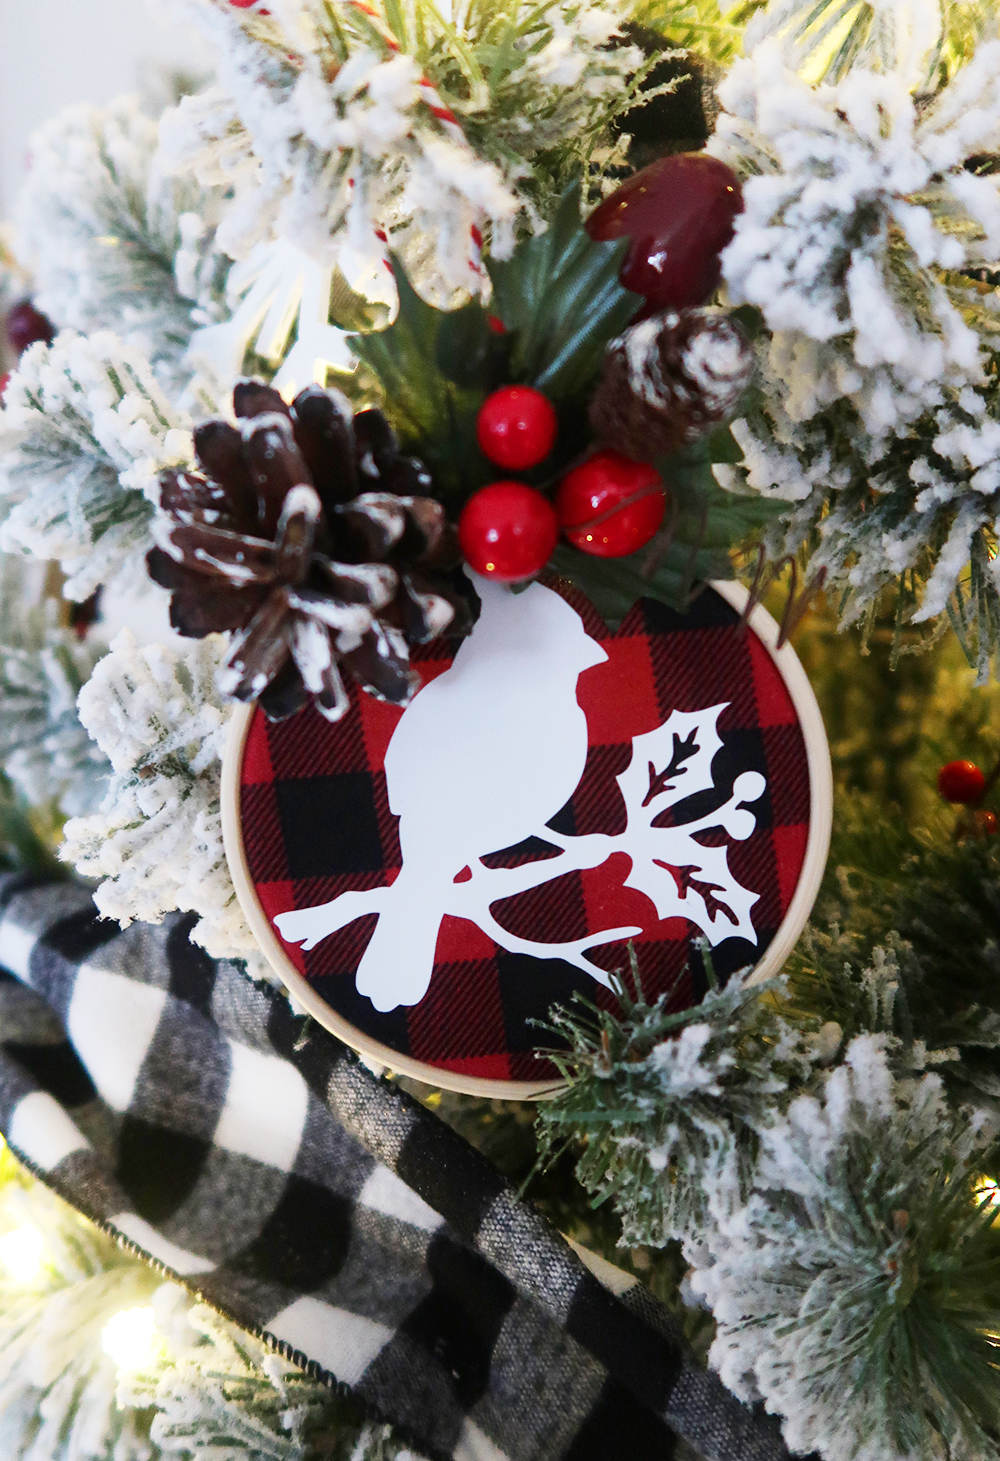
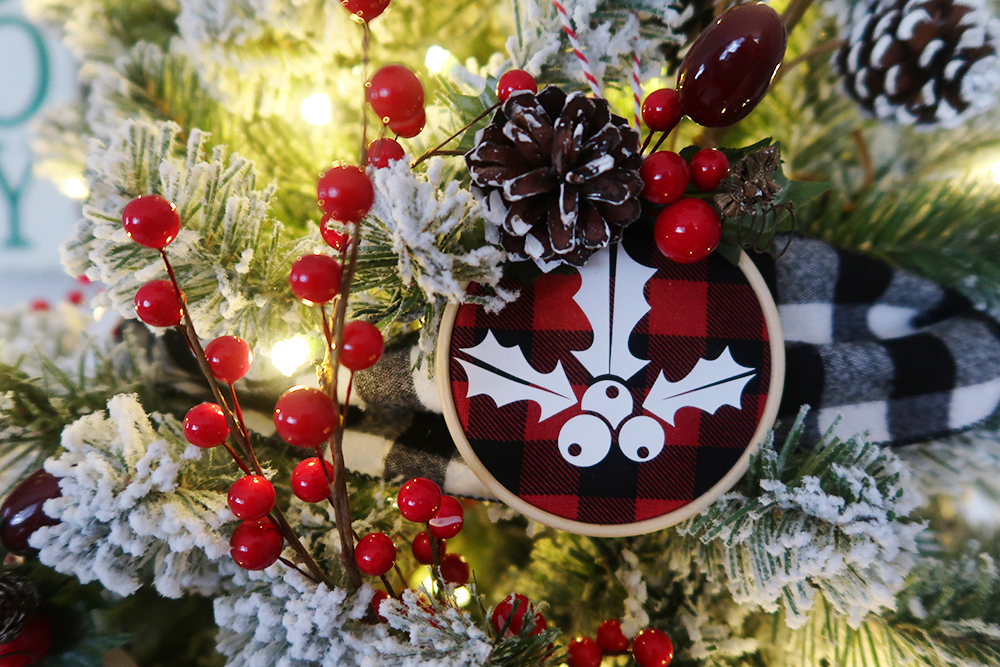
I used all shapes that I found in the Cricut design space. I sized them under 3 inches since we know our mini ornaments are 3 inches wide. I set my Cricut to the iron-on setting and made sure to mirror my images. Placing the clear plastic side of the iron-on down I loaded my mat and started to cut.
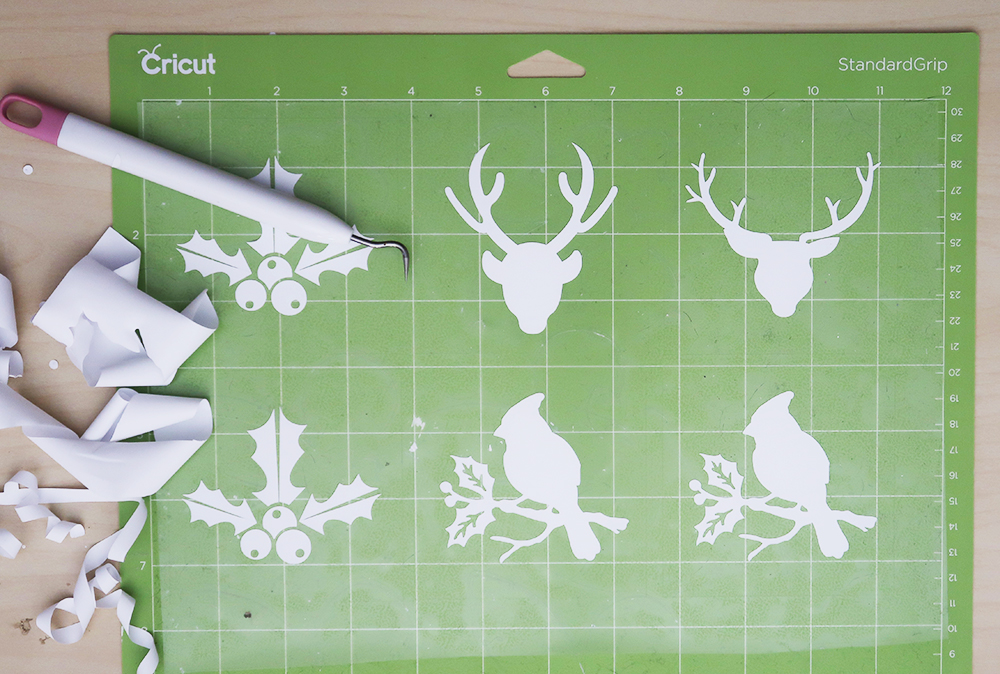
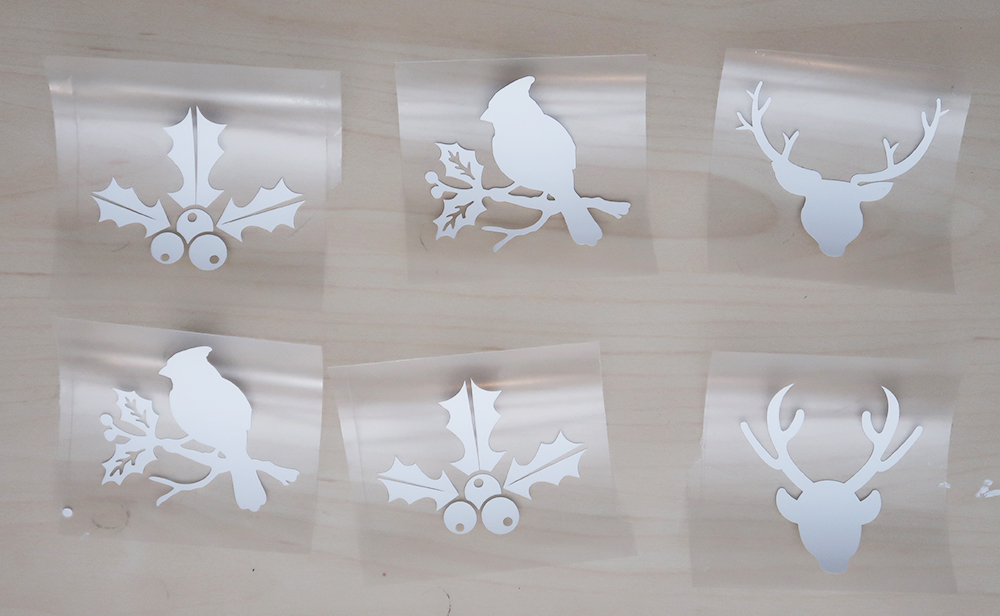
Once I weeded out the extra iron-on vinyl I used a ruler and exacto knife to cut them out individually.
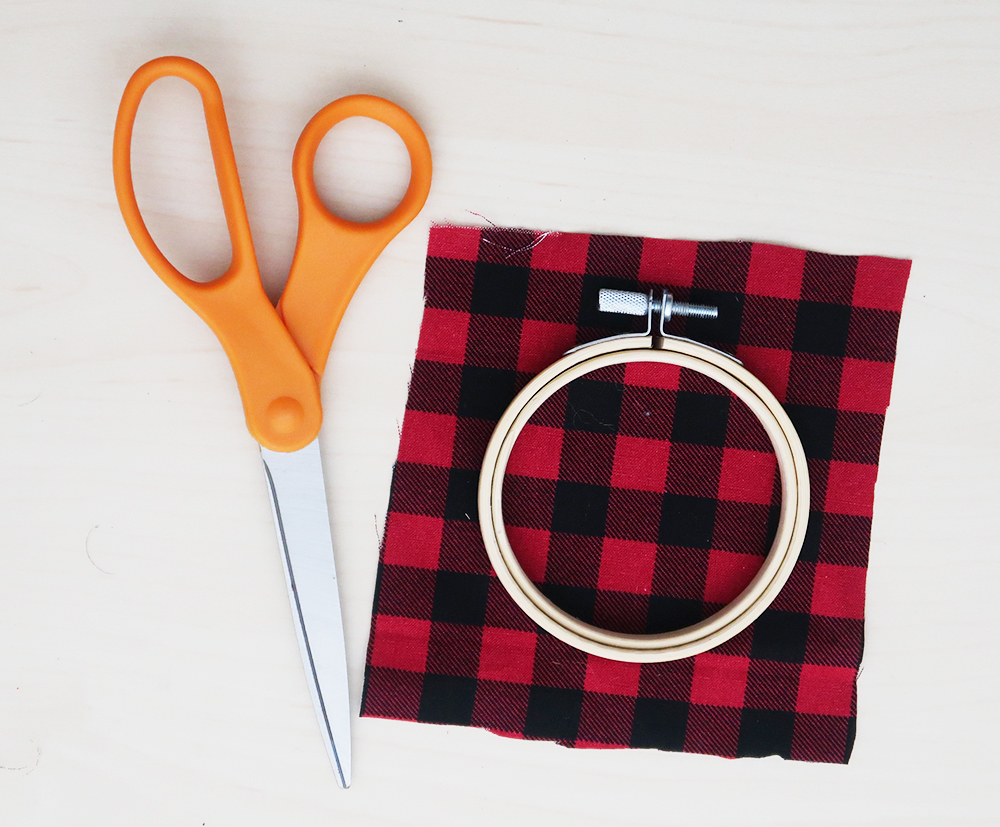
Cut your fabric
Place your hoop on your fabric and cut around the hoop leaving about a 1/2 inch of excess fabric on each side.
I placed my hoop on the fabric to get a sense of where the wording should be placed. Lift your embroidery hoop and you are ready to grab your heat press.
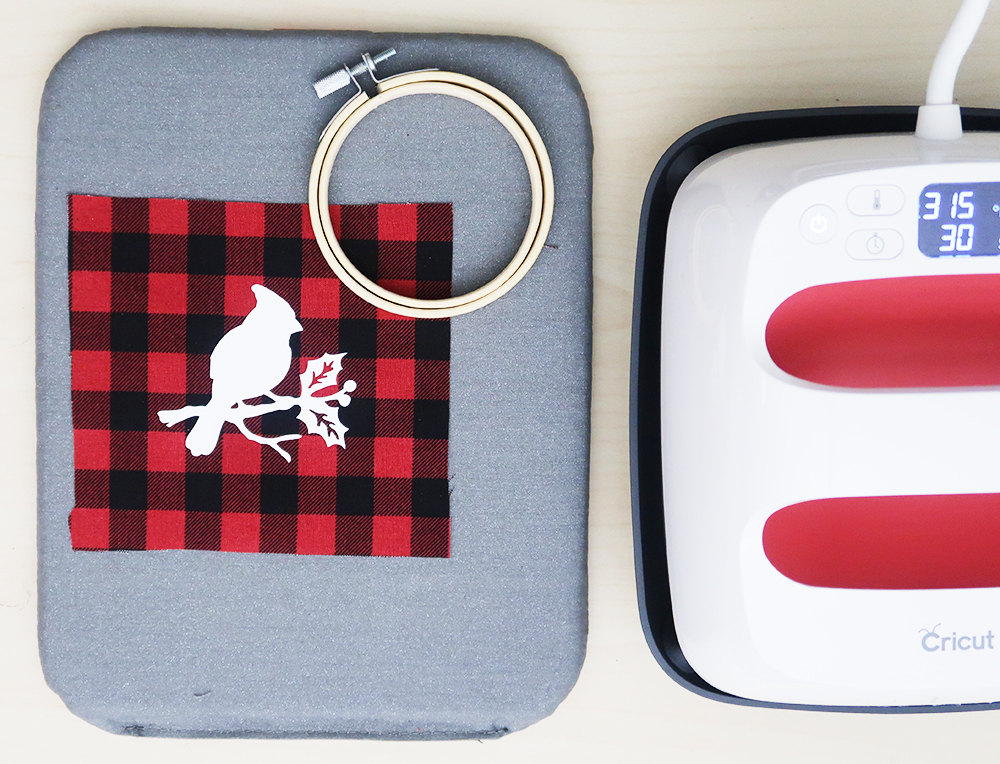
Heat Press
We are going the apply the iron-on to our fabric. Now I wanted to choose a Christmas fabric but still something subtle enough that the lettering would shine through. I went with this buffalo check from Joanns. For my heat press I used the Cricut EasyPress2 6×7 (discontinued) I set it for 315 degrees for 30 seconds. I liked having a smaller heat press for a small project like this.
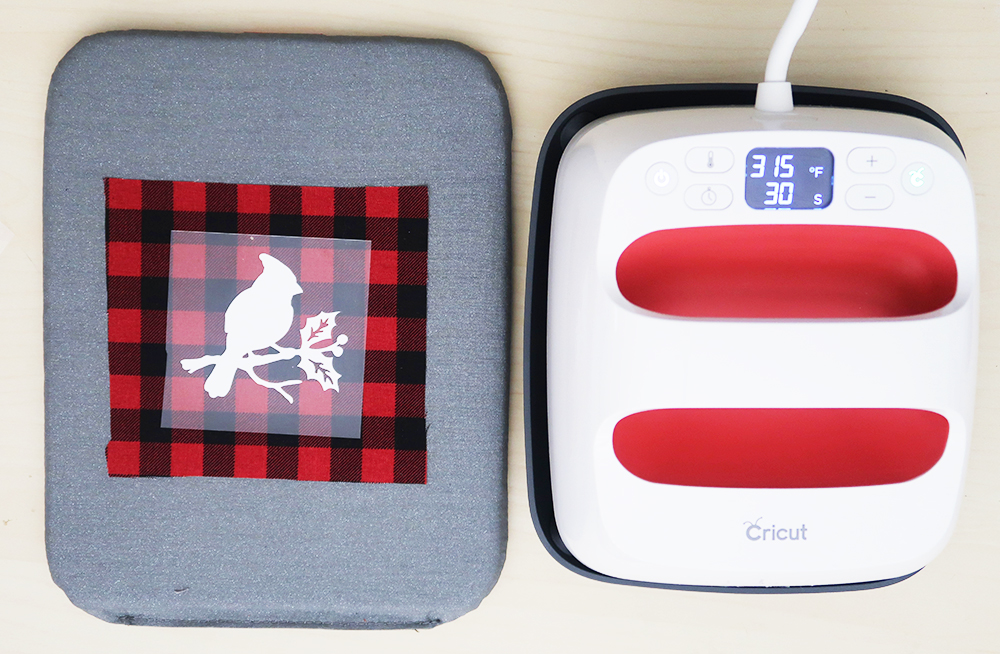
I usually let my iron-on cool to the touch before pulling it back.
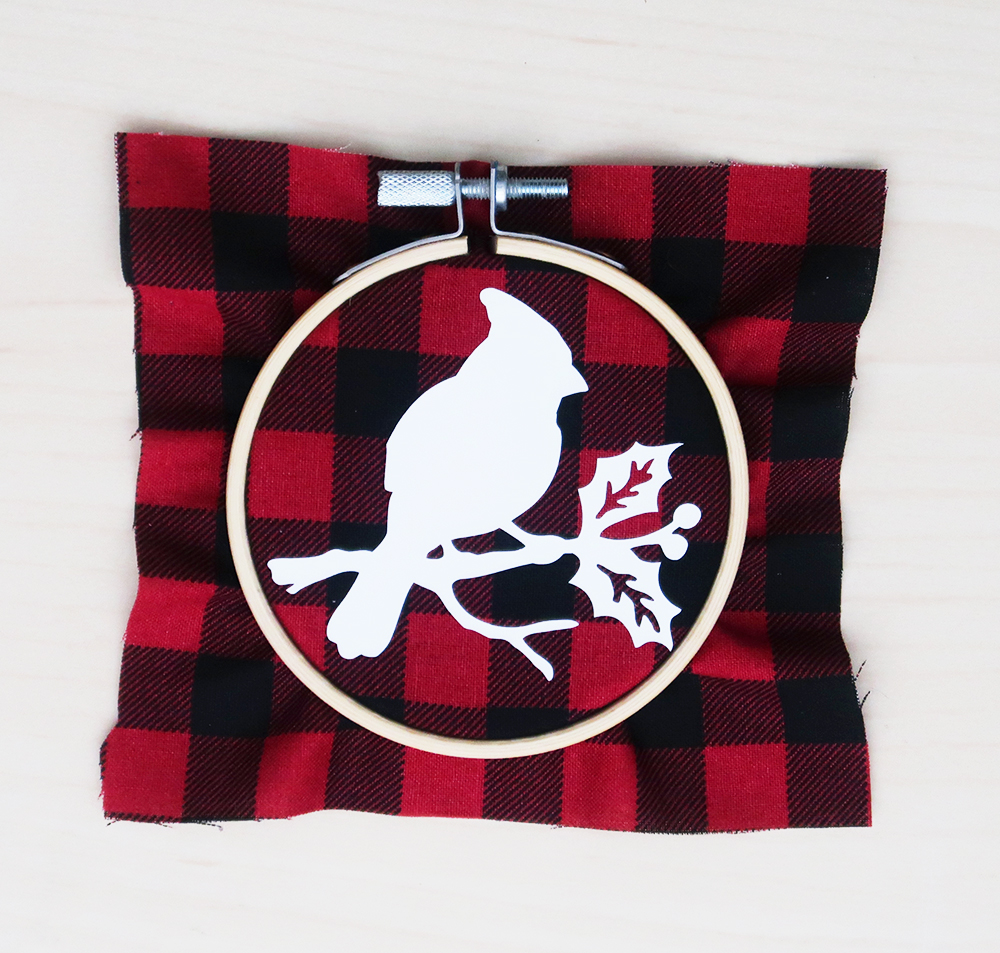
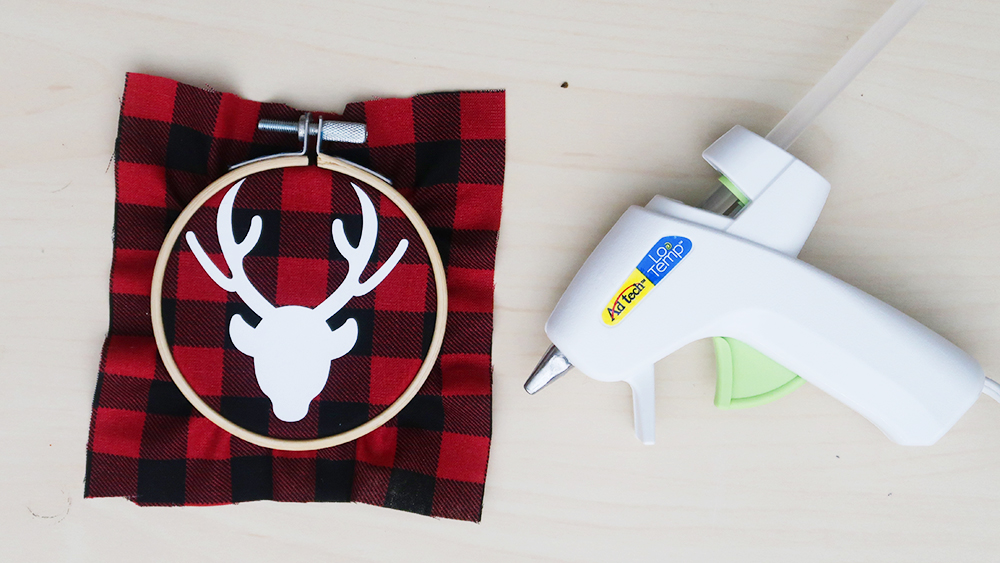
Embroidery Hoop
I unscrewed the top of the embroidery hoop loosening it just so you could remove the inner circle. I placed my design on top of the smaller hoop once it was in position I placed the larger hoop over it. Make sure to pull the fabric tight and screw the top back into place.
Trim
Once your fabric is in place cut the excess fabric on the back of the hoop. Do not trim to much. You need enough fabric to glue to the back of the hoop. Use a hot glue gun to glue the excess fabric to the inside of the embroidery hoop.
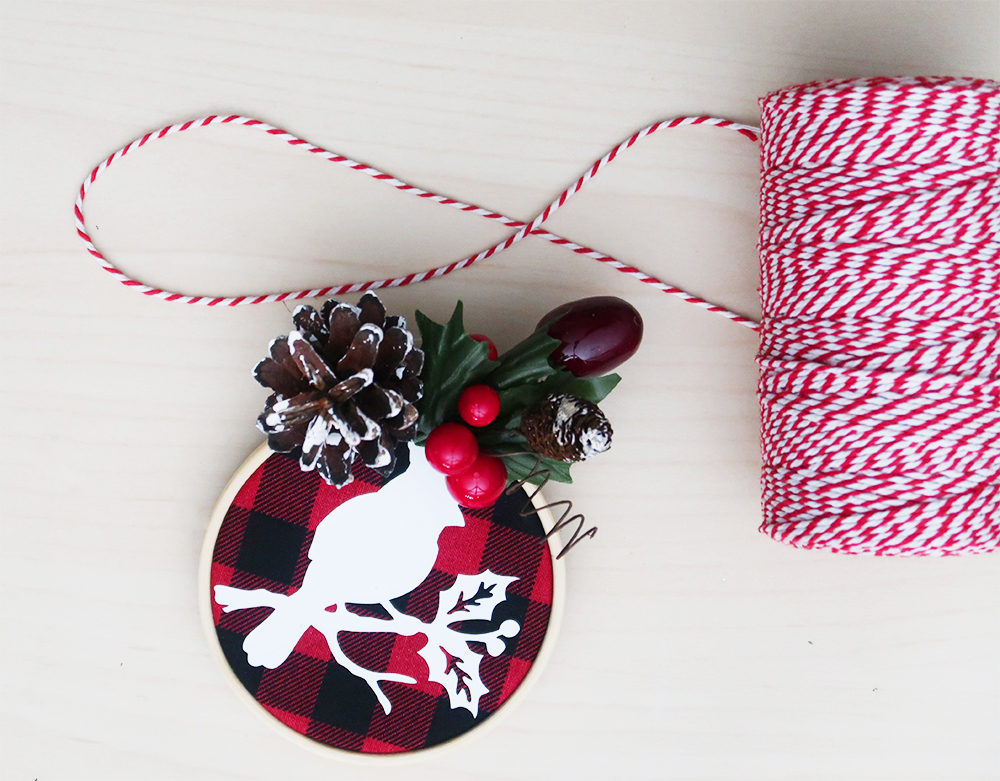
Glue on accents
I found these small floral accents at Hobby Lobby. Using a high heat glue gun I added the floral pieces to the top of the embroidery hoop. Since this was smaller swag I was able to twist it through the enclosure. To finish it off I uses some bakers twin to make a loop to hang on the Christmas tree.
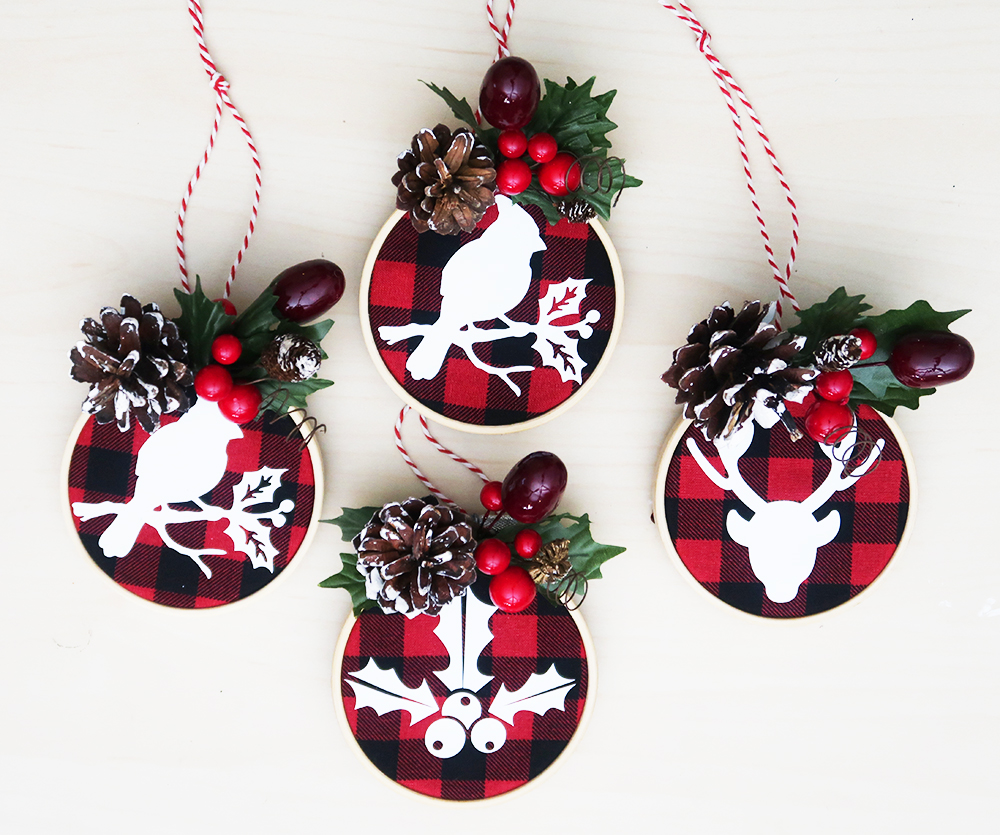
I am so happy with how these came out. I think choosing a few different kinds helps add variety to the Christmas tree.
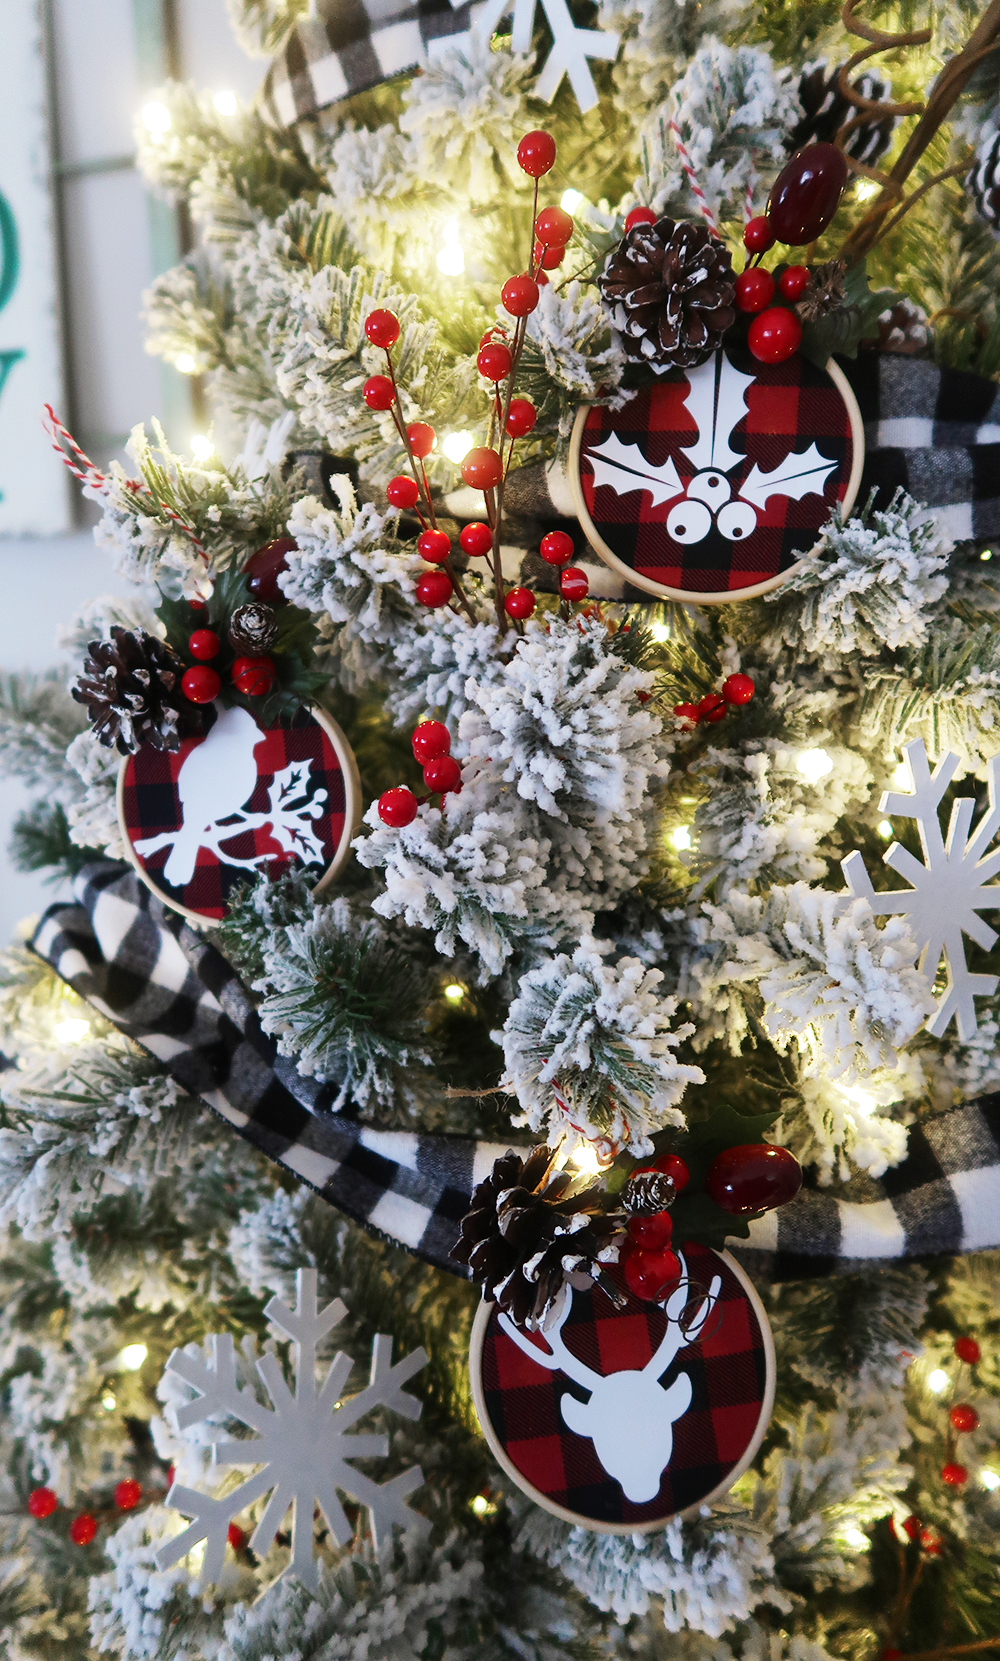
Now this year the theme for my Christmas tree is buffalo check. Now the white and black buffalo check is the focal point but adding smaller pieces of red and black buffalo check really pop off the flocked tree.
Want to see my full Christmas tree? Check it out here.
If you are going to create these on your own make sure to pick iron on vinyl that will pop or contrast to your fabric.
Tip: I always add pine cones and red berries to my Christmas trees it makes them feel fuller and more upscale. It will also help incorporate some natural elements.


Those are cute. I’ve been thinking about getting a Cricut. Are they hard to operate?