This post contains affiliate links, please read our disclosure policy.
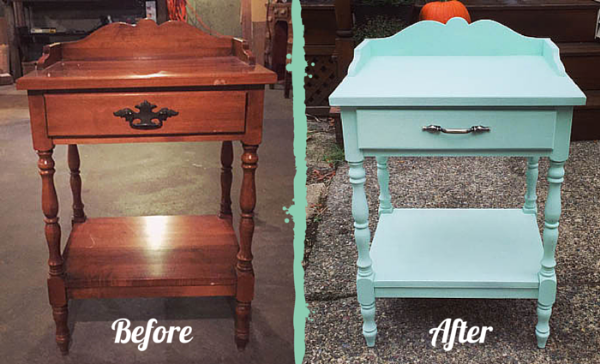
A few weeks ago I scored this table after a yard sale was over. I was searching for a yard sale I had found on my yard sale app, after going up and down the street 3 times I was about to give up. I stopped at a house with a sweet couple chatting with a neighbor in their drive way. They were standing there with this table next to them. I asked them about the street number and it turned out I had put in County St. instead of County Rd. in my GPS.
But that’s okay because they were putting this pretty lady on the street with a free sign. It was as if it was meant to be, destiny! They had put on a yard sale the week before and she hadn’t sold.
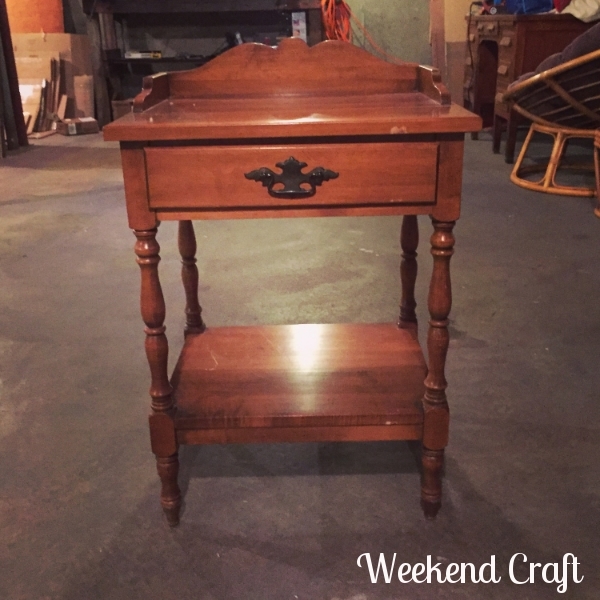
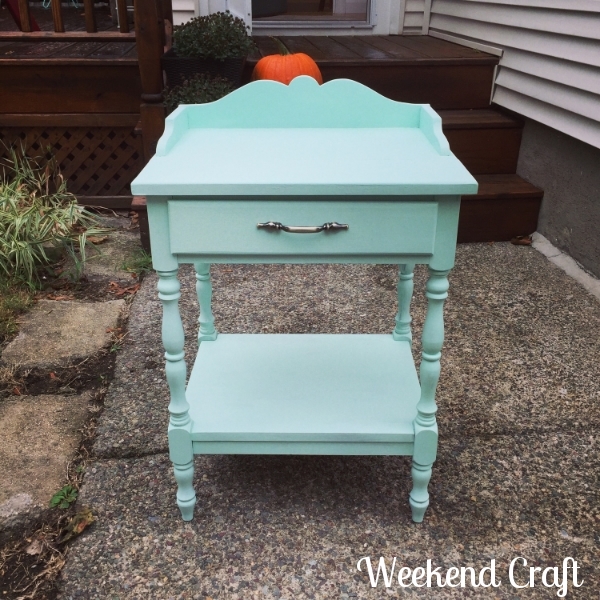
Most people would see this table and think it’s dated but I see it and think look at those legs! It’s getting past what it looks like now and seeing the potential! With a little bit of paint and some new hardware she will be back in this century.
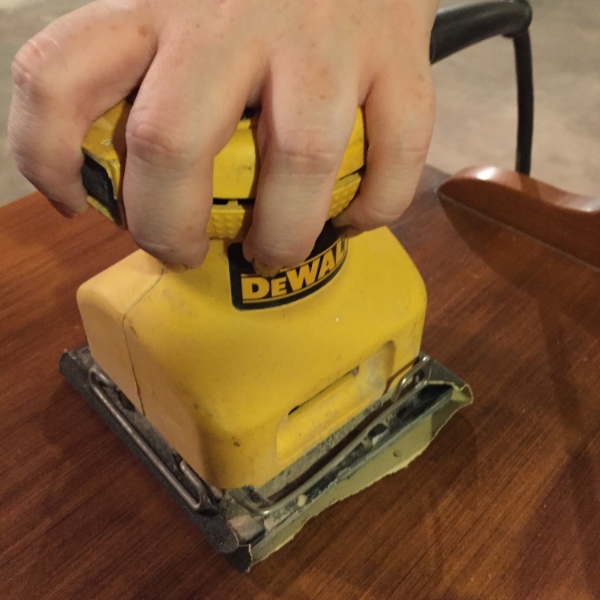
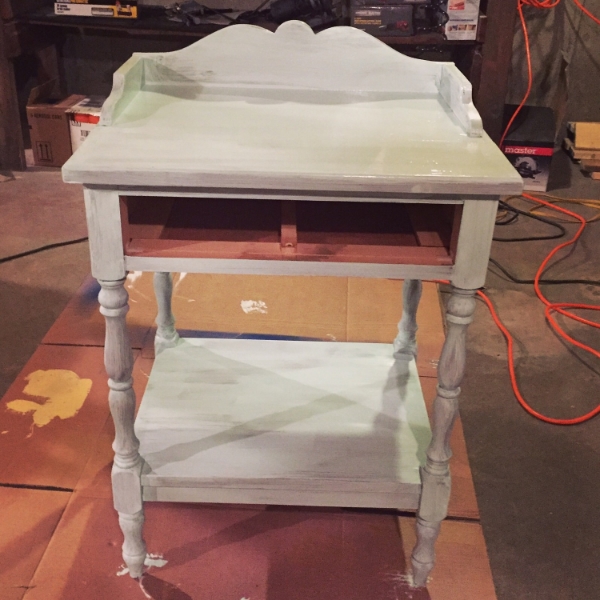
Even though I am using chalk paint I like to scuff up the surface by sanding it. This will create a porous surface for the paint to adhere to. Use either 100 or 150 grit sand paper you can do this with a palm sander or by hand if you don’t have one. I also suggest hand sanding the legs of the table.
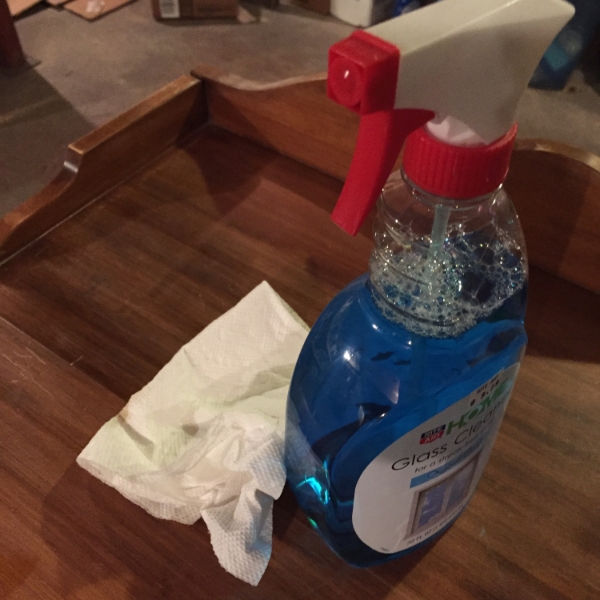
After sanding you want to make sure that you clean and dry the surface of the table. You don’t want the dust from sanding to mix with your paint.
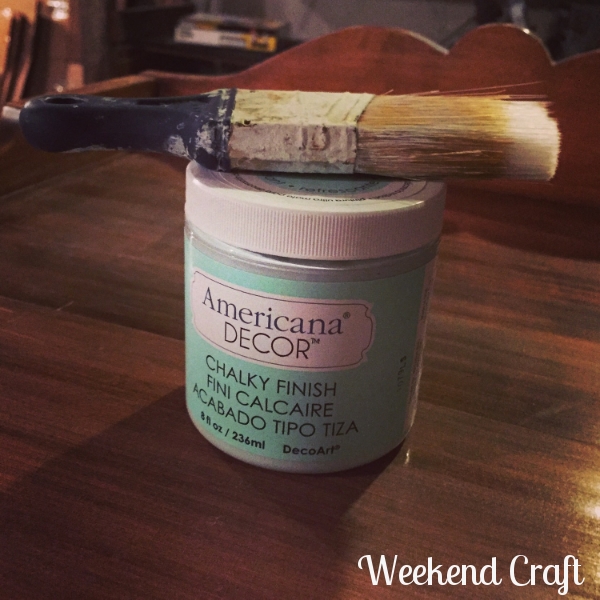
I had recently purchased Americana Decor chalk finish paint for another project but decided that this color would be perfect pop of color to make this end table stand out. Choosing a chalk finish paint gives the end table more of a flat finish almost like using an eggshell paint on your wall vs. a gloss sheen.
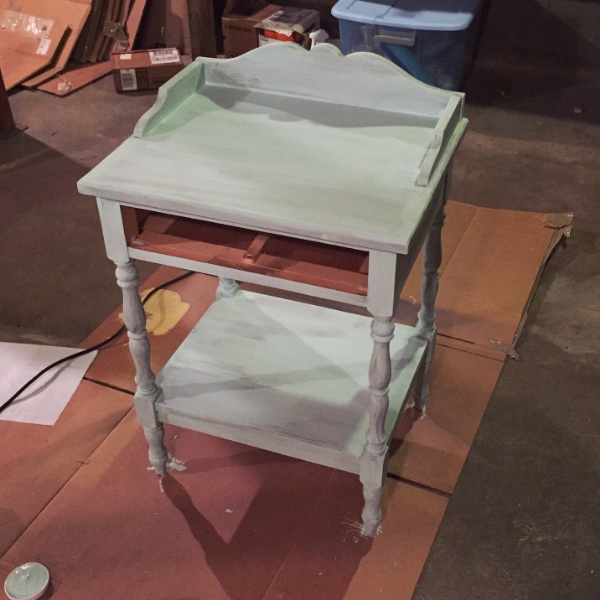
Now if you were going for more of a shabby look 1 or 2 coats may work for you but with this piece I was looking for consistent overall paint coverage. This required 3 coats. Luckily chalk paint usually dries fast. Making it a project that can be done in a day or in this case a Friday night. Believe me there is nothing I would rather do on a Friday night than make a cocktail and grab a paint brush. Especially after a long week at work.
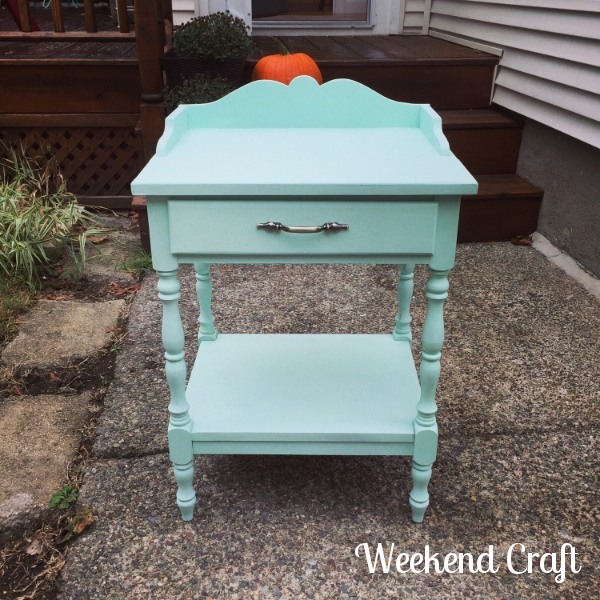
I absolutely love how this came out! I even debated keeping it for myself. I finished this piece off by going to my local hardware store and finding a drawer pull that was a little bit more modern than the original pull. I did want to make sure that the pull had some detail to make it a statement but also be timeless.
Another curbside rescue and it only took a few hours. So think twice before putting something out at the curb or don’t be afraid to make that U turn if something catches your eye. Any passenger in my car should know that their will be a detour if I catch something curbside that catches my eye.
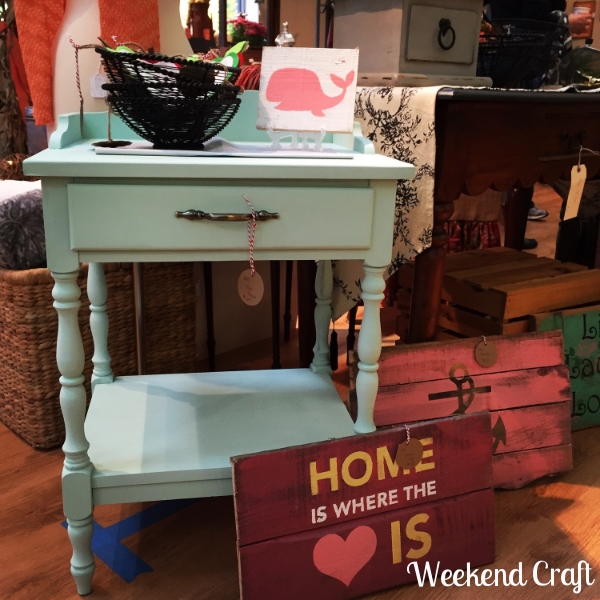
This lovely mint (looks more on the blue side in these photos but it’s more mint) is residing at Signature Finishes in North Grafton, MA. Stop by and say hello or maybe even take her home with you 😉 !


I love this color, it’s so pretty! Awesome makeover 🙂
I love this…I have been using the Chalky Finish paint for a lot of projects lately. What do you use for sealing? I have been using the Soft Touch Varnish, but I know they have other "sealers" too.
Hi Kim! I have used a few different sealer on this one I used Deft Finishing spray in satin. Its a quick sealer to just spray on. https://amzn.to/1Etrp1q
I just bought Johnston paste wax after seeing Bre from Brepurposed use it. I am going to use it on my next project. https://amzn.to/1pPK51v
Love how this turned out!!
It’s beautiful! Did you finish it with some kind of wax? I’m just starting to use chalk paint in my projects and haven’t quite figured out the waxing part yet!!:)
This looks fabulous! Pinned. We couldn’t think of anyone better to party with! Thank you for stopping by. I hope to see you on Monday at 7 pm. https://loulougirls.blogspot.com/Happy Saturday! Lou Lou Girls
I just love this color. What a lovely job you did!
Super cute! I love the color, and it look so great in the store!!!
Love this I want to do with my end tables!
It looks beautiful!! I adore mint and you did a great job 🙂 –Brittanywww.diyjustcuz.com