This post contains affiliate links, please read our disclosure policy.
Table of Contents
- How to convert Epson printer into a sublimation printer. Step by step how to convert an Epson EcoTank ET-2720 into a sublimation printer.
- What is sublimation printing?
- What is a sublimation printer?
- Can you use a regular printer for sublimation?
- Supplies to convert Epson printer into a sublimation printer
- Buying a Epson printer for sublimation
- Tips for finding an Epson EcoTank printer in stock.
- How to convert Epson printer into a sublimation printer
- Step 1: Unbox the Epson EcoTank 2720
- Step 2: Prep your workspace
- Step 3: Empty Epson in bottles
- Step 4: Clean ink bottles
- Step 5: Transfer sublimation ink
- Step 6: Load ink into printer
- Step 7: Setup the printer
- Sublimation transfer paper
- Tips for sublimation printing
- How to make a sublimation mug
How to convert Epson printer into a sublimation printer. Step by step how to convert an Epson EcoTank ET-2720 into a sublimation printer.
This post contains affiliate links.
I am so excited to share with you guys how I converted an Epson EcoTank 2720 into a sublimation printer. This Epson sublimation printer conversion was so easy. I went from working with vinyl, iron-on and HTV to sublimating in under an hour.
We’ve been seeing the trend of sublimation in crafting the past year. I had dabbled in sublimation with Cricut Infusible Ink but found the colors and patterns limiting to the designs I wanted to create.
What is sublimation printing?
Sublimation printing is a printing process that transfers ink on to a material using heat. In this case you print with sublimation ink onto a sublimation paper which is then heat pressed on to an object ie: shirt, mug, hat, etc. This is a permanent process that gives you a professional quality.
Sublimation is used by many print on demand companies.
What is a sublimation printer?
A sublimation printer is a printer that can support sublimation ink. You can buy a sublimation printer like a Sawgrass or you can convert a printer like we are doing today.
Note sublimation printers are very expensive from $700 to thousands. Which is why many crafters choose to convert a printer into a sublimation printer.
Can you use a regular printer for sublimation?
An Epson sublimation printer is an Epson EcoTank printer that has been converted into a sublimation printer. It’s essentially a hack that will turn a $200 printer into a sublimation printer that saves hundreds.
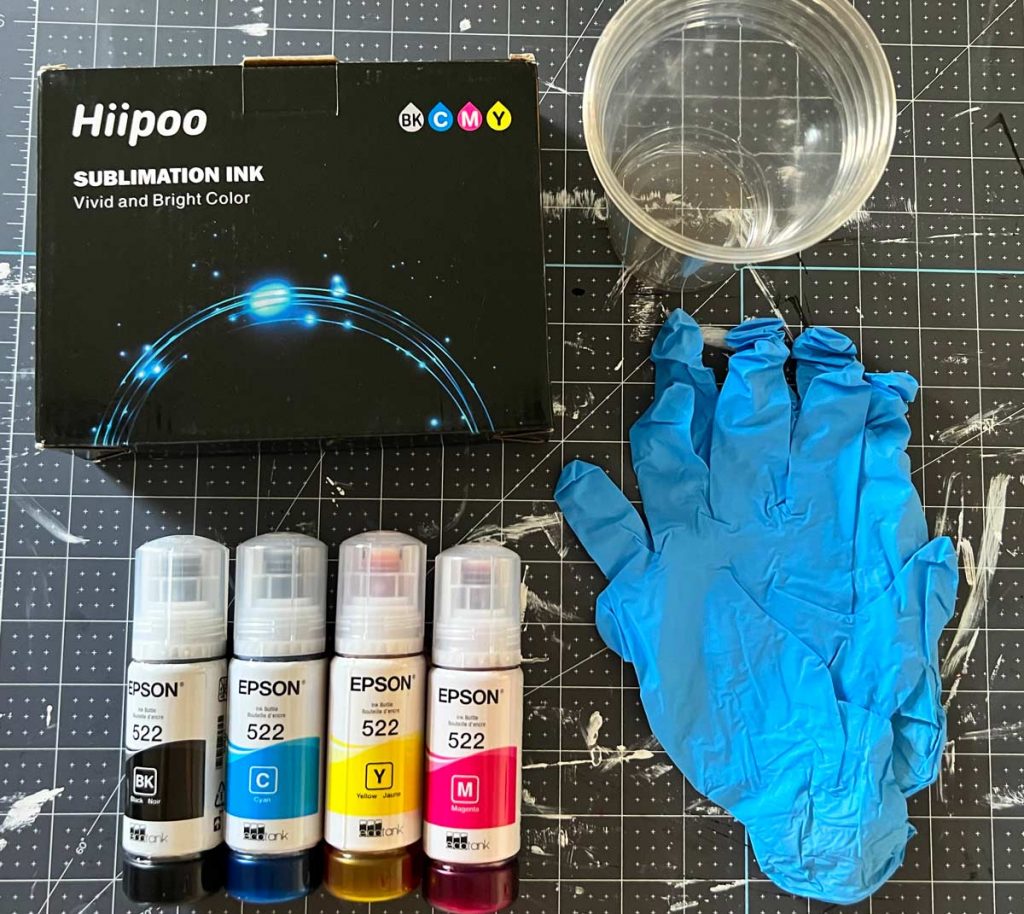
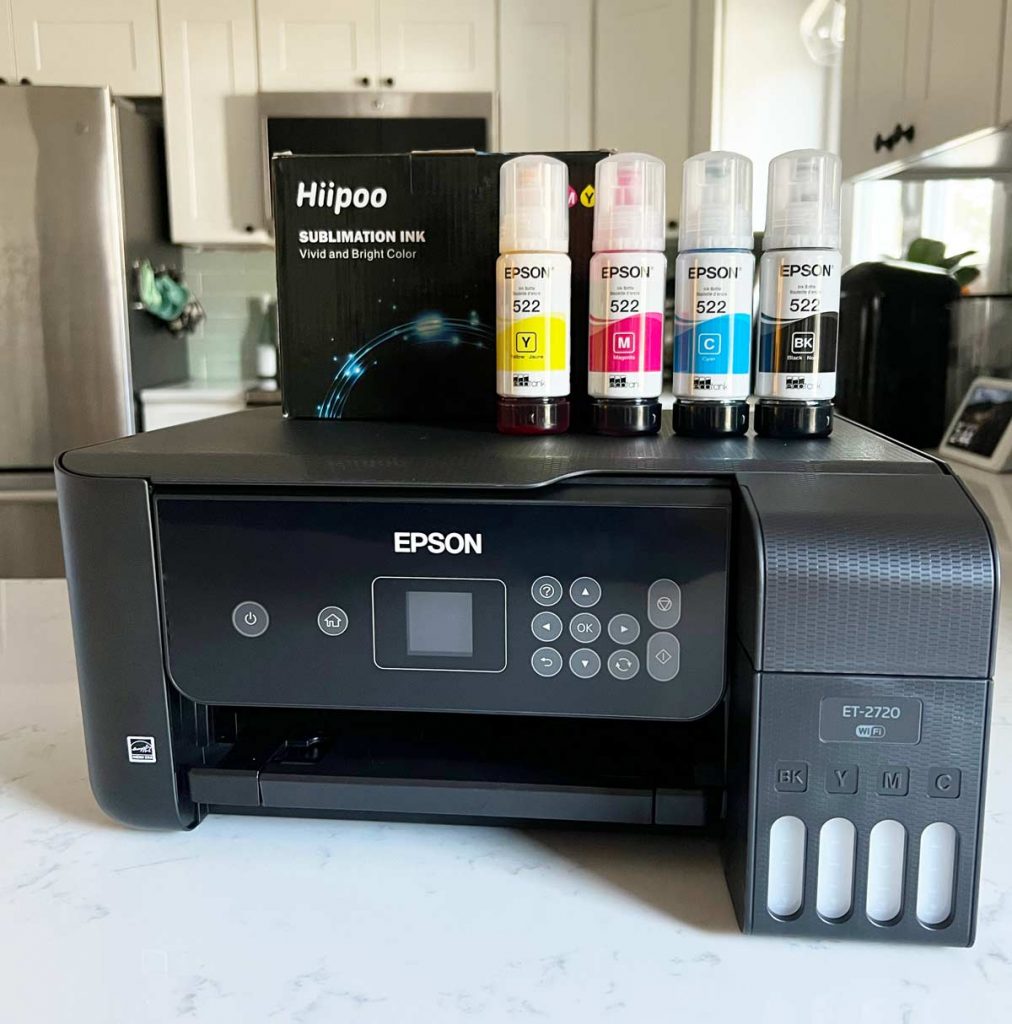
Supplies to convert Epson printer into a sublimation printer
Buying a Epson printer for sublimation
The printers that are working to convert for sublimation are the Epson EcoTank ET-2720 and 4700. These printers can be hard to find. They should be between $199-249. There are a lot of resellers out there so beware of higher prices.
There are also a lot of refurbished options. DO NOT buy a refurbished or renewed printer. In order for the conversion to work no ink can have ever been placed in your printer. Once you purchase your printer DO NOT put ink in it before converting it.
Note: If you choose to convert a printer to sublimation you will void the warranty on the printer.
Tips for finding an Epson EcoTank printer in stock.
On Target’s website you are able to set an alert when it is back in stock. They have been getting more and more in stock lately but they go quick. If you have the Target app you will get an alert as a notification on your phone. Otherwise you will just receive an email.
How to convert Epson printer into a sublimation printer
Seven steps to converting an Epson EcoTank 2720 into a sublimation printer. The process of converting the printer is to swap out your Epson inks for sublimation ink. Since the ecotank printers come empty and allow you to refill the thanks with ink it makes the process really simple.
Just remove the ink from the Epson refill bottles and clean the bottle out and add sublimation ink.
What is unique about the Epson refill bottles is that each color ink has a different cap to it. This is how it fits into the corresponding ink tank on the printer. Make sure to keep the caps with the corresponding color as you clean out the bottles.
Step 1: Unbox the Epson EcoTank 2720
First thing you will want to do is remove your Epson EcoTank ET-2720 from its package. DO NOT plug it in.
Step 2: Prep your workspace
Since we are dealing with ink you will want to protect your workspace and put on gloves.
I use a self healing cutting mat to protect my table or counters.
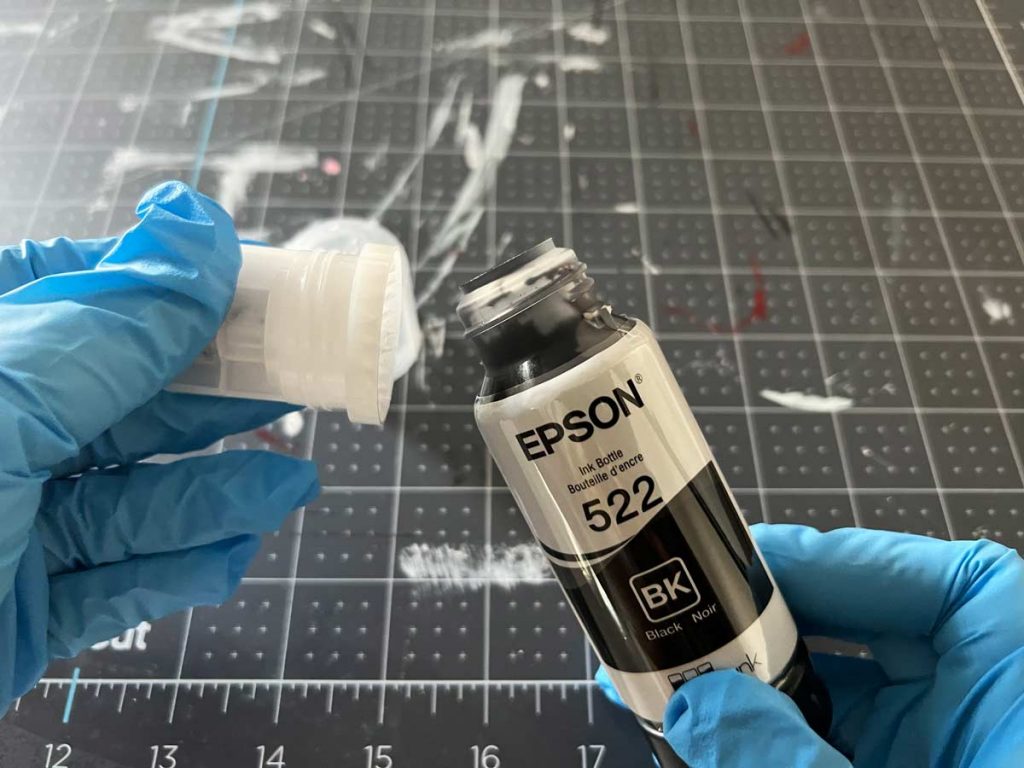
Step 3: Empty Epson in bottles
Now you are ready to remove the ink from your Epson ink bottles. I was able to just screw off the caps to the bottles with my hands easily.
Pour ink into a container. Safely discard the extra ink. DO NOT pour it down your drain.
Tip: make sure to keep bottle caps with the corresponding color as you clean out the bottles.

Step 4: Clean ink bottles
Rinse and completely clean out your ink bottles. Make sure they are completely dry before the next step.

Step 5: Transfer sublimation ink
Now it’s time to transfer your sublimation ink into the Epson ink bottles. I am using Hiippo sublimation ink. You can grab it here. It came recommended to me for it’s color vibrancy.
Unscrew the top of your sublimation ink and out it into your Epson ink bottles. Fill almost to the top and screw the top back on.

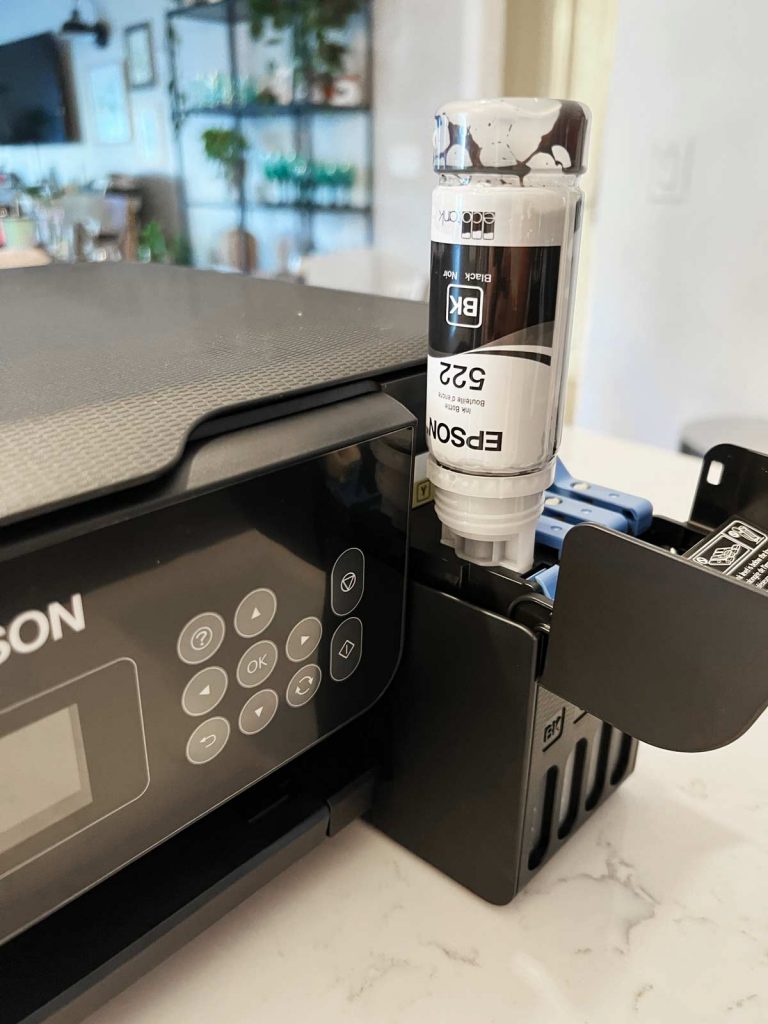
Step 6: Load ink into printer
Open the ink housing on the front right side of your printer. Flip open the blue cover on the ink tank. You will see corresponding labels for each ink tank black (bk), yellow (y), magenta (m) and cyan (c).

Load your ink into the printer. Insert the tip of your ink bottle into the printer. Remember that each bottle has a unique tip the corresponds with the color ink.
Once the ink tank is full remove the bottle and place the cover back on. You will have some extra ink left in the bottle. Set aside for when you need to refill your printer.
Store inks in a cool and dry place.
Repeat the process until all the tanks are full. I love that you can see the ink fill up on the outside of the printer. This makes it easily to visually check ink levels as you use your printer more.

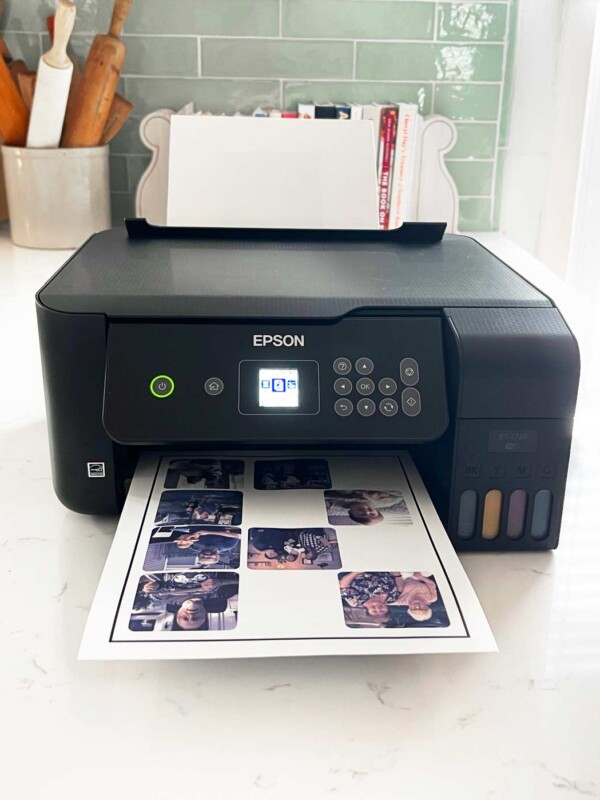
Step 7: Setup the printer
Now it is time to plug in your printer. Follow prompts on the printer screen to setup wifi, check ink levels and a quality test.
Now that the printer is set up let’s test it out by making a mug. First up I chose a design I had on hand and mirrored it.
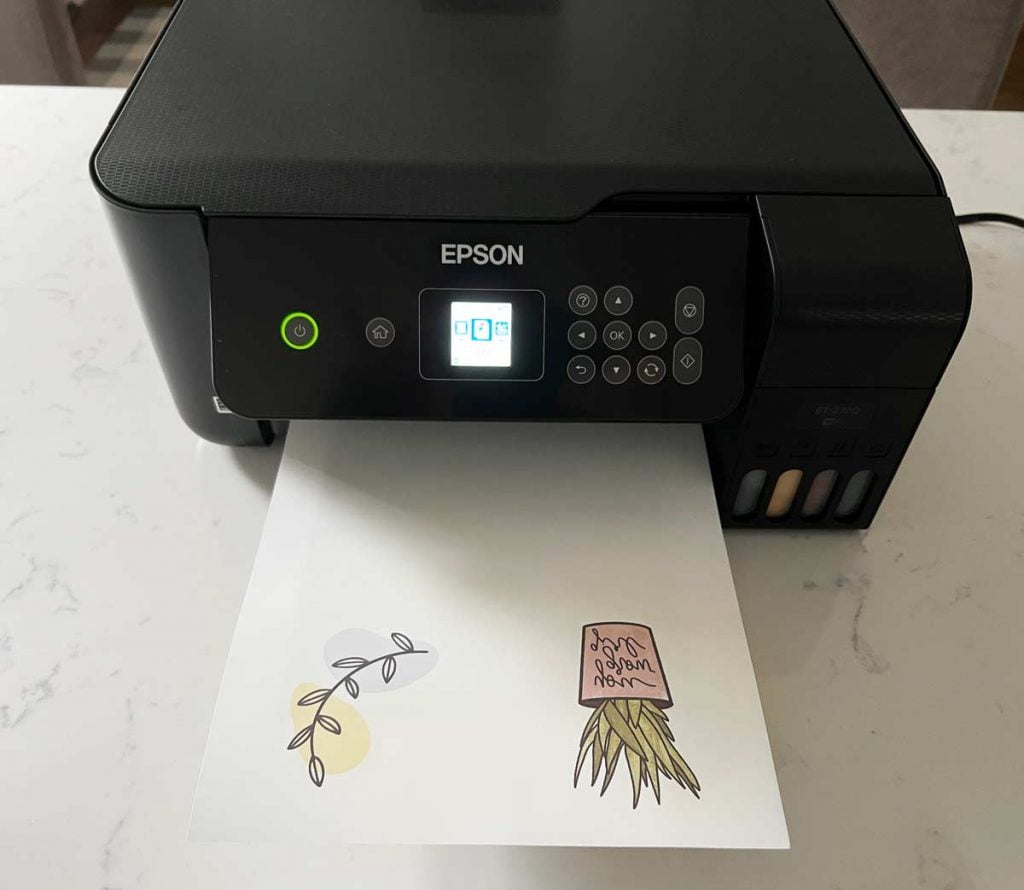
Sublimation transfer paper
I am using sublimation transfer paper from A-Sub I got here. I chose to buy. 125g sublimation paper because the higher the weight the more ink it can observe without curling or warping.
Tips for sublimation printing
- Load sublimation paper in rear tray face up.
- Mirror your design.
- Print setting matte paper on best quality.
- Use sublimation paper for the best results.

How to make a sublimation mug
I decided for my first sublimation project to make a mug. I’ve made plenty of mugs before with infusible ink.
- Print your mirrored sublimation design.
- Cut out design and tape it to sublimation mug with heat resistant tape.
- Wrap in parchment paper.
- Press it in the Cricut Mug press.
- Remove and let cool
- Remove tape and sublimation paper

I still just can’t believe how professional these look! I cannot wait to walk you through how to sublimate t-shirts, pillows, all of the things.
Overall I am very impressed with quality of these prints for under $250 to do the printer conversion.


This was the most complete, easy to follow method I have seen to set up this printer. I was able to do it in now time and the results are amazing. Michelle thank you for this wonderful guide!! It is truly priceless!
thank you Diane
I’ve not done any sublimation or infusible ink yet, but this makes it seem so simple. Thanks so much for this easy to follow tutorial!