This post contains affiliate links, please read our disclosure policy.
How to make a buffalo check pumpkin spice mug using the Cricut mug press. Step by step tutorial on how to use the Cricut mug press. The perfect fall mug.

This post is sponsored by Cricut but all opinions are my own. This post contains affiliate links.
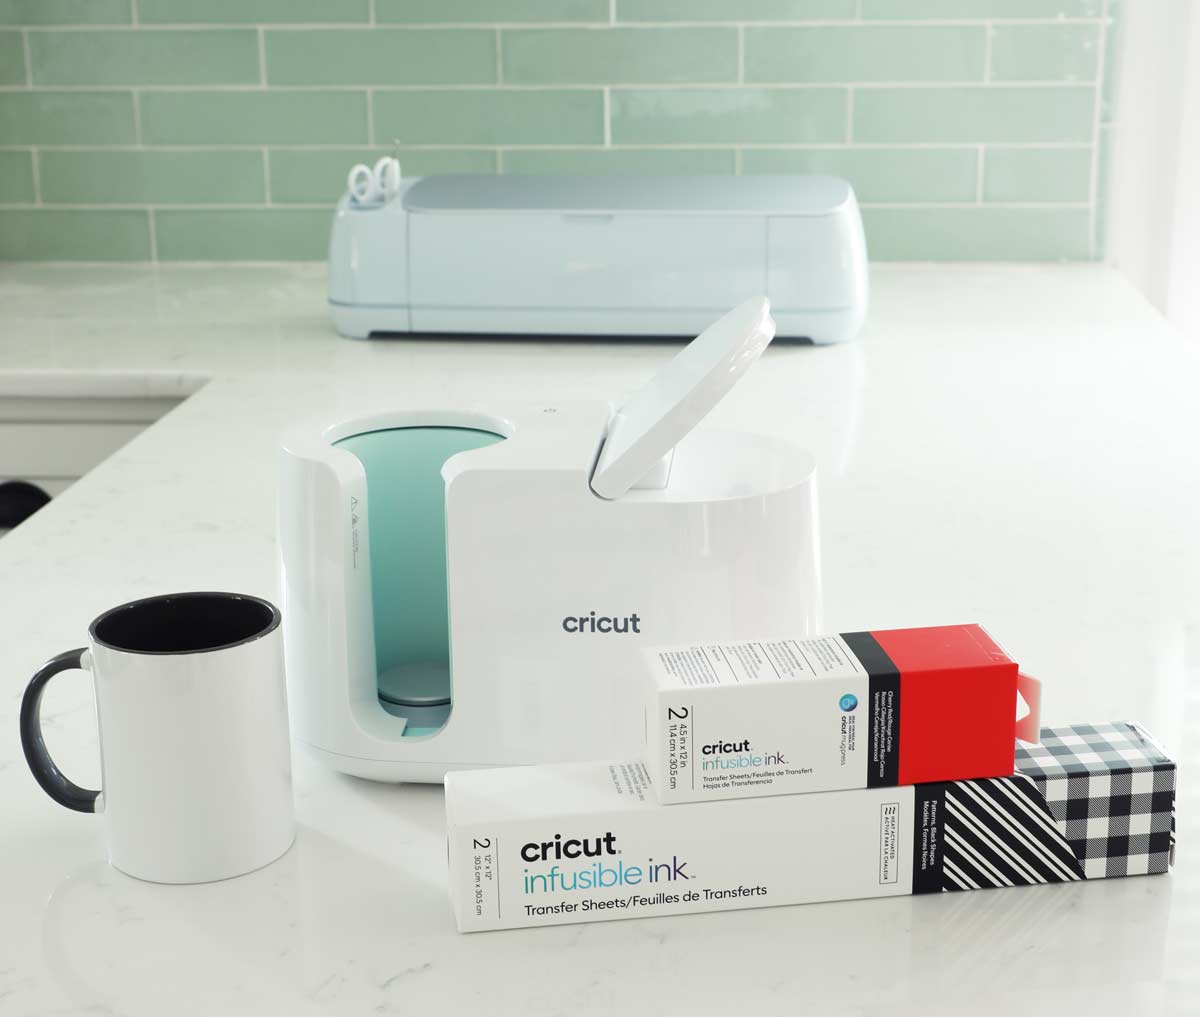
Cooler mornings mean sipping pumpkin spice coffee on my sunporch. Today I am going to be showing you how to use the Cricut Mug Press to make this buffalo check pumpkin spice everything mug using Infusible Ink. I love having the ability to custom design mugs and create them at home. You can have a custom personalized mug in minutes.
These mugs make wonderful gifts for family, friends, teachers and coworker. If you run a craft business they make great products to sell or to just fill your kitchen cabinets with beautiful custom mugs.
Table of Contents
What is the Cricut Mug Press?
The Cricut mug press is a mug shaped heat press designed to help you make professional looking mugs at home. The mug press is designed to wrap around the outside of your mug and heat evenly to transfer Infusible Ink or sublimation prints to your mug.
What is Infusible Ink?
Infusible Ink is an ink transfer material in the form of a transfer sheet or pen that is permanently infused into your base material. Once heated the dry ink will infuse into the fibers of your material. Unlike iron-on vinyl it does not sit above the surface which means no flaking, no peeling, no cracking, and no wrinkling.
Want to learn how to make a mug with the mug press? Let’s get started.
Here’s what you’ll need
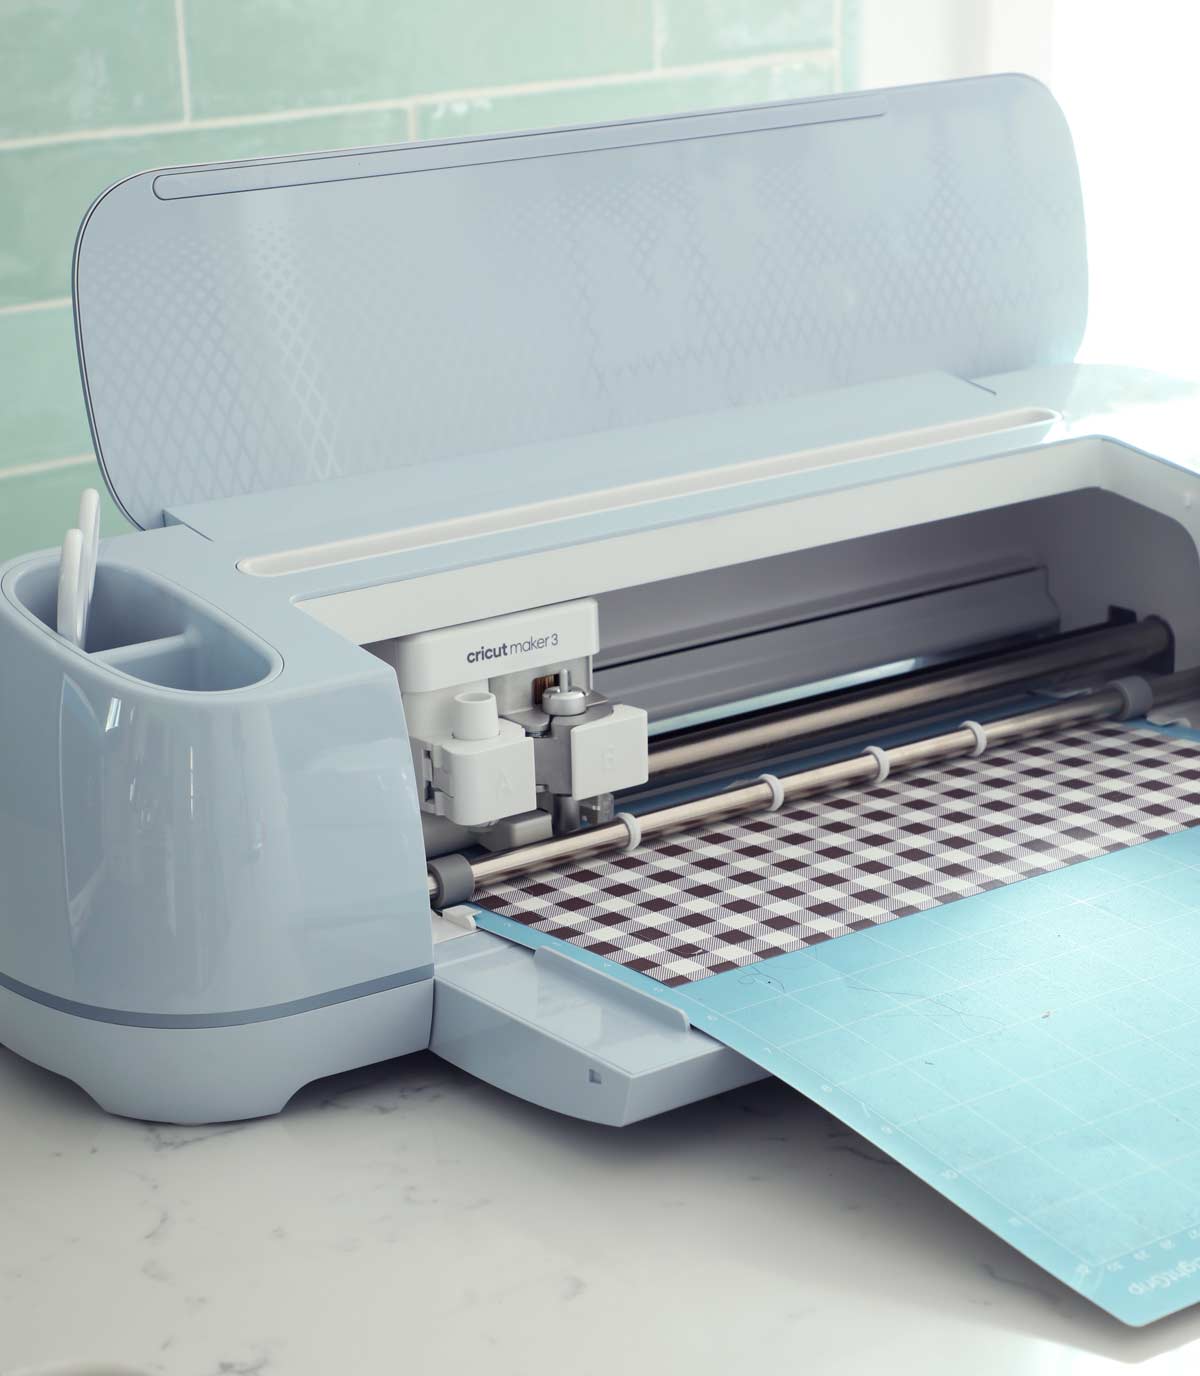
- Cricut Maker 3 or other Cricut Machines
- Cricut Mug Press
- Cricut 15oz Grey Mug
- Buffalo Check Plaid Infusible Ink
- Cherry Red Infusible Ink
- Cricut Light Grip Mat
- Heat Resistant Tape
- Design Space Pumpkin Spice File for 15 oz mug
Designing your mug wrap
Cricut Design Space makes it easy to design your mug. Under the projects tab on the left tool bar search Cricut mug press. Select mug design setup.
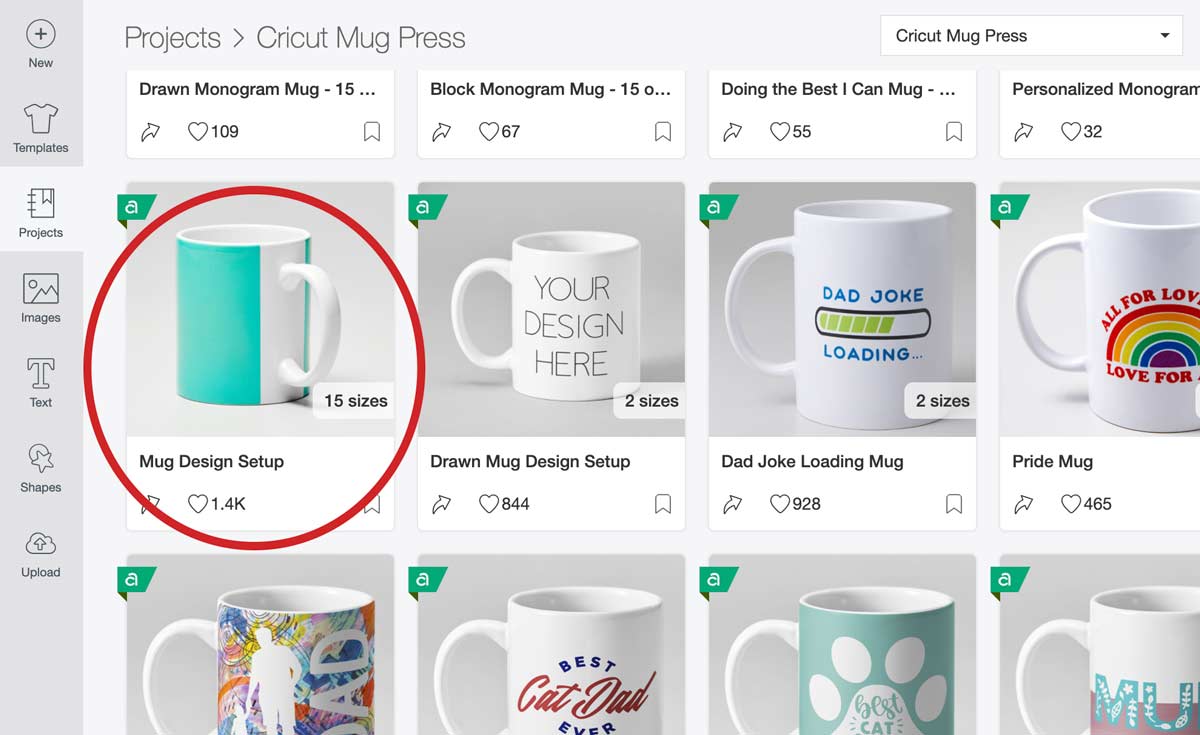
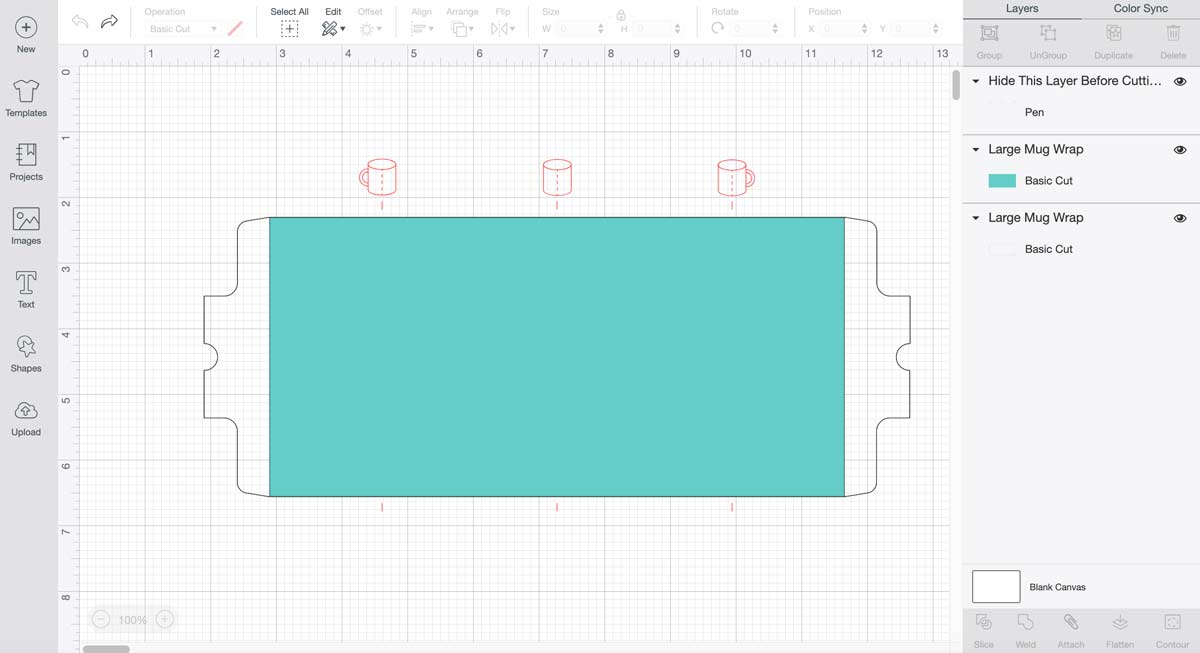
Select the size mug you are creating. This will open up a template in design space. The template is layered. In the layers panel you will see 3 layers.
The first layer labeled “Hide this layer before cutting” is your guide to where on the mug the wrap falls. You will need to hide this layer before cutting your Infusible Ink.
The “large mug wrap” layer that is teal this will be your Infusible Ink design layer.
The last layer is the overall shape of your mug.
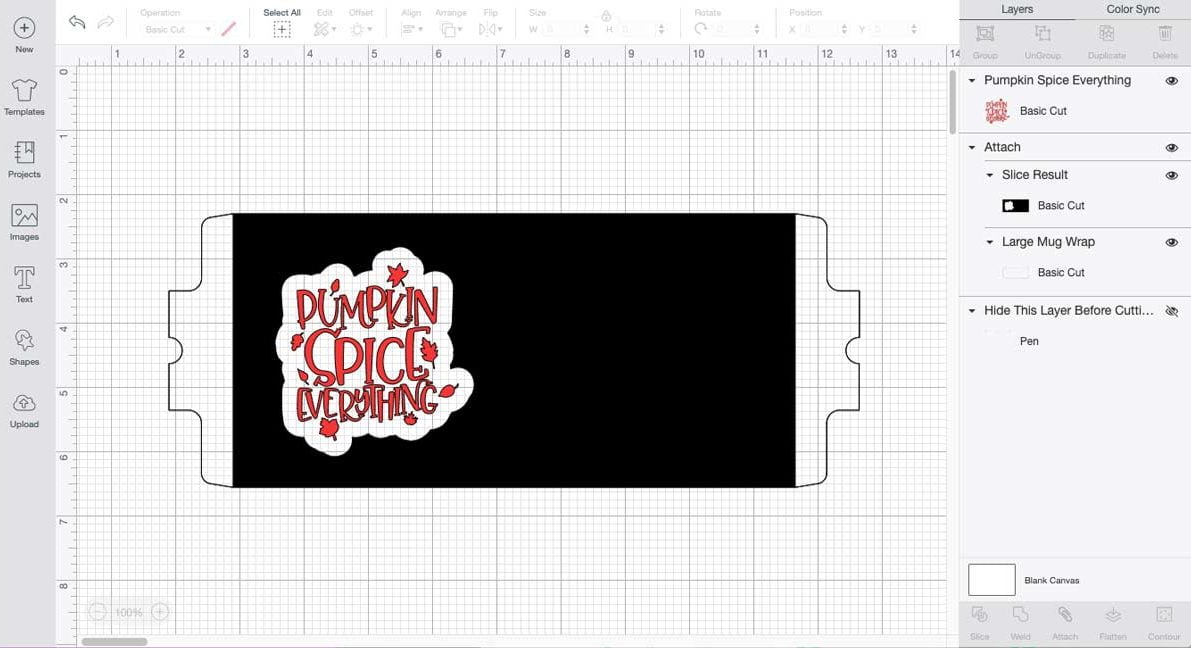
How to layer Infusible Ink
The question of how to layer infusible ink comes up often. If you layer Infusible inks the color will blend since they don’t just sit on top of the surface like vinyl. When I am designing I like to use the slice method.
What’s the slice method? Where my colors are supposed to intersect I slice out the negative space to make room for a new color. You can see below I sliced out an offset of my lettering to make it stand out on the buffalo check plaid pattern.
Don’t know how to make an offset? Learn how to use this tool here.
Once I have my offset made. I select the offset layer and the top colored mug wrap layer and slice them together. I delete the extra layer leaving behind the slice result. It sounds complicated but once you do it once or twice it’s a simple way to get a beautiful result.
Remember if you don’t want to create your own design you can grab this cut file here. It uses Cricut Access design files.
Now you are ready to cut your design. You will want to click make it on the top right of your screen. With infusible ink you always want to make sure you select mirror on all you cutting mats. Select Infusible Ink for your material and you are ready to cut.
Tip: When handling Infusible Ink you always want to wash and dry your hands first. This removes any oil that’s on your hands to reduce transfer of the ink onto your skin
You will want to load your Infusible ink on to your light grip mat pattern or color side up. Today I am using my Cricut Maker 3 machine.
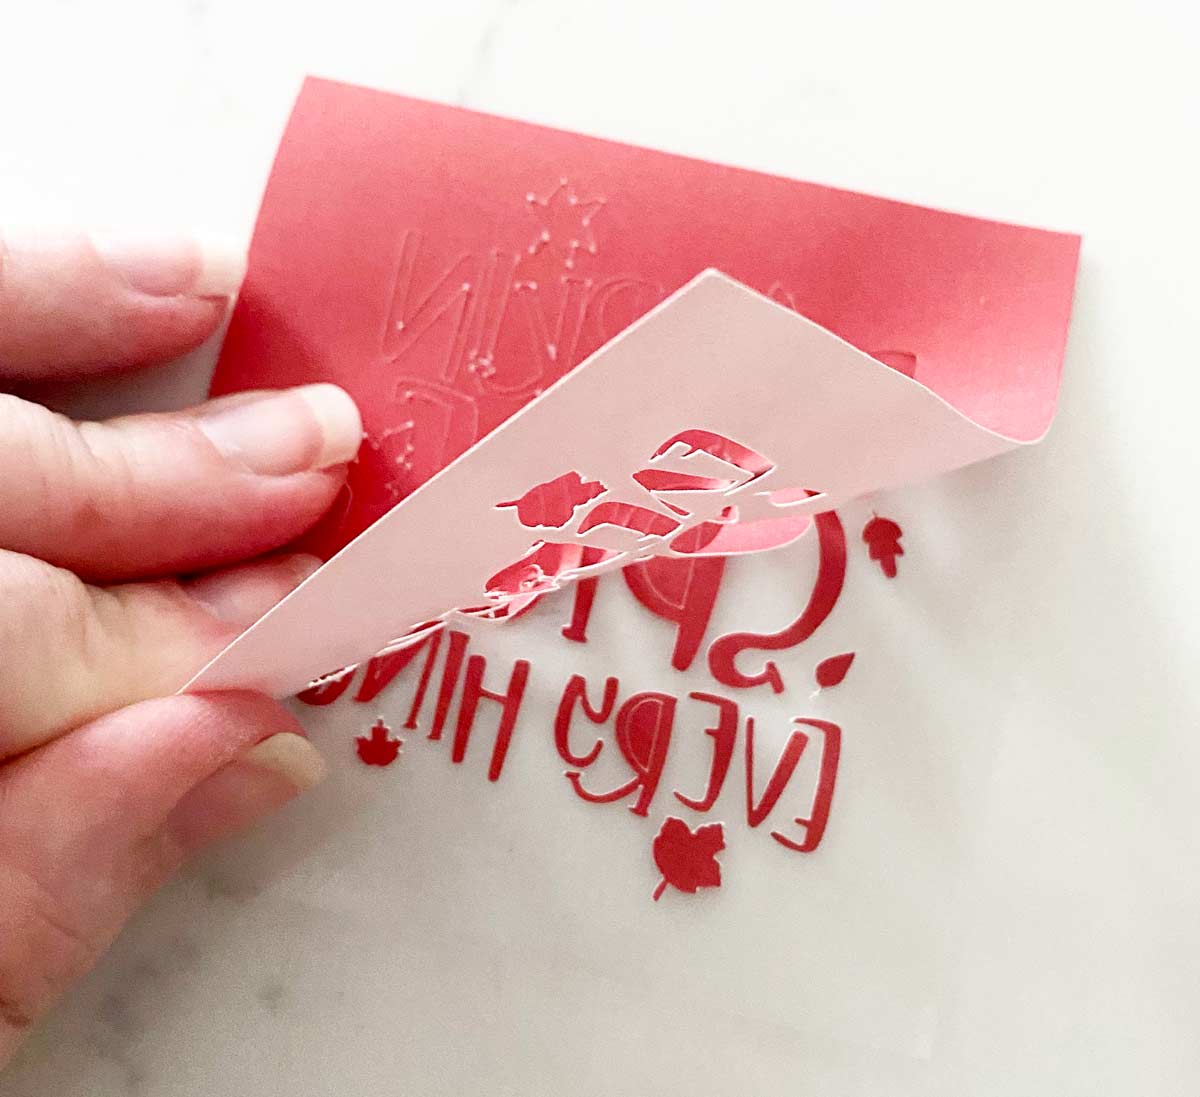
 Weeding Infusible Ink
 Weeding Infusible Ink
Infusible Ink is different to weed than vinyl or iron-on. The material is similar to a thick cards stock. Do not use your hook tool. You are going to want to use tweezers or your hands.
Layering Infusible Ink
Since we are using the slice method for layering or using multiple colors of Infusible Ink. You want to grab your scissors and cut around your lettering. Cutting the carrier sheet as close as you can to your lettering.
Infusible Ink can only be heated once so you will want all your designs and colors applied to the same mug wrap.
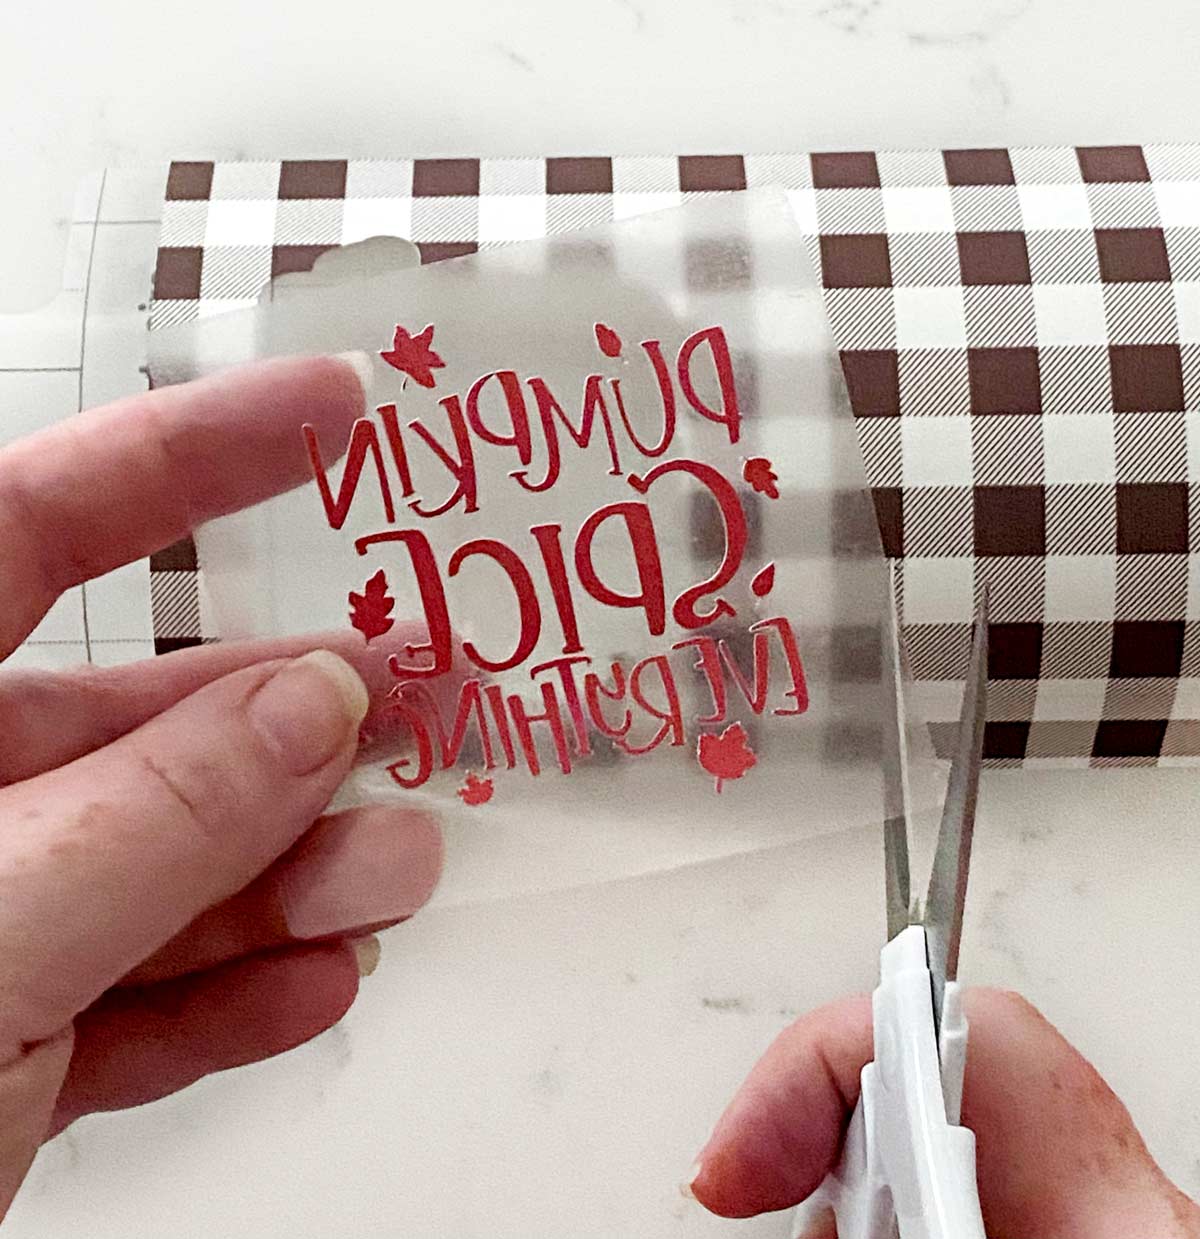
Once you have cut out your lettering some people hand place their design on to your slice. I do not. Instead I layer the carrier sheet on top of the other carrier sheet making sure not to overlap any of the Infusible Ink. The double carrier sheer does not effect the transfer or heating process.
This is a great tip I learned from Happily Ever After, etc.

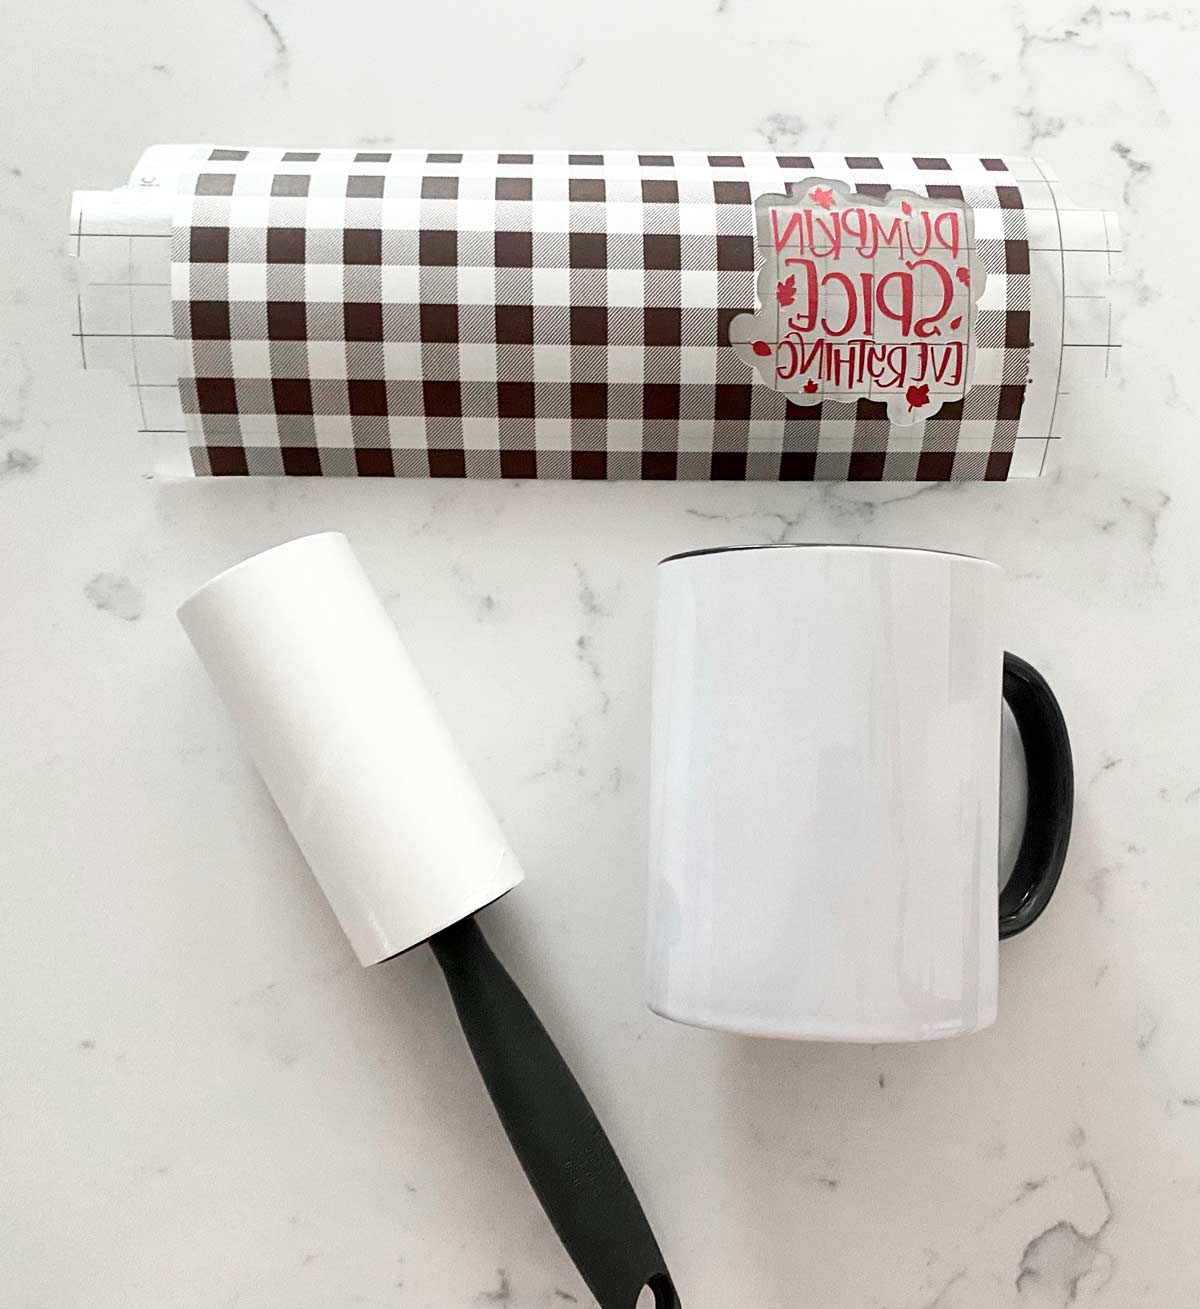
Prep your mug
Since we are transferring ink on to the surface of a mug we want to make sure the mug is free of lint and any other residue that could effect the transfer. Use a lint roller on the entire surface of the mug.
Apply your mug wrap
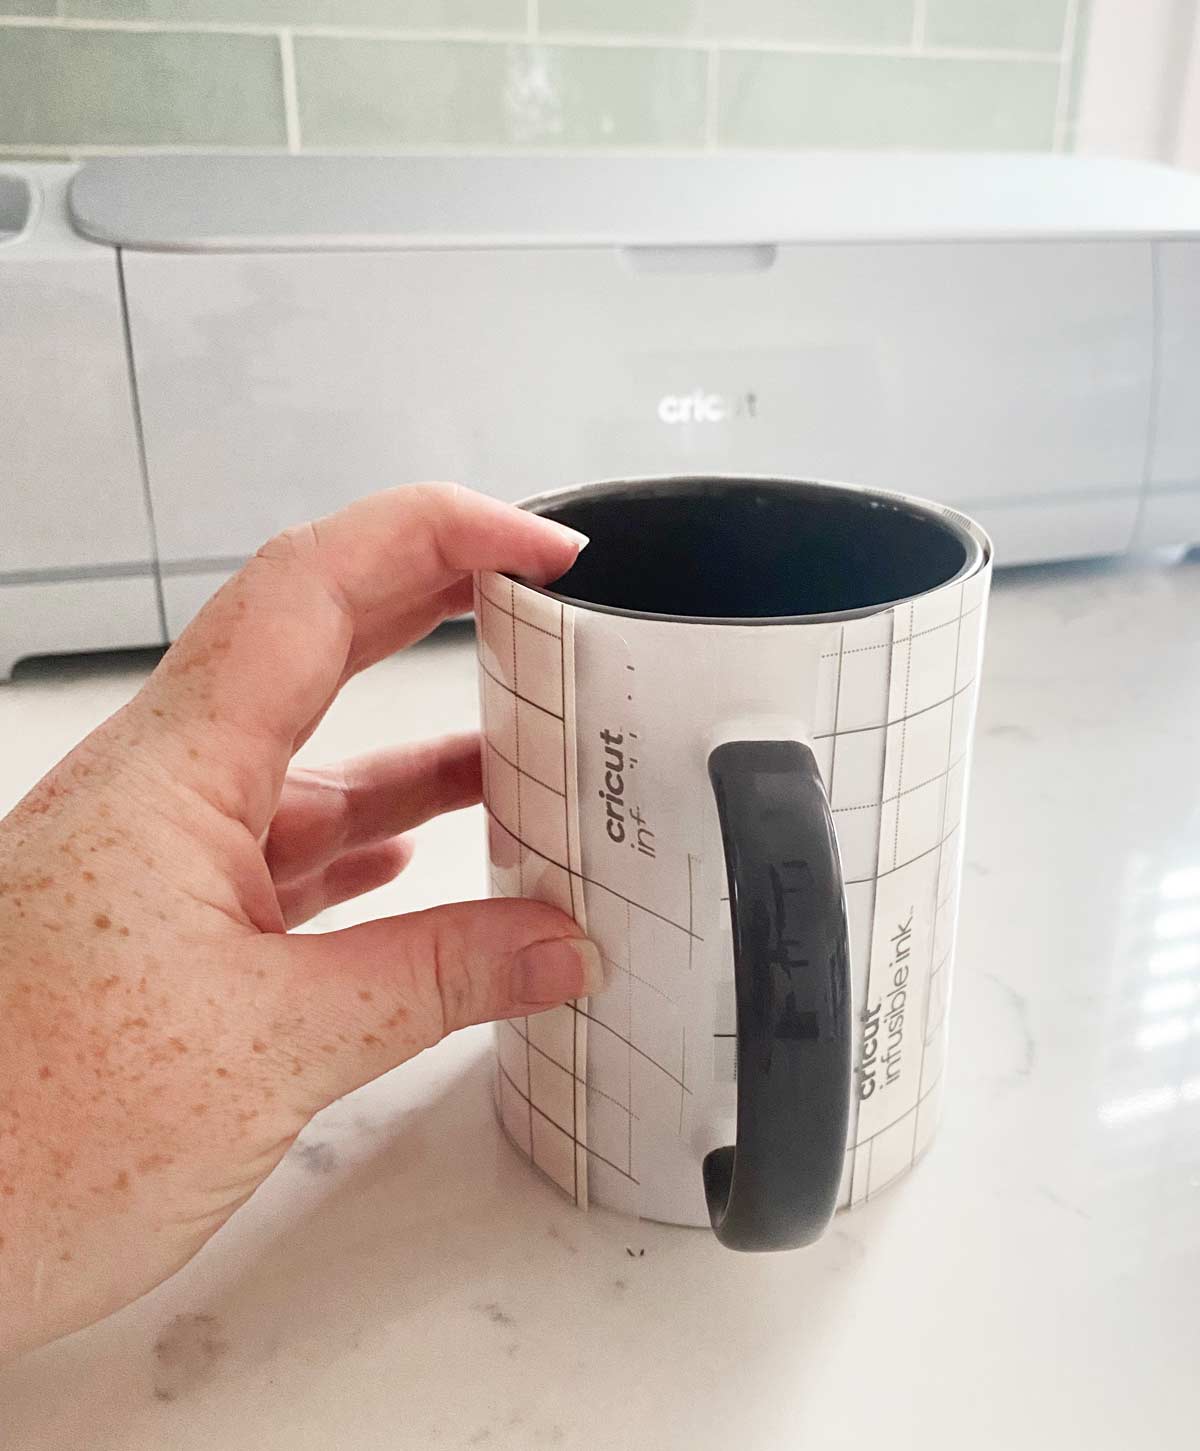
Now its time to position your mug wrap onto your mug. You will want align the design on the mug. I like to use two hands grabbing both ends of the Infusible Ink carrier sheet. The carrier sheet is gridded and will meet under the handle. I use the bottom of the mug and where it meets the table as my straight edge. Pull tightly and wrap the design around the mug ensuring no gaps between design and mug.
I match the grid lines where the two ends of the carrier sheets meet under the handle. Once these are lined up I use my heat resistant tape to secure the edges.
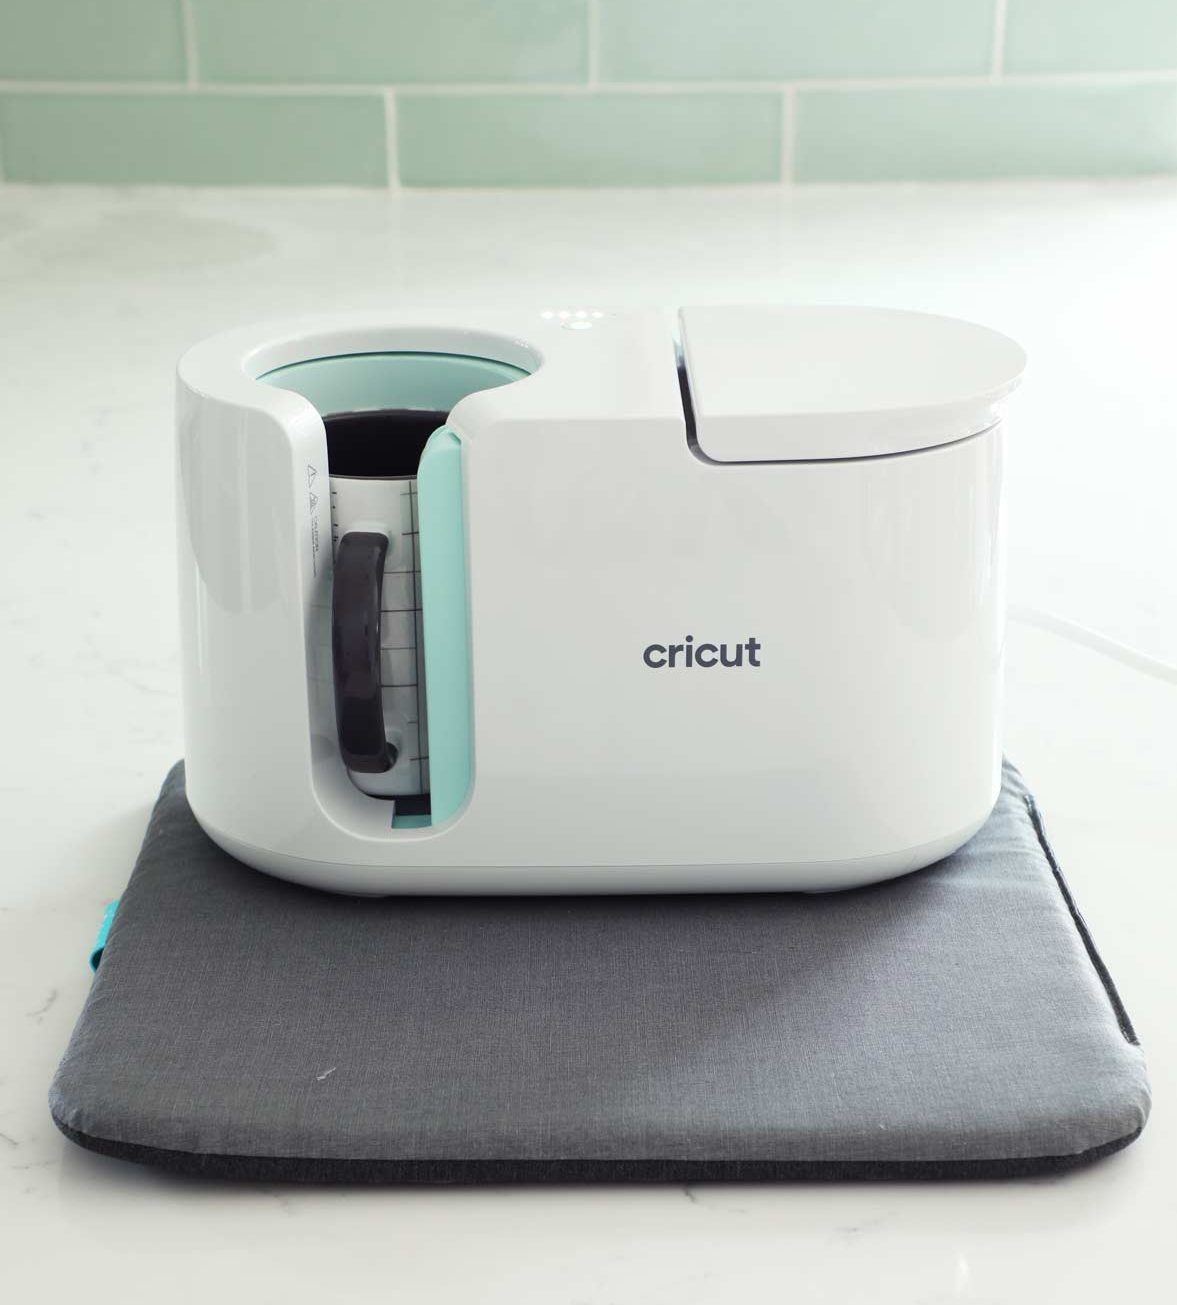
Apply your design using the Cricut mug press
Press the power button and let your mug press pre heat. This will take a few minutes. The press will beep when it is preheated.
Insert the mug into the preheated mug press. I offset the mug handle slightly to the left to account for the shift when you apply pressure to the lever.
Push the lever down to begin transfer. Make sure the design is completely covered by heat plates.
As your mug is heating you will see a series of dots light up above the power button. This indicates where you are in the process of heating. When all the lights are lit and your your machine beeps your mug is done. This takes about 6 minutes.
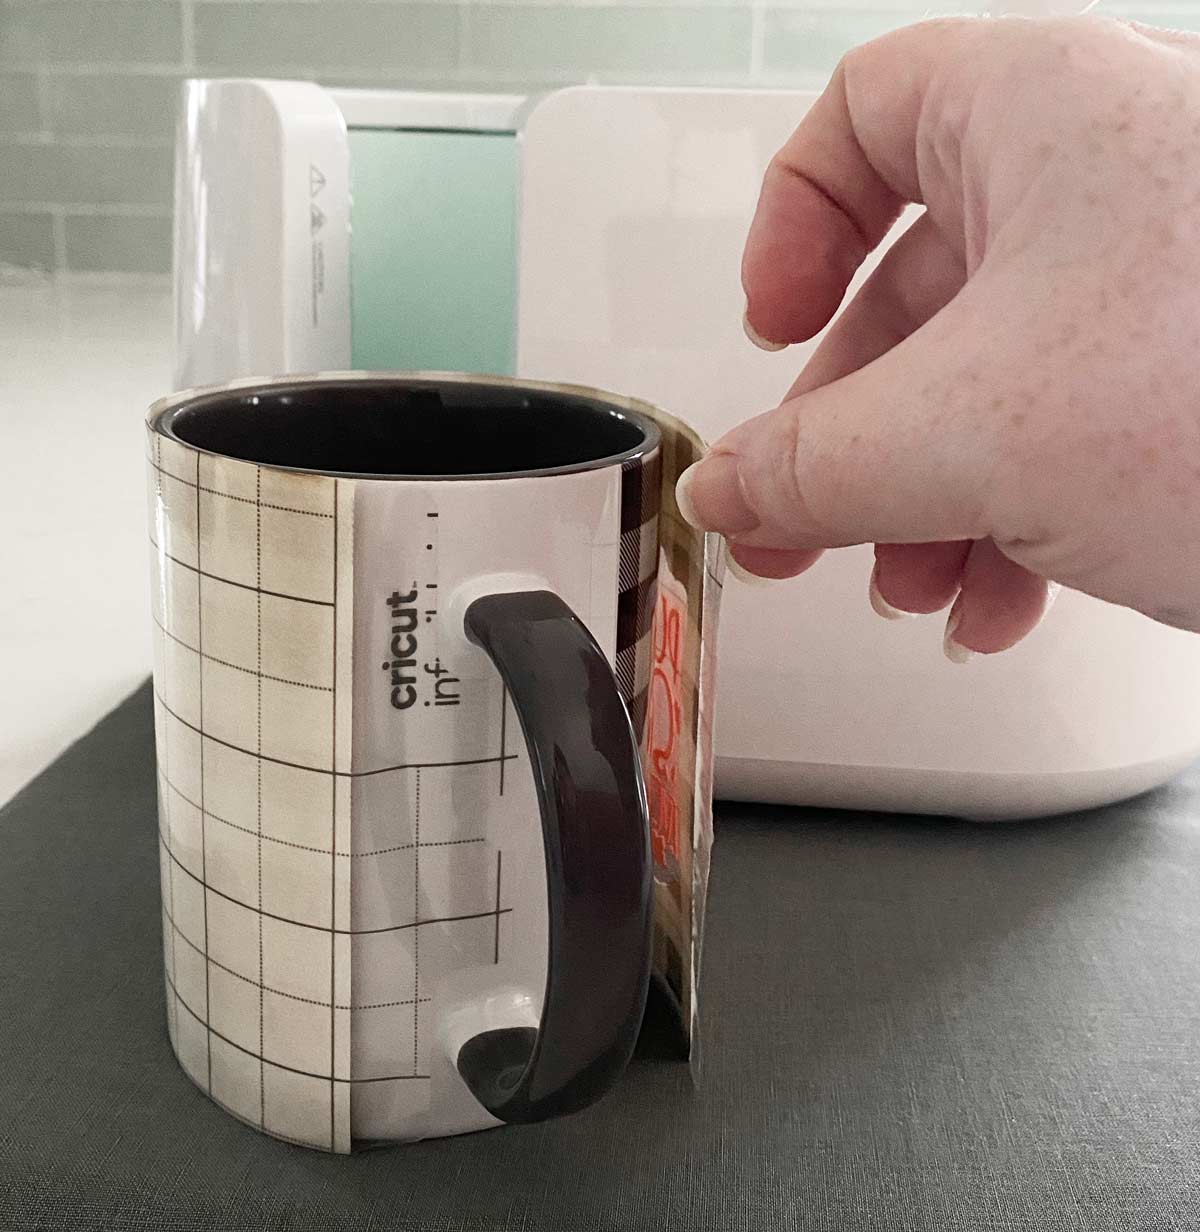
When transfer is complete lift the lever.
Use the handle to remove the mug. If you are using other sublimation blanks the mug handles may be hot. The handles of the Cricut mugs are designed to not hold the heat. Please use caution. Heat resistant gloves are great to use.
CAUTION: Mug body will be very hot.
Place mug on EasyPress Mat or towel and allow to cool before handling. When cool to touch, remove tape and paper
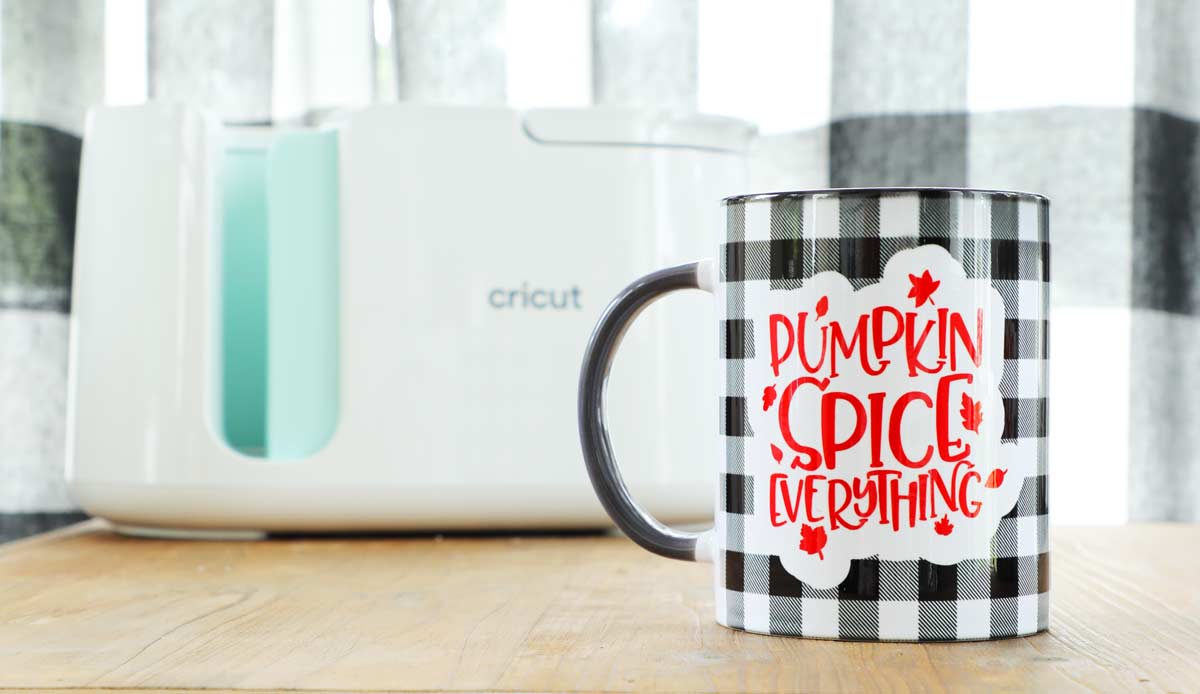
I am so impressed with the quality of this mug! It looks like I just bought it at the store. It’s hard to believe I made this at home. It is not even comparable to make a mug with vinyl.
The Cricut Mug Press definitely elevates crafting to more of a professional level.
I am already thinking of all the mugs that I can make for Christmas or even personalized as gifts for everyone on my list.
Are Infusible Ink mugs dishwasher safe?
Yes, Infusible Ink mugs are dishwasher safe. You can run them in the dishwasher with the rest of your dishes. Only suggestion when hand washing avoid using steel wool or anything too abrasive.


Oh my goodness! I love it. Really appreciate seeing how it works before buying it! And, great tip about layering the infusible ink!
Thanks Maureen! Can you imagine making custom mugs for a brunch tablescape!
Wow this is amazing, really love it. Michelle, You have to be one of my favourite bloggers. You have so much different content. Thanks from me x
Thanks so much Jackie! I try to write about all the things I am passionate about.
This is so helpful and the mug is stunning!!! Thank you for this!!!
Thanks Tina. I am obsessed with how it came out. I decided to make a set!
I just love how you explain the process from the beginning to end. I I watched the video on sublimation as well. I’m finishing up the camp class and I’m ready to try this out. Thank you you’re so easy to follow.
Thanks Dolores! I am glad this tutorial was helpful. I am working on a few more projects likes this.