This post contains affiliate links, please read our disclosure policy.
Table of Contents
- A Step-by-Step Guide for how to apply iron on vinyl or heat transfer vinyl (HTV) on wood using a Cricut machine. Also with a video tutorial
- Whats the difference between iron-on vinyl and heat transfer vinyl.
- Why use iron-on vinyl instead of adhesive vinyl on wood?
- Here’s what you’ll need
- Cricut Design Space
- Cutting Iron-On Vinyl
- Weeding Iron-On Vinyl
- Place Iron-On Design on Wood
- Applying Iron-On Vinyl to Wood with a Heat Press
A Step-by-Step Guide for how to apply iron on vinyl or heat transfer vinyl (HTV) on wood using a Cricut machine. Also with a video tutorial
One of my favorite methods for adding a design to wood is using iron-on vinyl. Now it may seem a little unconventional but this works great. Let me show you how to use heat transfer vinyl or iron-on vinyl on wood. This is an easy alternative to adhesive vinyl. This method can be used with both a Cricut or a Silhouette.
Before we get started let’s go over some basics of the different types of vinyl and why you would use iron-on vinyl on wood.
This post contains affiliate links.
Whats the difference between iron-on vinyl and heat transfer vinyl.
There is no difference between iron-on vinyl and heat transfer vinyl. They are the same thing. Heat transfer vinyl is also often referred to as HTV.
Why use iron-on vinyl instead of adhesive vinyl on wood?
- Iron-on vinyl is easier to weed. Especially intricate designs.
- Some adhesive vinyl can have issues adhering to textured wood.
- Tighter seal.
- Repositionable (before heat)
- Not as glossy as permanent adhesive vinyl.
- No transfer tape needed.
- Doesn’t get air bubbles like adhesive vinyl.
- You have the iron-on vinyl on hand.
- More colors and matte finishes available.
Don’t have a Cricut but thinking about getting one? Check out my guide for buying a Cricut here. Looking for an EasyPress and not sure which one to get? Check out my Cricut EasyPress guide here. Use code WEEKENDCRAFT to get 10% off Cricut machines or heat presses.
Want to know more about Cricut Materials check out this Cricut Materials guide.

Here’s what you’ll need
- Cricut Maker or Explore
- Iron On Vinyl
- Wooden Blank Surface
- Cricut EasyPress, Iron or Heat Press
- Light Grip Mat
- Hook Tool
- Brayer (optional)
- Teflon Sheet
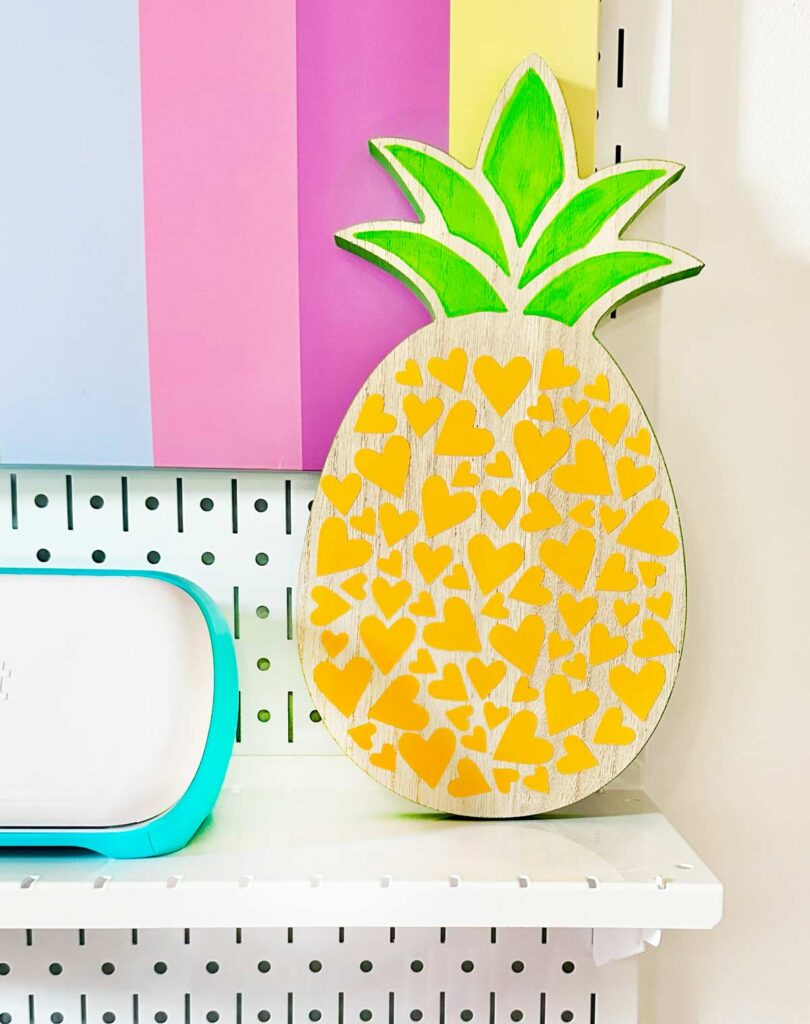
- Pineapple SVG File

Cricut Design Space
In Cricut design space upload your SVG file. Once uploaded select make it. You will want to make sure that your design is mirrored. Next on a light grip mat add your iron on vinyl shiny side down. Make sure to select your material in design space.

Cutting Iron-On Vinyl
The way that you cut iron on vinyl is from behind or the backside. This is why it’s essential to mirror your design. Once your mat is loaded into your machine you are ready to cut your design. Press the blinking c or play button on your machine. When it’s finished cutting press the blink arrows to unload your mat.
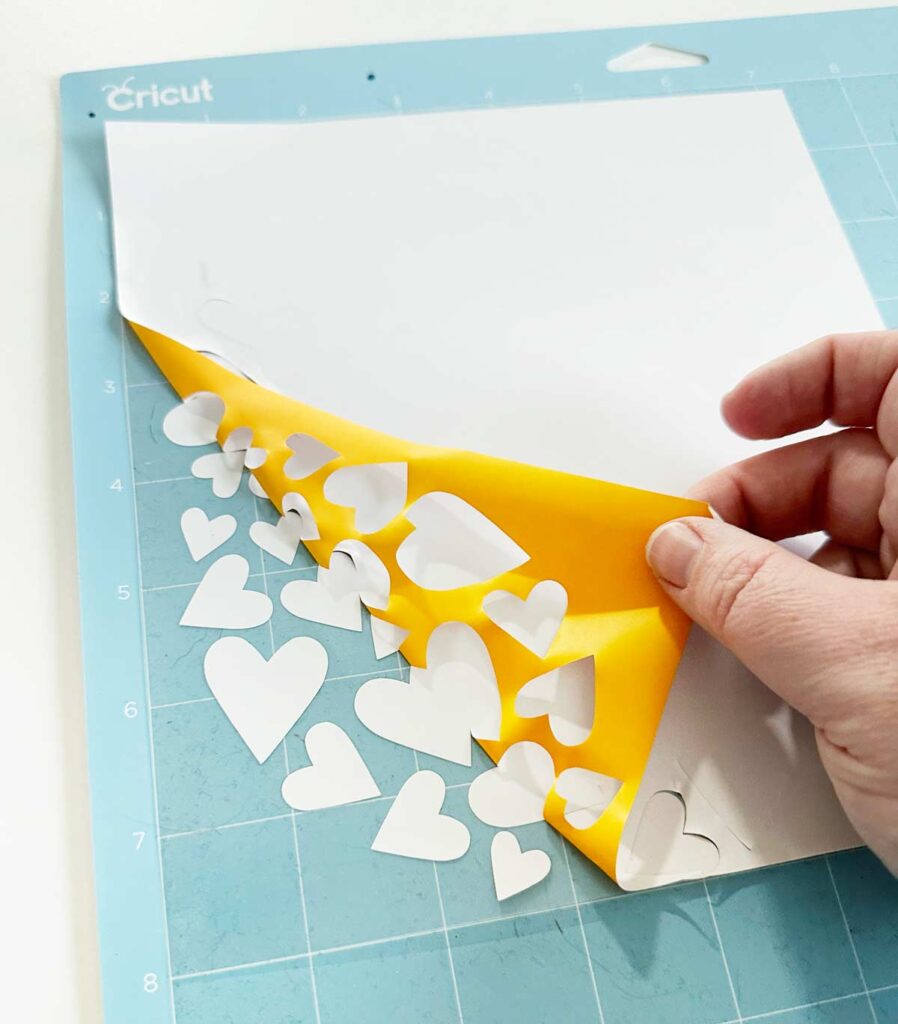
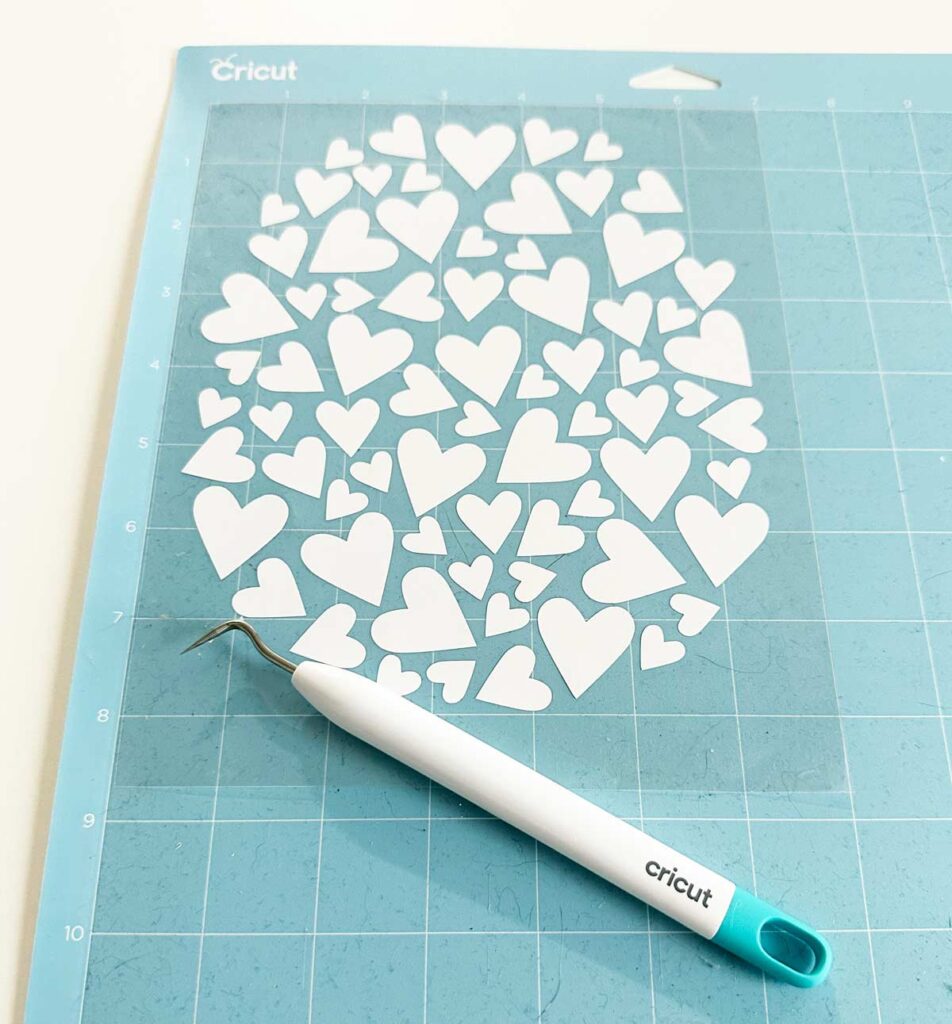
Weeding Iron-On Vinyl
Now it’s time to remove the excess vinyl to reveal your design. This process is called weeding. Start by peeling back a corner. I like to do this with my hook tool. I like to weed while my iron-on vinyl is still on the mat. It gives you a little more control.
One of the advantages of using iron-on vinyl instead of adhesive vinyl is that it is easier to weed. It’s easier because iron-on vinyl is not sticky which can be difficult to weed intricate designs.
Once you have weeded all of the iron-on vinyl you will be left with your design and the clear carrier sheet.
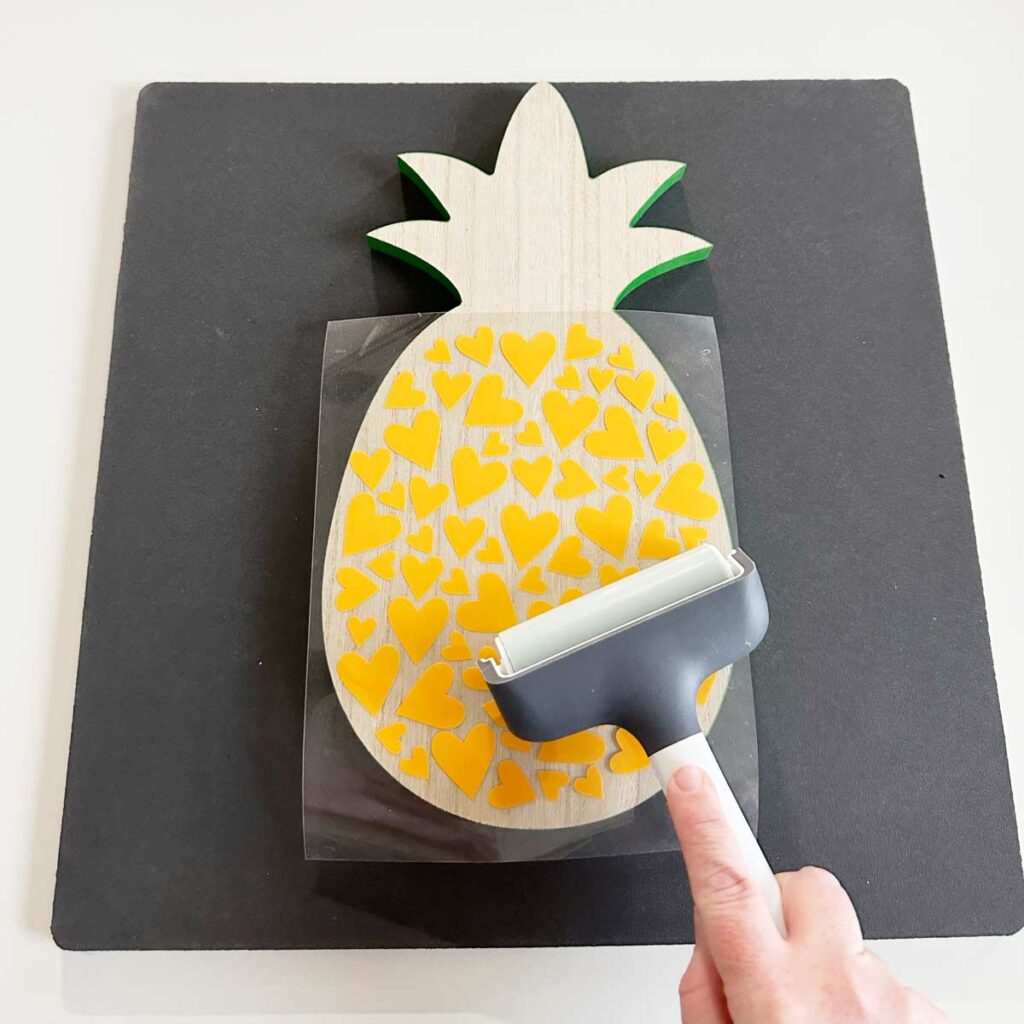
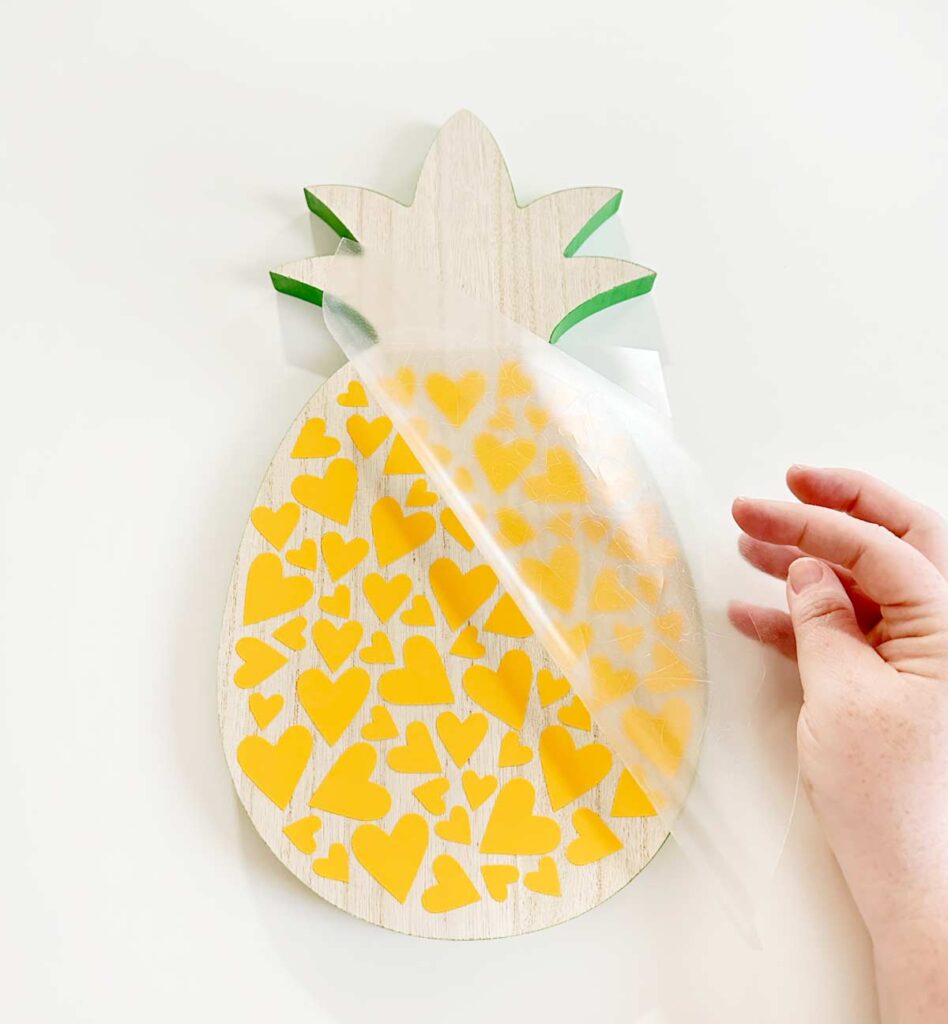
Place Iron-On Design on Wood
With the sticky side down place your iron-on vinyl on to your wooden blank. You should be able to see your design through the carrier sheet. Once you have the desired placement I like to use my brayer to secure the iron-on vinyl.
Applying Iron-On Vinyl to Wood with a Heat Press
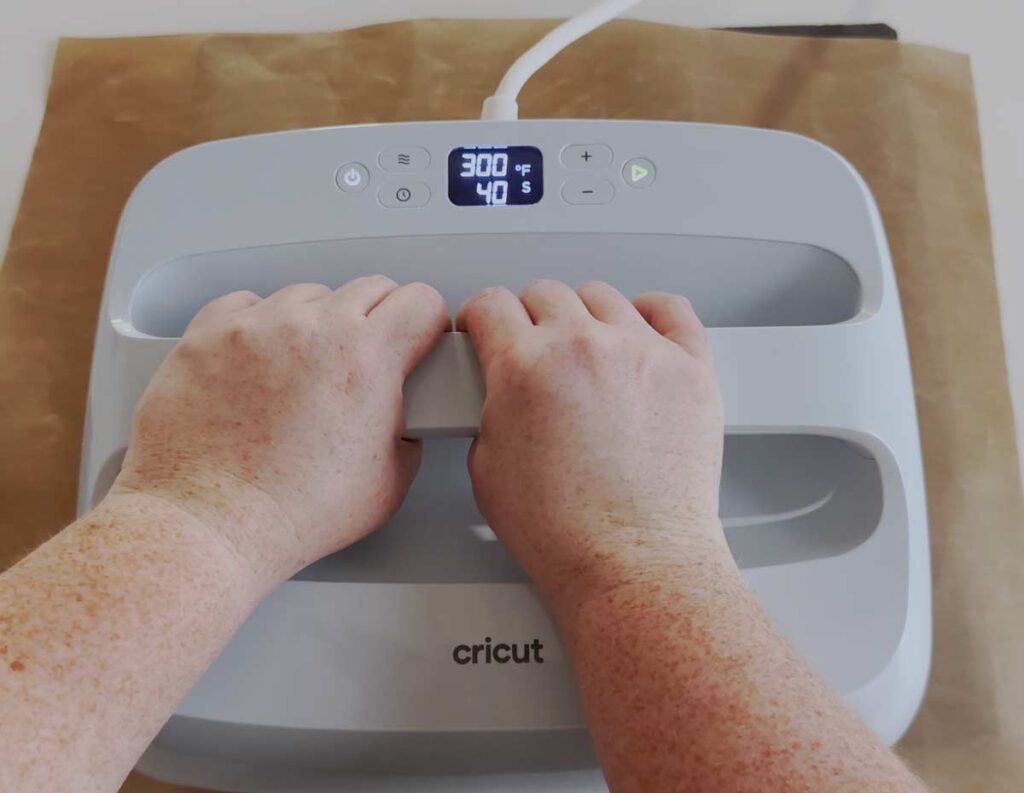
Preheat your heat press to 300ºF and set the time for 40 seconds. I am using the Cricut EasyPress 3. Now we are going to have to press this a few times but we will start at 40 seconds. Place your wooden blank on to a heat resistant mat and I like to add a teflon sheet between the iron-on vinyl and the heat press and add a bit of pressure.
Once your heat press is at temperature lower your heat press and add medium pressure. Make sure to keep the heat press in place you don’t want to move it back and forth like you would an iron. This can cause the vinyl to shift.
Now you will need to press this a couple times. I like to check the iron-on vinyl by peeling back the corner of the carrier sheet when it’s cool enough to touch. This project I ended up pressing twice. The reason it varies is because the type of wood you are using will vary depending on your blank or sign. That’s why I like to start out at 40 seconds.
You can use a household iron but the timing and temperature will be different. I highly suggest using a heat press.
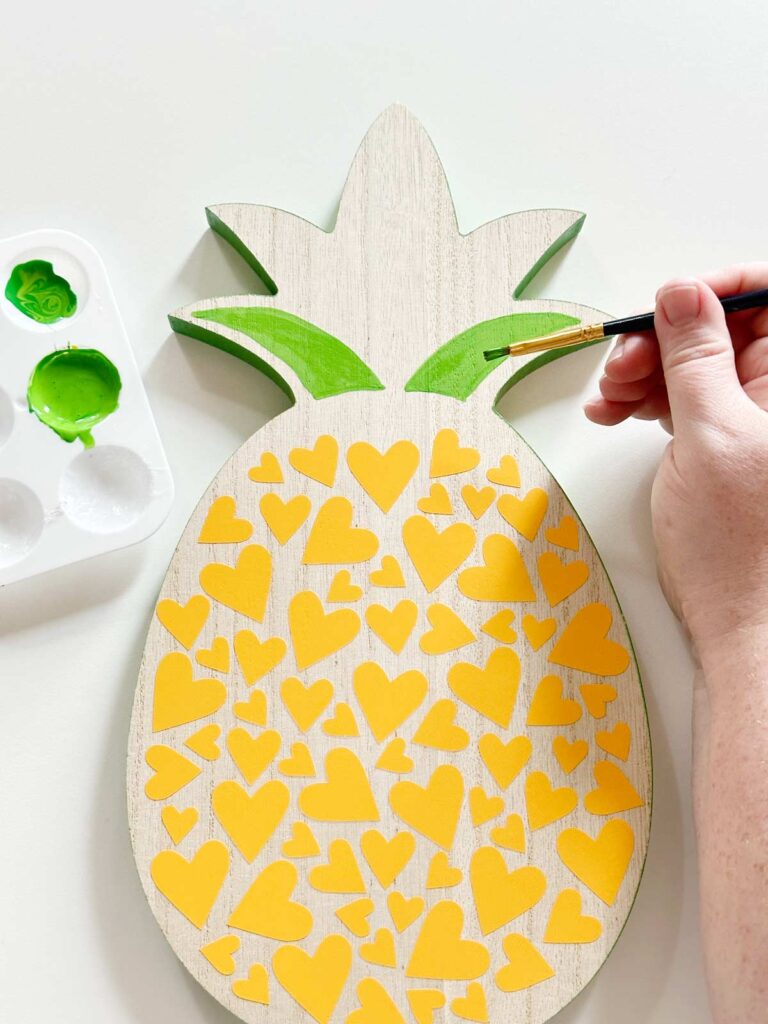
To finish this project I added details with acrylic paint. I love the way this pineapple crown came out.
What do you think would you try iron-on vinyl on wood? Or would you stick to adhesive vinyl?


awesome