This post contains affiliate links, please read our disclosure policy.
Step by step instructions on how to upload an SVG file in Cricut design space.
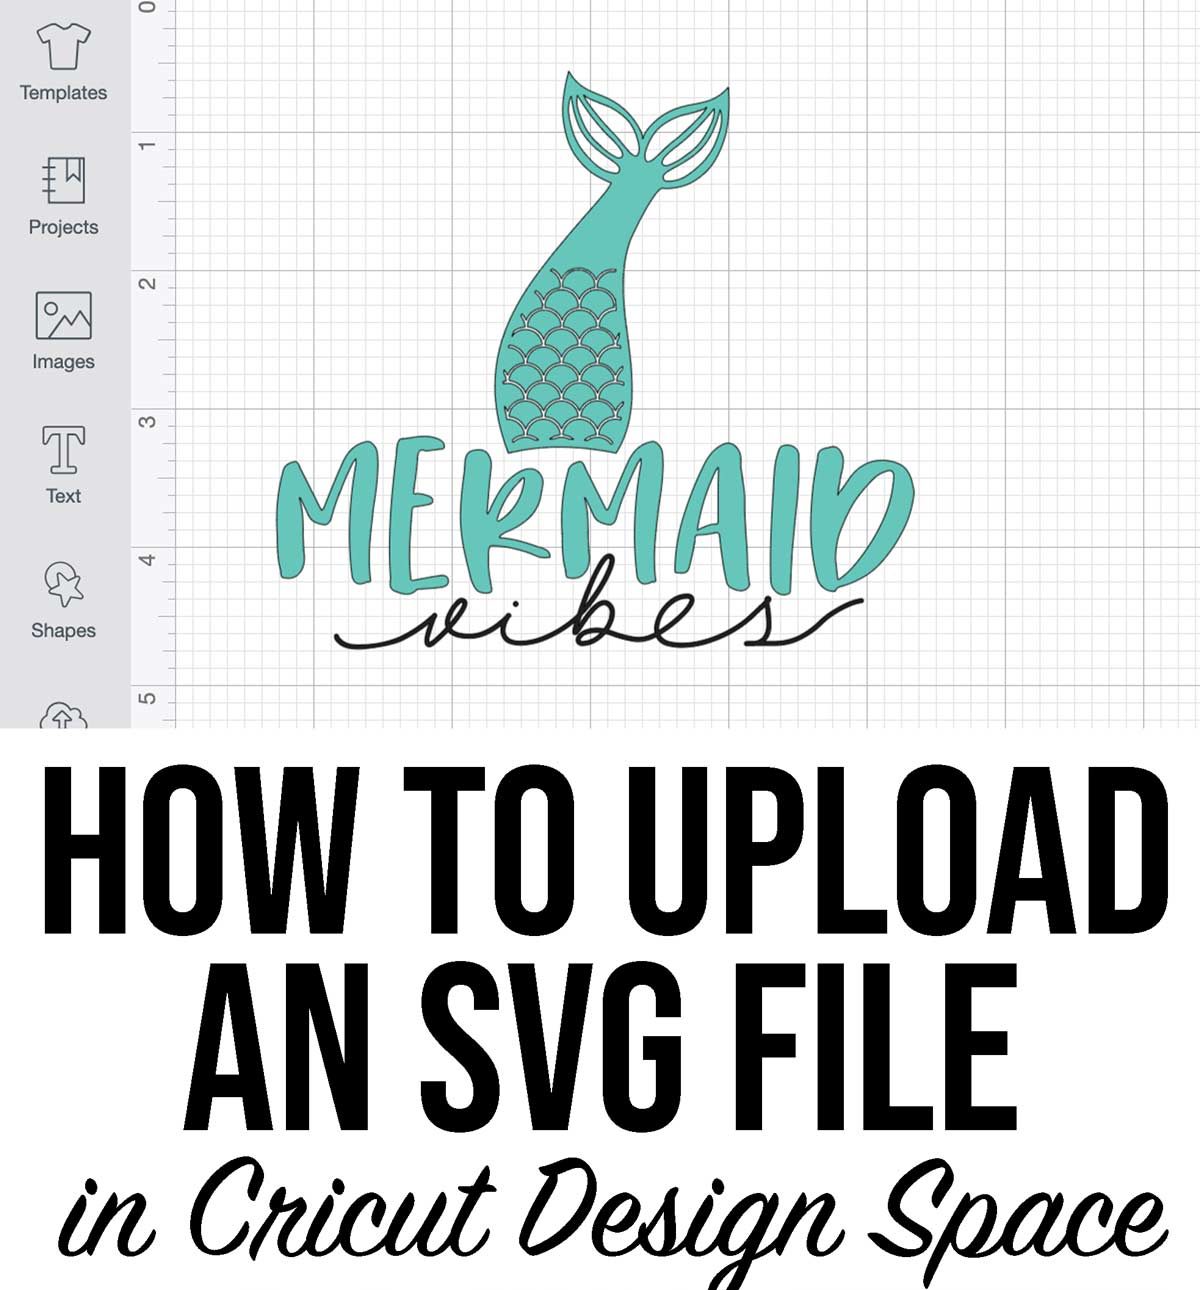
This easy tutorial will teach you how to upload an SVG file in Cricut Design Space. Opening up opportunities for you to use a variety of design files beyond what is just available in the Cricut library.
Whether you are a beginner with your Cricut or an advanced user. Uploading your own SVGs will allow you to be more creative with your projects and designs.
What is an SVG File?
An SVG is a vector graphic file that Cricut software prefers when uploading designs into Cricut Design Space. Often times people will use their own SVG designs rather than the purchasing or subscribing to design in Design Space.
Where can you get SVG files?
There are loads of resources to find SVG designs. The most common being purchasing them from Etsy or downloading them from bloggers. There are even some SVG memberships.
How to upload an SVG in Cricut Design Space
Step 1: Open Cricut Design Space
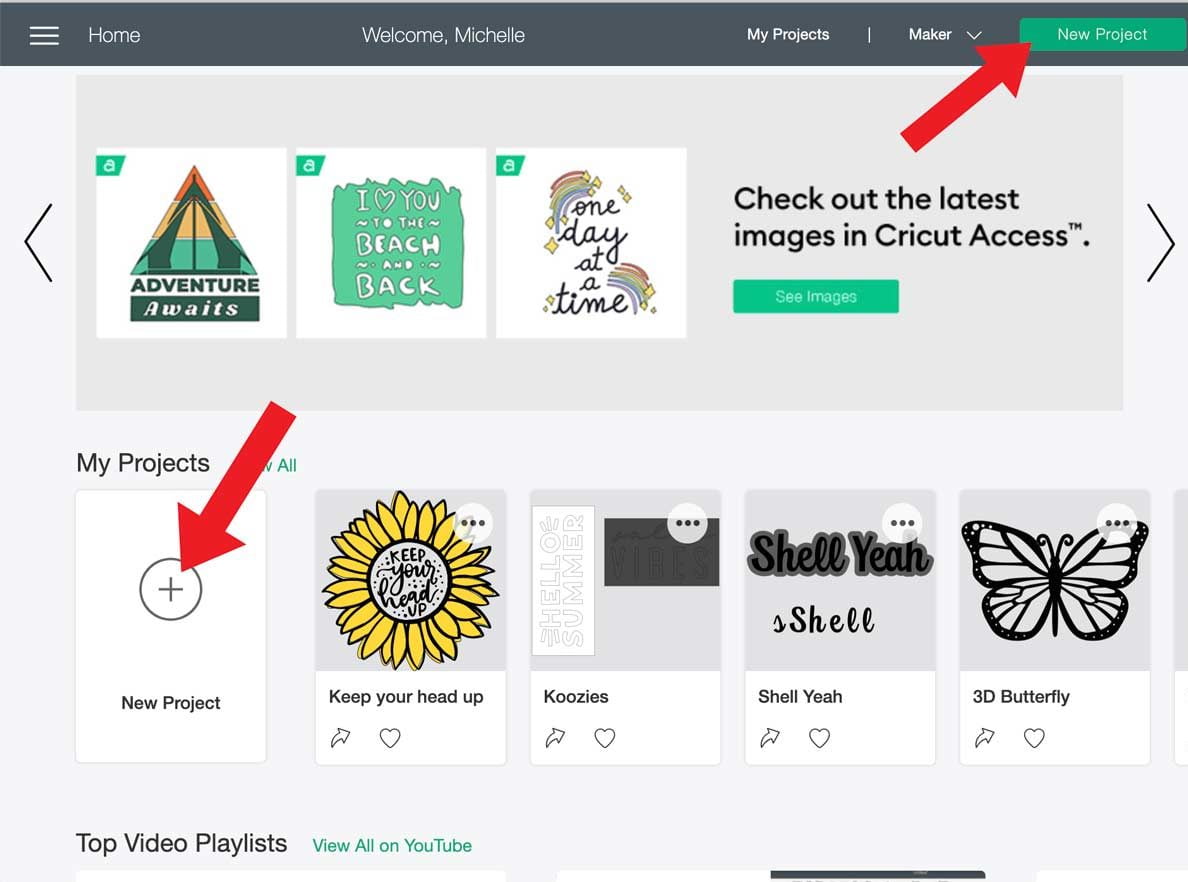
If you don’t have Cricut Design Space on your computer yet you can download it here. Once the software is open select new project.
There are two places to do this first being the green “new project” button on the top left and the plus sign in the my projects section.
Step 2: Upload
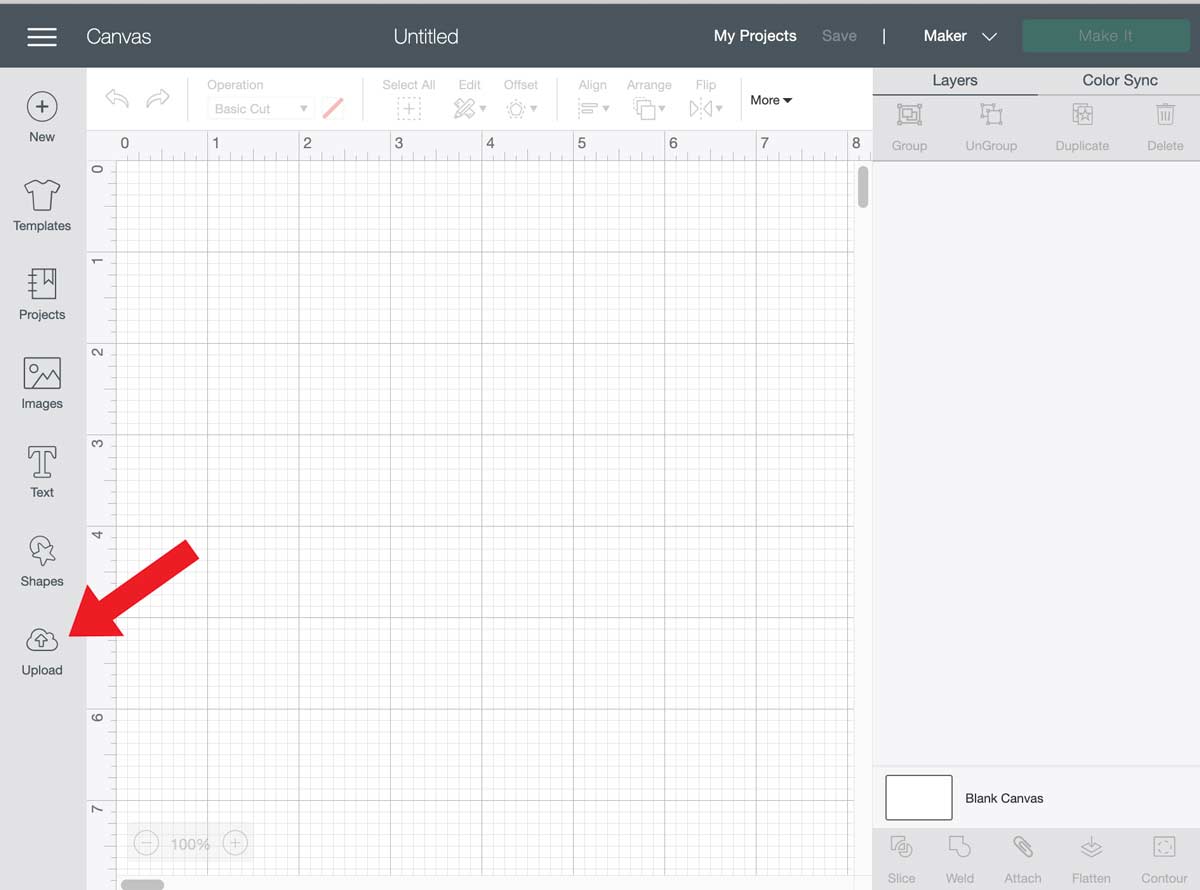
On the bottom left of the tool bar you will see a cloud with an arrow in it. It should say upload. Select this.
Step 3: Upload Image
A new screen will open, select upload image.
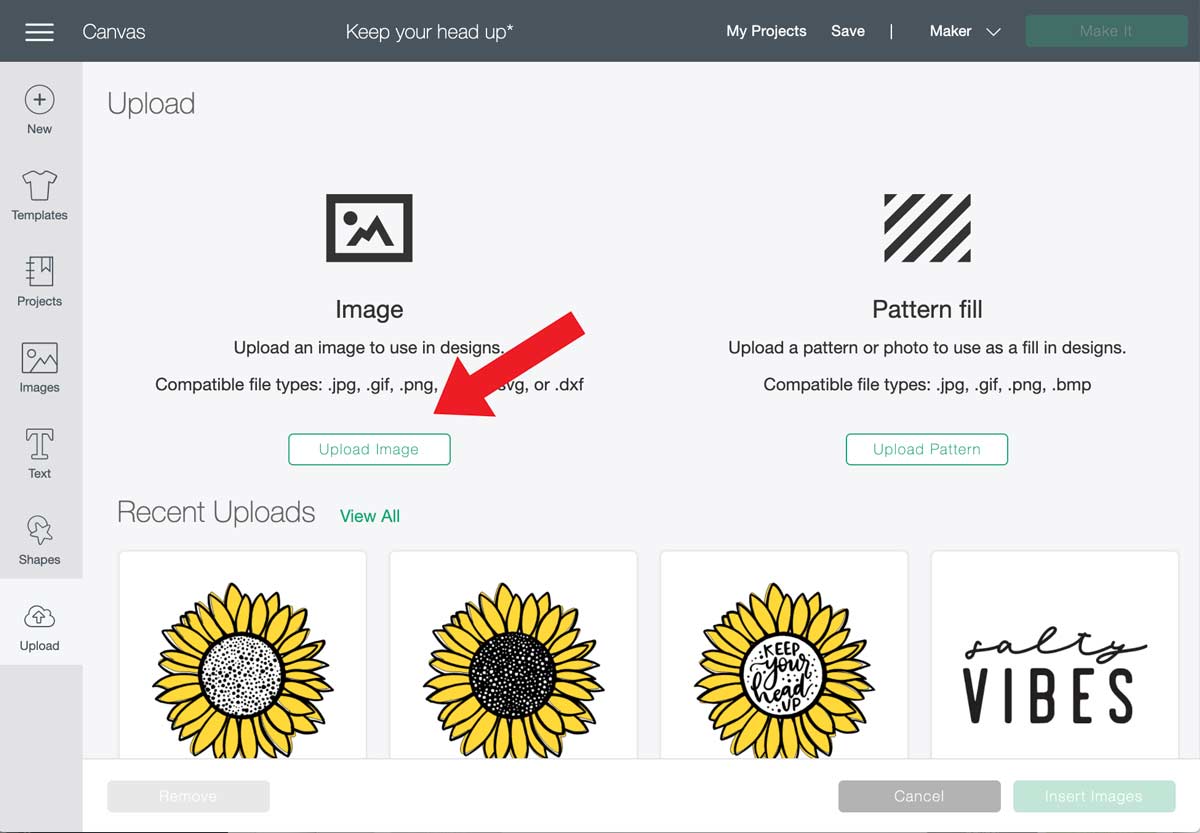
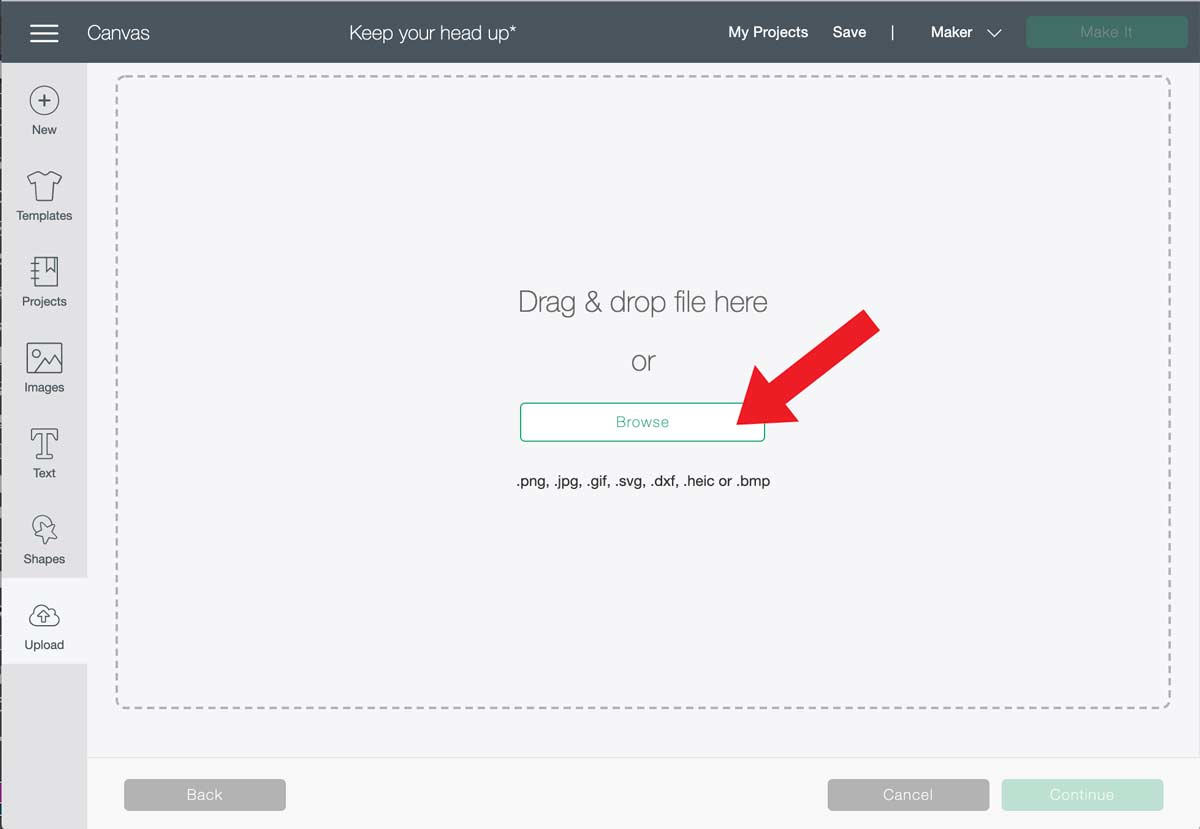
Either Drag or drop your image or select browse. Remember where you saved your SVGs. Can’t find them? Check your downloads folder.
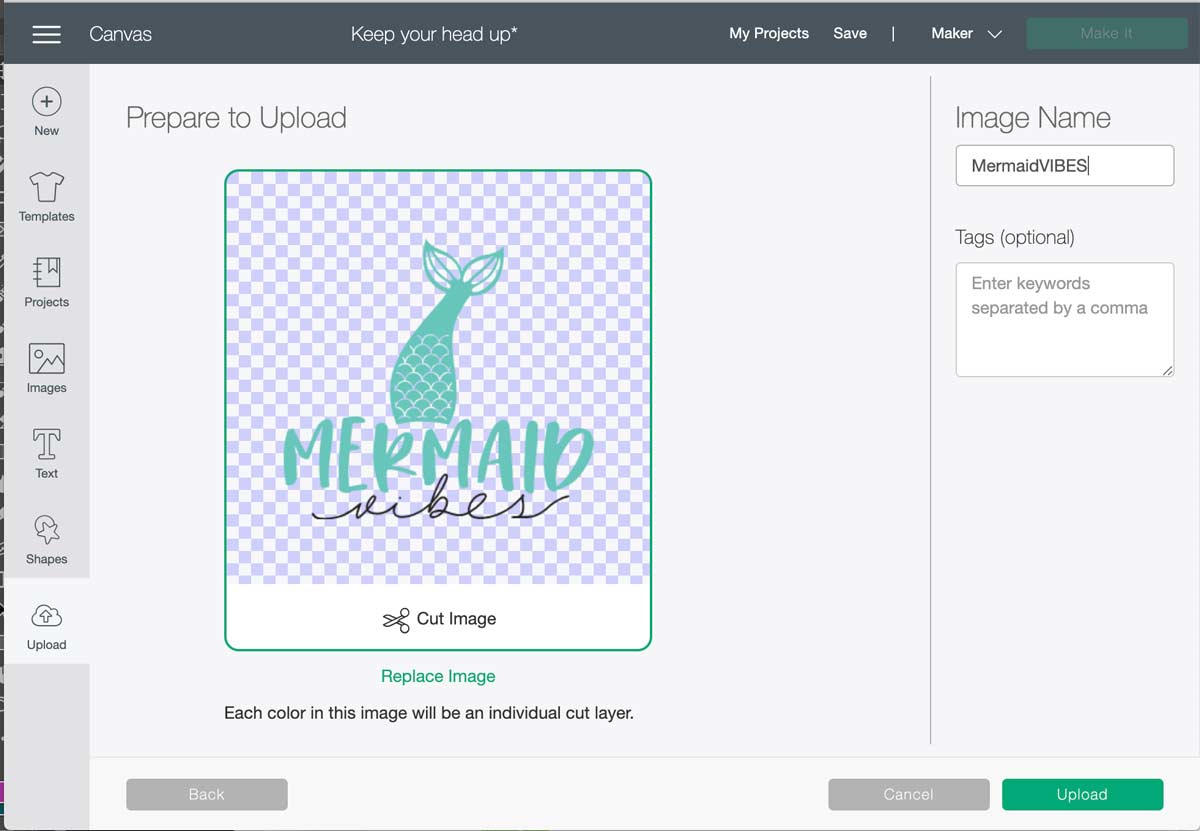
Step 4: Name your image
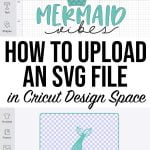
You will see a preview image. The checkered background is not part of your design but just showing that transparency. Name your image and add any tags if needed. Then select save.
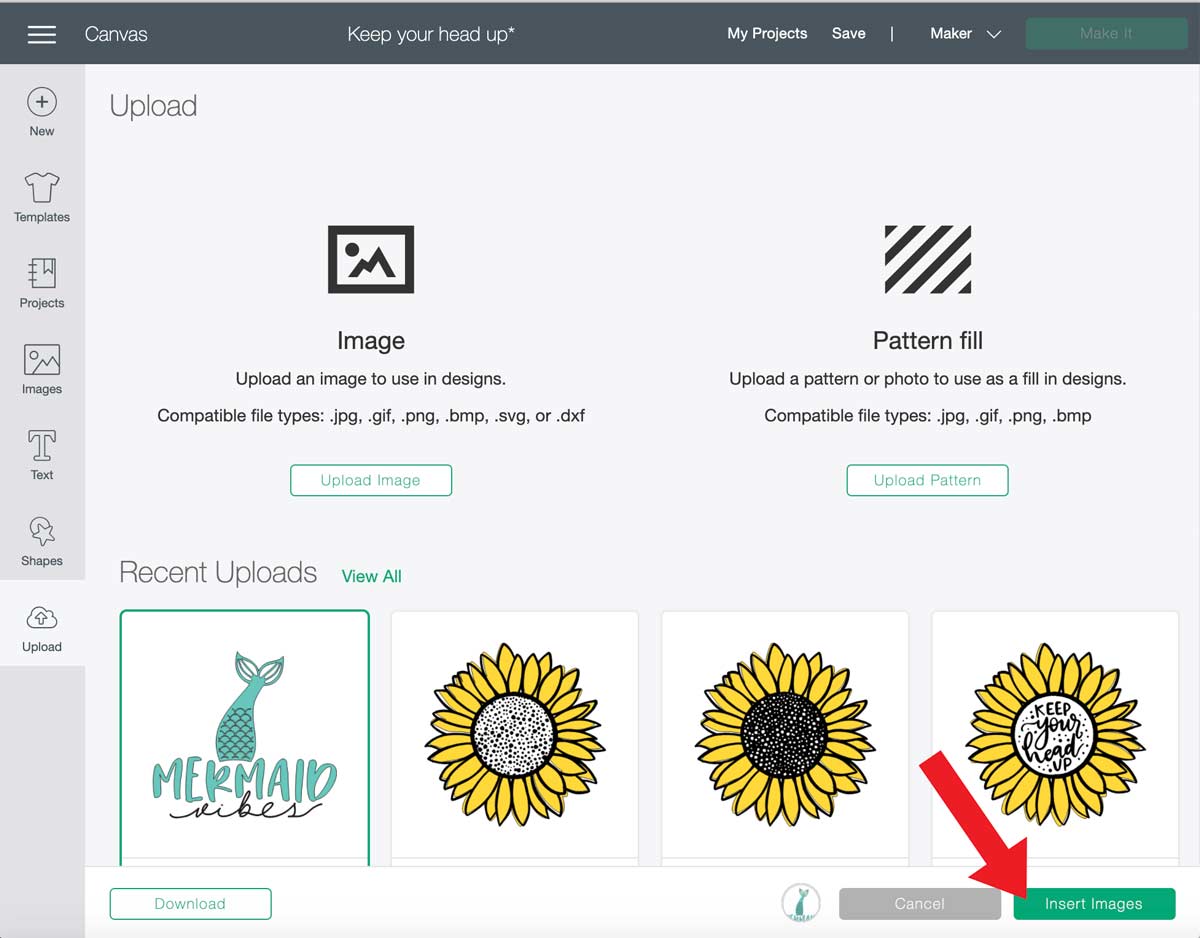
Step 5: Insert Image
Your image should now be located with your recent uploads. Select your image and insert it into your project.
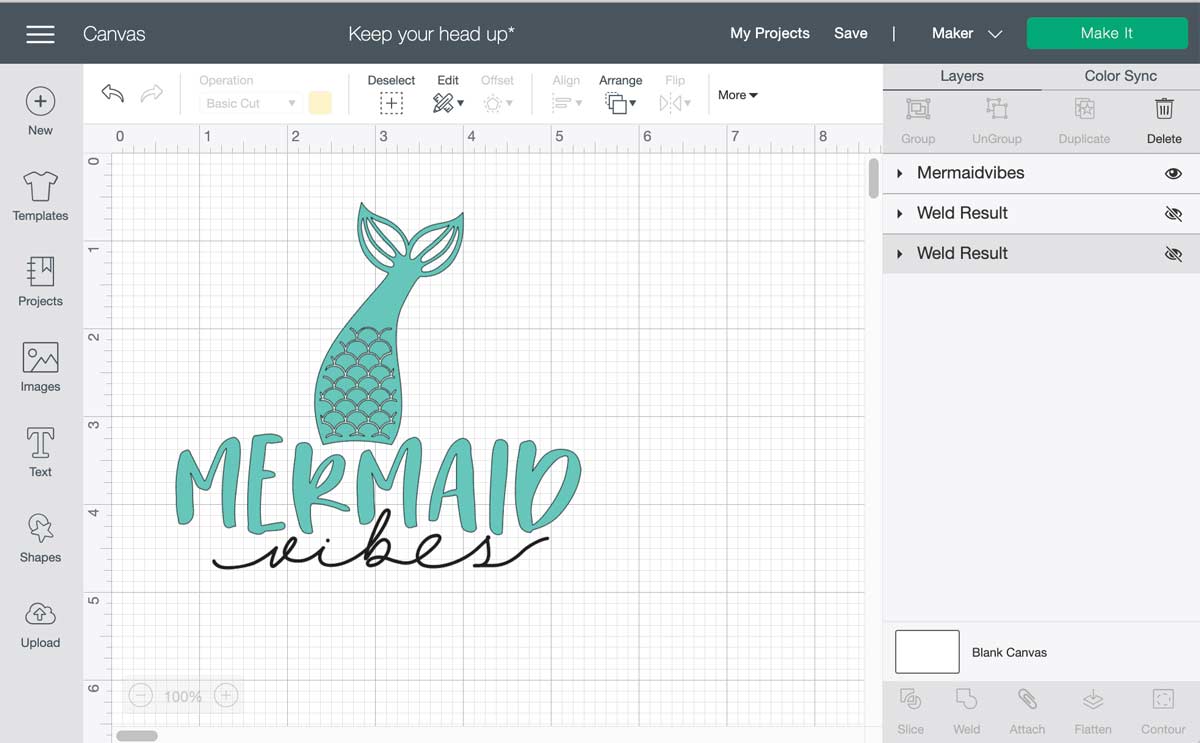
Step 6: Resize the Image
Resize your design to fit your project. You are read to cut or make It with your Cricut.



3 Comments