This post contains affiliate links, please read our disclosure policy.
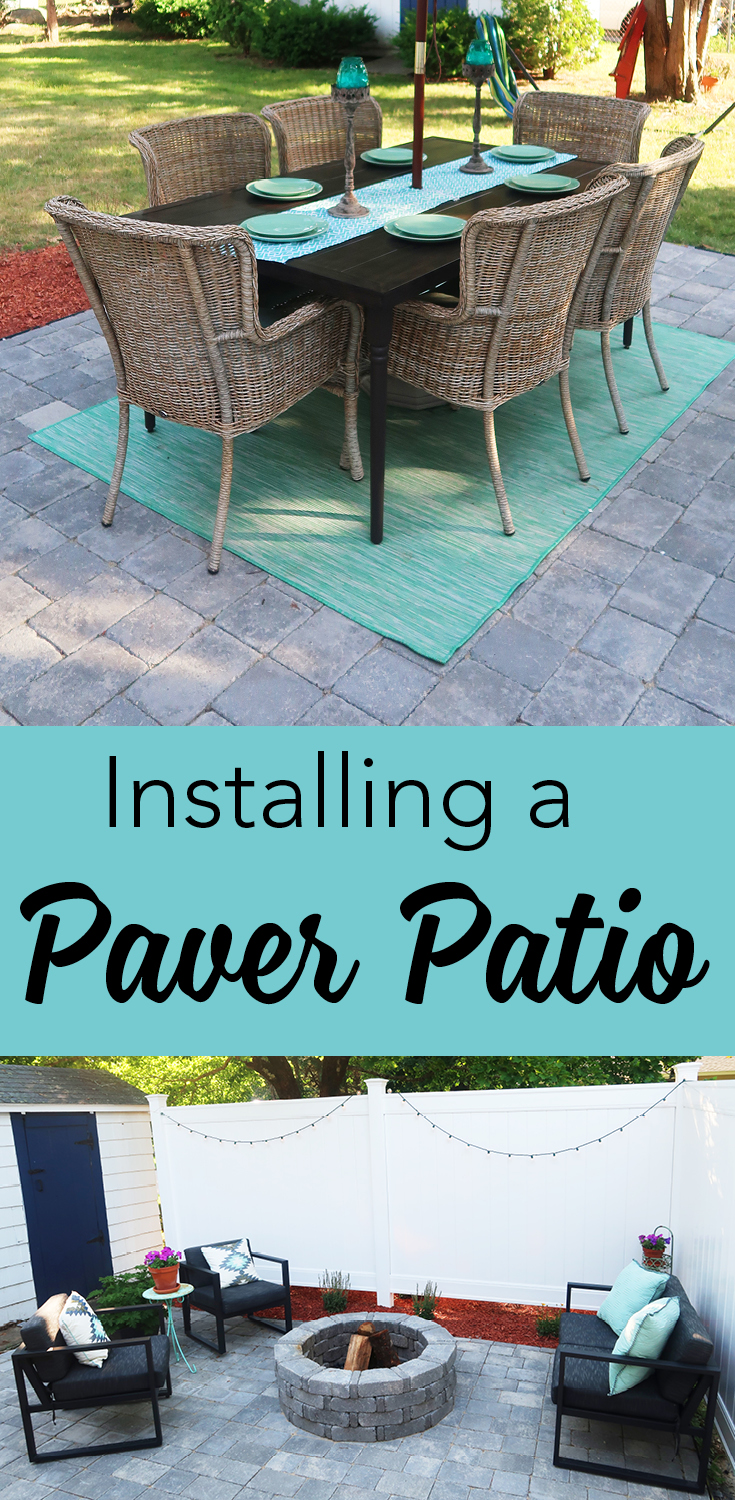
How to design and install a paver patio with Pavestone pavers.
This is a sponsored post from Pavestone but all opinions are my own.
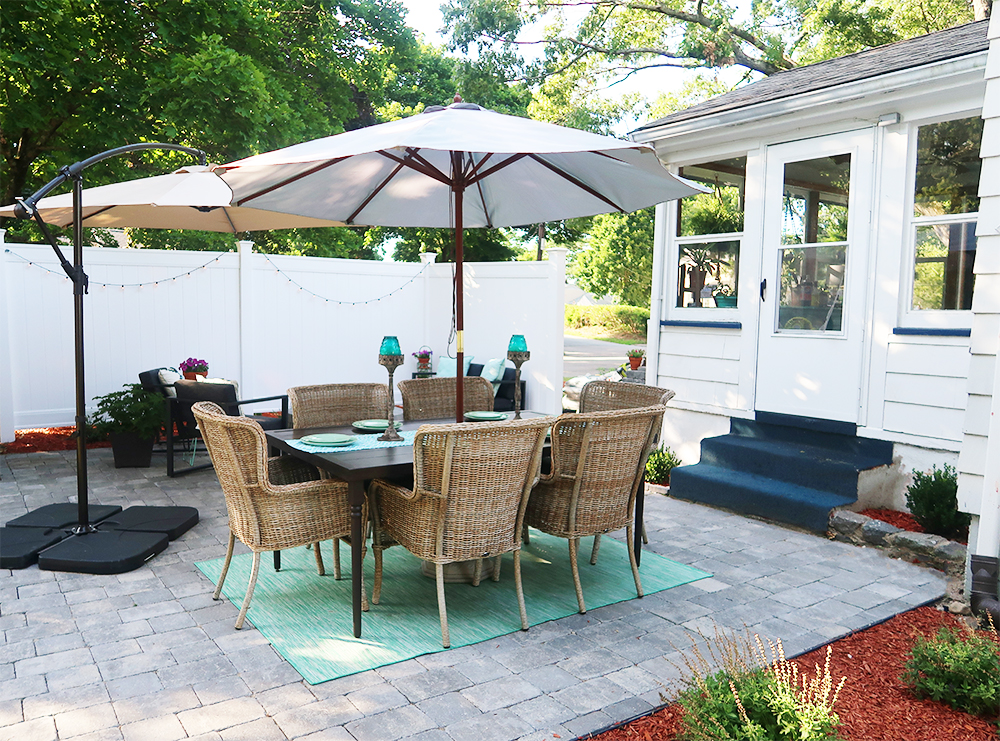
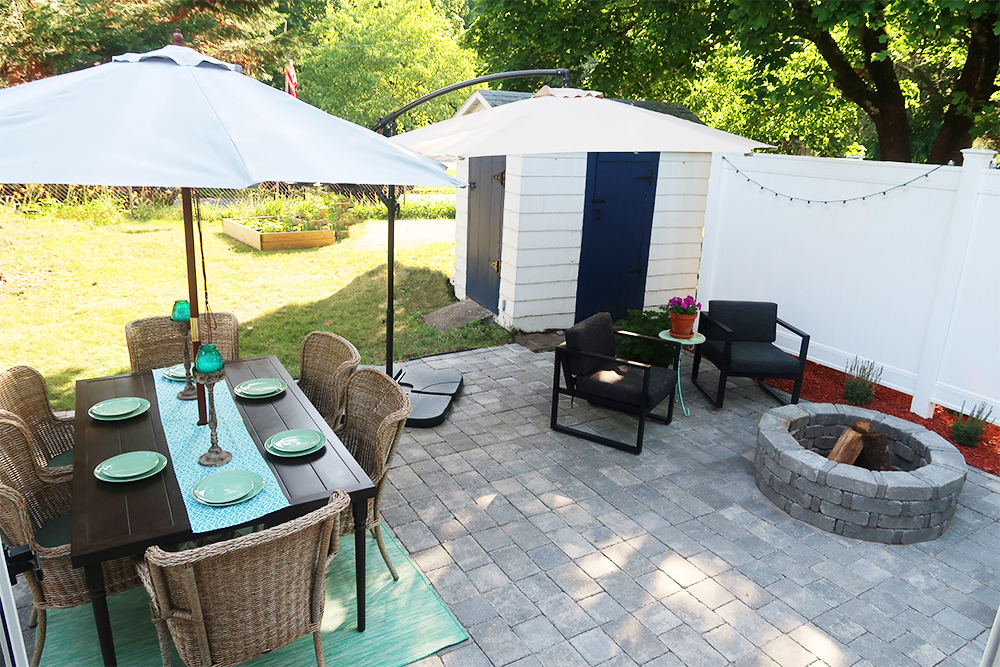
My paver patio is finally done and landscaped! I am so excited to show you the transformation. Less than a year after moving into my house I had some major plumbing issues which led to my back deck needing to be removed and my entire side lawn dug up to remove a clay sewer pipe that went to the street. Not only was the plumbing a large expense but it left me without an outdoor area to relax and entertain in.
Damage to the yard and deck.
See the video below for the damage to my back yard and deck.
//video.mediavine.com/videos/h5pipuf4fzos8x6b3cph.js
After it sunk in that my back deck was gone my Dad and I started to figure out what to do with the area. This led to an entire winter of nothing but patio talk. Our family thought we were crazy. Even on vacation in Florida, thousands of miles from home, we ended up in Home Depot looking at pavers. We measured the area roped it off multiple times to figure out the space and even had a few people come out for estimates. My dad and I decided we would tackle this project on our own with the help of Pavestone.
How to get started designing your patio
First thing to do is to plan the space. How big of a patio are you looking for? What are you looking for in the space? For me it was all about entertaining. I wanted to be able to have dinner but also have a fire on a cool summer night. I knew I needed room for two seating areas. This increased the size of my patio to roughly 10ft x 22ft.
Next I decided what type of pavers I wanted. I spent a lot of time at Home Depot looking at pavers from Pavestone. Ultimately I decided on grey rumblestone in grey. I really liked the organic feel of these pavers.
Check out Pavestone RumbleStone here
Once you have figured out the size and pavers you are using come up with a pattern for the area. I found my inspiration by checking out some completed projects online.
Looking for patio or pattern ideas check out these here.

Step 1. Prepare the area
Step one to installing your paver patio is to dig your base. Now I thought this was something we could do with a small cultivator but we ended up having a neighborhood landscaper dig it out. I had way to many large rocks/boulders to do it by hand.
Now how far do you dig? You want to take in count you need 6 inches of stone and at least one inch of sand. You also want to factor in the depth of the pavers you choose.
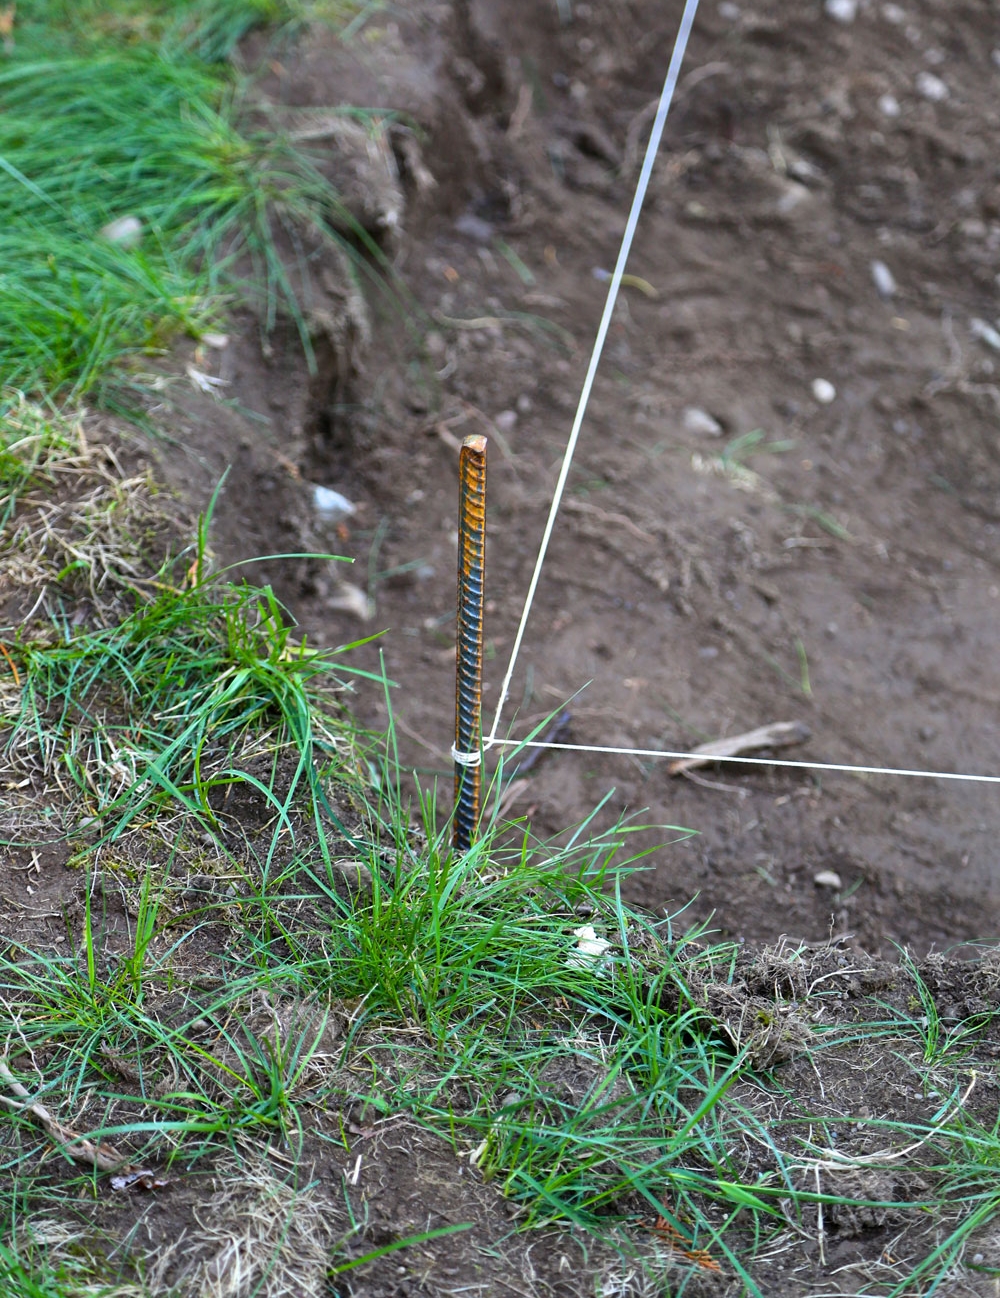
Map out your perimeter. We did this using rebar and staked them into the ground about every 8 feet. We used string and a hanging level to make sure the areas are level. The string represents where the pavers will come up to. Keep in mind you will want to slope the patio away from the house. This helps with water when it rains.
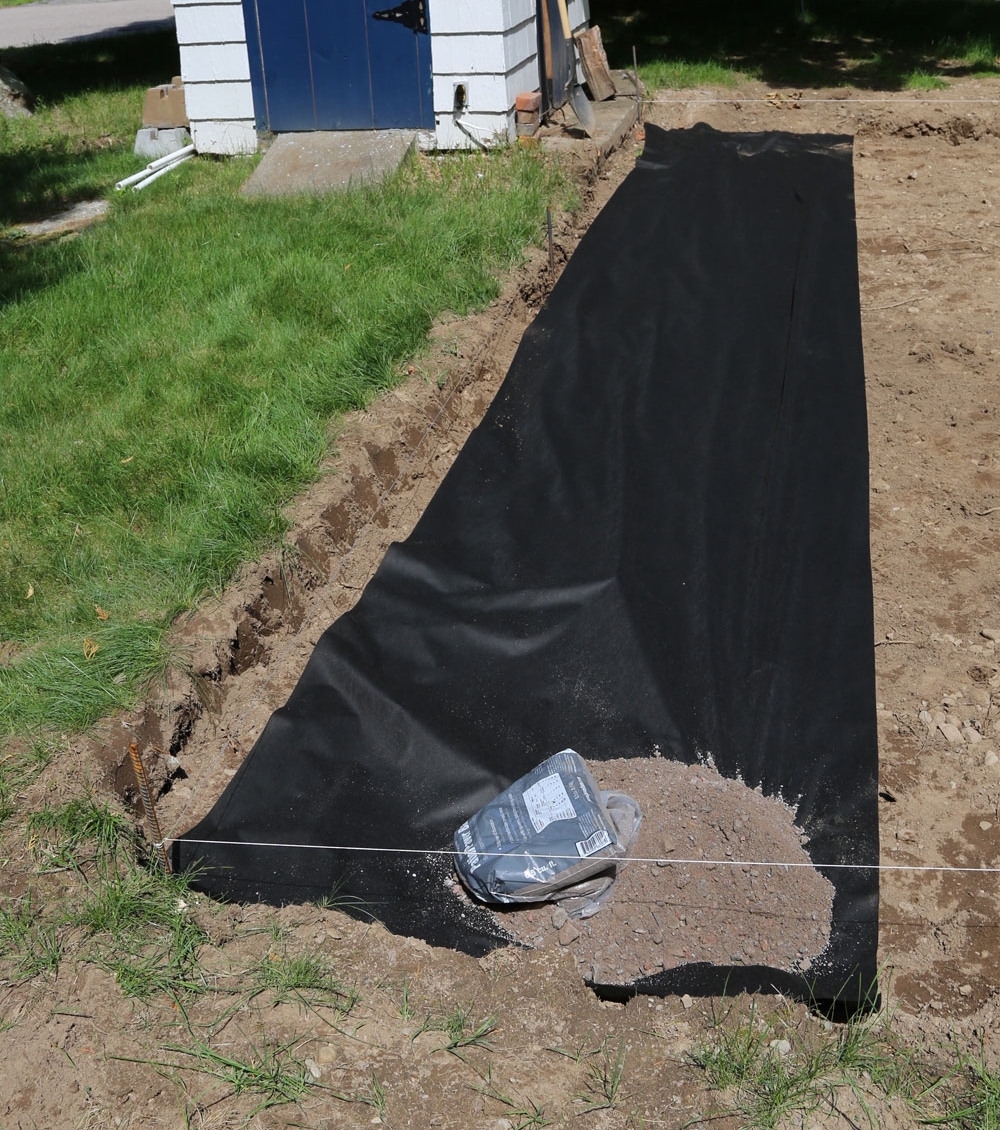
Step 2. Weed Barrier
Now that your area is dug and the perimeter is mapped and dug you will want to spread a weed barrier. Run it the size of the future patio and make sure to over lap to barrier a few inches. This will help protect weeds growing up through the pavers.
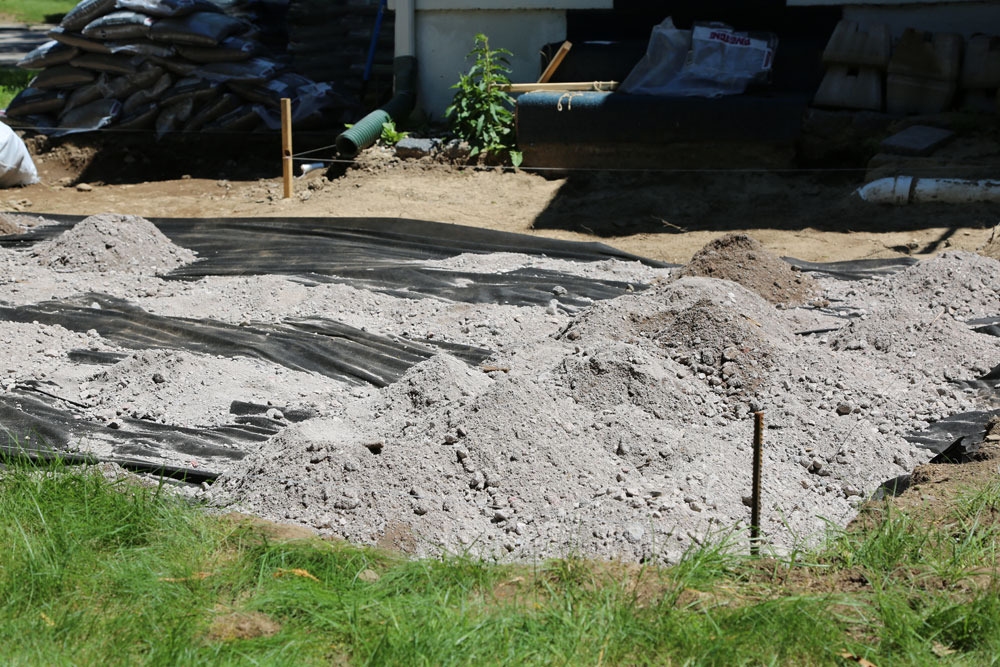
Step 3. Stone Base
I know it seems silly to dig a hole just to fill it in again but that is essentially what we are doing. Once your weed barrier is in start filling in the patio area with your paver base. This is crushed stone. You will want a 6 inch layer of compact stone.
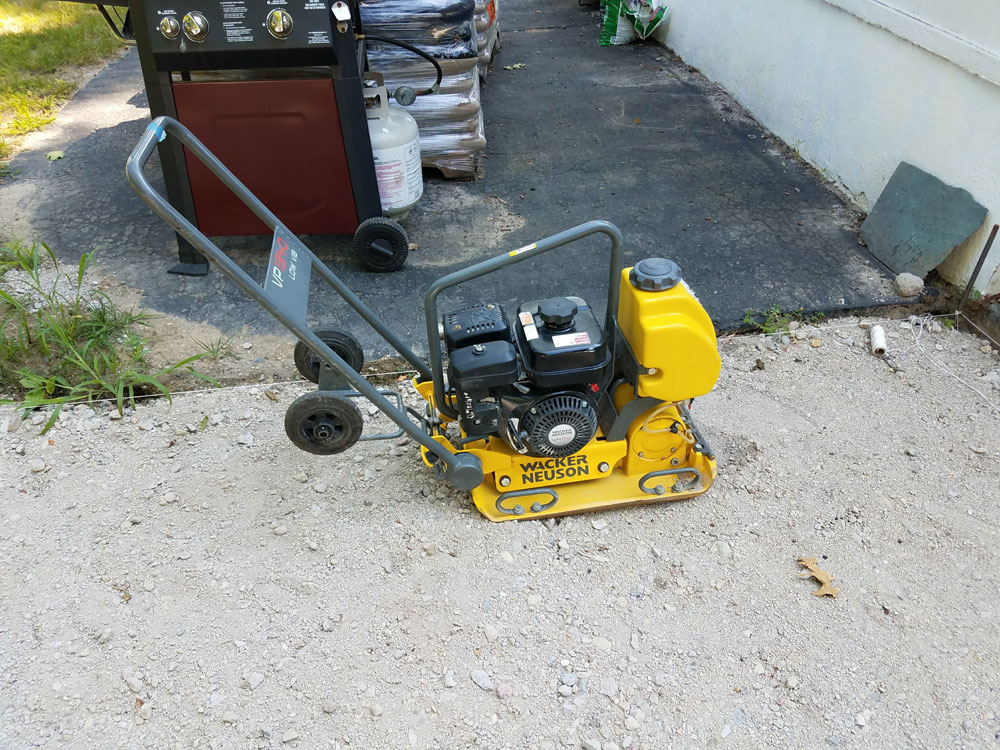
Now instead of tamping this by hand we rented a tamper from Home Depot. This saved us a lot of time and physical labor. We rented it after all the stone was laid. You usually rent by the hour or half day so you want to make sure you are ready for it before you go and get it.
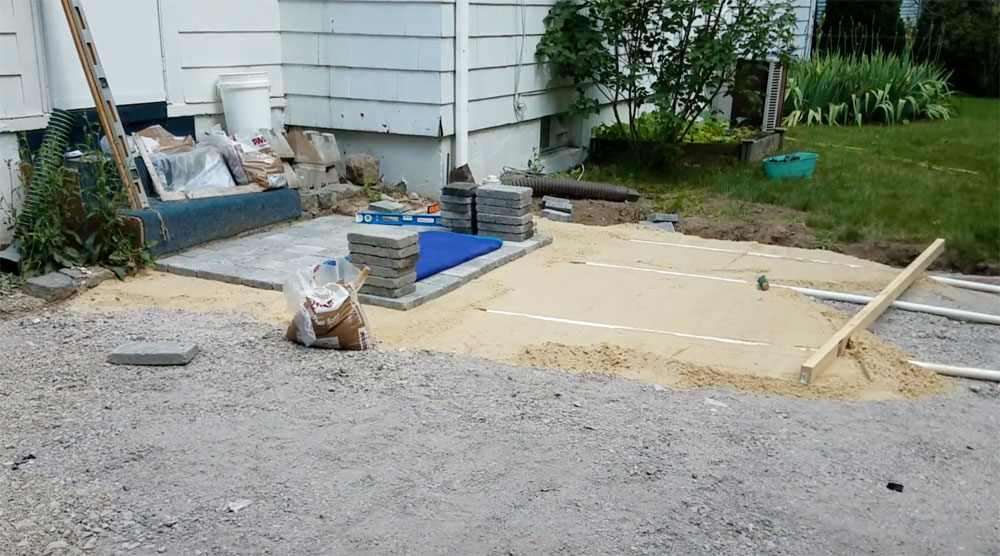
Step 4. Leveling and sand
This step is so important to having a level patio. You will need PVC pipes and a 2×4. You are going to place PVC pipe on top of your compacted stone. Fill a section with sand, over your PVC pipes, using your 2×4 push the 2×4 forward on the PVC. This creates a level section to start laying your pavers. Do not lay your pavers over the PVC. Slide the pipes out and fill in the gaps of sand.
Step 5. Laying pavers
They key to laying your pavers is to do it in sections. We leveled the sand in about a 5ft x 5ft section and laid the pavers section by section. This is important if you are not laying all your pavers in one day. Since my patio was on the large side we laid it over the course of several days. We also used a rubber mallet and a level to make sure we were laying the pavers level. We kept our pattern simple so we would not get mixed up laying the pavers. This pattern also made for almost no cuts.

Step 6. Edging stones
I really like the look of edging the patio with the brick sized RumbleStone pavers. It really gave the patio a finished look. Now to keep the patio in place and to avoid shifting you want to install paver edging. We went with the Proflex Paver Edging from home depot. It slips under the edge of your pavers and is staked in every foot or so.
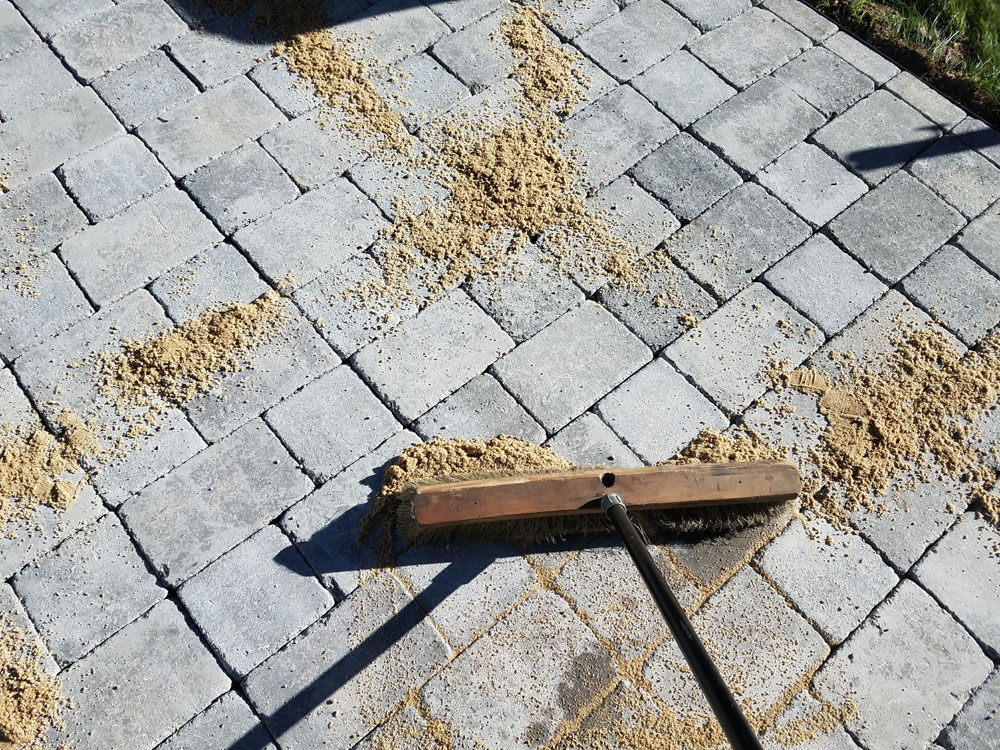
Step 7. Sand
It’s funny when your think of laying tile our masonry you think of mastic or grout you don’t think of sand. Well thats exactly what helps keep your pavers in place. That’s right SAND. Using a large push broom push the sand into the cracks of the patio. Now you want to do this several times. The sand will settle so come back in a day and do it again or after it rains.
As maintence with your patio you do want to do this every year. In the spring before you put your furniture back out just grab a bag or two of sand and your push broom. This will help your patio with stand your everyday use.
See the whole process of installing the paver patio in this video
//video.mediavine.com/videos/owrjqcrailpd2ba5ioar.js
Advice for installing a paver patio
This was one of the largest DIY projects we have ever taken on. I am not going to lie it was a tough one. It was tough for 2 reasons. First being the physical labor of the project from the bags of sand and stone to the actual pavers. Second being starting this project in 90+ degree weather. My biggest suggestion or advice would be to have the sand and stone delivered loose instead of bagged. Second piece of advice would be choose your season wisely. If I did this again it would’ve been a perfect Fall or Spring project. That being said I would 100% do this project again. My backyard truly feels like an oasis and if I do ever sell this house I think it will be a feature that helps sell this house. It truly feels like I have extended the square footage of my just outside.
The Biggest Thank You!
Without my dad I could not have completed this project. He took the lead on this one. It was a hot summer and a lot of physical labor. I am so lucky to have a Dad who is willing to jump into just about any DIY project and help me figure it out.
Also a huge thank you to Pavestone for supplying all the materials and being so patient with us on this project.
See the full patio reveal here.

Thanks to Michelle’s dad, too! You guys did a wonderful job. It looks beautiful!!
My dad is the best! I learned so much from him on this project.
Oh Michelle, it looks fantastic! A lot of work indeed, but you will have years of enjoyment entertaining on your patio! I love the pavers you chose, and the edge really gives it a finished look! Maybe you and your dad can come visit me! I am thinking of adding a small patio out in the yard!!
Thanks Maureen! We are really happy with how the patio came out. I agree the edging just makes it feel complete. Honestly it is the patio of my dreams. I’m on my way as long as there is peach tea!
Luke and I installed pavers in our first house and it didn’t turn out nearly as good as this! Awesome awesome job! I love it.
Thank you Ashley! I feel like I’ve turned my back yard into my own personal sanctuary or oasis.
WOW. This looks AMAZING!!!
Thank you! I am still in disbelief this is my back yard.
This is so impressive. You really knocked it out of the park! I love that fire pit too. Now I need to work on my backyard!! :0
I think the firepit might be my favorite spot!
Awesome tutorial! My husband and I installed about 2 square foot of pavers last summer and I thought it was going to kill me. Your patio looks great!
MICHELLE!
GASP! It looks incredible! I know you are loving every inch of that patio and those patio pavers. And yes, you are very lucky to have a dad who can help you with those projects!
Your step by step instructions are so helpful for someone who wants to do the same thing in their backyard.
Well done my friend!
hugs, Lynn