This post contains affiliate links, please read our disclosure policy.
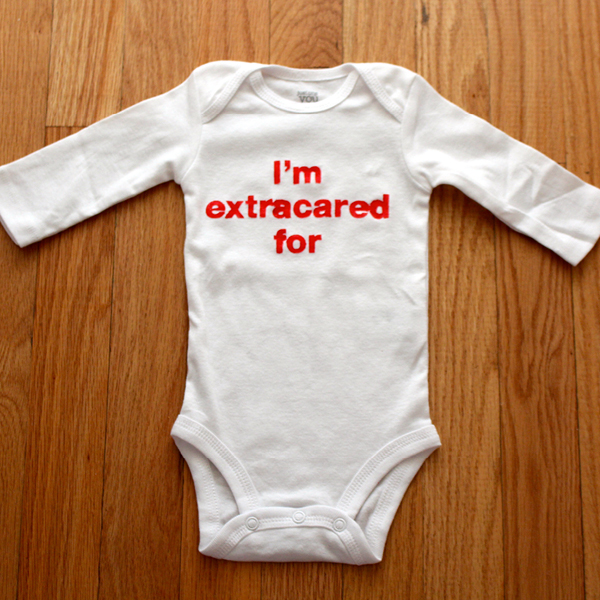
I don’t often write about my 9 to 5 (because really who wants to hear about that) but today is an exception because recently my two worlds merged for a few hours. I helped throw another baby shower at work (click here to see a bunny themed work baby shower). I work at CVS along side designers that work on the ExtraCare loyalty program. So when one of the designers was pregnant it just seemed naturally or punny to make an ExtraCare onesie. Also this is a Silhouette Challenge Monday. The theme this month was kid’s projects so this fit in perfectly! Make sure you stay until the end of the post and check out 10 other kid’s related silhouette projects.
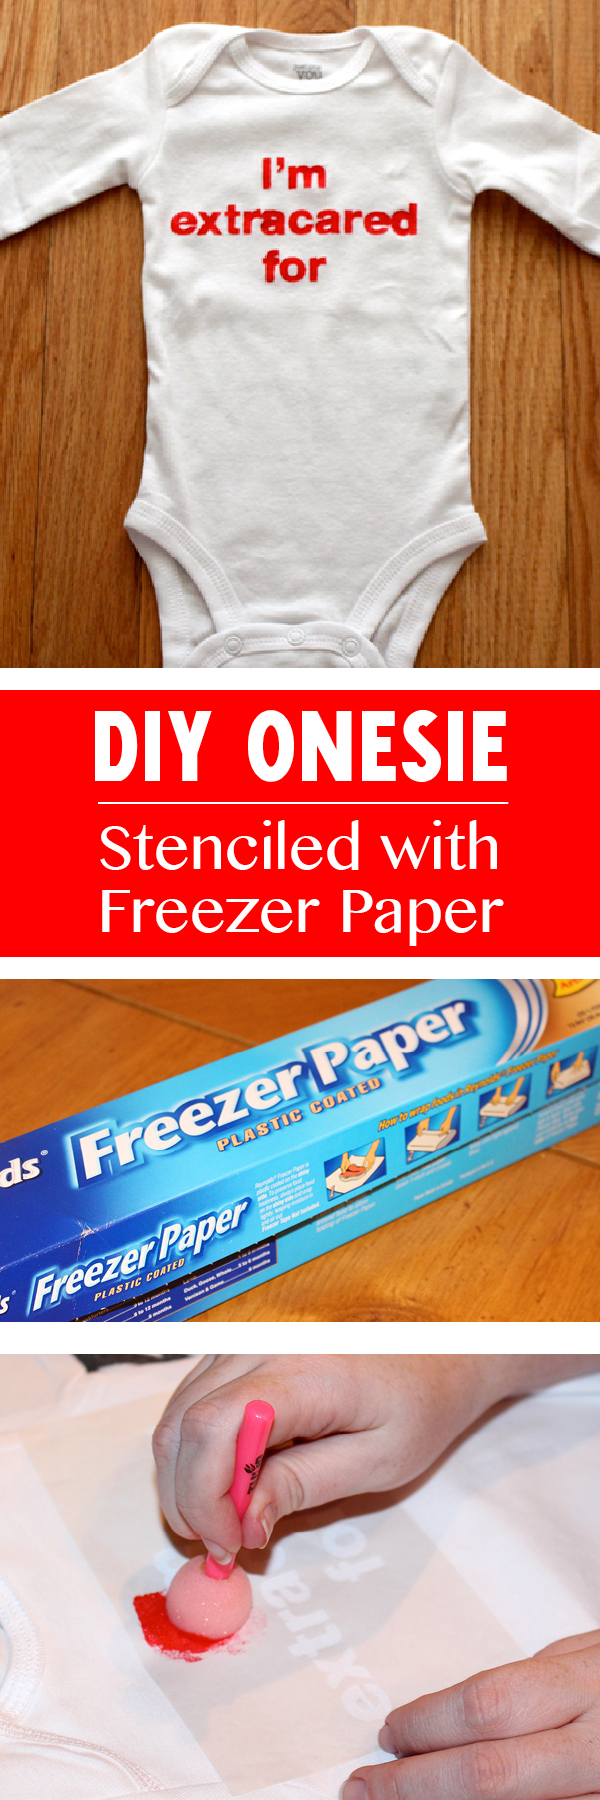
Now I have made a few onesies before but believe it or not I never shared them. They were always a bit last minute where I was working late into the night and I never took pictures. I have yet to venture into the world of Heat Transfer Vinyl so instead I actually use freezer paper stencils.
![]()
What you will need
- Blank Onesie
- Freezer Paper
- Silhouette
- Iron
- Fabric Paint
- A few pieced of computer paper
- Hook Tool
- Tulip Paint Sponge Pouncers
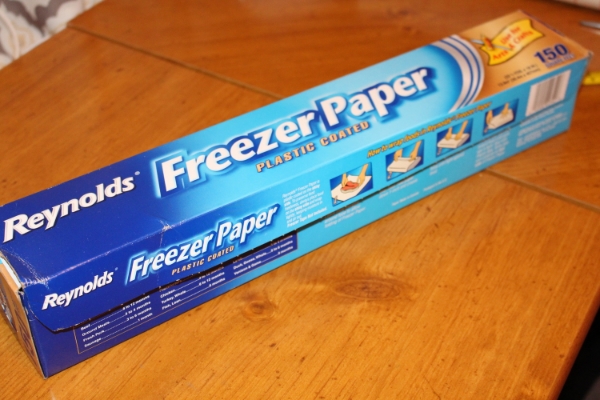
I thought finding freezer paper would be easy. I am not sure if it is because I live in the Northeast or because freezer paper is not used as much anymore. I went to three stores and then sent my Dad out to Walmart in the snow to get it. Walmart did have it but it is the largest roll I have ever seen. Which is actually good because I foresee myself using a lot of it! It is an inexpensive way to customize fabric.
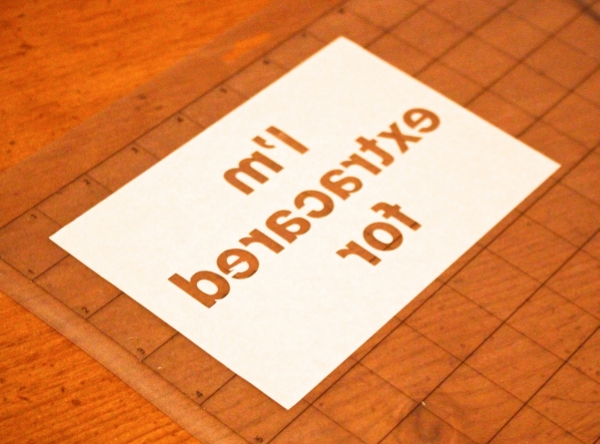
Start by creating your design in silhouette studio. Make sure to mirror your image before sending it to cut. I did this by selecting all Object > Transform > Flip Horizontally. You will want to place the freezer paper shiny side up on your cutting mat. The shiny side is the side that when ironed will stick to the fabric making a temporary seal to paint the stencil.
I used the cut settings of Blade 3, Speed 3, and a Thickness of 10.
Using your hook tool. Weed out the insides of the letters leaving the outer edges and the middle of the a, e and o’s. Make sure to have your iron turned on. I suggest you use the heat setting for the fabric that you are using. In this case I used the cotton setting.
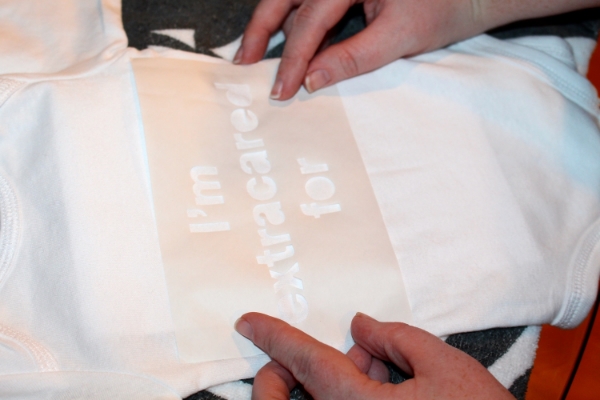
Place the freezer paper shiny side down and position it on the onesie. May sure to position it straight. You can eye ball it or use a tape measurer.
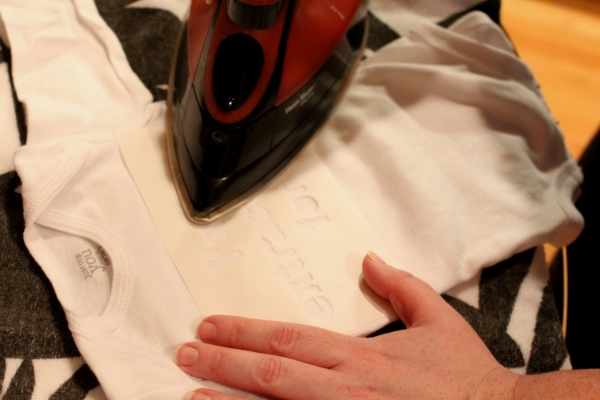
Take your hot iron and start by placing the iron on top of the stencil. Gently moving the iron over the rest of the stencil. Make sure all edges of the lettering have been ironed to create a seal. Hand place the centers of the a, e and o’s. Using the tip of the iron to set them in place. Take your time with this it is the trickiest part (triple check the you place these small pieces shiny side down).

Using fabric paint (make sure to read the fabric paint instructions on the bottle, they all seem to vary) and a sponge “pouncer” start to dab paint over the stencil. I’ve tried a few different techniques and I found that the pouncers versus a foam brush or a paint brush works the best and does not bleed as easily through the stencil. That being said try to control the amount of paint being used. You can always go back over an area.
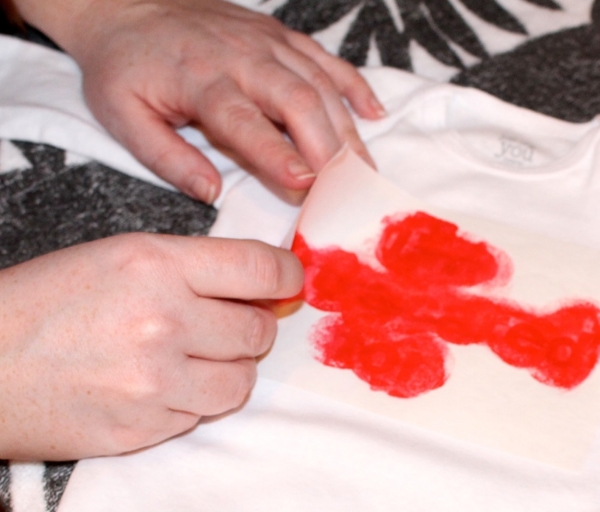
Let the paint dry about 20 minutes and you will be ready to peel back the freezer paper.

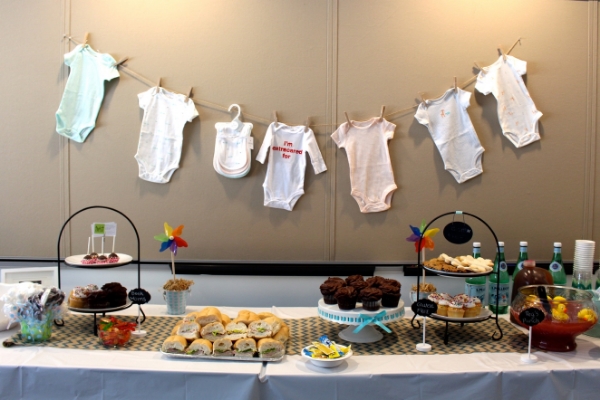
The onesie not only made the perfect gift but played a great role as part of the decorations as the focal point of the onesie clothes line.
Looking for another project to use that roll of freezer paper on?
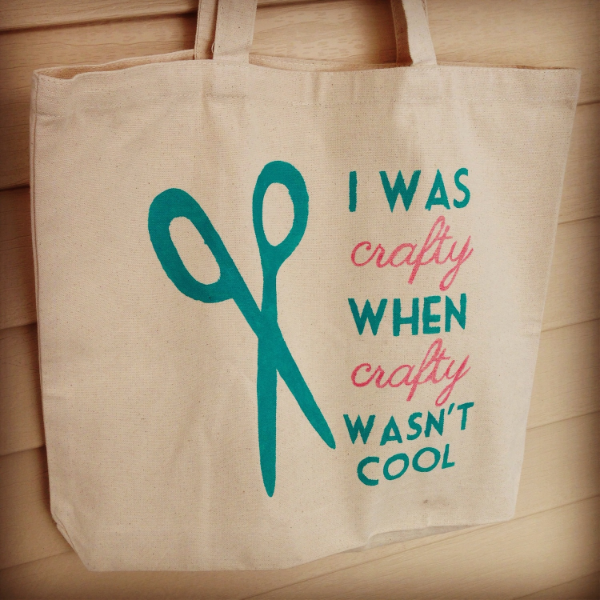
Check out how I made this tote bag using the same type of stencil.
Want to Check Out More Silhouette Projects?
My Silhouette Challenge buddies and I are all sharing projects on our blogs today, so peruse the projects below for a wealth of Silhouette inspiration!
1. unOriginal Mom // 2. Architecture of a Mom // 3. Crafty Bonds // 4. Simply Kelly Designs // 5. Weekend Craft // 6. Cutesy Crafts // 7. DIYJustCuz // 8. My Paper Craze // 9. Where The Smiles Have Been // 10. From Whine to Whine


You know I love puns so I love this onesie. Love how you combined the name of the program your friend works for with the saying on the onesie. Very clever.
Hehe, so clever!! I’m sure your coworker loved it!!
Haha, that’s so cute! I love that you made a pun from work…I also can’t believe it’s still snowing where you are; that’s crazy! I never thought to use paint and a stencil for a shirt…I’m going to have to try that since you made it look so easy :)Great job!–Brittanywww.diyjustcuz.com
So cute! What a great way to tie in the company’s rewards program. You and mama should get a bonus at least for all the free advertising CVS will get when the baby wears it!
Just brilliamt! <3 the pun!