This post contains affiliate links, please read our disclosure policy.
It’s that time of the month again! Time for the Silhouette Challenge where 40 Silhouette loving bloggers get “together” to craft keeping in mind a theme and share the results. This month’s theme, which is very appropriate with this gorgeous weather, is Spring! Make sure to stay until the end to see 40 other inspirational projects!
I didn’t know what I was going to do for this challenge for the longest time. I had originally thought about making flowers but then I peaked at next months challenge, which the theme is flowers, I decided to go back to the drawing board. Don’t worry it’s nothing a trip to Michaels can’t fix.
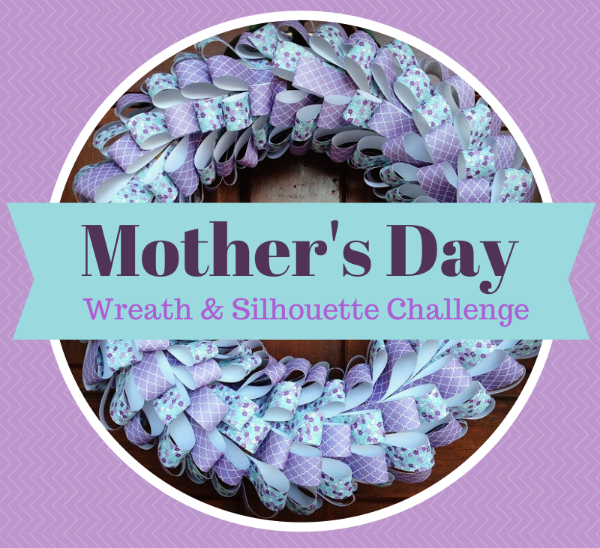
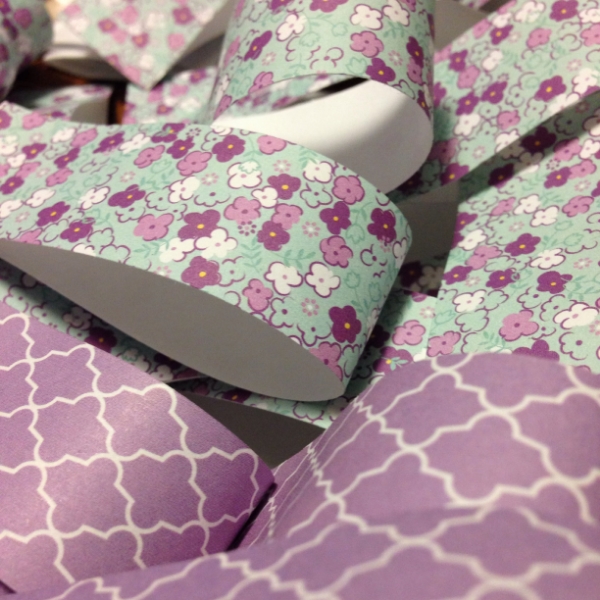
Last week Michaels was having a huge storewide sale. Perfect! I went to the paper aisle and started looking at different color combinations and landed on a purple and light blue. Now with Mother’s Day coming up I thought lets kill two birds with one stone! My Mom loves purple and she also loves wreaths. She adorns our front door with a wreath for every holiday or season. (Also I have never made a wreath before!)
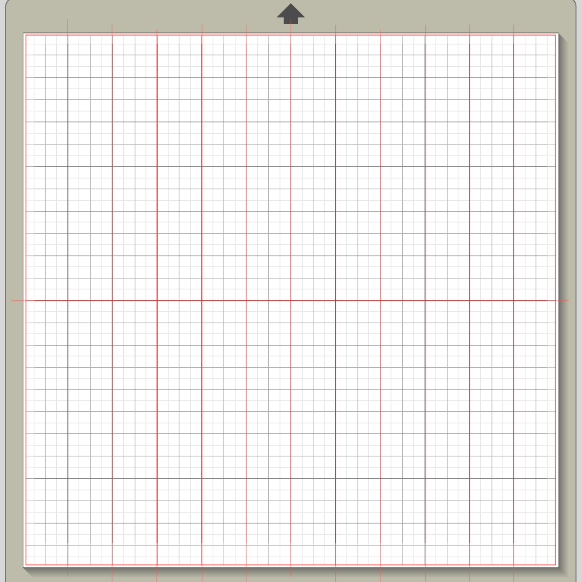
The concept of this wreath is simple but time consuming. The wreath is entirely made of paper strips that have been folded and glued to make a loop. In the Silhouette Studio I drew lines every inch vertically with one line in the middle of the mat. This will create 24 strips of paper per 12×12 sheet. Now for this project I used about 6 sheets of each pattern 12 total. But some extra just incase.
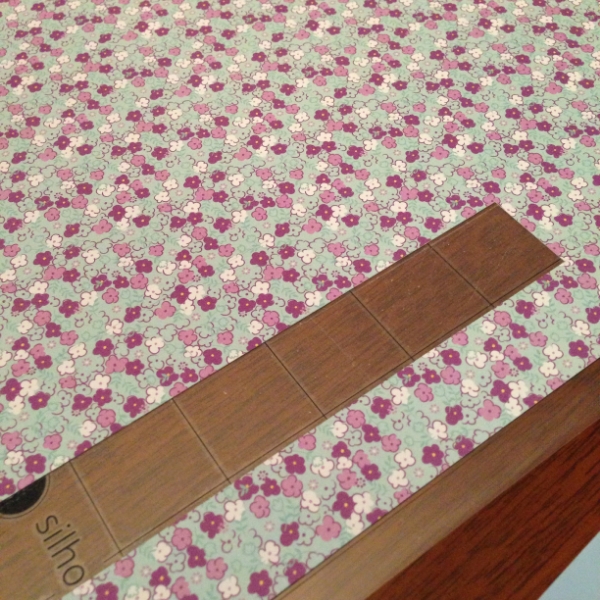
It’s as easy as peeling them off the mat. (Unless it’s a new mat 😉 ).
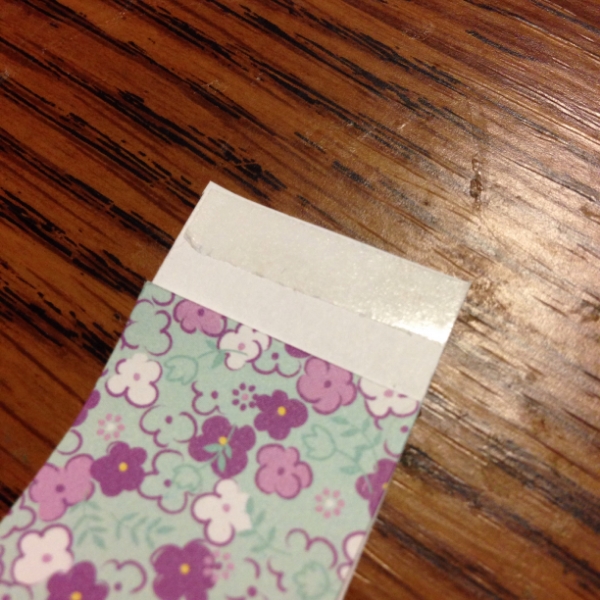
Now I am obsessed with scrappy tape. I will never go back to just glue or plain old double sided tape. I cut the scrappy tape to size and peeled of the backing, folding over the piece of paper onto the glue.
Now do this 288 more times. It goes by quick and is mindless enough to do in front of the tv or when you are on the phone.
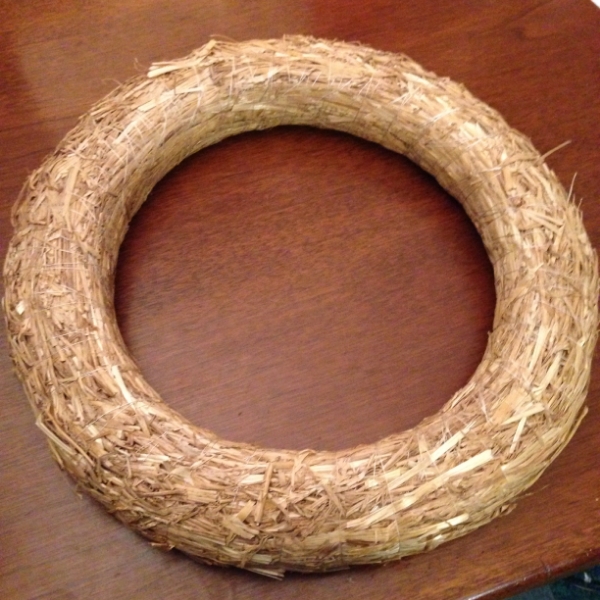
I was so excited when I found this wreath at a yard sale last weekend. I paid 50 cents for it and it was still wrapped in cellophane. It was a little messy to work with. There was hay everywhere. Thinking back if I was to do this again I would wrap it in muslin.
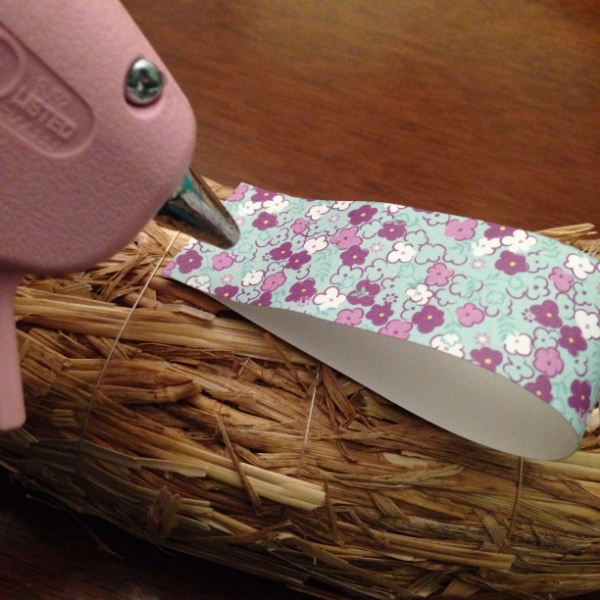
Start by gluing on side of the loop and placing it on the wreath.
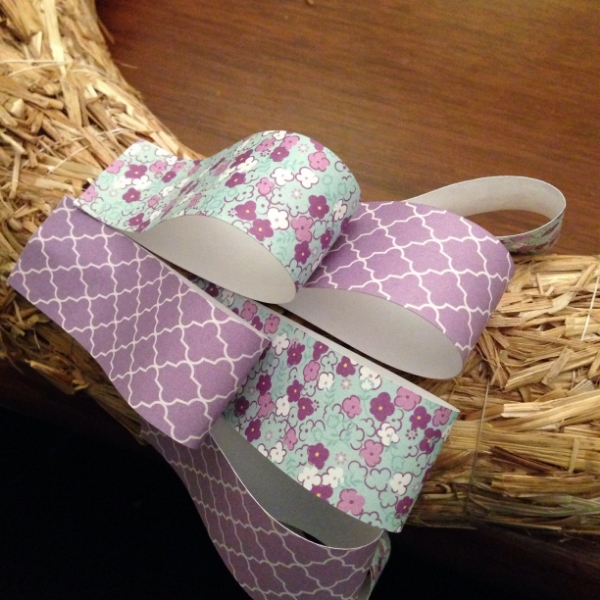
I started with a pattern of one lattice, one flower, one lattice, one flower and so on. This wreath could also be done with more than two kinds of paper and for any season. Next time I think that I make a wreath like this I will make sure to buy double sided paper.
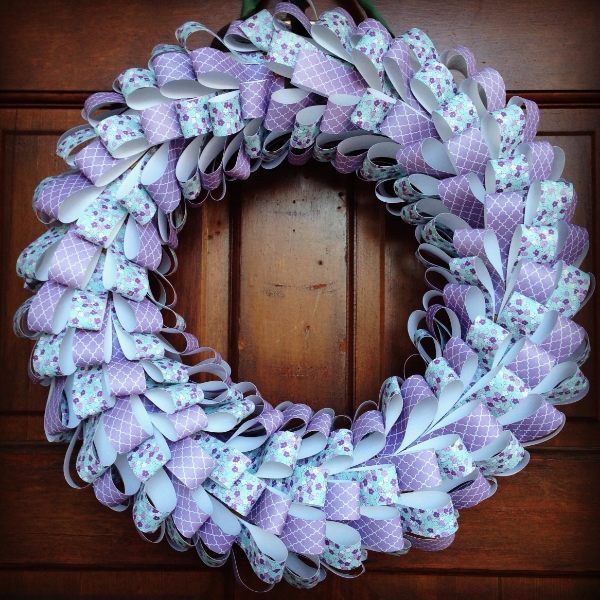
TA DA! I love how this wreath came out! I may still embellish it with a bow or a Mother’s Day bunting banner, I’m not sure. What do you think?
Want to Check Out More Silhouette Projects?
My Silhouette Challenge buddies and I are all sharing projects on our blogs today, so peruse the projects below for a wealth of Silhouette inspiration!
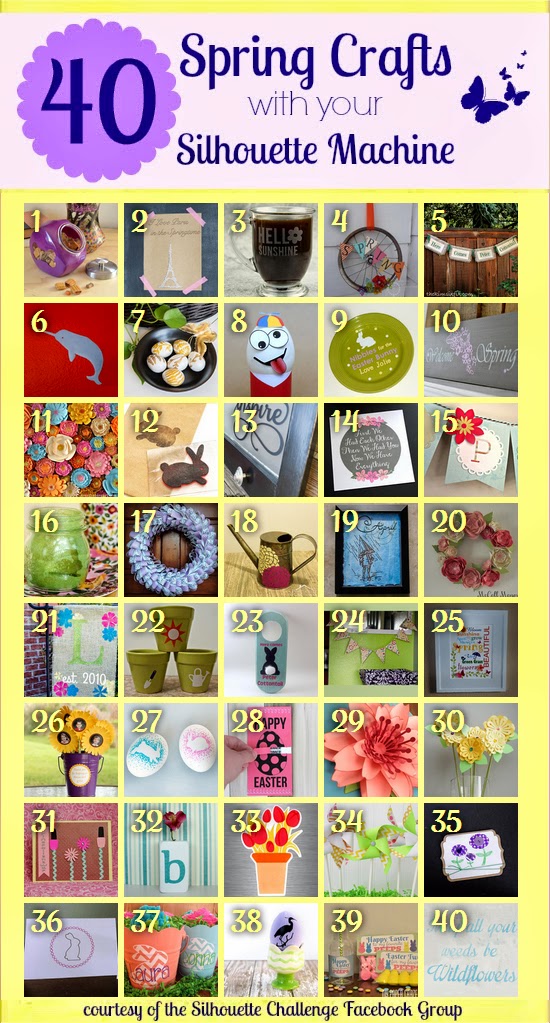
1. Dream a Little Bigger // 2. So Much Better With Age // 3. Adventures in All Things Food // 4. Creative Carnival // 5. The Kim Six Fix // 6. feto soap // 7. One Dog Woof // 8. The Experimental Home // 9. From Wine to Whine // 10. Architecture of a Mom // 11. Grey Luster Girl // 12. Minted Strawberry // 13. Designed Decor // 14. Tried & True // 15. Silhouette School // 16. Bringing Creativity 2 Life // 17. Weekend Craft // 18. Practically Functional // 19. Please Excuse My Craftermath… // 20. McCall Manor // 21. unOriginal Mom // 22. Creative Ramblings // 23. A Tossed Salad Life // 24. A Glimpse Into Barb’s Life // 25. Kate’s Paper Creations // 26. Simply Kelly Designs // 27. Cutesy Crafts // 28. Persia Lou // 29. Whats Next Ma // 30. Two Purple Couches // 31. The Frill of Life // 32. Nearly Handmade // 33. Get Silvered // 34. Ginger Snap Crafts // 35. Life After Laundry // 36. The Sensory Emporium // 37. Monograms & Cake // 38. The Thinking Closet // 39. My Paper Craze // 40. Chicken Scratch NY


Love it! It looks very cool. I agree a bunting would be appropriate. Next time you buy a wreath like that…just leave it in the plastic. That’s what I do. Unless you’re hot gluing again… I don’t know, though. Maybe with a low temp glue gun (the little mini ones) it might be okay. I’ll let you know when I get around to making my next wreath. Great job!
I was thinking of leaving the plastic on but didn’t because of the glue gun. I wonder what I could use to hold the paper besides hot glue. I will have to think about this. There was hay everywhere!
looks so cute- I think a little pennant banner might look cute on there too. 🙂
I may add a flower. I have a little time. Maybe I’ll try both 😉
I love the papers you chose for your wreath! It looks great! I like the Mother’s Day bunting idea too.
Awh thanks Kelly!
Such a fun loopy wreath! I ADORE those papers. I too have recently fallen in love with Scrappy tape, all because of Shelley. Thanks for being a part of the challenge!
Isn’t she amazing! I would have never known without her!
Scrappy Tape?! I just discovered how amazing double sided tape is! haha I’m incredibly intrigued! Your wreath is just darling!
Oh Janice it is amazing. Shelley from Tori Sophia sells it. It may be coming to my etsy shop soon if I can work out bulk pricing. Keep an eye out.
It came out great! I have been dying to make a paper wreath. Thanks for the inspiration! I finally bought an advanced (double-sided) tape glider – I hear you about the scrappy tape!
Lisa I need an ATP! Which one did you get? I just need to bite the bullet.
Wow! I love the textured look of this wreath; and that color-combo is too perfect! I wouldn’t add a thing. I think it’s quite the statement piece on its own. (Although I do find it hard to resist adding bunting to ALL THE THINGS.) Thanks for participating this month, Michelle! You always bring your A game.
Thanks I love how 3 dimensional it came out too! I think I may keep it as is or add a flower. I know I love punting banners just received some mini bunting banners from PYP!
Hi Michelle, I love your colour combination. The wreath looks great with all the lovely loops.
288 more times – is that all? LOL It was worth all the effort 🙂
Haha I know should I not have counted?! Makes it seem more intense then it was.
This is SO pretty!! I can only imagine how amazing it looks in person!
Thanks Emily! It’s just as stunning in person 😉
Wow….all of that work….it looks GREAT!