This post contains affiliate links, please read our disclosure policy.
The Silhouette Challenge has coordinated another great event! Similar to the card swap a few months ago and handmade gift exchange was organized. Each participant was randomly paired up with a partner. You were challenged to get to know your partner and create a handmade gift for them.
My partner is Melissa Stout from The Stamp Doc. We had a great time getting to know each other and secretly coming up with gifts that we would both enjoy. Melissa loves to cook and I had been dying to etch some more glass! So it worked out perfectly.
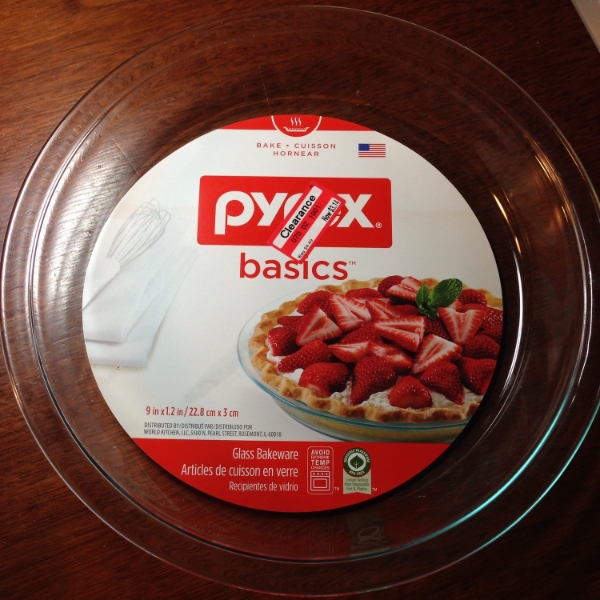
Do you know what was even more perfect I found a Pyrex on clearance at Target. I feel like Pyrex’s never go on sale!
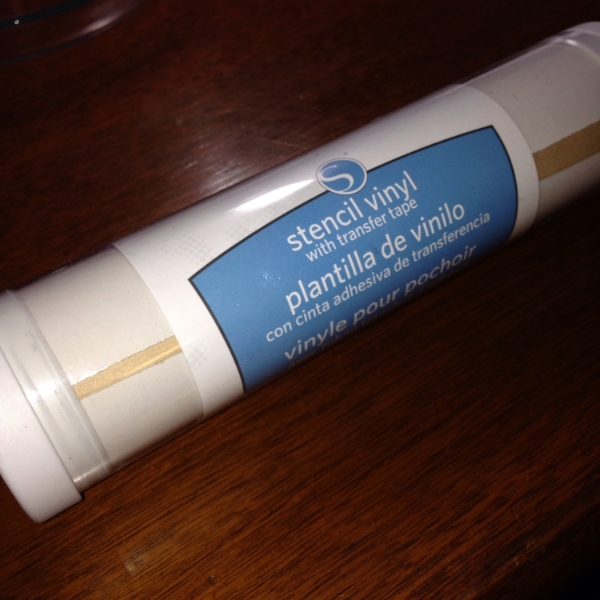
When etching glass make sure not to use just regular vinyl. Stencil vinyl will create a tighter seal for the strong etching chemical that must be used.
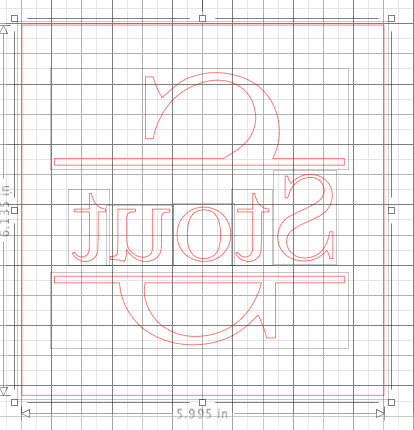
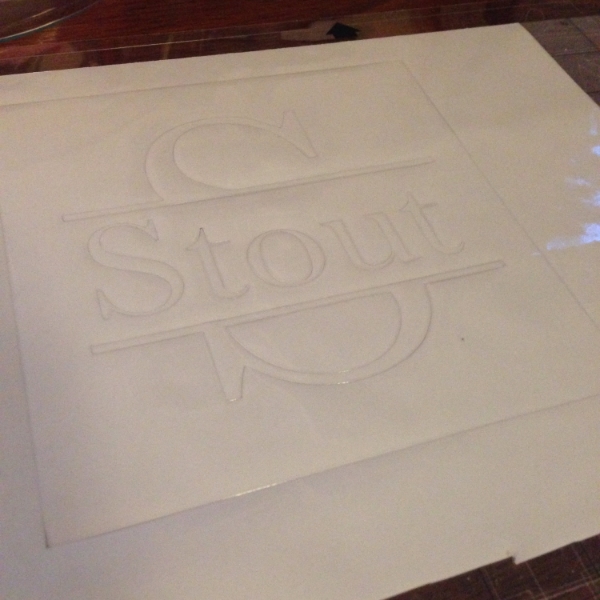
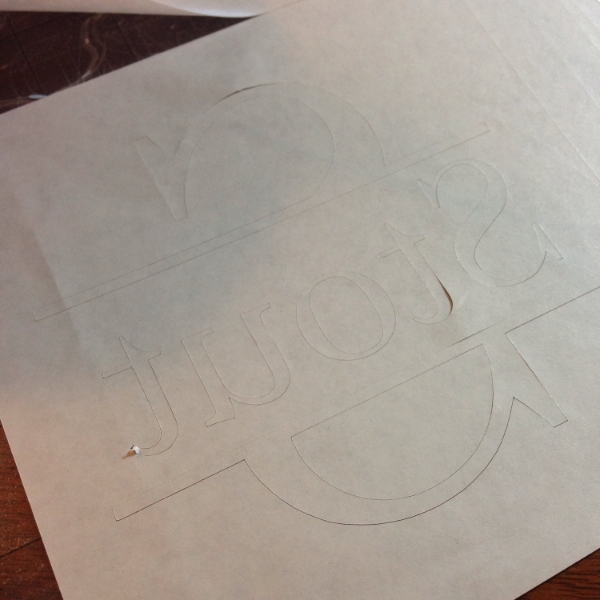
I created a monogram (tutorial on this to come later) flipping it horizontally to be mirrored image for etching. I also added a box around the monogram to make it easier to manage when weeding and placing. Don’t make the box to close to your design since we will be painting on the etching cream and you don not want the excess to get on to the pie plate.
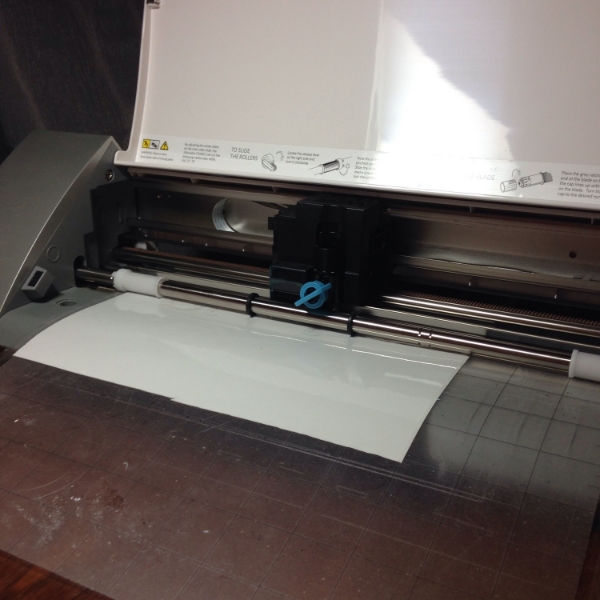
Cutting the stencil vinyl and placing it on your mat you are now ready to cut. For the settings I used the Silhouette preset for vinyl.
Now I have used this preset in the past with no problem at all but this time the blade cut too deep making it more of a sticker cutting all the way through. Instead of scrapping it I knew I could work with this. Cut your transfer tape to size. I usually let it overlap the stencil vinyl about a quarter inch.
![]()
Place the transfer tape over the design. Flip the design over and make sure to add back the center of the o and then negative space of the S.
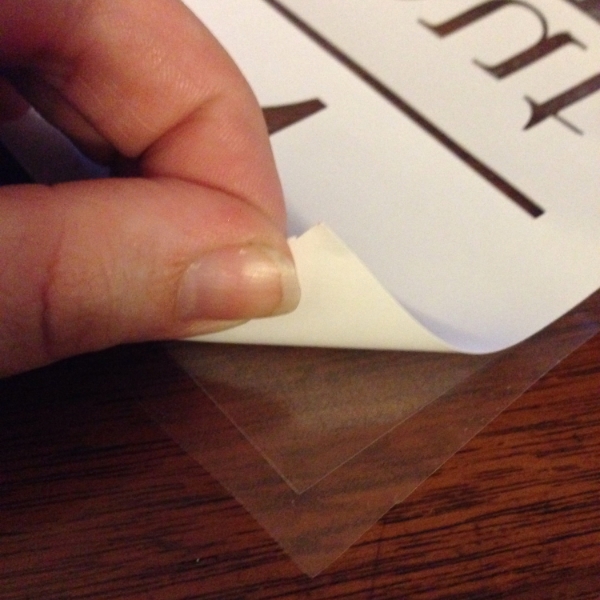
Peel the white paper back from the stencil vinyl. This will leave just the stencil vinyl left on the transfer tape.

Place the transfer tape and vinyl down carefully on the Pyrex. Make sure to leave no air bubbles or creases. Use the scrapper tool or a credit card to rub on the design.
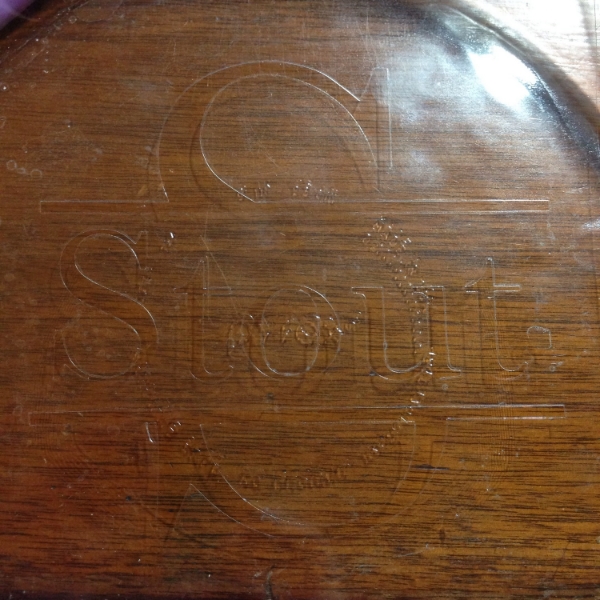
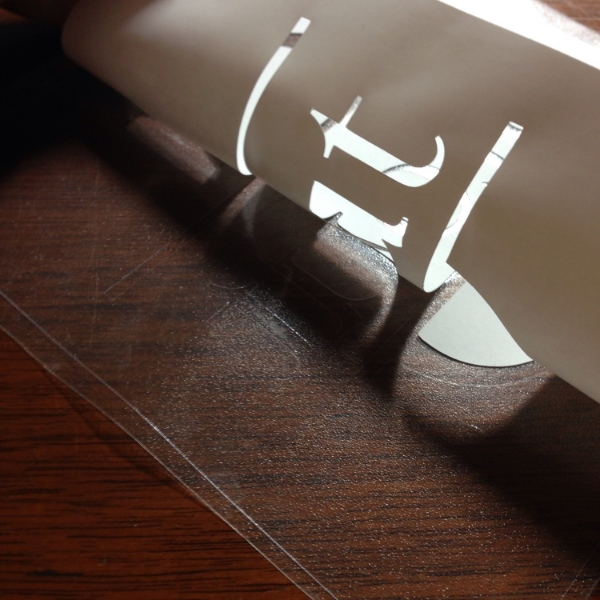
Pull back the transfer tape carefully. Tip: pull back tight and low this will help the stencil from not lifting.
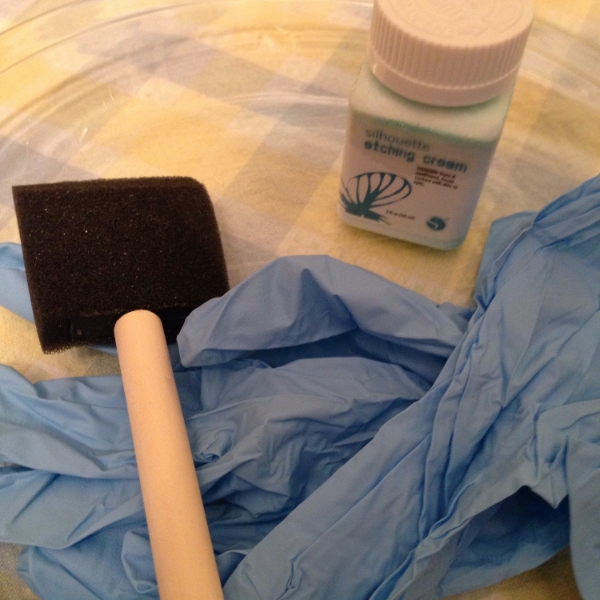
I had originally bought the glass etching starter kit from Silhouette but if you already have the stencil vinyl you can just buy the cream.
Make sure to wear gloves since the chemical you use to etch is very strong. Note if you are sensitive to smells this may not be the project for you.
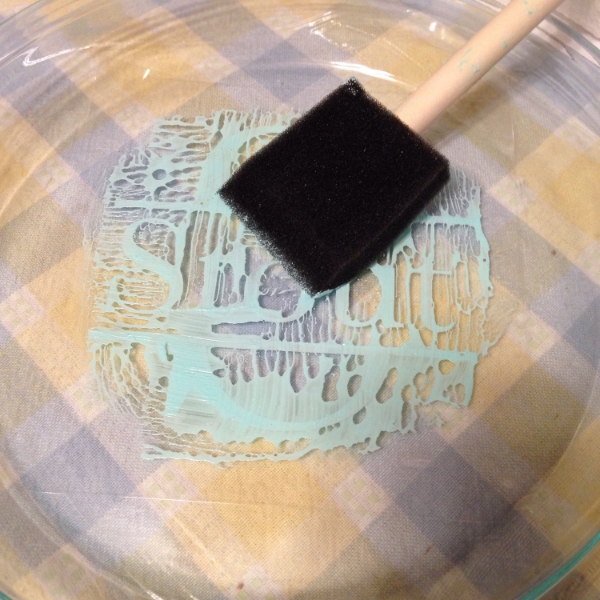
Using a foam brush spread an even coat over the stencil. Make sure to not spread the cream past the stencil. Any cream that gets on the glass will etch.
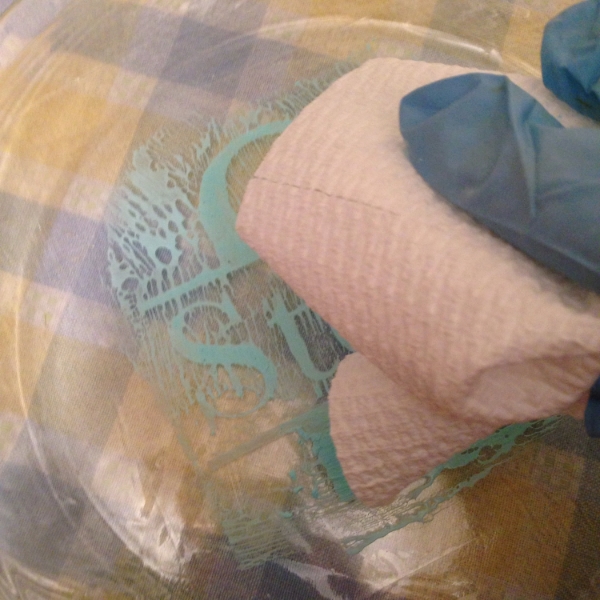
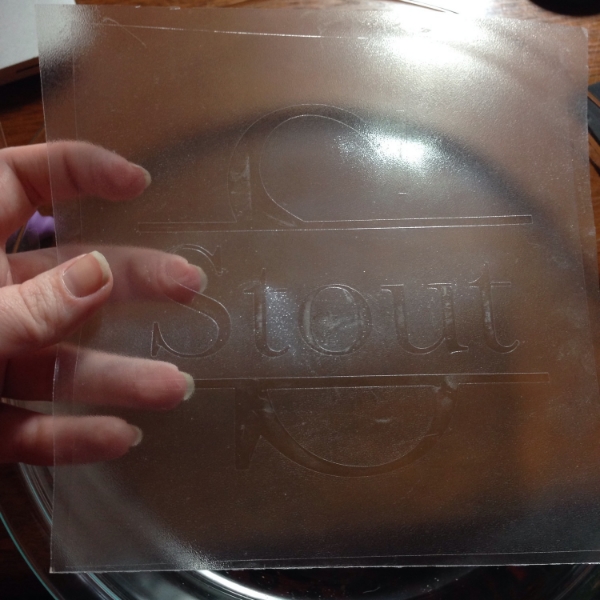
The instructions say to leave the etching cream on 30-60 seconds but I usually leave mine on atleast for 5 minutes. Then I use a paper towel to carefully rub all the excess cream.
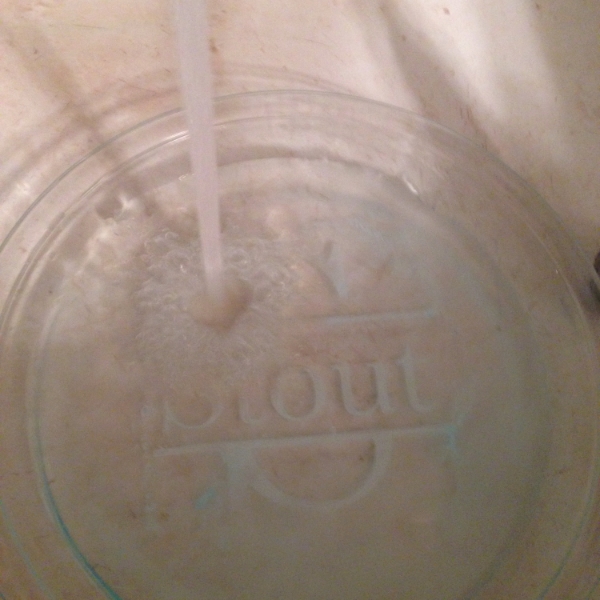
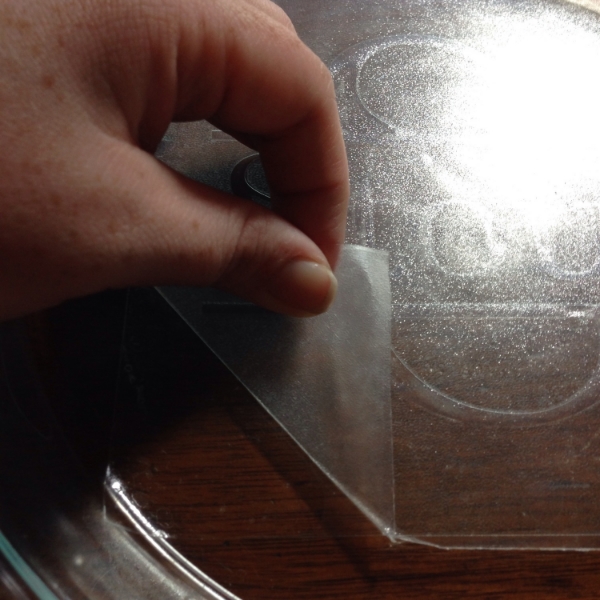
Leaving the stencil on wash the cream off of the Pyrex. At this point I just use water and wash throughly. Then I remove the stencil and wash with dish soap (a few times).
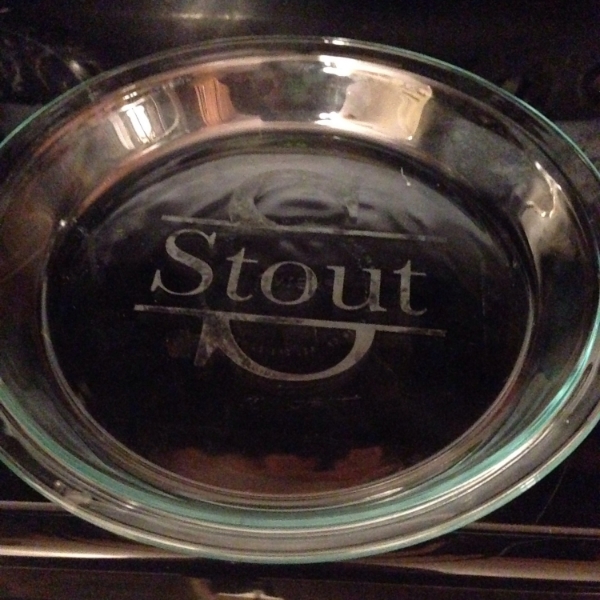
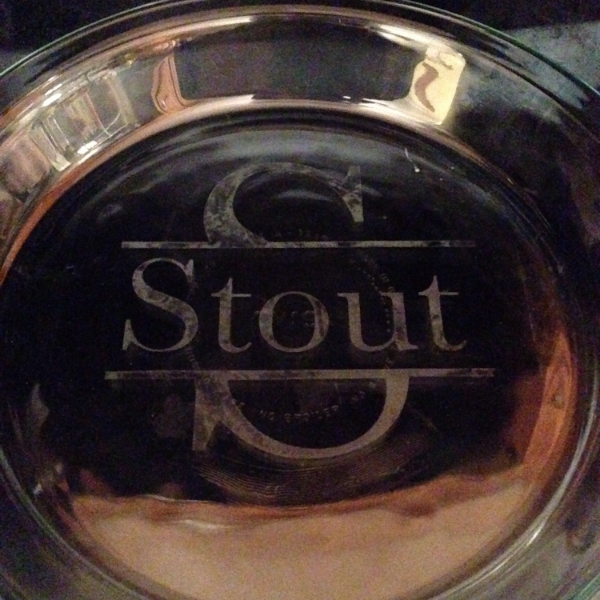
Now I must admit photographing the project was difficult. Trying not to get the etching cream on my iphone screen and then trying to take a picture of the finished product which is glass but I think the finished product came out great and this was only the first part of the gift!
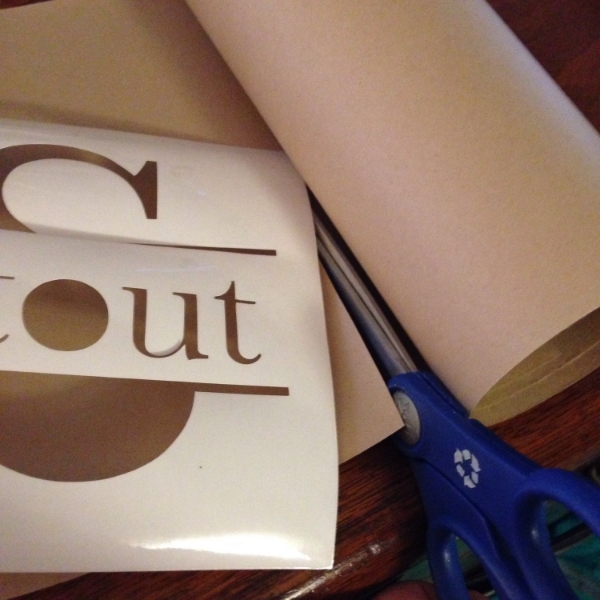
Since I already had the monogram created I decided to try to make some monogrammed tea towels for Melissa’s kitchen. I used the same design and cut it out on freezer paper.
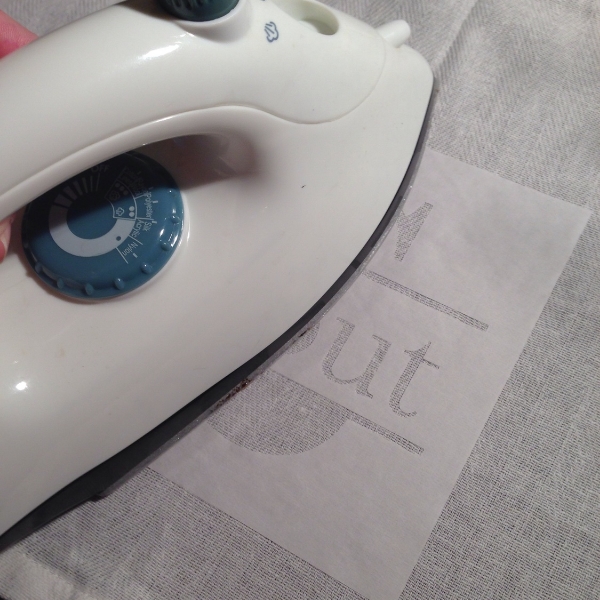
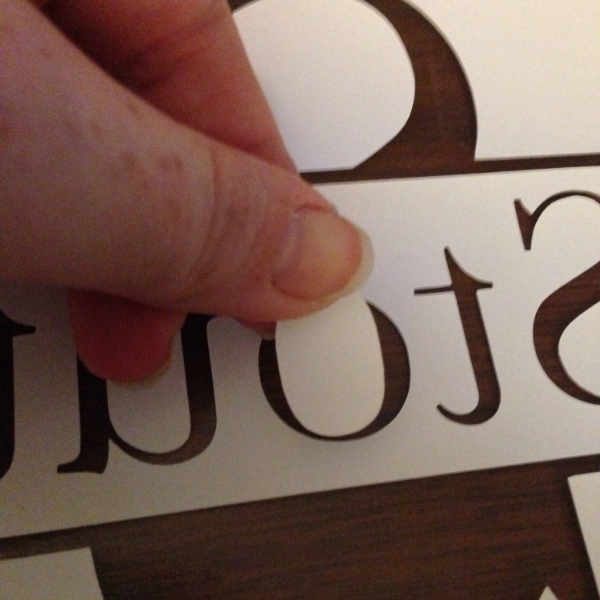
Weeding the design and placing shiny side down iron the freezer paper on the cotton setting.
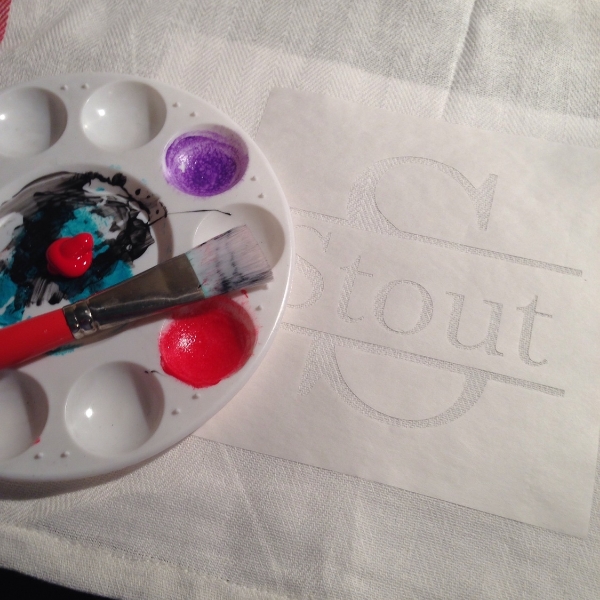
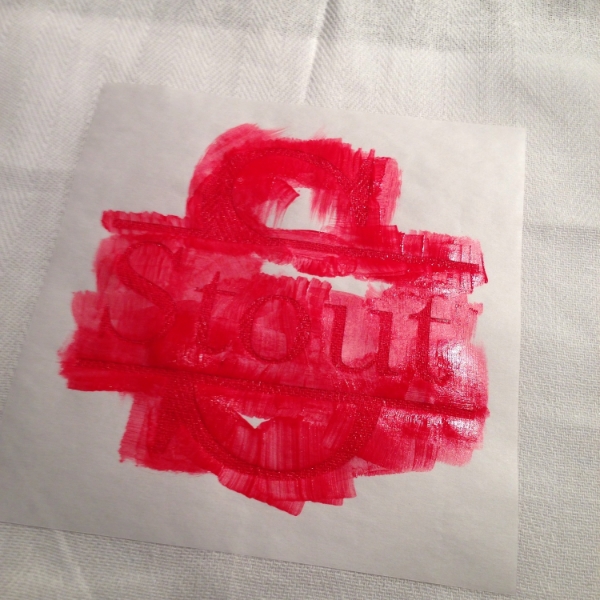
I used tulip fabric paint which I have used a million times and brushed it evenly on to the tea towels.
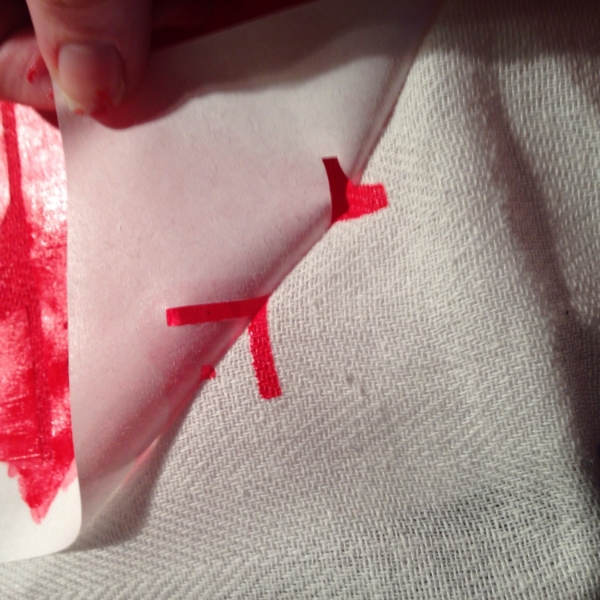
Now there is always the question of how long to wait until you can pull the freezer paper back. Some wait hours or over night….I am impatient I wait until the paint is dry to the touch which is usually only a few minutes with this paint.
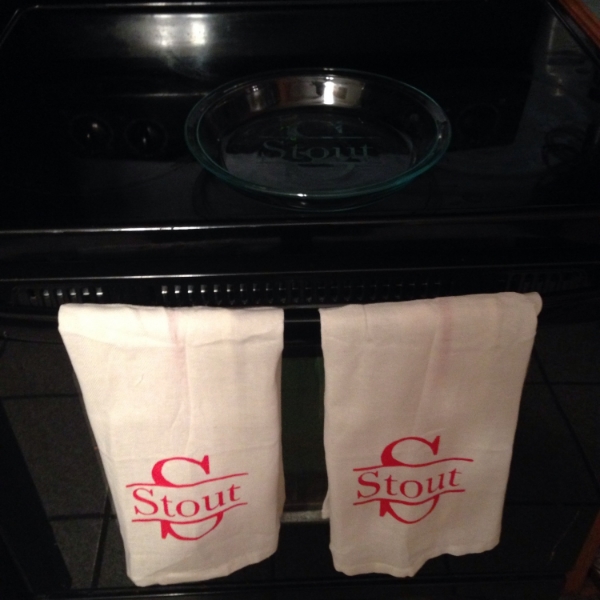
Overall I loved the end result and I hope Melissa did too!
Now I know you are dying to see what I got!
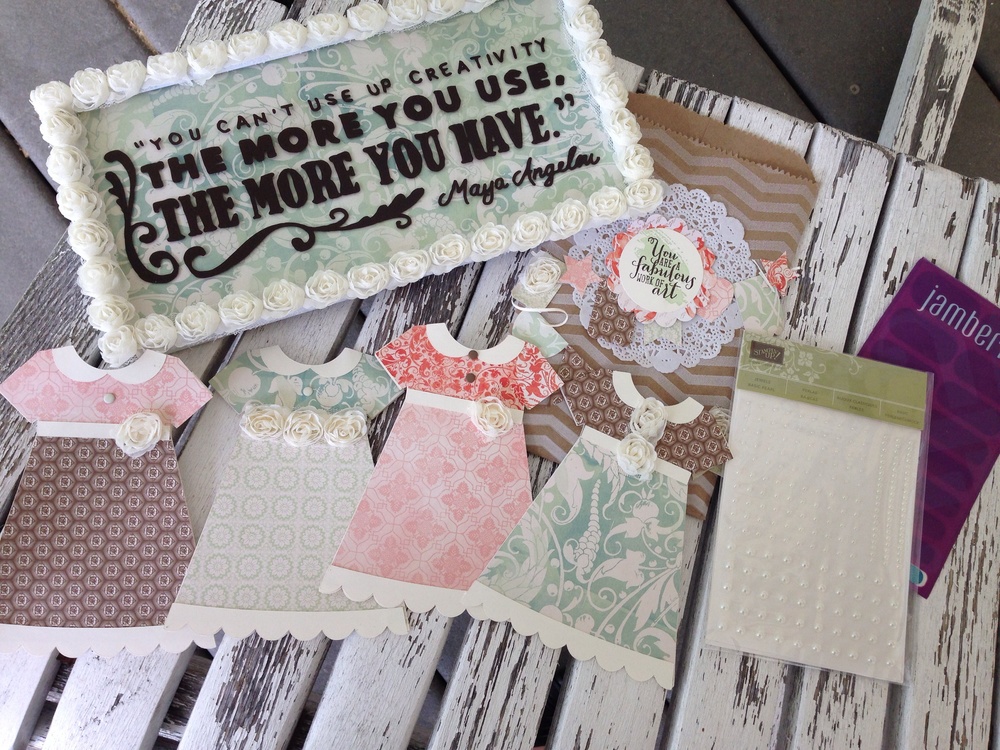
Melissa was so cute and creative. I had told her how much I loved Shabby Chic Style and she ran with it! She created a Maya Angelou quote picture framed that is lined with fabric roses, adorable dress cards, Jamberry nails and pearl stick ons. How perfect!


I think tea towels and a pie plate are a perfect gift for someone who loves to cook! I think the universe speaks to us so a Pyrex on clearance at Target was probably pushing you in the right direction. Thanks for the etching tutorial. I didn’t know there was such a thing as special vinyl stenciling. Melissa’s gfit for you is perfect for shabby chic! Pinning this tutorial for future reference.
Michelle, The towels and pie plate are perfect for Melissa. Thanks for showing me how to do the stenciling and etching.I had fun with the exchange did you? Karen Marie Dragonfly & Lily Pads
Oh Michelle! I loved my gift and I was a bit overwhelmed. Thank you so much! I really appreciate the tutorial, too. Can’t wait to try these techniques.
I love this matching dish and towels! Great gift idea 🙂