This post contains affiliate links, please read our disclosure policy.
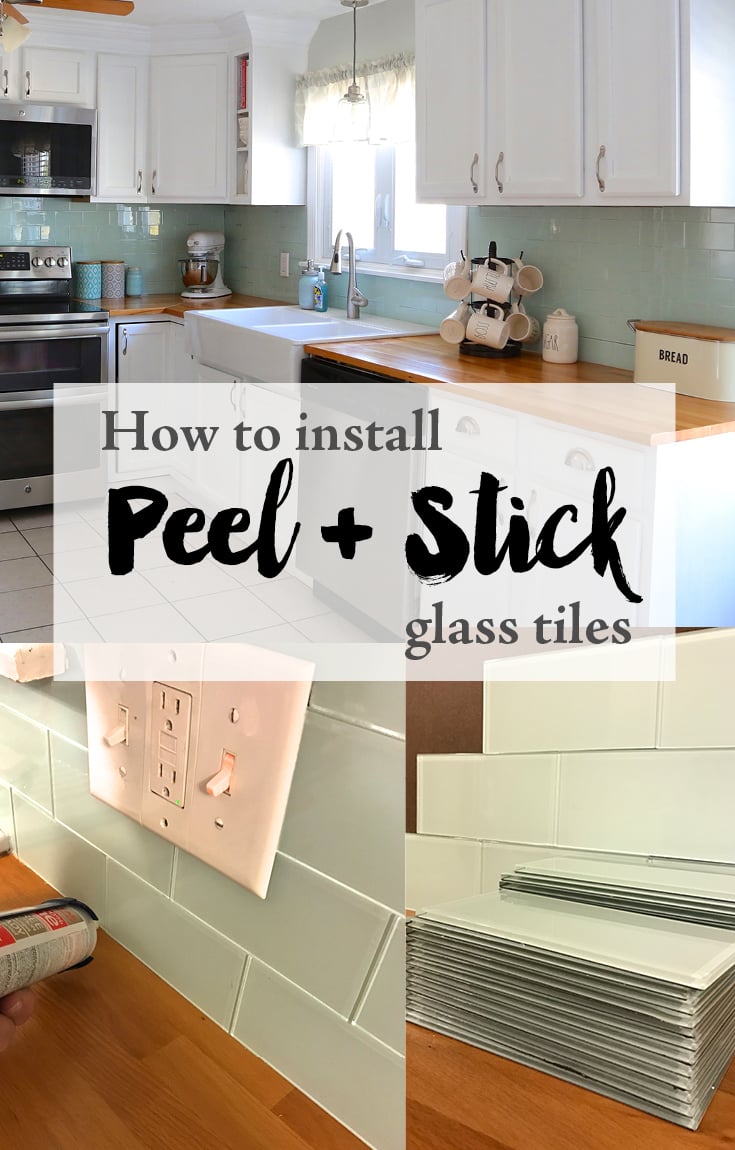
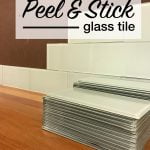
How to install a peel and stick glass tile backsplash in your kitchen.

![]()
Yes you read that right! Today I am going to show you how we installed peel and stick glass tiles. When I was in Georgia last summer I saw a demo from Aspect Tile and I could not believe that they had peel and stick glass tiles. I knew this was exactly what I wanted to do in my kitchen renovation.
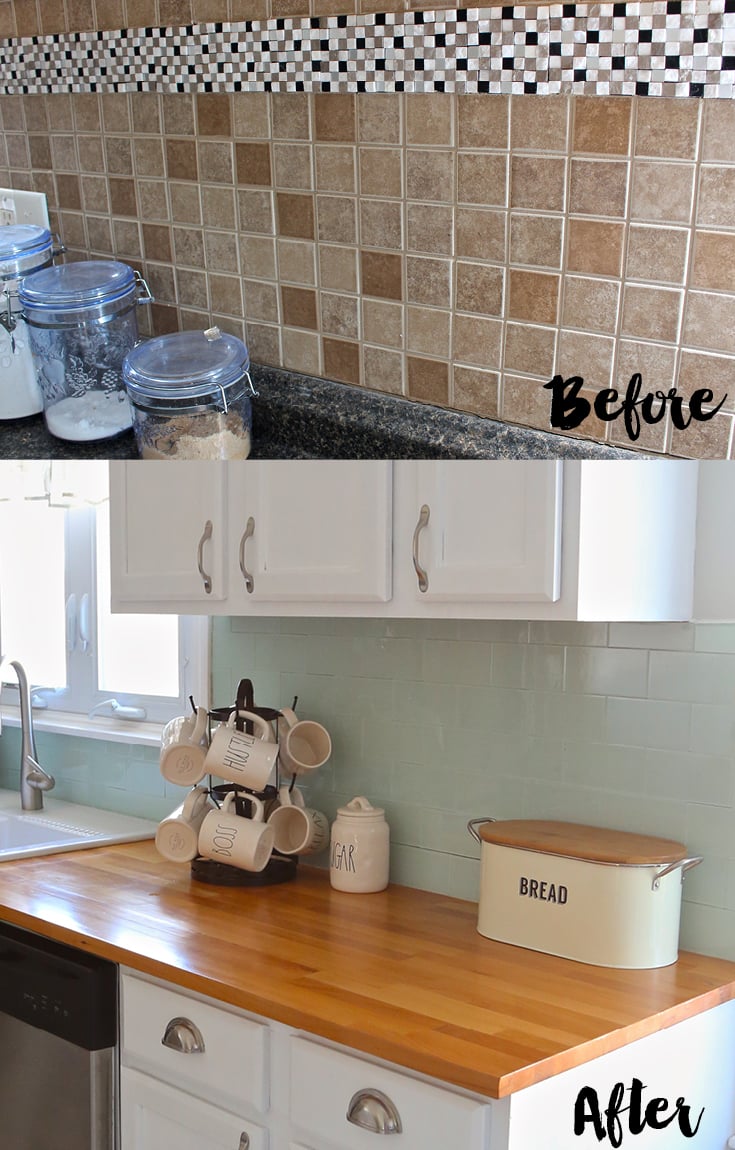
Let me just remind you of how my kitchen looked before we started renovations. You can check out all the progress so far here.
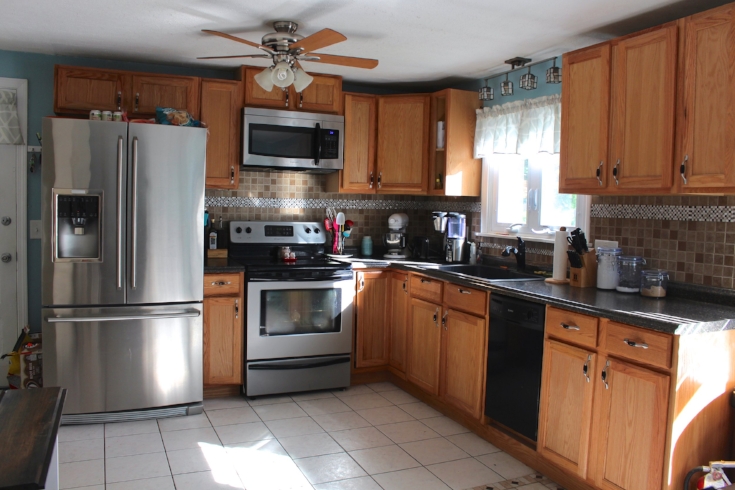
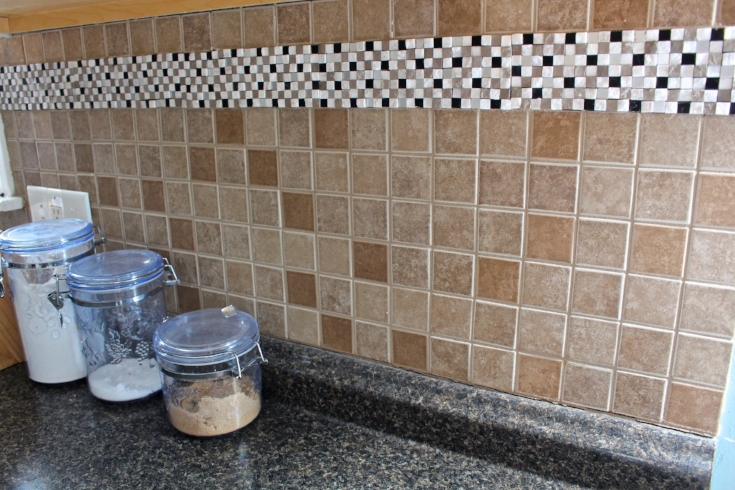
I still can’t believe what a difference this renovation has made. I cringe when I look at this hideous backsplash. It was almost like they used square bathroom tiles then added in this weird accent tile that did not lay flat all the tiles were at different heights.
If you’re asking how I removed this tile you can read all about that here. Now I had removed my tile before knowing I was going to be using these peel and stick tiles. Supposedly you can just tile over your existing tile backsplash. Had I known that it would have saved me a lot of time!
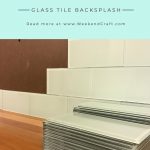
How to install glass peel and stick tile backsplash
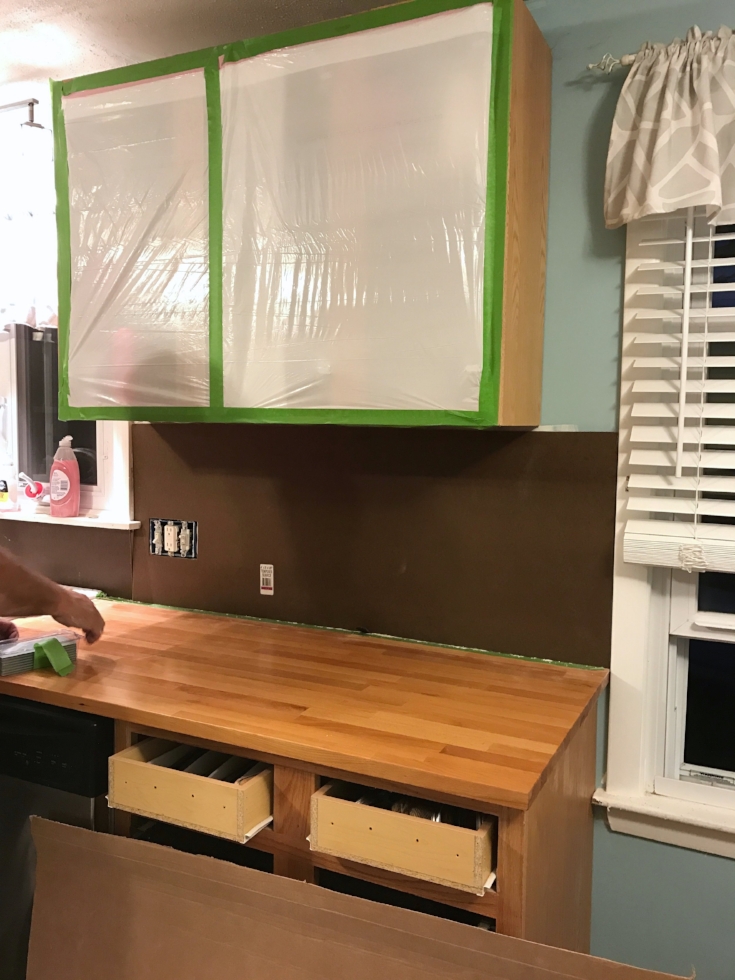
The most important thing is to have a level surface to stick your tiles too. Since the sheetrock was fairly uneven and gouged we tried to replace some sheetrock and build it up with joint compound. But in the end it was actually easier to buy some masonite and put it up. This gave us the level and even surface we were looking for.
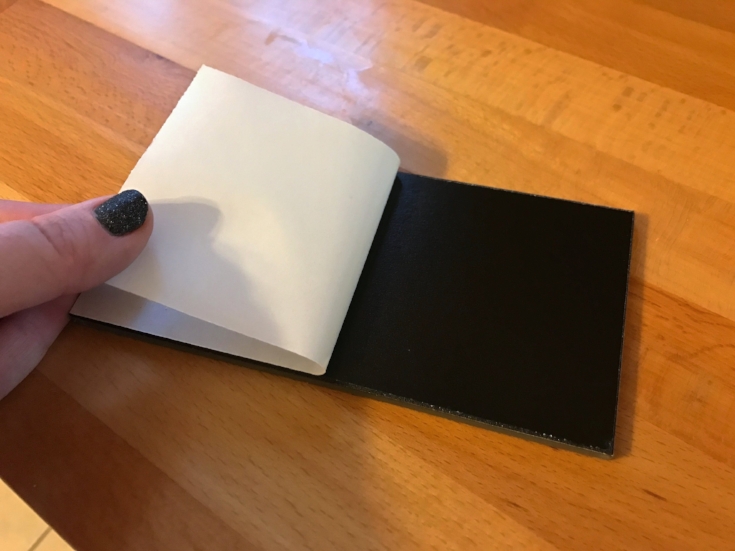
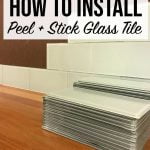
Each tile comes almost like a sticker. You have to peel the paper backing off. These tiles are very sticky! so make sure not to flip them over on your counter after peeling them off.
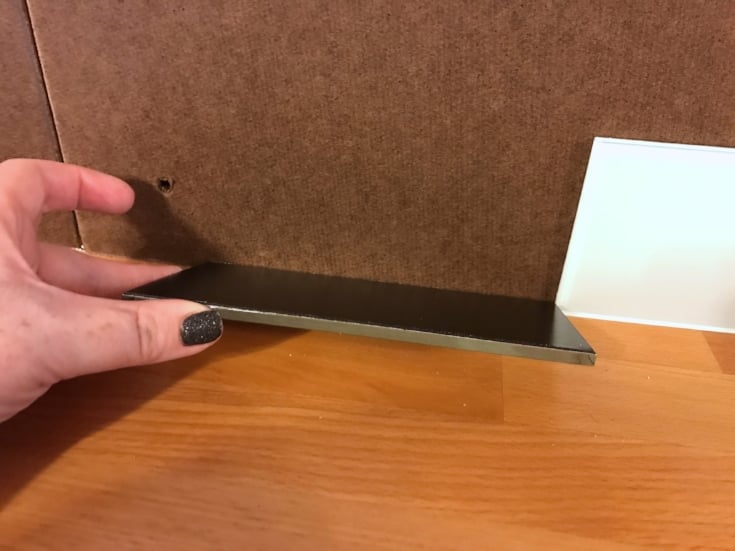
You want to be very careful and precise when adhering them to your wall. The technique that worked well for me was getting the bottom in place, almost at a 45 degree angle, then slowly lifting the tile upright towards the wall. Making sure it is tight with the tiles next to it.
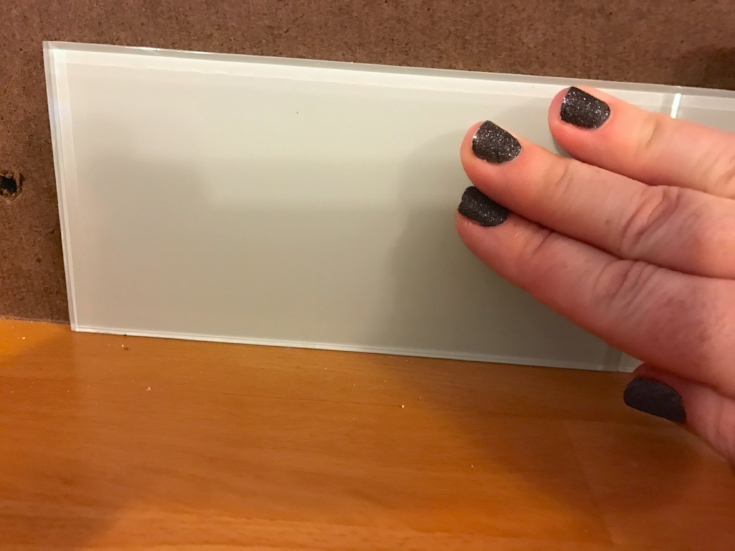
Then apply pressure to the tile. Once you do this it is very hard to reposition the tile so make sure it’s in place before applying pressure.

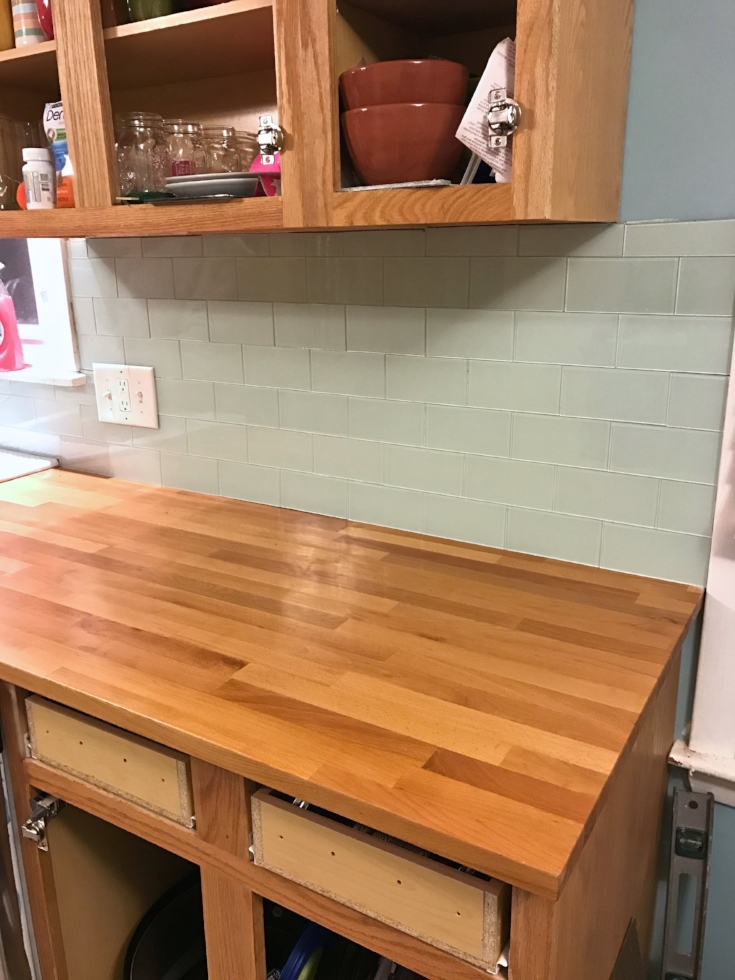
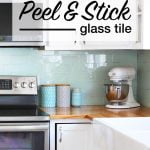
What I really liked about this tile was that it was fairly easy and fast to install. A great project to complete over a weekend or even a few nights after work. I picked the morning dew color because I knew I wanted my kitchen’s accent color to be teal, everything in my house seems to be kissed with a touch of teal. You can find a full kit here.
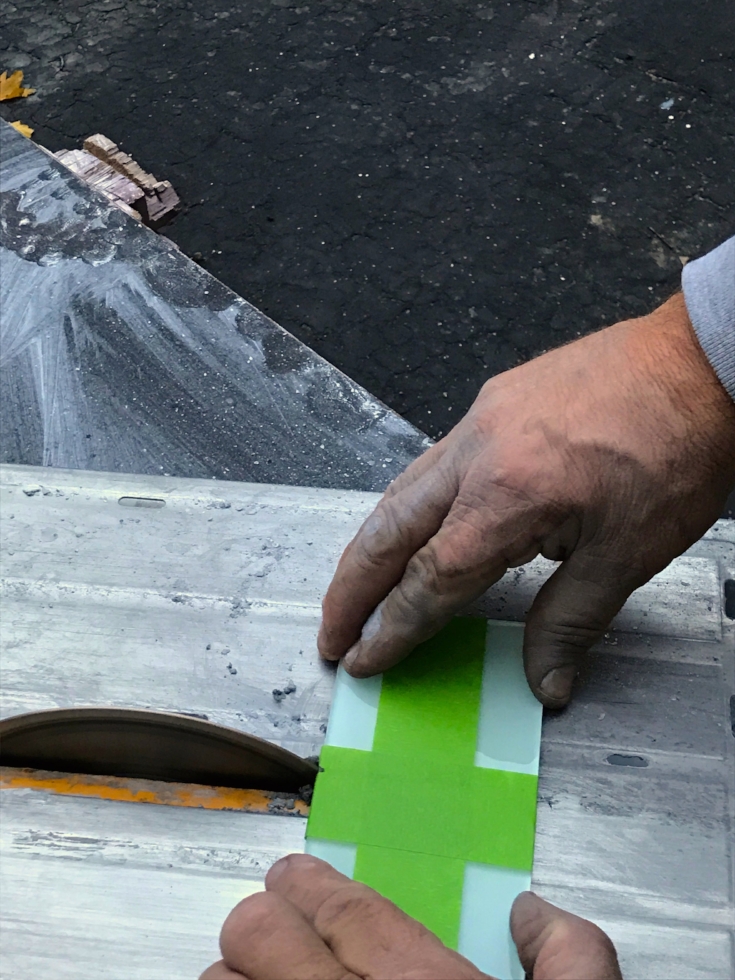
How to cut peel and stick glass tile
Now the instructions said we could cut the tiles with a glass scorer but we had some trouble with shattering. The easiest way we found was to tape off our cuts with painters tape and use a tile saw (wet saw). This was the most difficult part of the install but it wasn’t too bad. If you don’t have a tile saw you can usually rent them at your big box hardware store.
Best part of when you get them all installed is that you don’t need to grout them… WHAT?!! yup that’s right groutless tile. Now friends have asked me if they have moved at all but the adhesive is so strong I really don’t think the tiles are going anywhere!
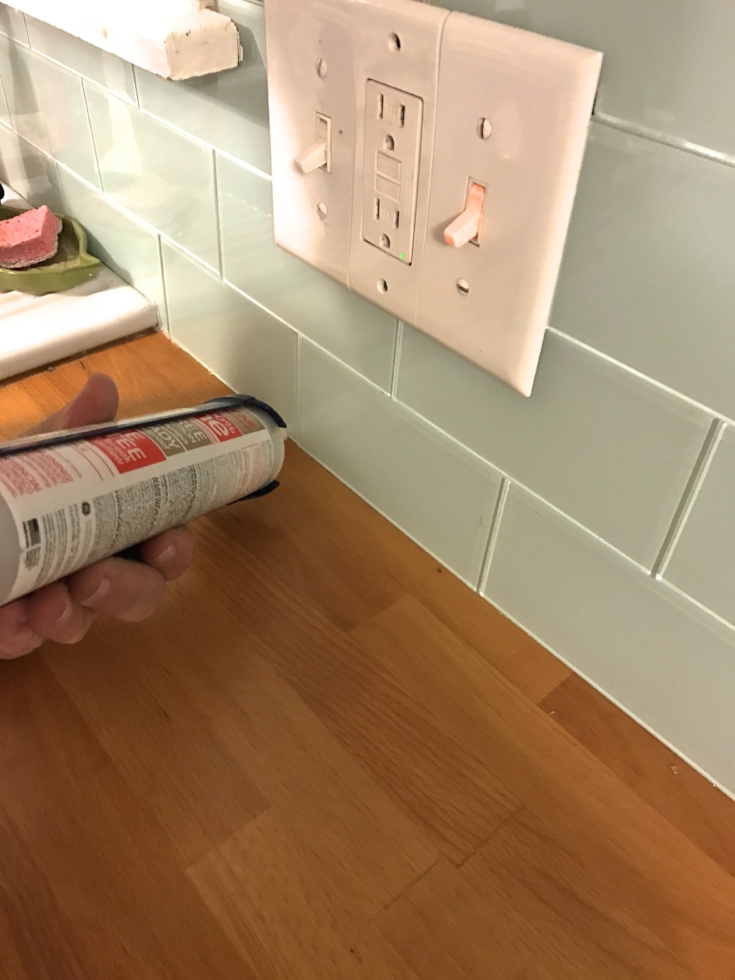
To finish it off we added some white silicone to seal the countertop and tiles from water. You want to do this because of the sink and any spills. You don’t want any liquids getting in between the counter and tiles.

Overall I could not be happier. And you guys get to see the first sneak peek of the full kitchen renovations above. The tiles were fairly easy to install. There are a few imperfections with gaps in the tile but honestly unless I point them out you would never be able to notice. The tile has been up for a dew months now and it cleans well and it really is stuck on there. It’s not going anywhere.
Want to read about more peel and stick tile projects? Sharing 11 of my favorite projects including using peel and stick tile in your bathroom, kitchen, laundry room and around your fireplace surround. Read more here.


Where did you find the tiles?
Looks great! It’ll be interesting to see how they hold up to the tests of time.
Great tutorial! Thank you! Kitchen remodeling can be fun in itself.
It’s beautiful. Nice job! Now, I’m contemplating using this product as well. Only problem is there isn’t anyone in my area who carries this product … can you get samples of certain colors to make a decision?
Would these tiles stick directly to a laminate backsplash? Or would you have to sand the laminate to create a better surface for the tiles to stick onto? Love the look of your kitchen!
OMG! i have the very same type of ugly tile backsplash, where can i read about sticking these cool peel and stick tiles over them? would you happen to remember where you read that? I would like to redo my kitchen but its not in the budget right now so i am trying to find ways to live with what i have a little longer via DIY projects.. in the process of painting my cabinets and was wondering what i was going to do about those super ugly tiles thanks to you now i know 🙂
Can I ask where you bought those cute mugs? I would love some for my kitchen!!
I’ve seen them in Home Goods.
How do you like tour butcher block counters? We are wanting to install. Pretty kitchen!!!!