This post contains affiliate links, please read our disclosure policy.
How to create a Christmas wreath with an embroidery hoop and your Cricut using fabric and heat transfer vinyl.

My love for buffalo check is no secret so why would we expect a wreath any different? I love making embroidery hoop wreaths, they are unexpected but so simple and beautiful when done. I made this embroidery hoop wreath this past fall. I decide to make another one and wanted to walk you through step by step how to make an embroidery hoop wreath for Christmas.
If you also like buffalo check then check out this mason jar Christmas tree , this buffalo check mason jar vase and buffalo check ornaments.
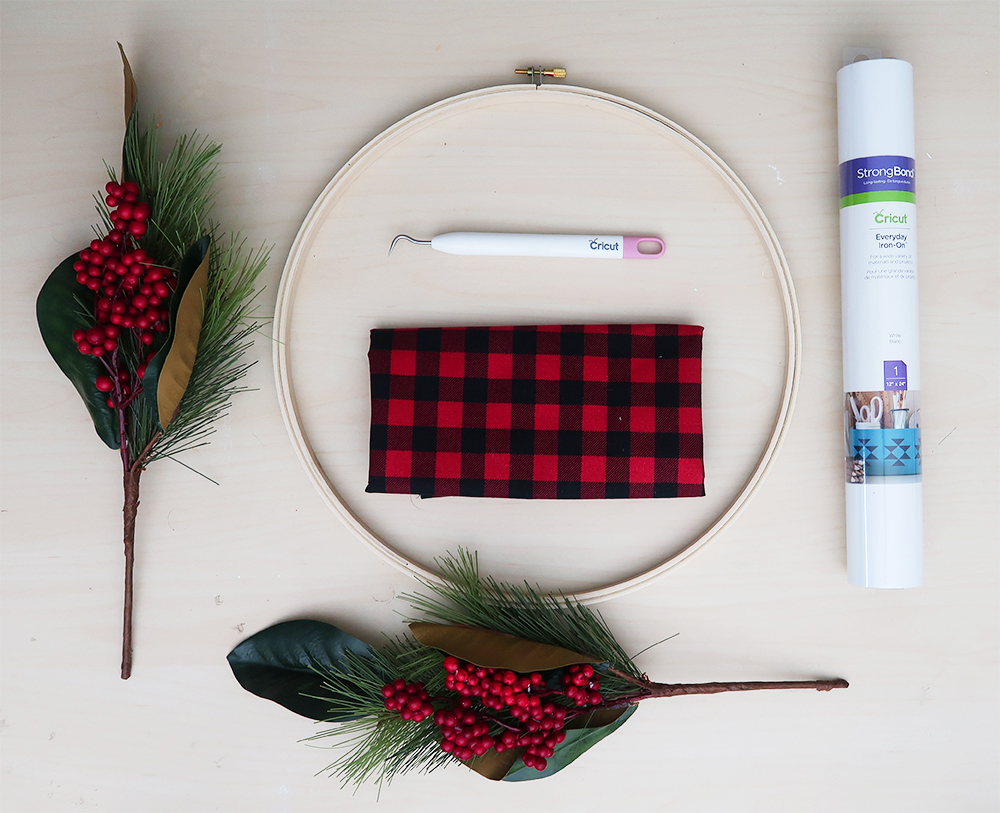
What you’ll need
-
12 inch Embroidery Hoop or Quilters Hoop
-
Buffalo Check Fabric
-
Christmas floral
-
Hot Glue Gun
Watch how I made it below
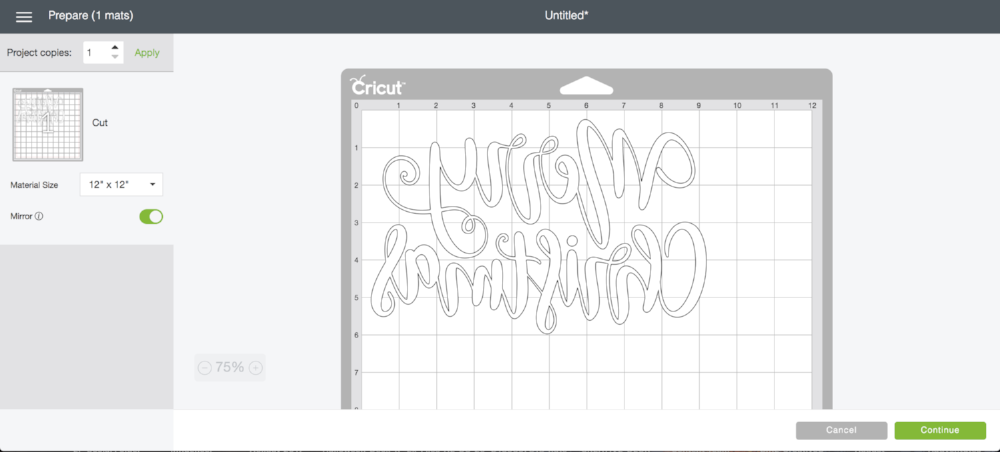
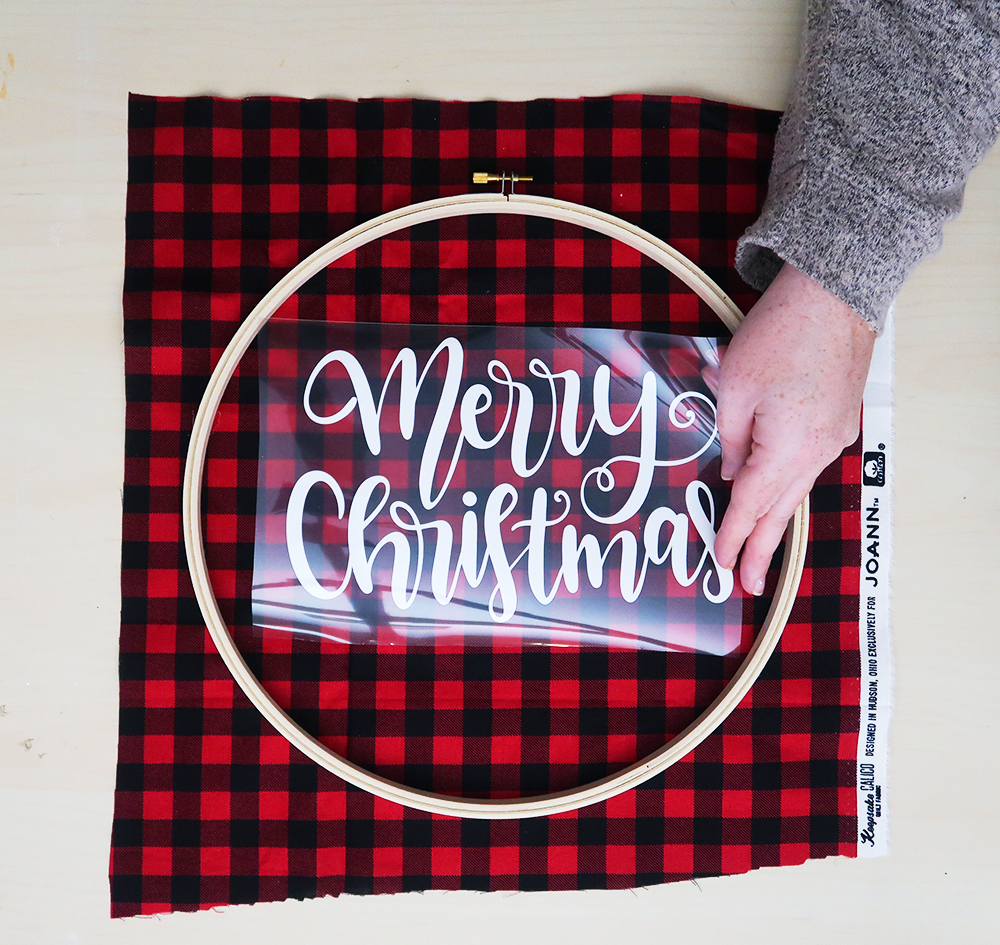
Now you will want to create your design in Cricut design space. If you like this design you can find it here. It was a graphic I found in Cricut’s images. Make sure to measure your widest and shortest points of the embroidery hoop and size the design accordingly.
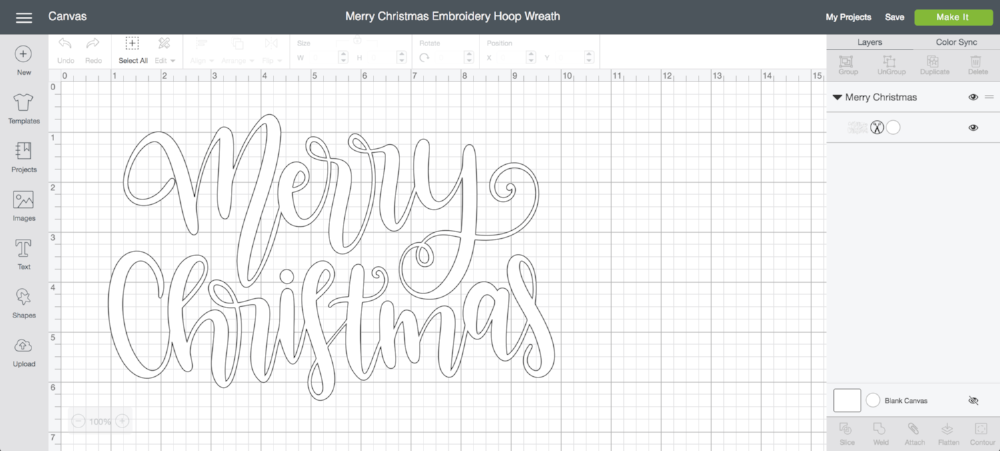
Once you are ready to cut be sure to mirror your design and select your material everyday iron-on. Place your iron-on shiny side down on the mat and load your mat in your maker.
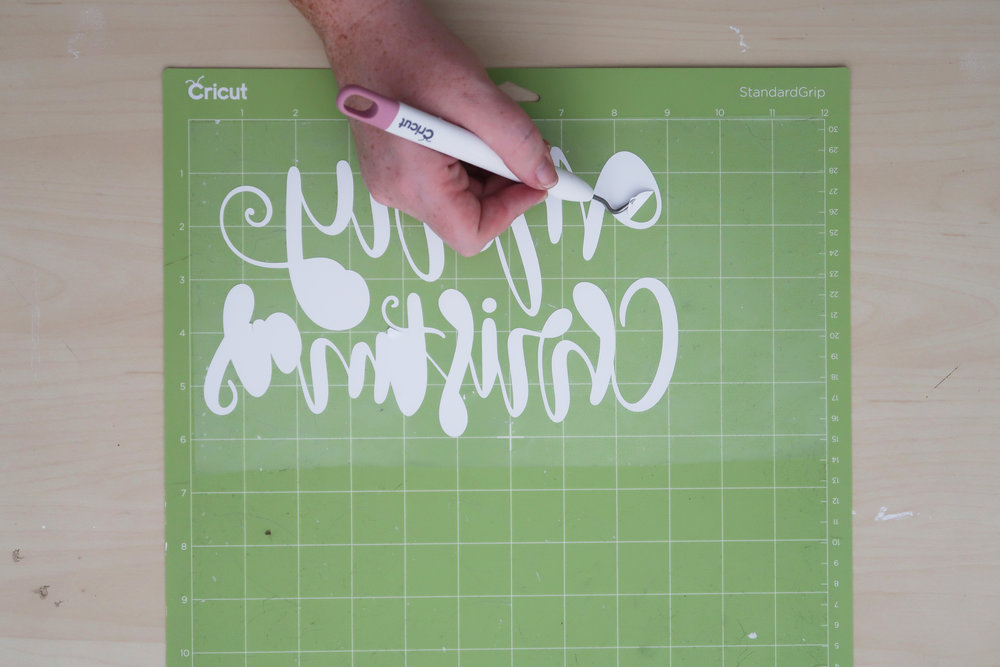
Weed your design
Once your design is cut weed the excess everyday iron-on just leaving your lettering. I use both my finger nails and my hook (weeding tool) to do this. What I love about iron-on is that it is so much easier to weed since it is not sticky.
Cut your fabric
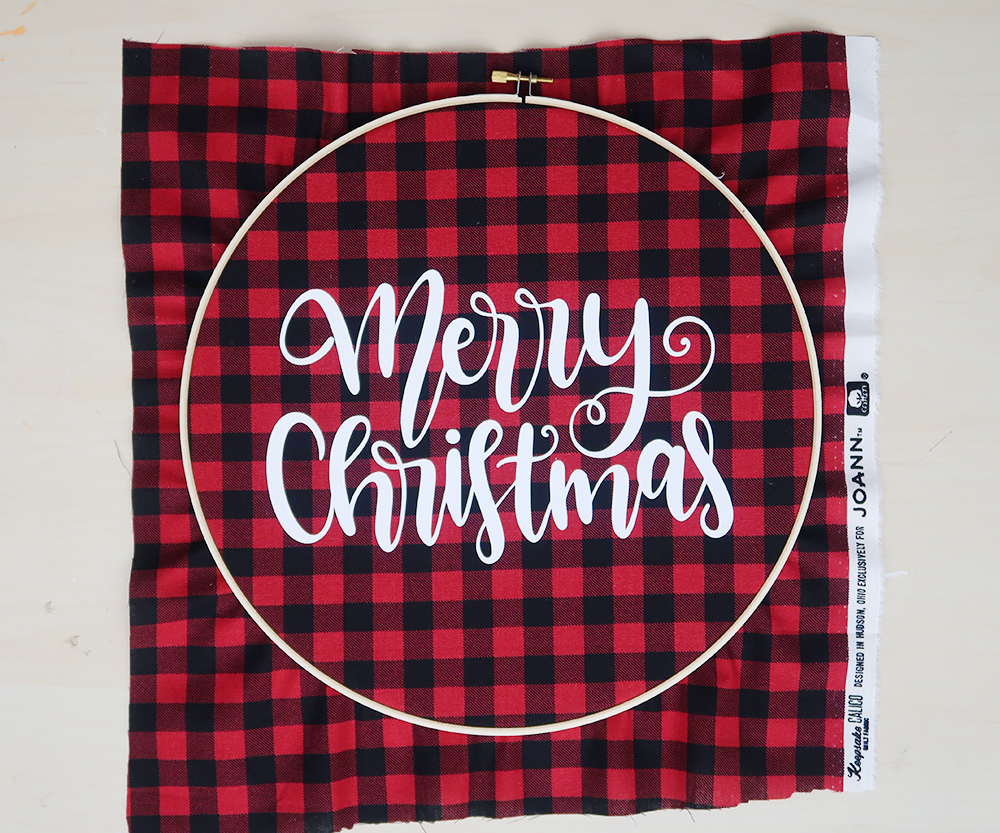
Laying your fabric down with your embroidery hoop cut your fabric leaving about an inch worth of fabric on each side.
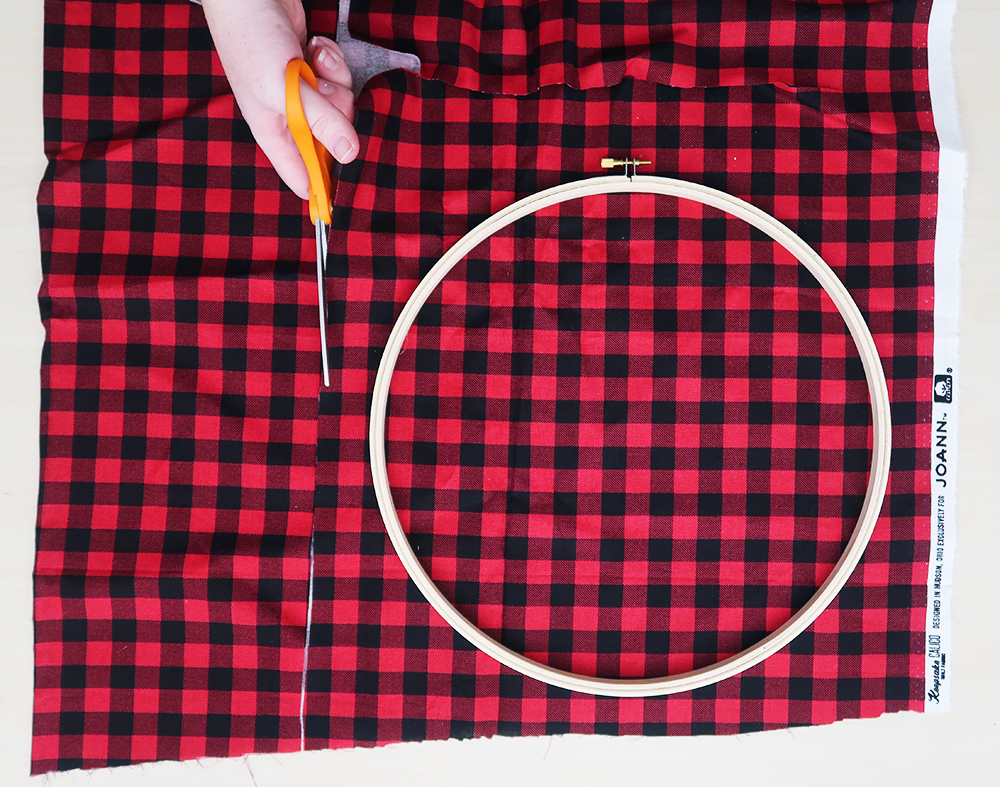
I placed my hoop on the fabric to get a sense of where the wording should be placed. Lift your embroidery hoop and you are ready to grab your heat press.
Heat Press
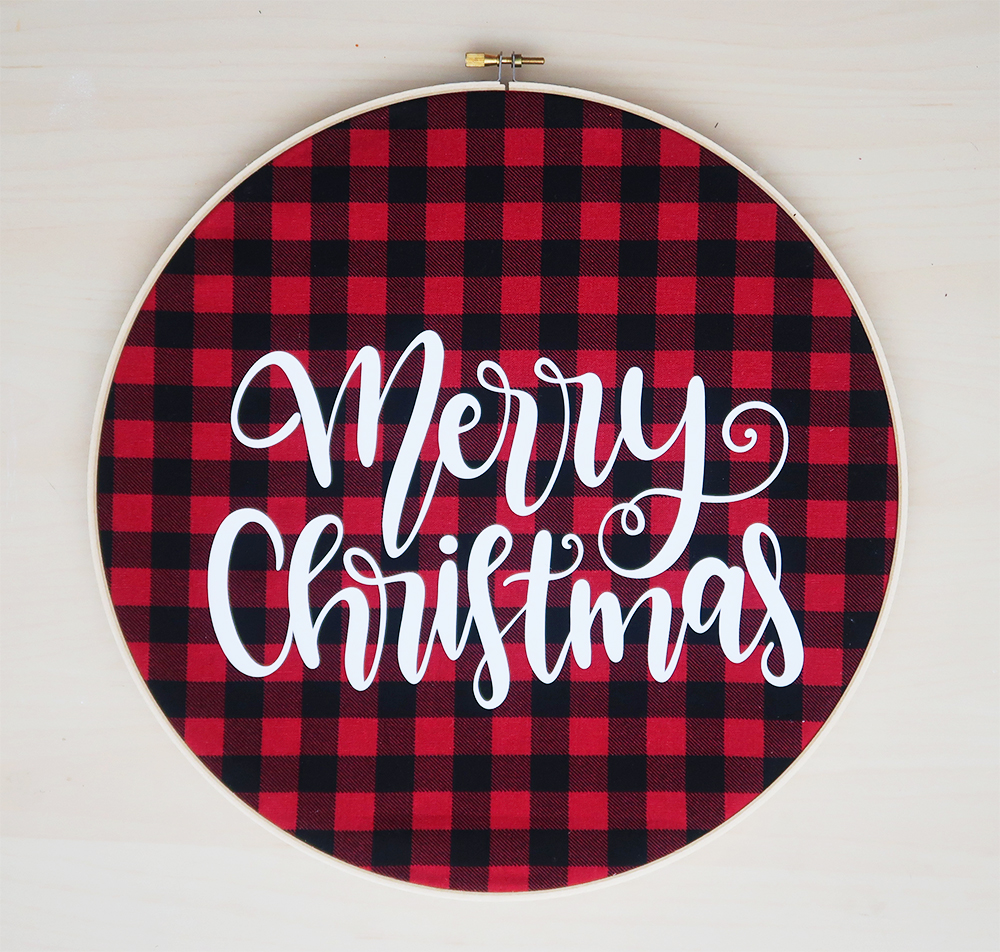
We are going the apply the iron-on to our fabric. Now I wanted to choose a Christmas fabric but still something subtle enough that the lettering would shine through. I went with this buffalo check from Joanns. For my heat press I used the Cricut EasyPress2 I set it for 315 degrees for 30 seconds.
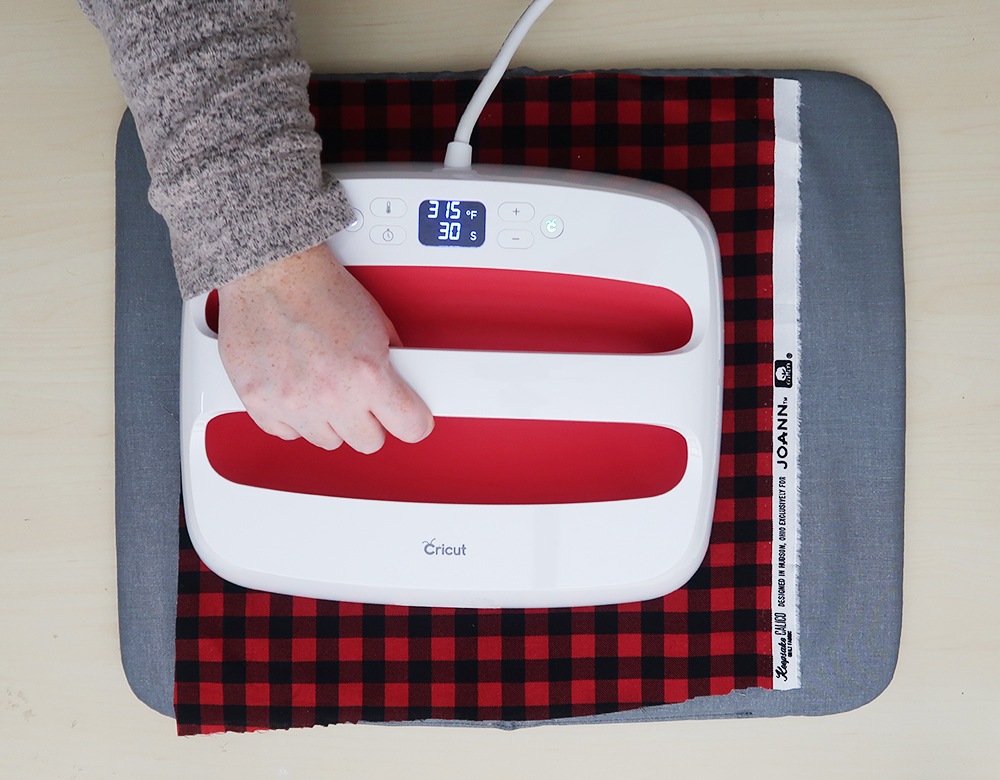
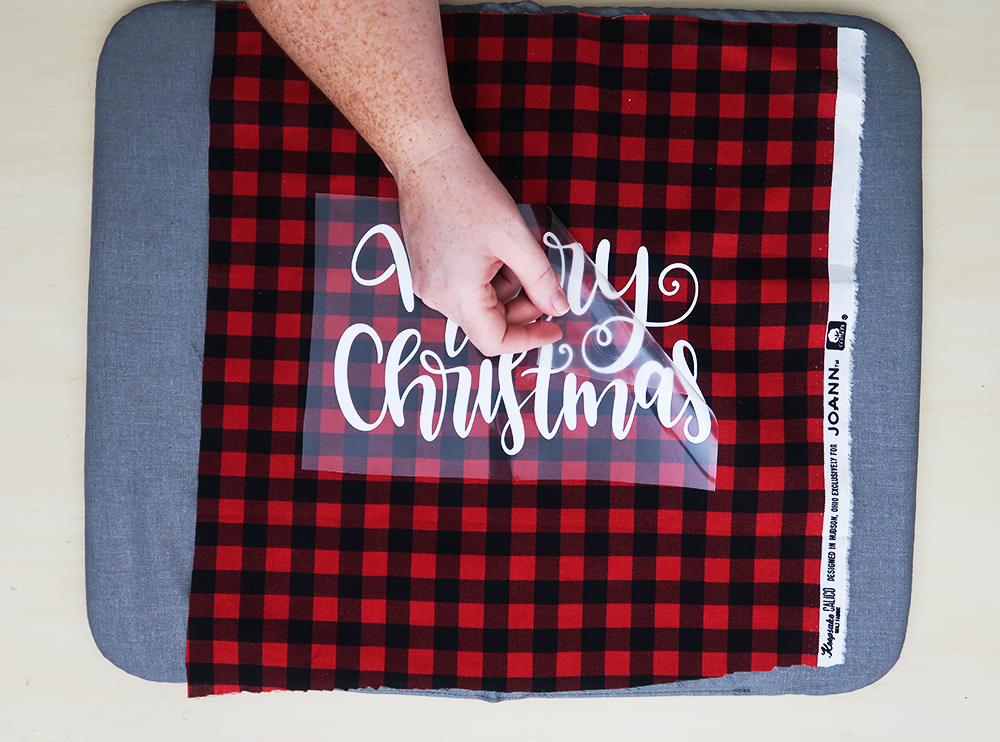
I usually let my iron-on cool to the touch before pulling it back. I like using the larger 10×12 EasyPress 2 it covers the whole design .
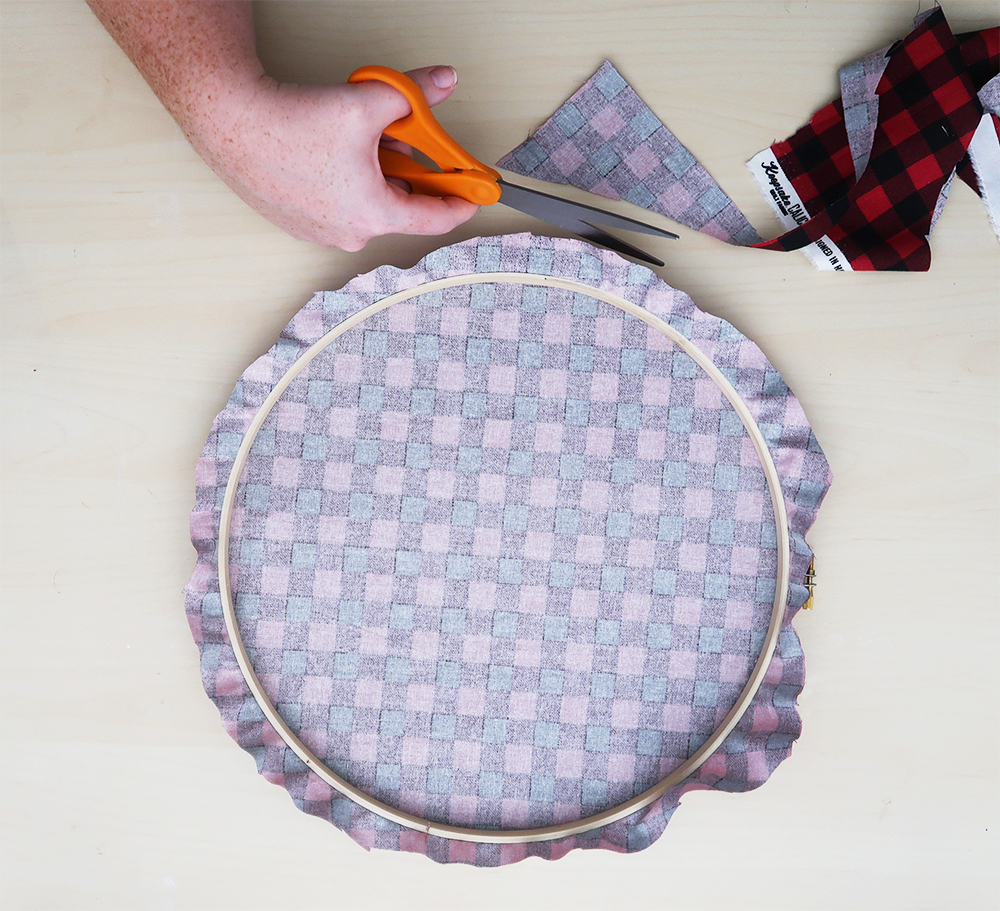
Embroidery Hoop
I unscrewed the top of the embroidery hoop loosening it just so you could remove the inner circle. I placed my design on top of the smaller hoop once it was in position I placed the larger hoop over it. Make sure to pull the fabric tight and screw the top back into place.
Trim
Once your fabric is in place cut the excess fabric on the back of the hoop.
Use a hot glue gun to glue the excess fabric to the inside of the embroidery hoop.
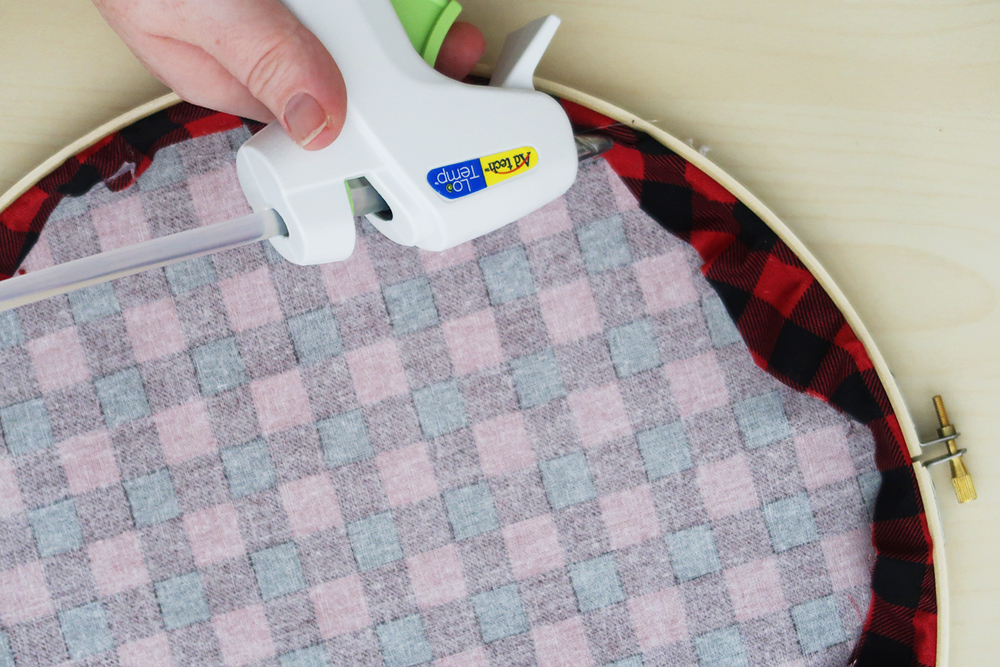
Once the excess fabric is glued you have a clean design that is ready to either hang or embellish.
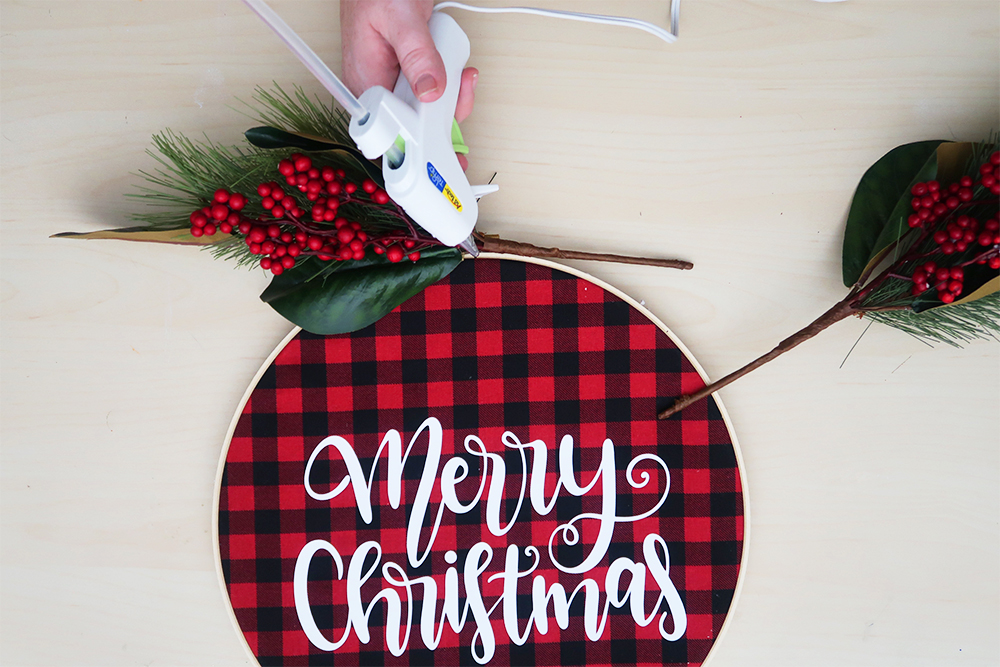
Glue on accents
I felt that the hoop need a little something to make it feel more like a wreath. I found these red berries and magnolia leaves at Hobby Lobby and knew they would be perfect to finish off the wreath. Using a high heat glue gun I added the floral pieces to the top of the embroidery hoop.
I am so pleased with how this came out! really beyond my expectations and the red just jumps off of my yellow front door.


37 Comments