This post contains affiliate links, please read our disclosure policy.
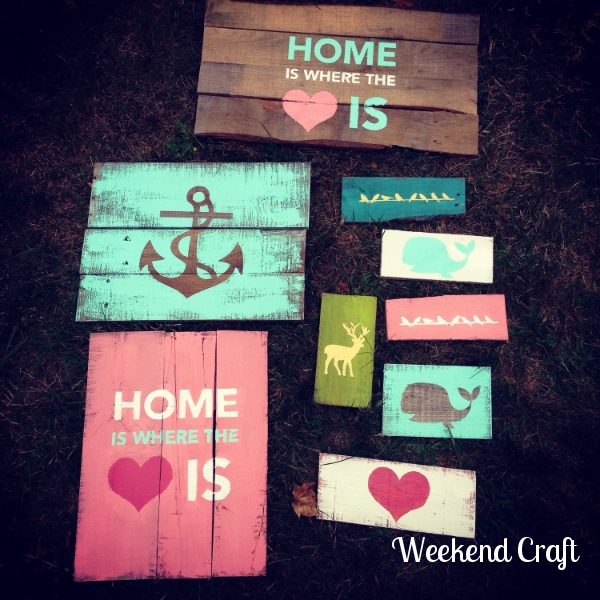
It’s that time again! Silhouette Challenge time! This month’s theme was all about home decor. Which is very appropriate since I just moved into my new home. Do you know I don’t even have one thing hanging on my wall yet? I just can’t decide what sort of style I am leaning towards. Anyway I had two big events coming up (Signature Finishes opening and Brimfield) where I needed to create some pallet signs to sell. So I thought I would share those with you this month.
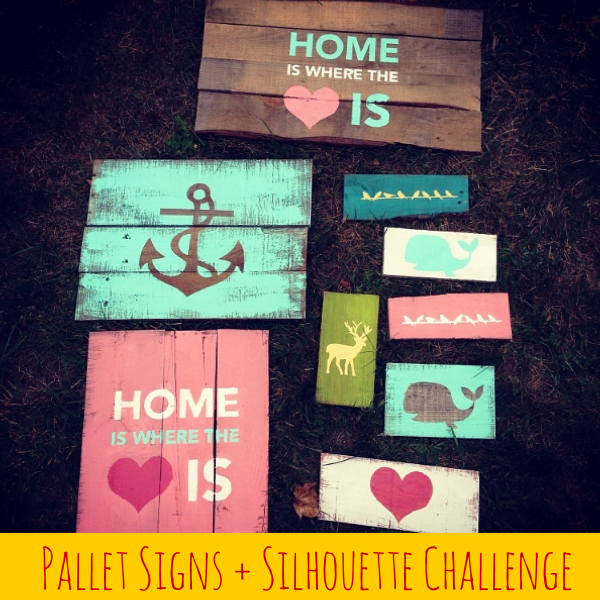
I’ve been pretty obsessed with making signs these days. I think its the combination of picking out the sayings or image thats going to be used and actually painting. I work on the computer all day I love to come home and be hands on with tools or painting. It really is therapeutic.
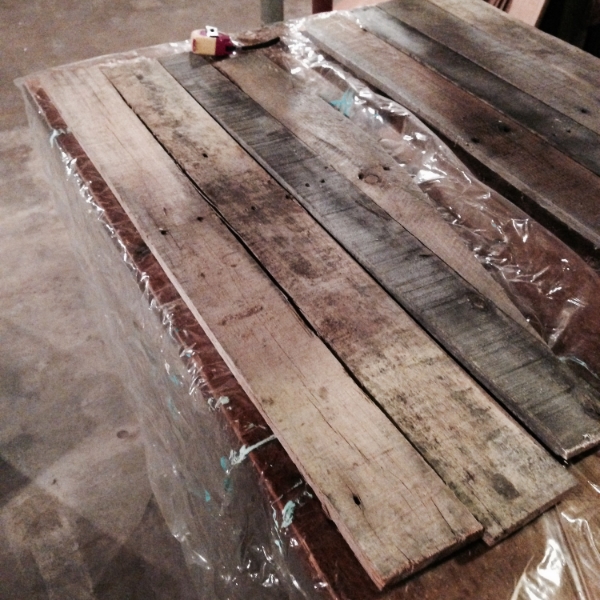
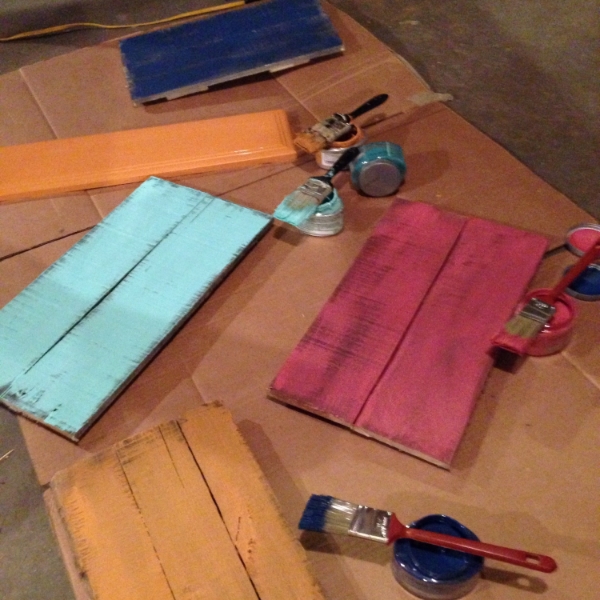
I start first by cutting down the pallets. Which you can read about that process here. Once I have the pallet cut down I lay out pieces that sort of fit together and cut them down to a manageable size.
Update: I was told about two other products that make dismantling a pallet easy and don’t require power tools. Pallet Buster and Deck Wrecker (affiliate links). Now they are a bit more expensive than a crow bar and a hammer but are worth checking out if you are going to be taking apart pallets a lot.
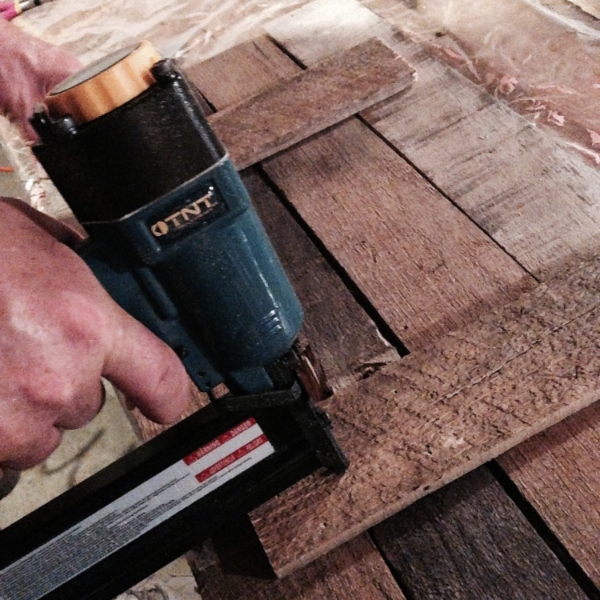
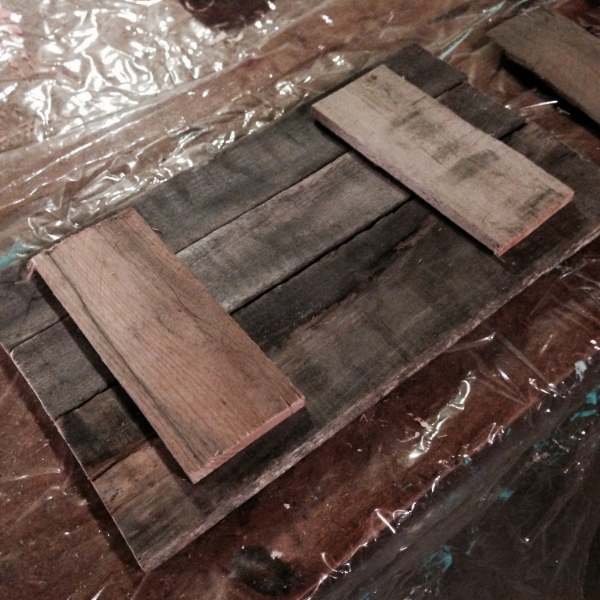
Once the pallets are cut down. I use the scrap pieces as the backing or the support. Tip: When you are nailing the support pieces don’t nail straight down into the wood always nail at an angle and then nail next nail at a different angle. This will insure that you can’t just pull the support piece off. I found when I nailed the support piece straight over time or if you dropped the sign the backing could come loose.

Now when cutting vinyl I have always found that I have the most success when I cut on a mat. So for pallet signs I decided to buy the 12×24 mat. I bought it about 2 months ago and I have used it more than my actual 12×12 mat! Only thing is you need to clear enough space on your work table to allow the mat to go through each side of the cameo (about 4 feet)
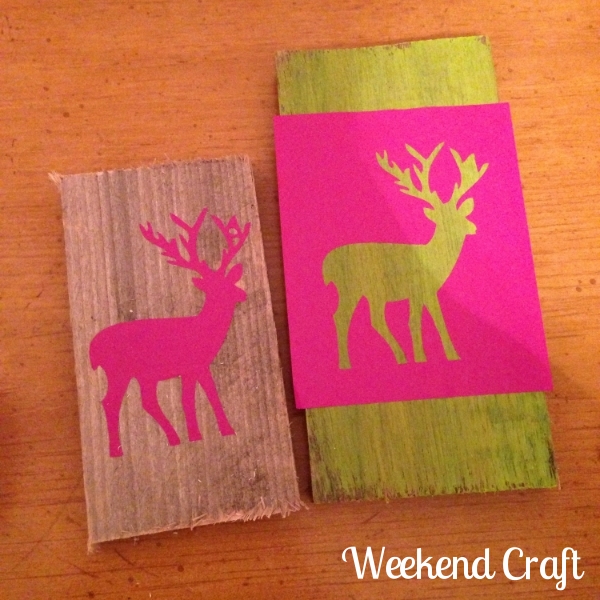
There are two different ways to make pallet signs. You can either paint the wood before stenciling or you can paint the wood with the stencil. I tend to do both. I actually hand place the vinyl most of the time so I can use the excess image as a second stencil. For example the deer above. Vinyl prices can add up so why not get the most use out of one cut.
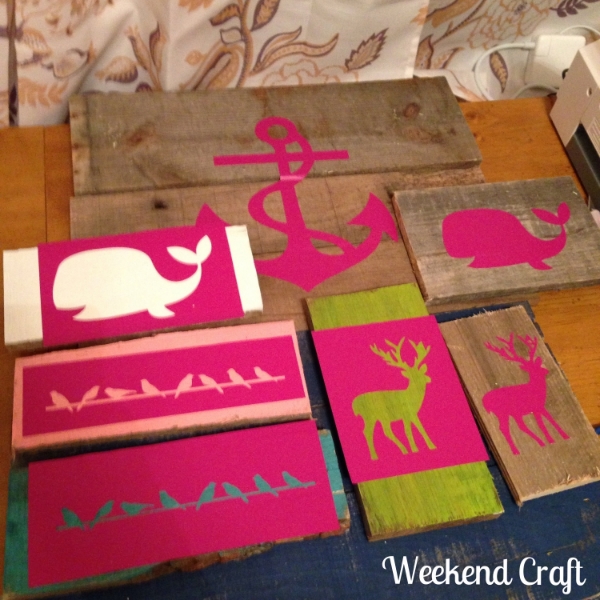
When I am making a large amount of signs I lay all the vinyl down on the wood first and then paint them all at the same time.

I use a small 1 inch brush from Harbor Freight. Try not yo over saturate your brush you can always do a second coat incase you need it. Once the paint is dry (about 20-30 mins) peel back the vinyl. You may need to do a few touch ups but for the most part you will get crisp lines!
Love this project? Pin it for later here.
Want to Check Out More Silhouette Projects?
My Silhouette Challenge buddies and I are all sharing projects on our blogs today, so peruse the projects below for a wealth of Silhouette inspiration!
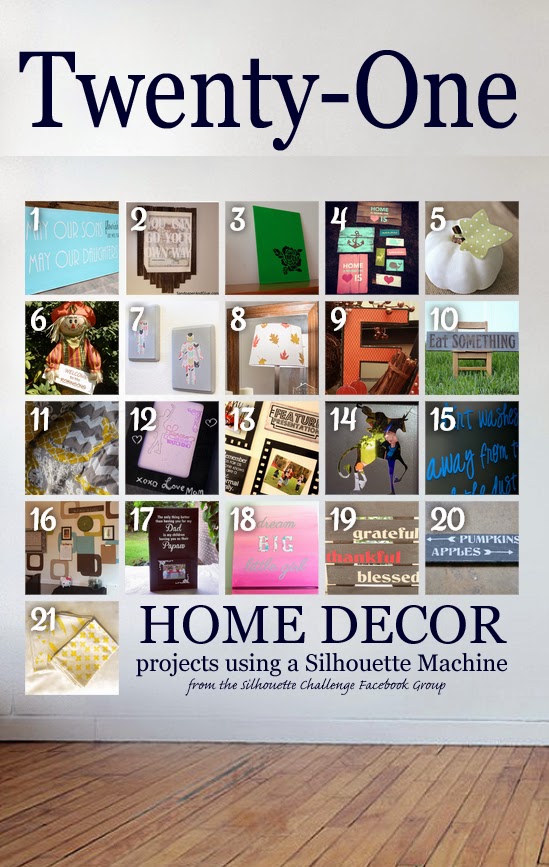
1. The Moberg Family // 2. Sandpaper and Glue // 3. American Honey // 4. Weekend Craft // 5. Grey Luster Girl // 6. From Wine to Whine // 7. Cutesy Crafts // 8. Practically Functional // 9. Home At Eight // 10. McCall Manor // 11. Dragonfly & Lily Pads // 12. Adventures in All Things Food // 13. Create it. Go! // 14. Please Excuse My Craftermath… // 15. The Outlandish Momma // 16. The Sensory Emporium // 17. My Paper Craze // 18. unOriginal Mom // 19. My Favorite Finds // 20. Architecture of a Mom // 21. Black and White Obsession //
Some links in this post are affiliate links. If you do purchase from these links I receive a small percentage which allows me to put it towards future projects to continue provide quality content to Weekend Craft readers.


These are all so lovely! I especially love the little birds on a line. I’d love for you to share this at my weekly link party. https://www.thelifeofjenniferdawn.com/2014/09/a-little-bird-told-me-link-party-107.html Hope to see you there!
I looove pallet art! I hope it never goes out of trend! Thanks for linking up to the Outside {the Box}! Hope to see you next week!
I love these! Pinned. We appreciate you being a part of our party. I hope to see you tonight at 7 pm. We love to party with you! https://loulougirls.blogspot.comHappy Monday! Lou Lou Girls
Love these! They are really beautiful. Thanks for linking at On Display Thursday, Michelle! We are so glad to have you!
Really love the colors you chose! You don’t see enough bright colors! They look great.
Agreed! We need more bright colors especially in the winter!
I’m looking for someone who will sell me vinyl silhouettes so I could make my own. You interested? If so email me, stephaniep423@comcast.net
This is a great tutorial. Wish I lived by you! One of your signs would most certainly already be on my walls!
Hey! Love this by the way. I had a quick question…..after you break down the pallets, do you prep the wood at al before painting? I’m still very new to this stuff. Thanks in advance!
Hi Bethany,
I like my pallets with a rough texture so I don’t tend to prep the wood. If you wanted a smoother finish you could definitely sand them. Hope this helps!
Love these! How do you get the paint to look unfinished? Sand paper? Thx!
Jennie I just use a dry brush never adding too much paint to it. That way the texture and roughness of the pallet comes through.
I love these. I’m just starting out after deciding that my silhouette shouldn’t intimidate me. My problem is that when I use a vinyl stencil on painted wood the stencil peels off some of the paint when I remove it. What kind of vinyl do you use?