This post contains affiliate links, please read our disclosure policy.
https://static.izea.cloud/analytics-core.js
This is a sponsored post written by me on behalf of FrogTape® for IZEA Worldwide. All opinions are 100% mine.
I have a tendency to get about 90% of the way done with projects and lose focus for the finishing touches… like painting trim. In fact did you guys know that I did a bathroom renovation ::cough cough:: years ago and haven’t even shown it to you? That’s because it has been 90% done but I just never got to the finishing touches.
So what is left on the bathroom you ask?
- Painting Trim,
- Painting Doors
- Building a custom door for an inset shelf.
So why do we get these mental blocks from finishing a project that we worked so hard on.
-
Is it functional? Yes. Then let’s use it.
-
Have you encountered a problem? Yes we built an inset cabinet that needs a custom sized door and building a door intimidates me.
- Did you leave your least favorite part for last? Yes, painting doors.
We see the obstacles and then we dwell on them. The amount of times you think of what’s left on your to do list you could have knocked something off that list. So today I am going to scratch something of that list and be one step closer to finishing this bathroom.
 I am partnering up with FrogTape® to finish painting the bathroom trim and show you that the finishing touches don’t have to be difficult and can make all the difference.
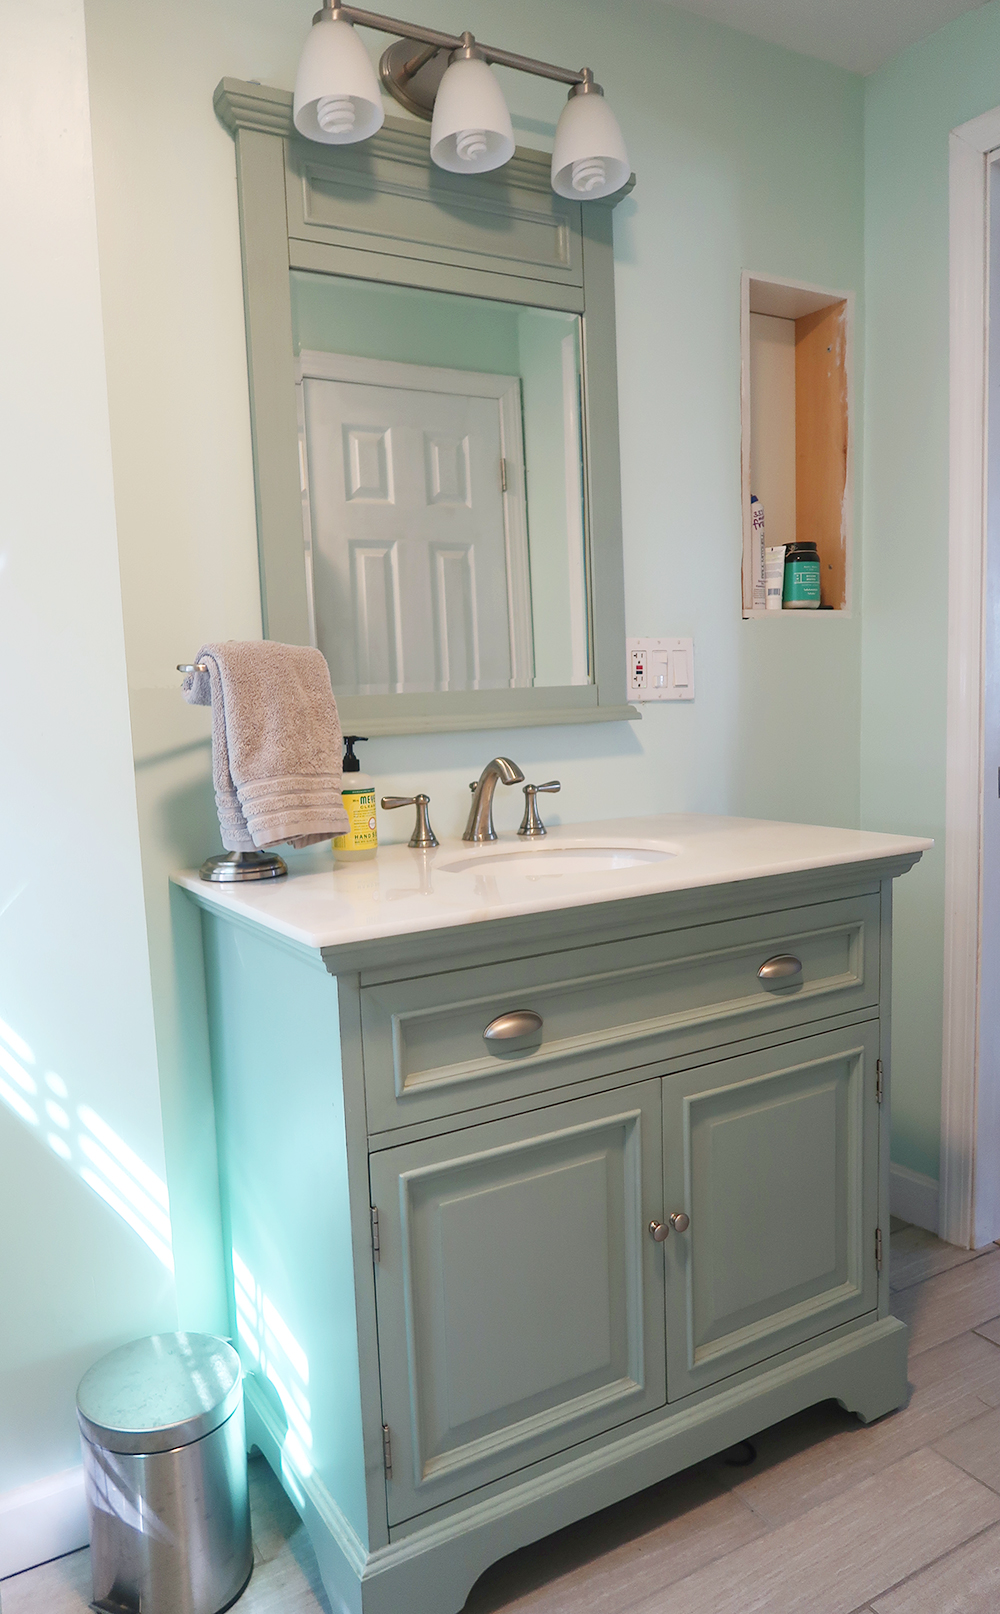
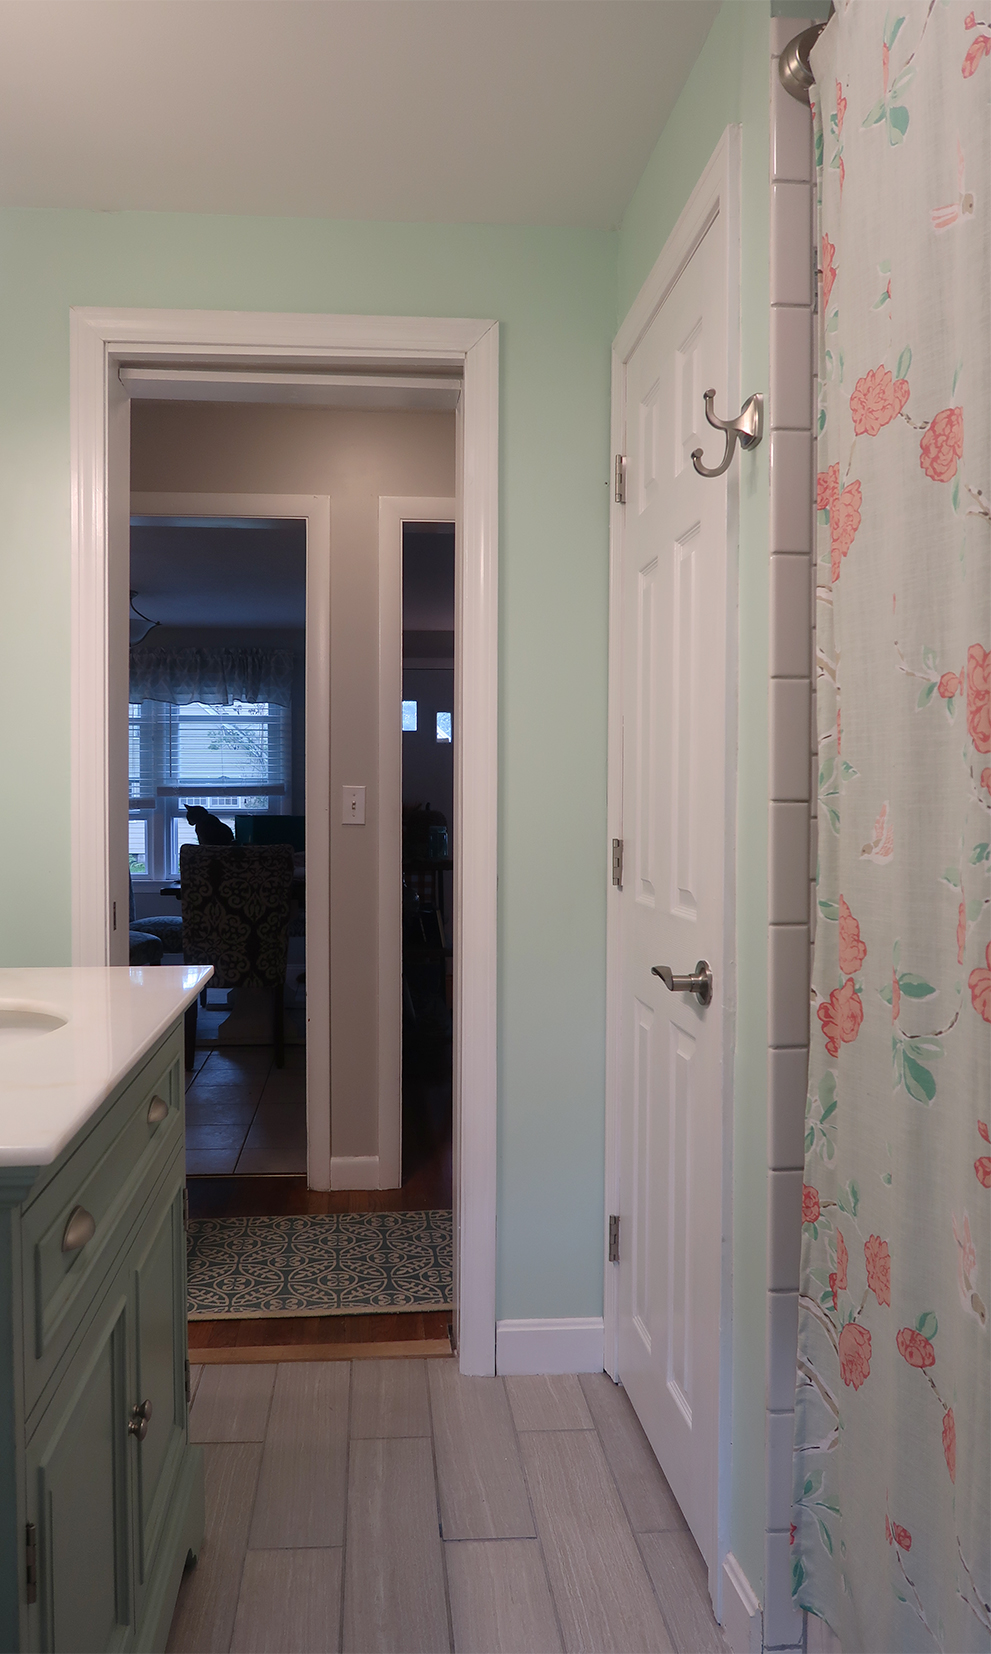
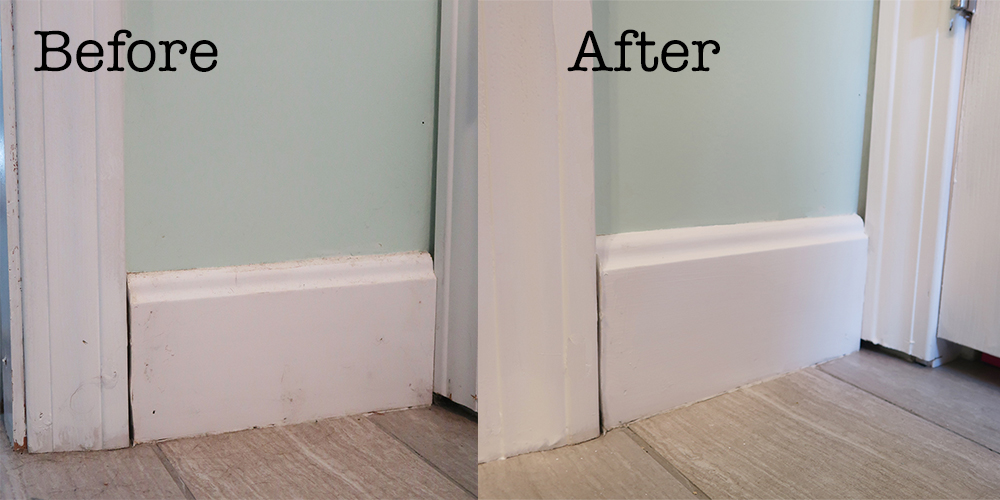
Before
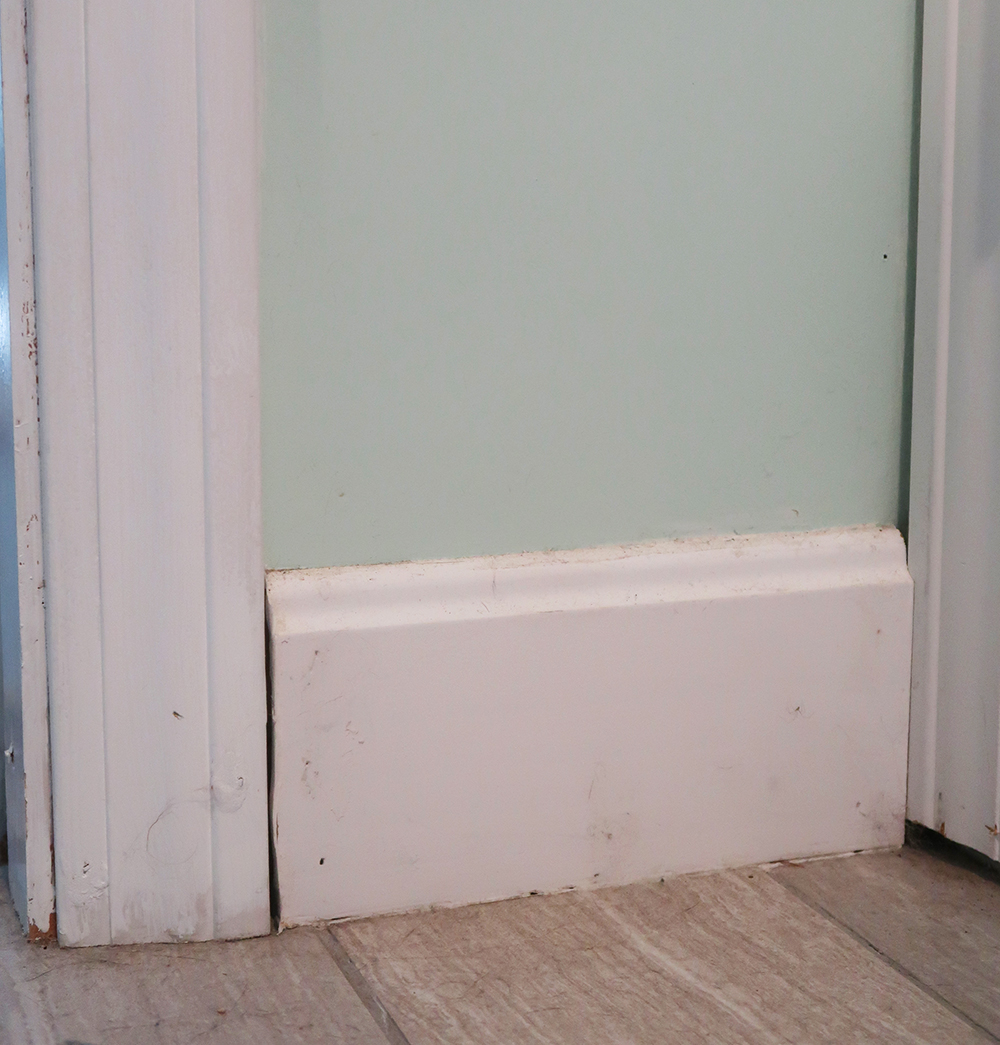
I can’t even believe I am showing you this before image. I didn’t realize just how badly my trim or molding was in need of painting. They had collected dust, pet hair and I had never even finished covering all the nail holes.
Before we even get to step one I spent some time deep cleaning the bathroom. This is my cats favorite room in the house so the floor get covered in cat hair quickly. I vaccumed and swiffered the whole area and then cleaned the base boards with all purpose spray. It’s important to make sure you get all the dust, dirt and pet hair off the trim work so it does not mix in with the paint.
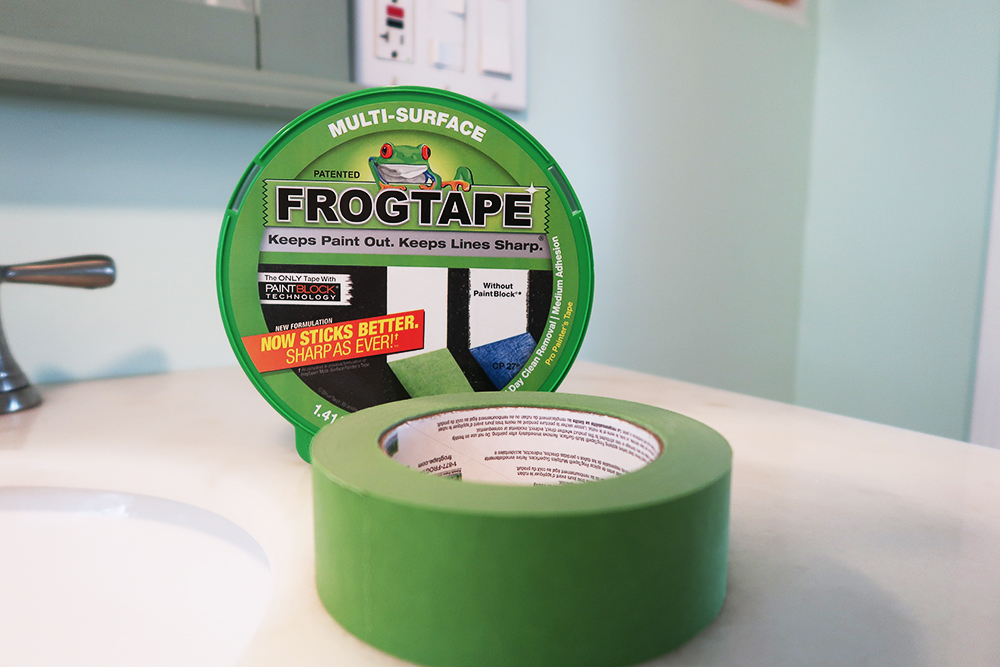
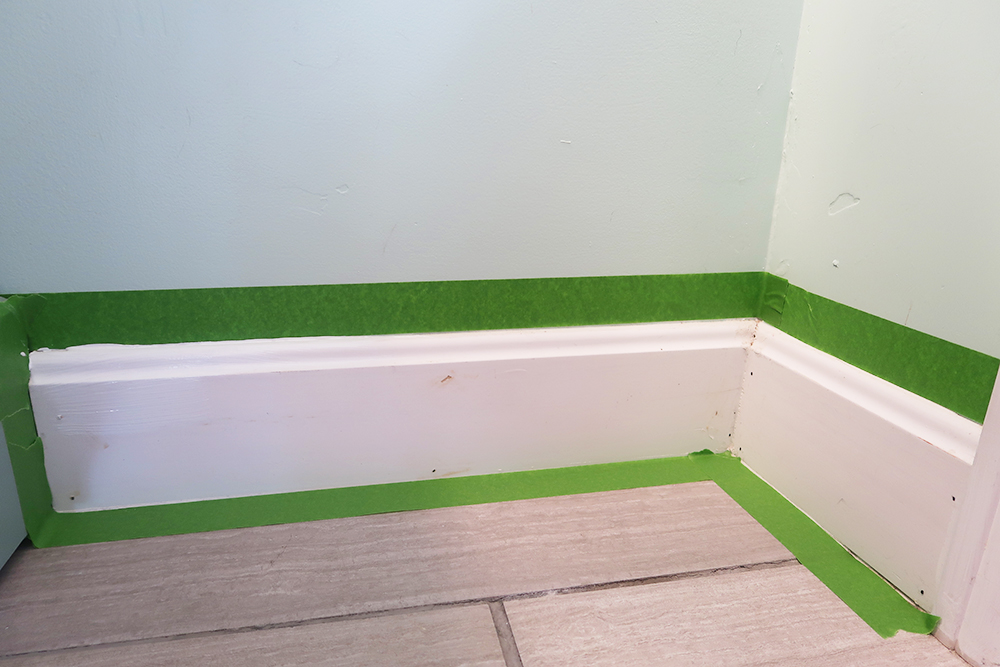
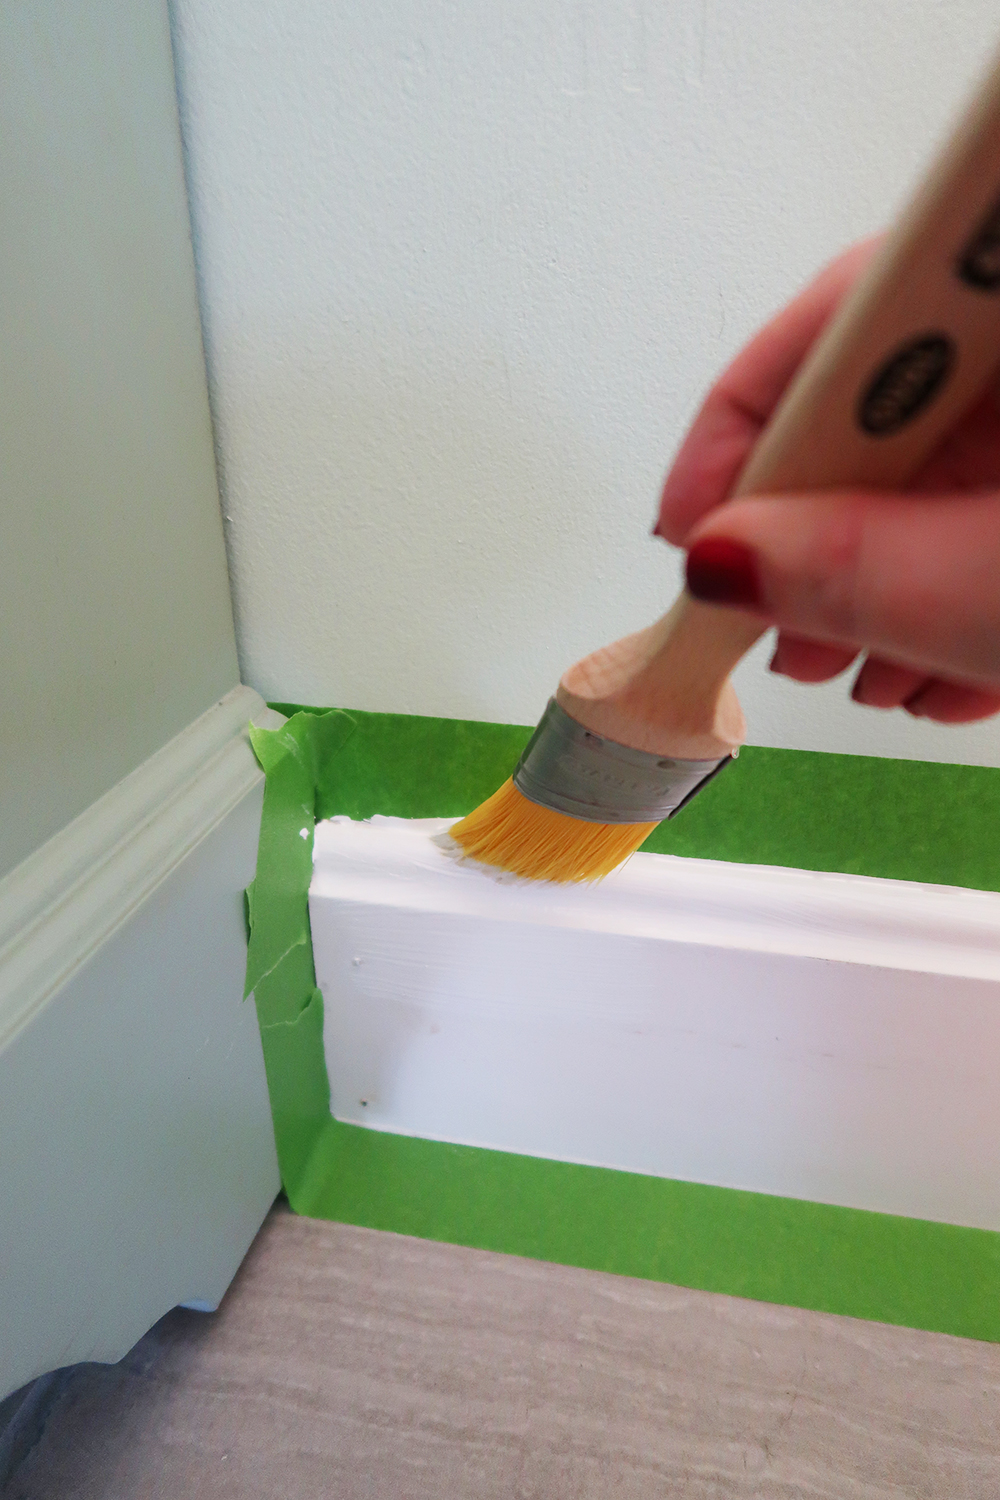
Step One: Painter’s Tape
I start by taping off the whole room. I placed FrogTape® on the wall butting up to the molding, on the tile floor right to the edge of the molding and on the vanity that the molding abuts to. I filled any nail holes with wood filler and sanded when it was dry.
The prep work to paint is most important. I have painted baseboards without painters tape before thinking I had a steady hand it was just a mess. Doing this prep work makes painting the finishing touches easier and look more professional
Why do I chose FrogTape?
FrogTape is the only painting tape treated with patented PaintBlock® Technology. PaintBlock reacts with the water in latex paint and instantly gels to form a barrier against paint bleed giving you the sharpest paint lines possible.
Step Two: Paint
When painting baseboard or trim I like to use and angled brush. I feel like it is easier to get right to the tape line. Since FrogTape gels to form a barrier I don’t have to worry about being exact with my paint lines.
I suggest painting 2 coats. You may need more if you are painting wooden trim white but I was lucky these baseboards came primed.
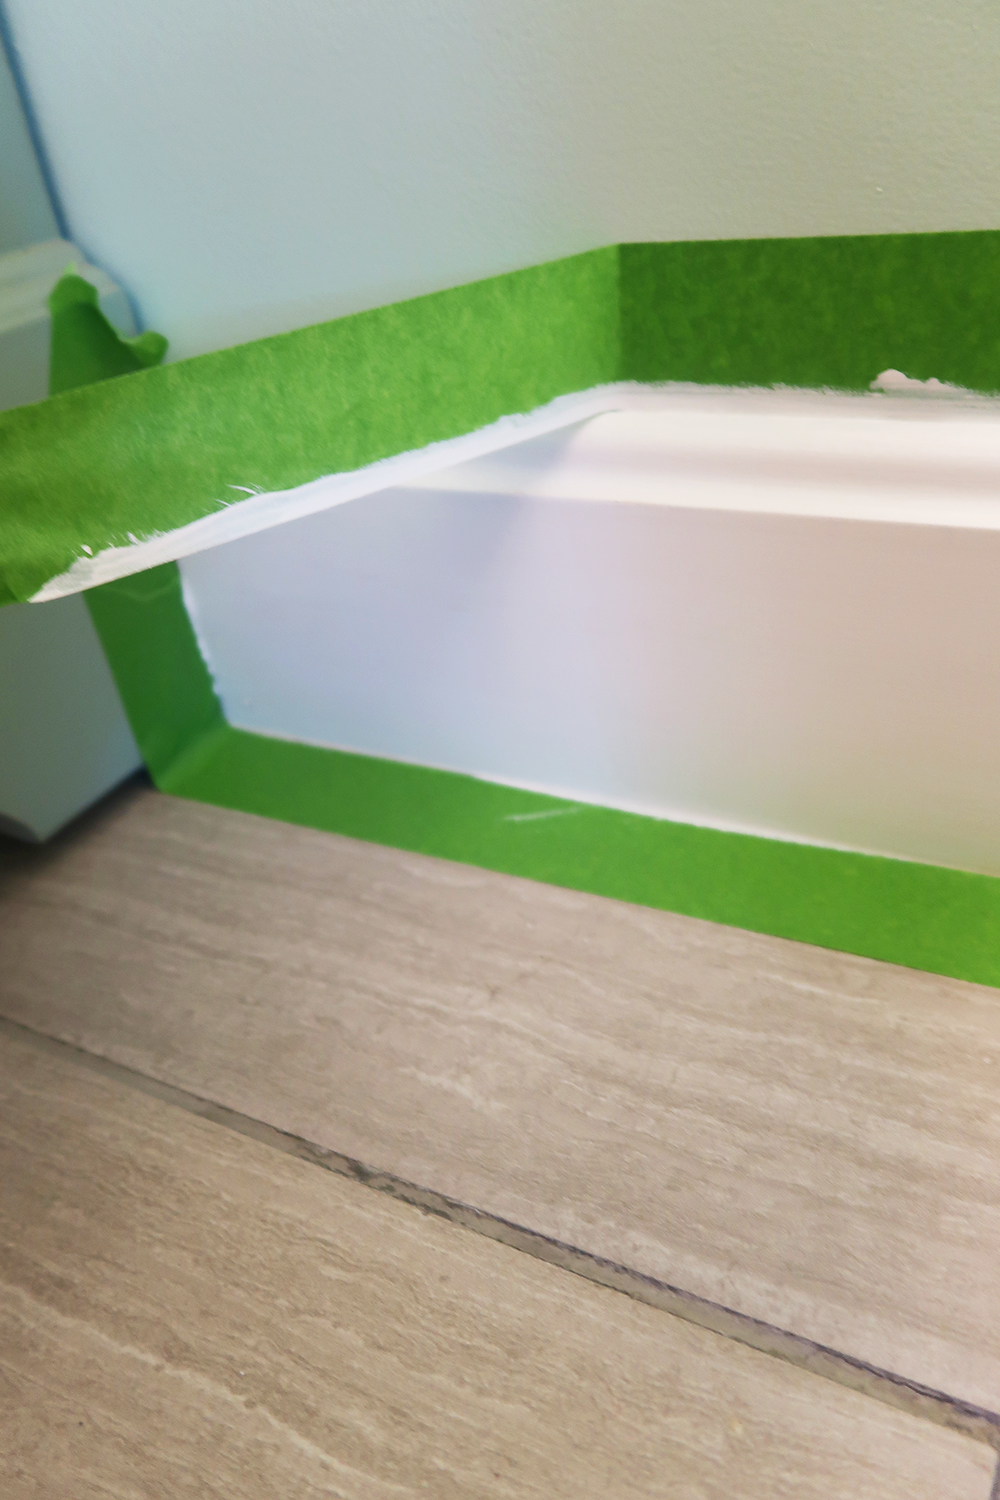
Step 3: Peel
While your second coat is still wet peel back your FrogTape. Pull tape off slowly at a 45-degree angle. Be careful if there is any paint on the tape make sure to discard and not place on a floor or counter.
What a difference paint trim work can make. It makes the room look fresher and cleaner.
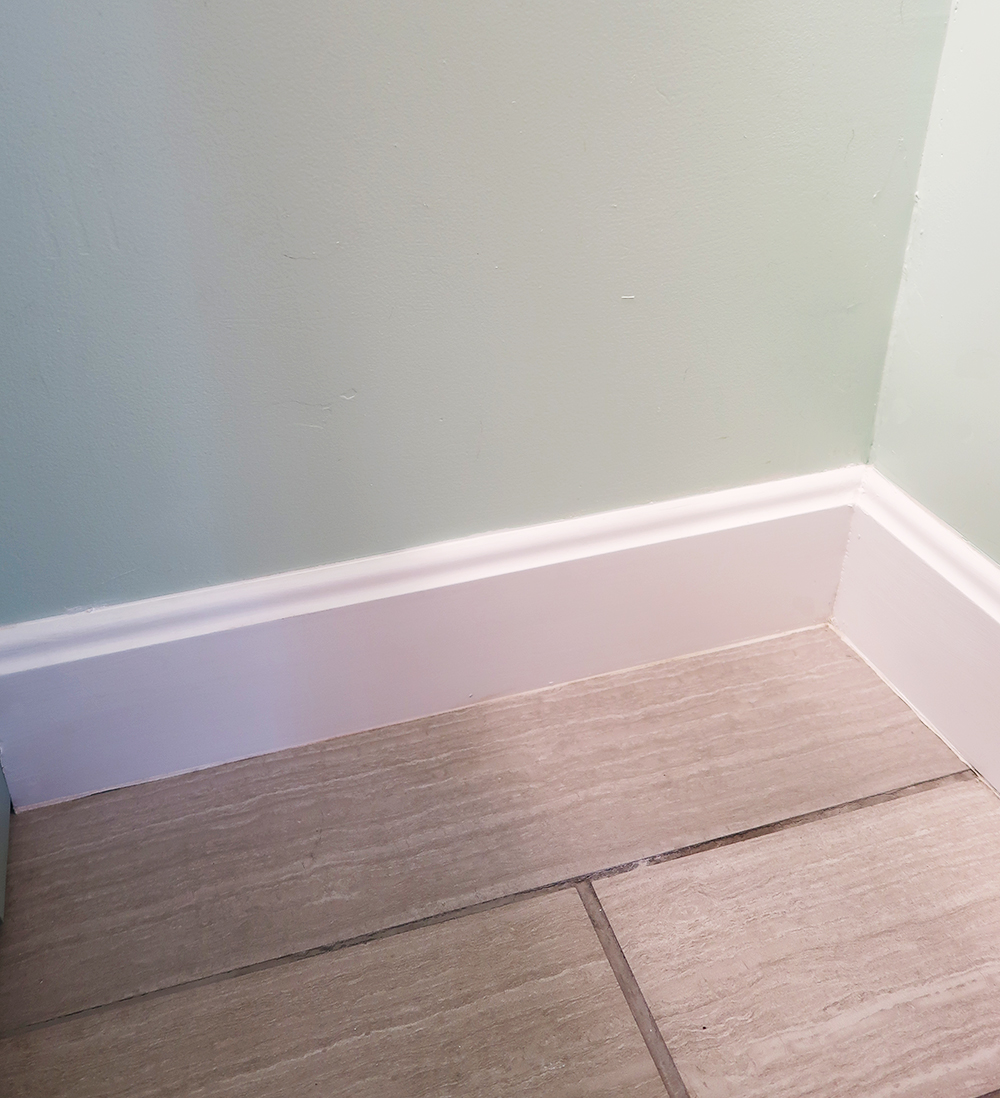
Now I caught myself staring at the baseboards in the hallway thinking that they could use a fresh coat. I went from putting off doing finishing work to wanting to paint more! Isn’t amazing the transformation a little paint can make.
I had planned to only paint the trim but since I was on a roll I started paint the doors. Funny how when you get one thing checked off your list you just want to keep checking them off. Now I need to figure out how to build and install a custom door.
You guys are first to see the sneak peek of my bathroom renovation. I cannot wait to show off the tile work in the shower. Also any guesses to my favorite color ;).


I didn’t know you were working on your bathroom too, Michelle! It looks so good. I agree about Frog Tape. It’s the only one I’ll use after trying so many duds.
Oh my! What a difference. Love the wall color, and it looks fabulous next to the bright white trim! I haven’t tried Frog Tape before, I will have to keep it in mind for my next paint project.
It looks beautiful! Funny part is I’m sure it didn’t take too long but I’m completely on board with procrastinating simple projects. I’ll have to pack up my un-motivation and get a few of those un-finished projects finished.
Michelle getting projects to about 90% completion is my life. Those little details are buggers!! The trim looks great and you’ve motivating me to just get moving on those lose ends around my own house. Also – I have both built cabinet doors and bought custom sized MDF cabinet doors off a seller on eBay. 100% I would do the latter – you give them your dimensions and they create the unfinished door for you, then all you have to do is prime, paint and hang it! Highly recommend. I can give you the company I used if you want!
OMGosh Lisa I would love to know the company you used. It’s the only thing left unfinished!