This post contains affiliate links, please read our disclosure policy.
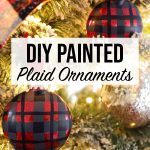
Beautiful DIY Christmas ornaments. Learn how to add glitter to glass ornaments and paint them plaid.
This post is sponsored by Beacon Adhesives but all opinions are my own.
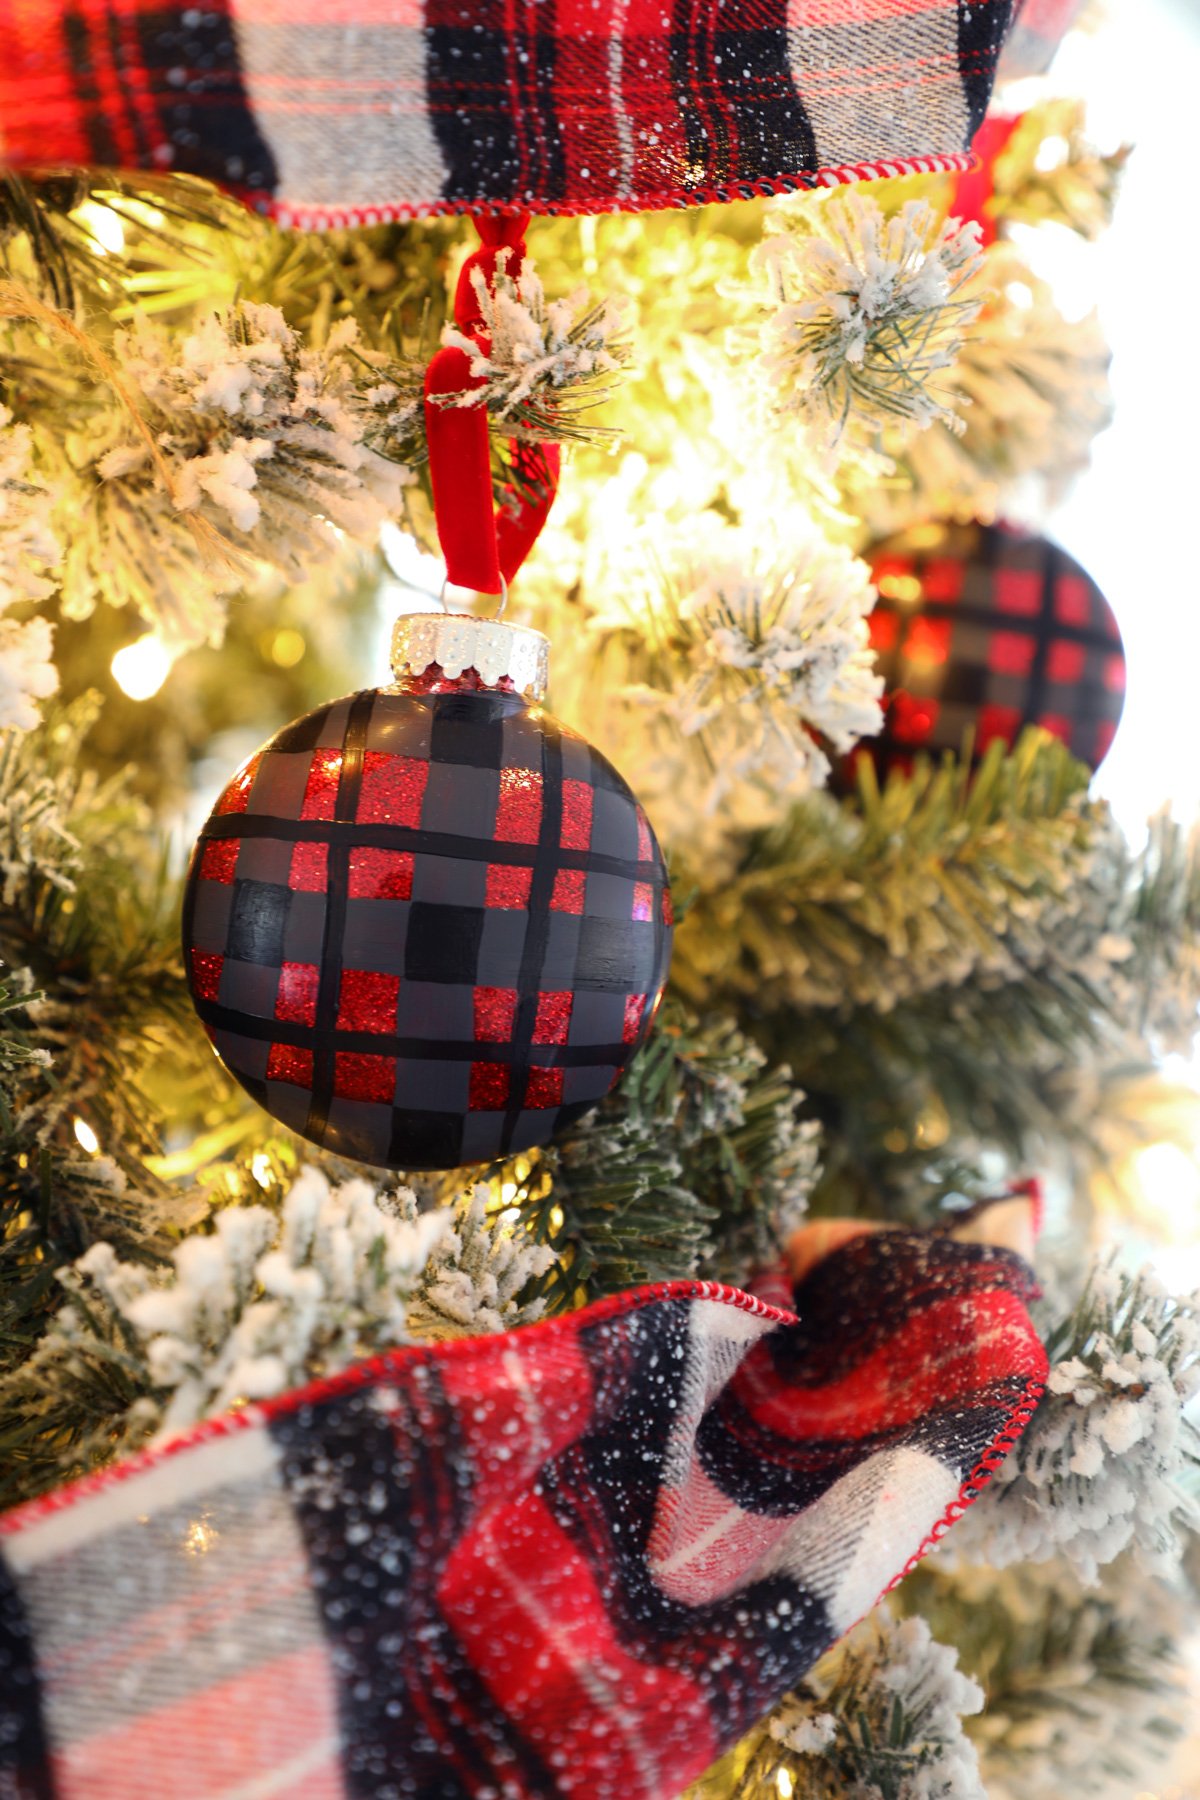
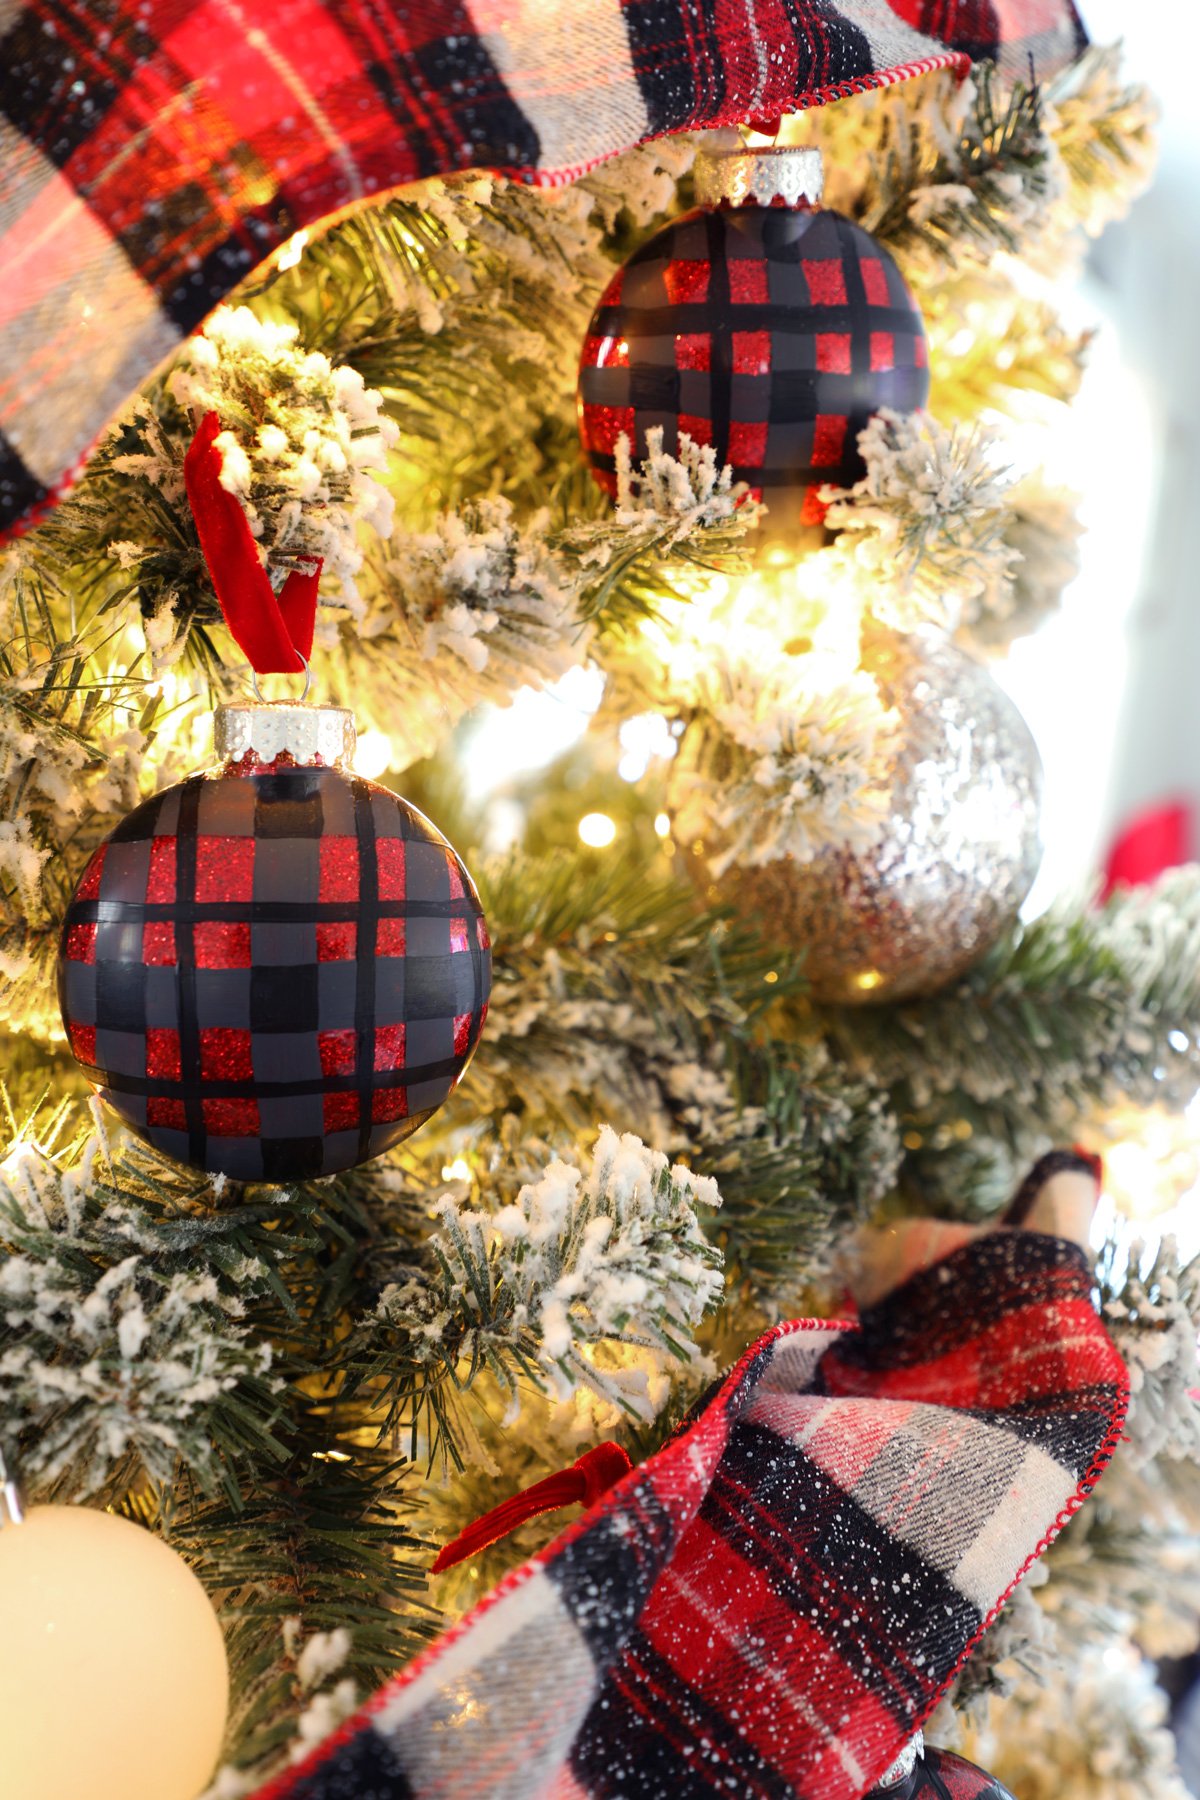
Christmas and plaid seem to go hand and hand. Today I want to show you how I made these DIY plaid painted ornaments with glitter. You’ll learn how to add glitter to glass ornaments and the technique I use to hand paint plaid on glass. This is an easy DIY all you need is a steady hand, Glitter-It!, acrylic paint, glitter and some paint brushes.
Have a project you want to paint buffalo check plaid? Learn how to paint a buffalo check sign here and a buffalo check mason jar here.
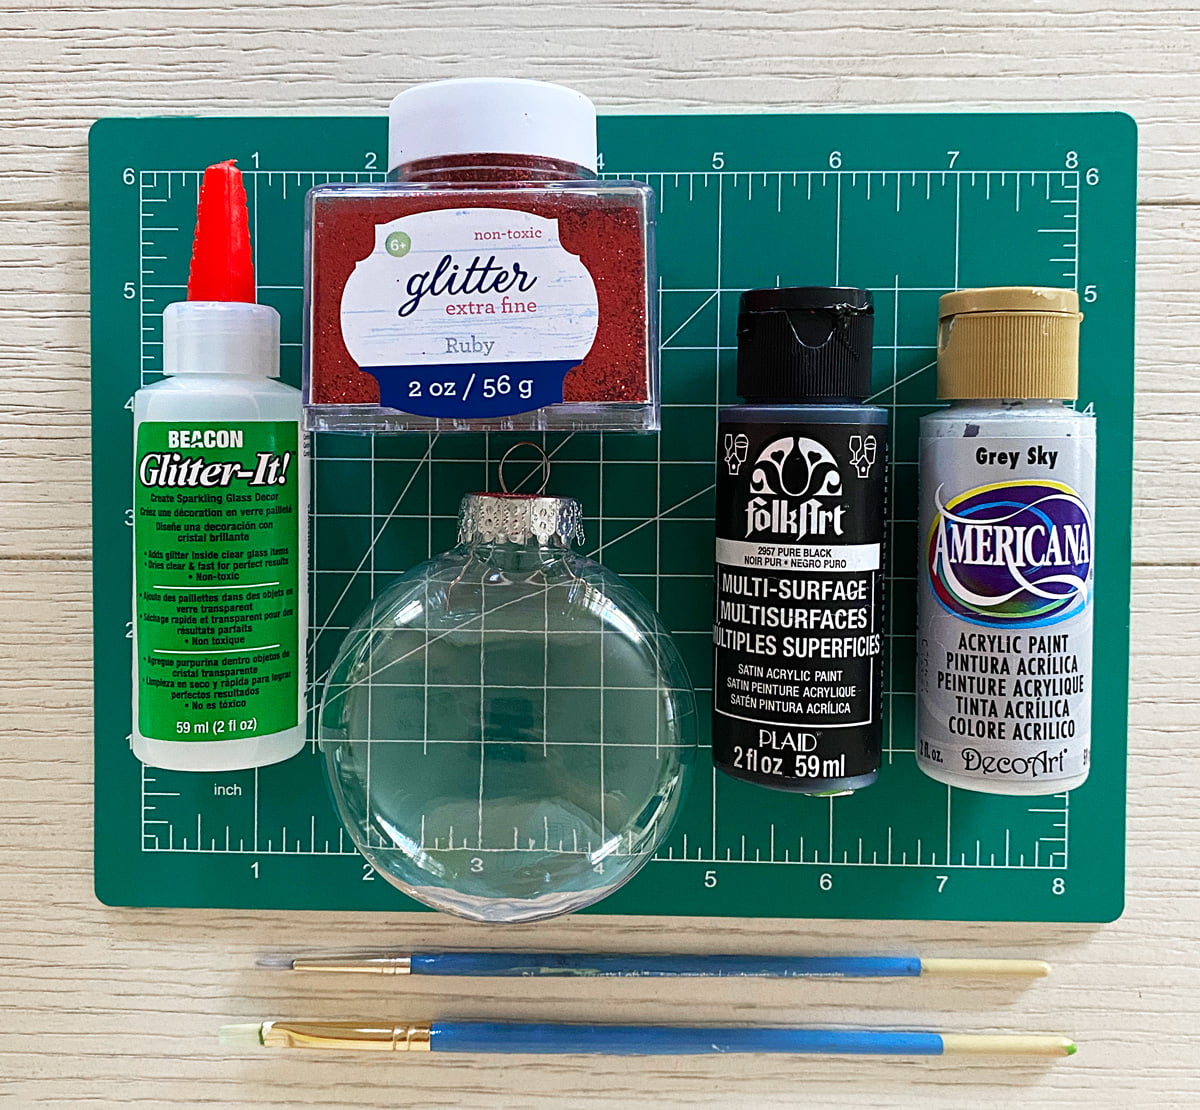
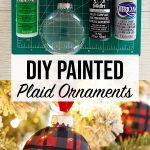
Here’s what you’ll need
- Clear Glass or Plastic Disc Ornament
- Beacon Adhesives Glitter-It!
- Extra Fine Glitter
- Black Acrylic Paint
- Dark Grey Acrylic Paint
- Paint Brushes
- Square Tip
- Detail Brush
- Ribbon
- Sheet of printer paper.
How to add glitter to a glass or Plastic ornament
What’s the secret to adding glitter to ornaments? Beacon Adhesives Glitter-It! It’s a non-toxic clear glue that makes it easy to add fine glitter to glass or plastic ornaments. This glue dries clear and fast and keeps the glitter vibrant! The pointed end makes it easy to apply with precision. It’s also easy to clean up with just soap and water.
Special offer, just for you!
Beacon Adhesives has given me a promo code for 20% off! Use code WEEKENDCRAFT20 for 20% off craft glues on their website. Exclusions apply.
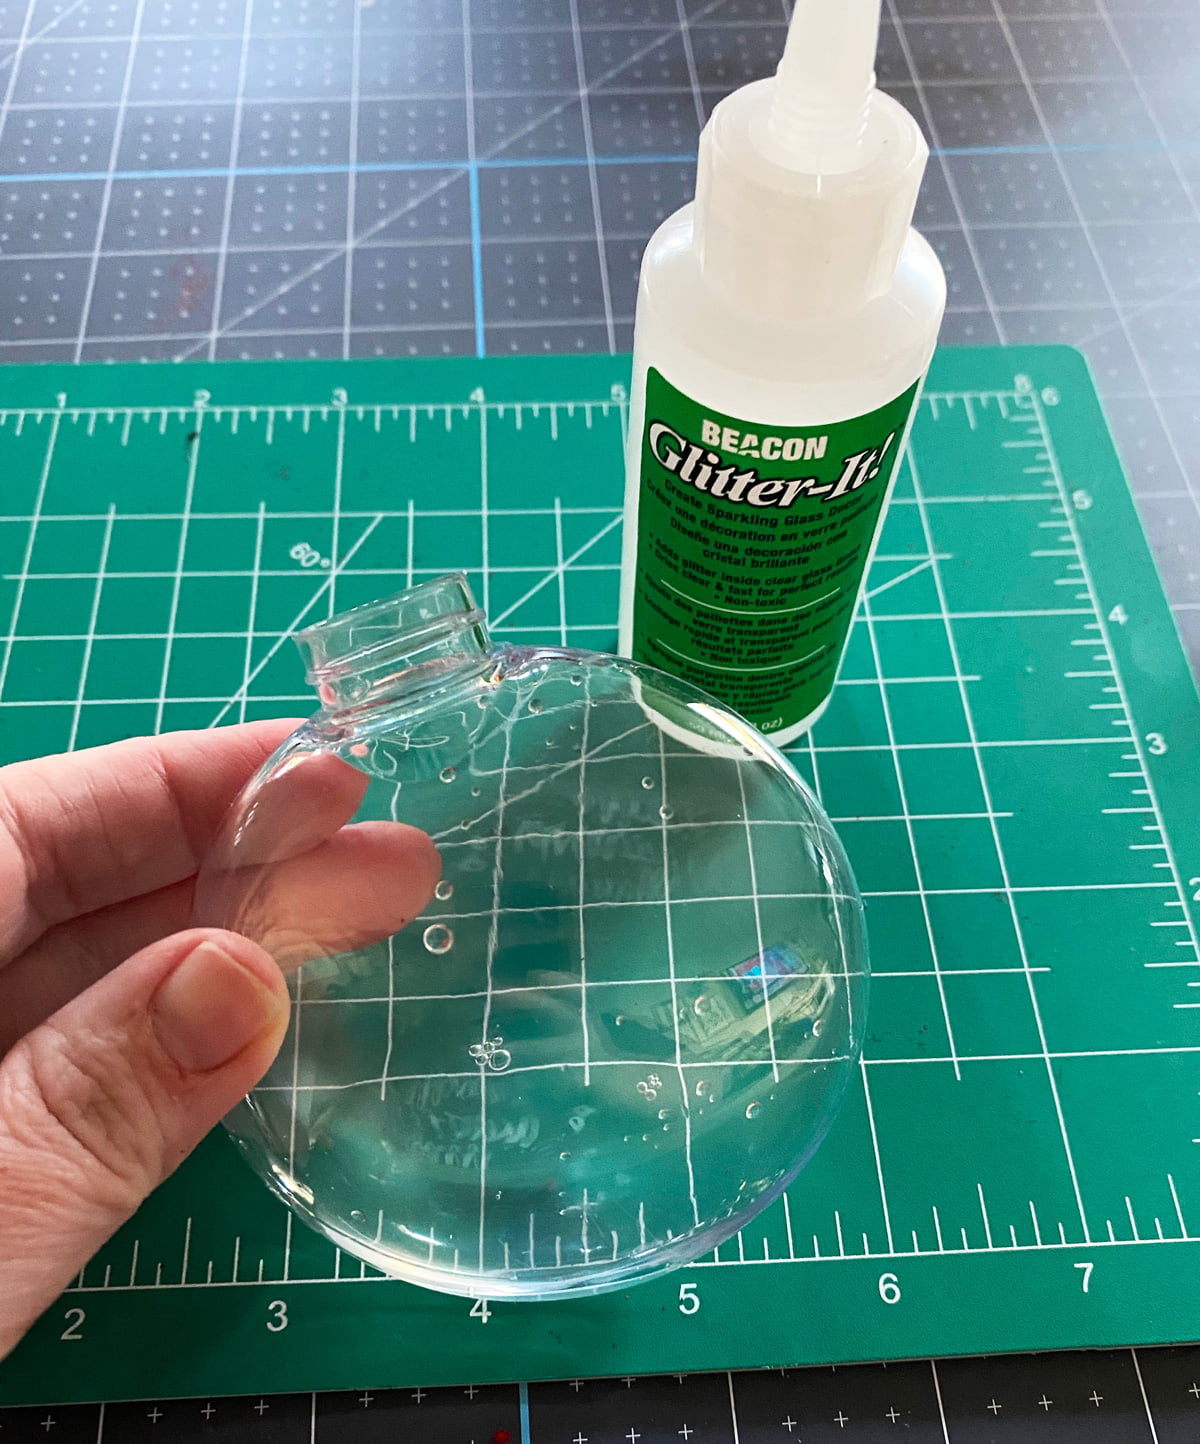
Step One: Prep The Ornament
Remove the hanger from the top of your ornament. Clean the inside of your ornaments with a mixture of water and vinegar.
Add one tablespoon of white vinegar to one cup of warm water and pour a small amount into the ornament. Swirl around to thoroughly clean glass. Rinse and leave to dry upside down. This helps remove any residue that has been left inside the ornament.

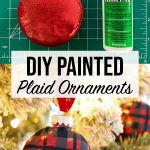
Step Two: Glitter-It!
Pour a small amount of Glitter-It! into the ornament. Swirl around to coat the entire inner surface. Add more if needed. Drain Glitter-It! from the ornament. Make sure the entire inner surface is well coated before adding glitter.
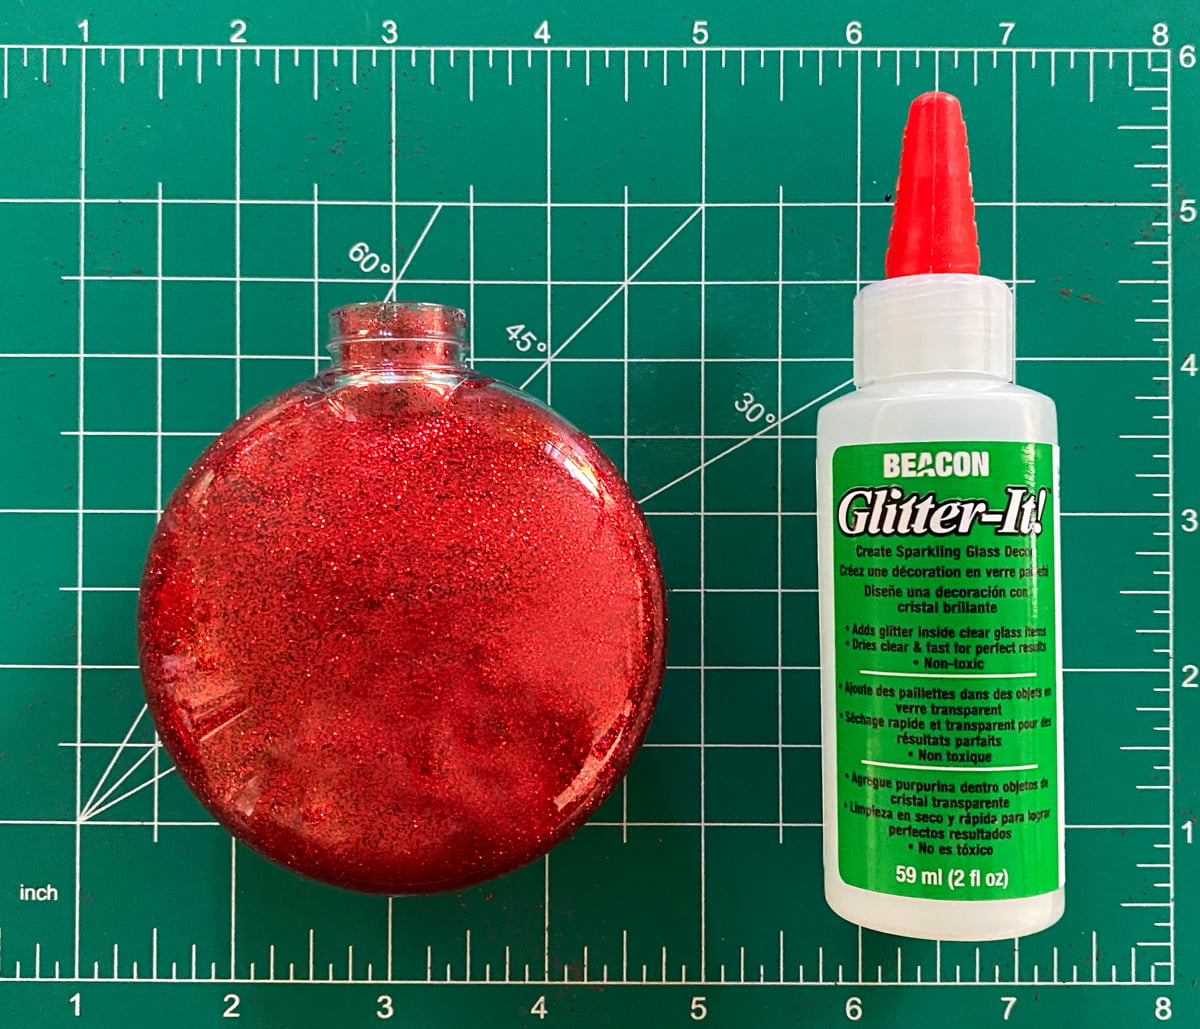
Step Three: Add Glitter
Take a piece of printer paper cut it in half and roll diagonally into a funnel. Immediately add glitter. Rotate and swirl the ornament until the inside is covered with glitter. If necessary, add additional Glitter-It! and glitter until all areas are covered.

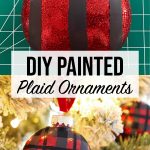
Turn ornament upside down and shake away any excess glitter. Now that the base color of our ornament is red glitter we are ready to paint your ornament plaid!
How to paint an ornament plaid
Now I do want to warn you if you are a perfectionist this may be difficult for you. These plaid painted ornaments are what we call rustic or organic all the lines are freehand. Take your time with it. Painting to me can be very therapeutic. Often I will turn on music or a movie and paint.
We are going to paint one side of the ornament and once dry turn the clear disc over an paint the other side.
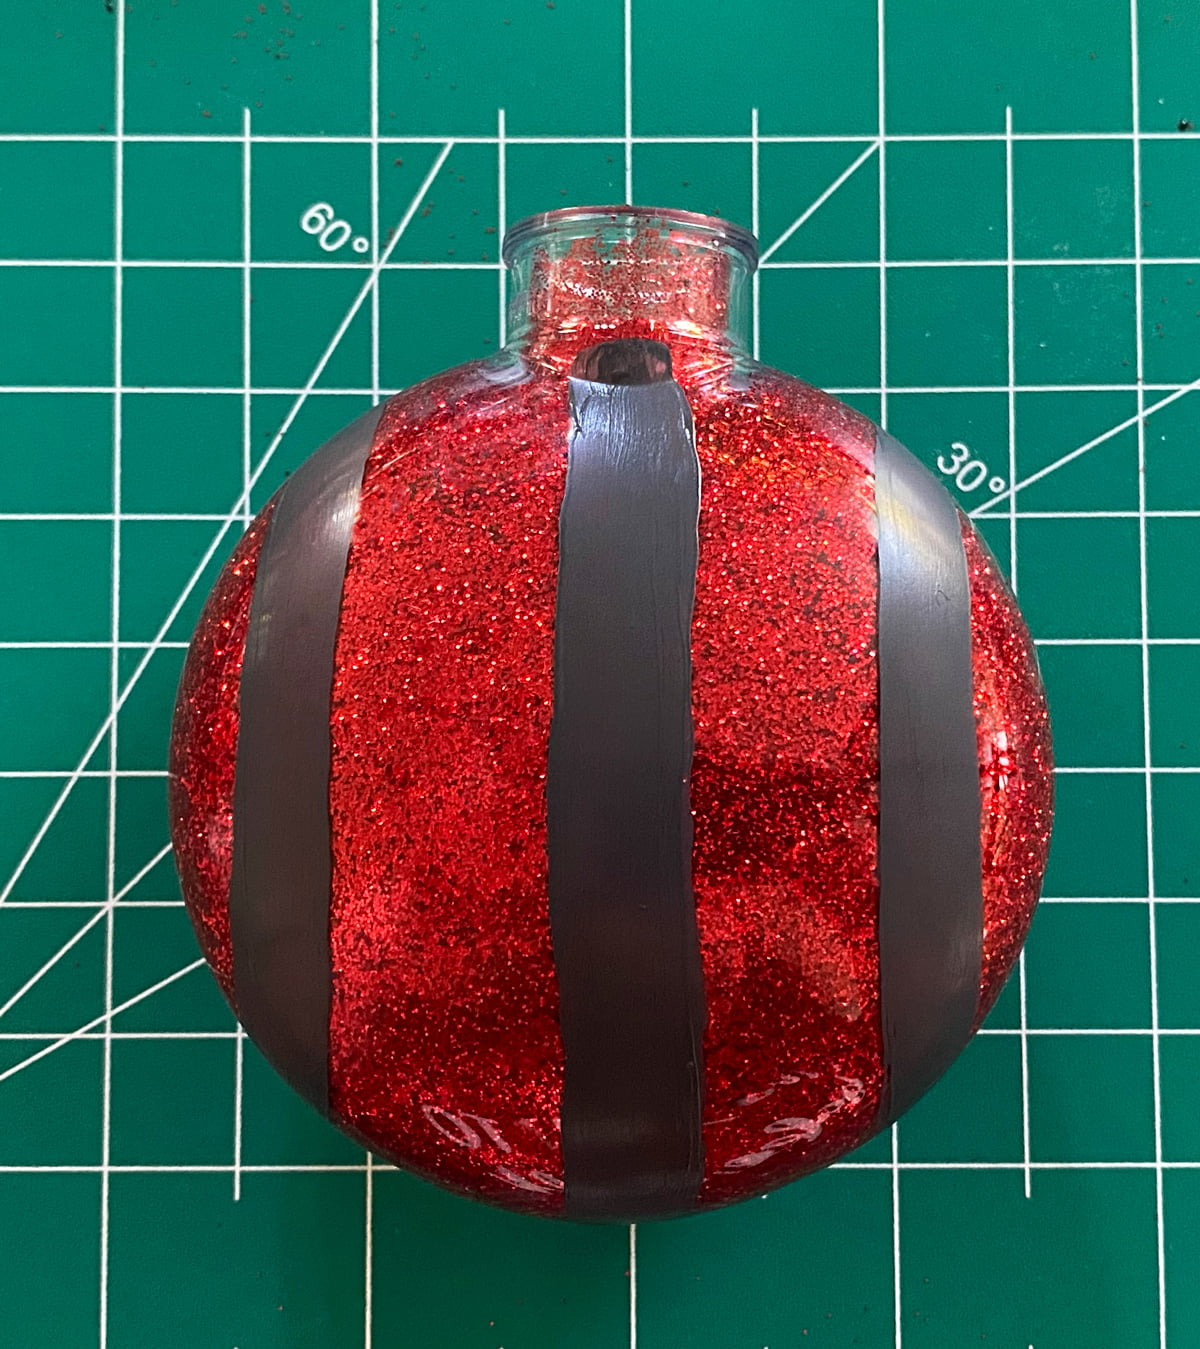
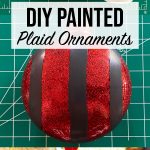
STEP One: VERTICAL STRIPES
Mix together or grab your dark grey paint. Starting in center use your brush with a square tip to paint a thick line down the middle of your ornament. Next about 2/3rds of the way to the left and to the right paint another vertical line. Make sure to leave room for a small pinstripe.
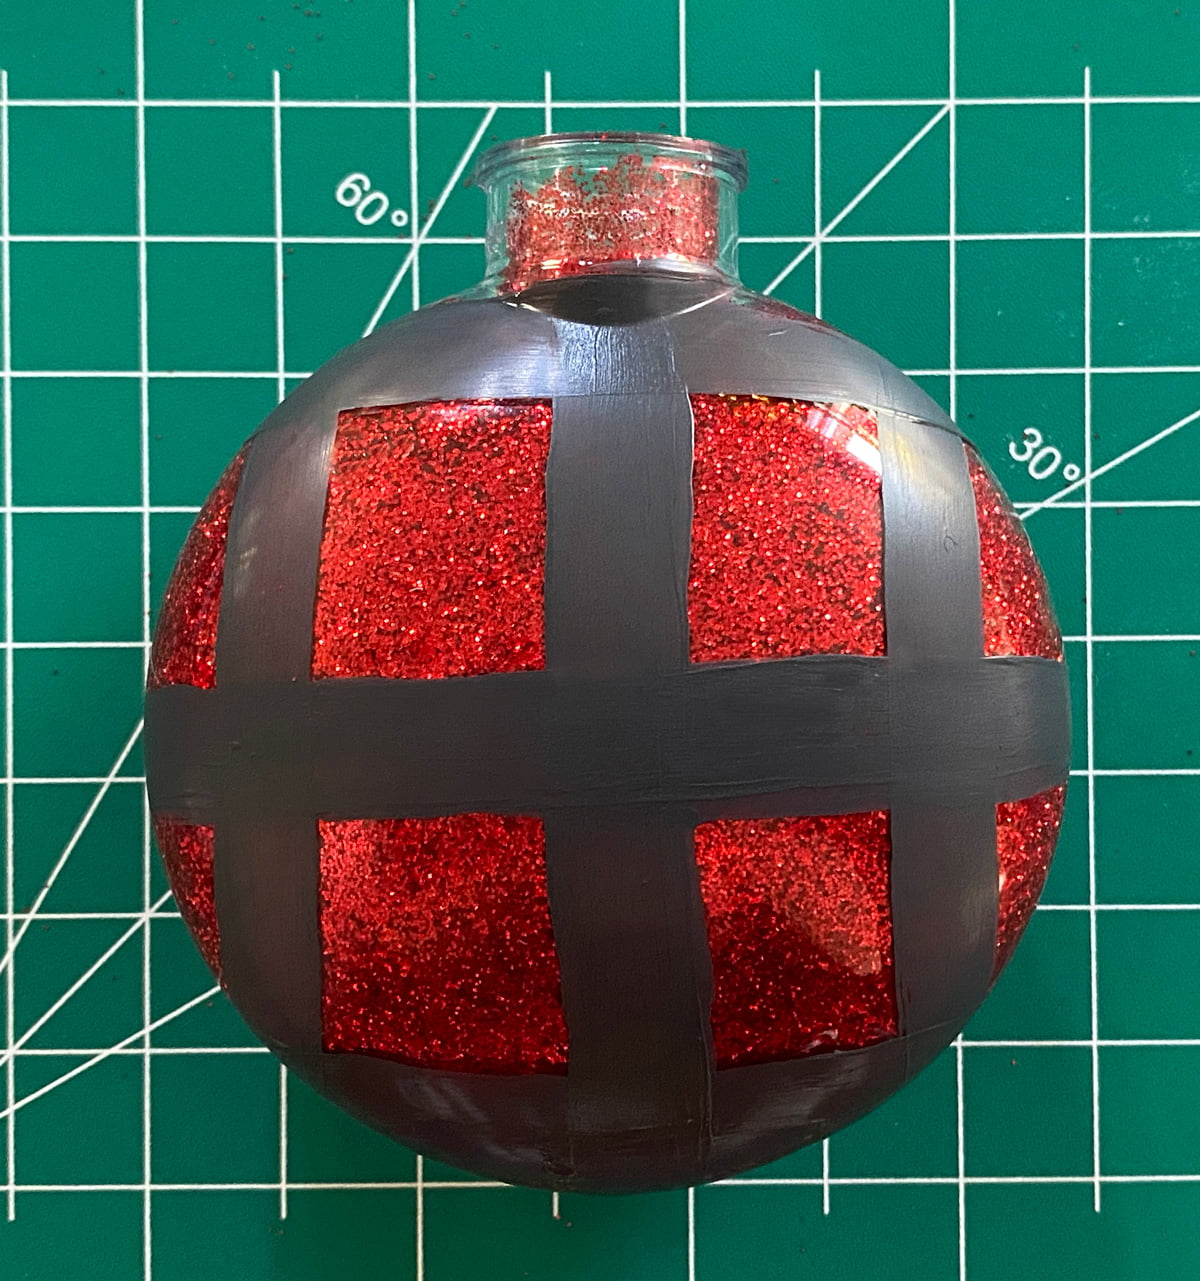
STEP Two: HORIZONTAL STRIPES
With the same grey paint start painting your horizontal stripes. I tried to keep my stripes equal distance starting in the center again. I also think it’s important to put a horizontal stripe around the top edge of the ornament. It helps grounds it.
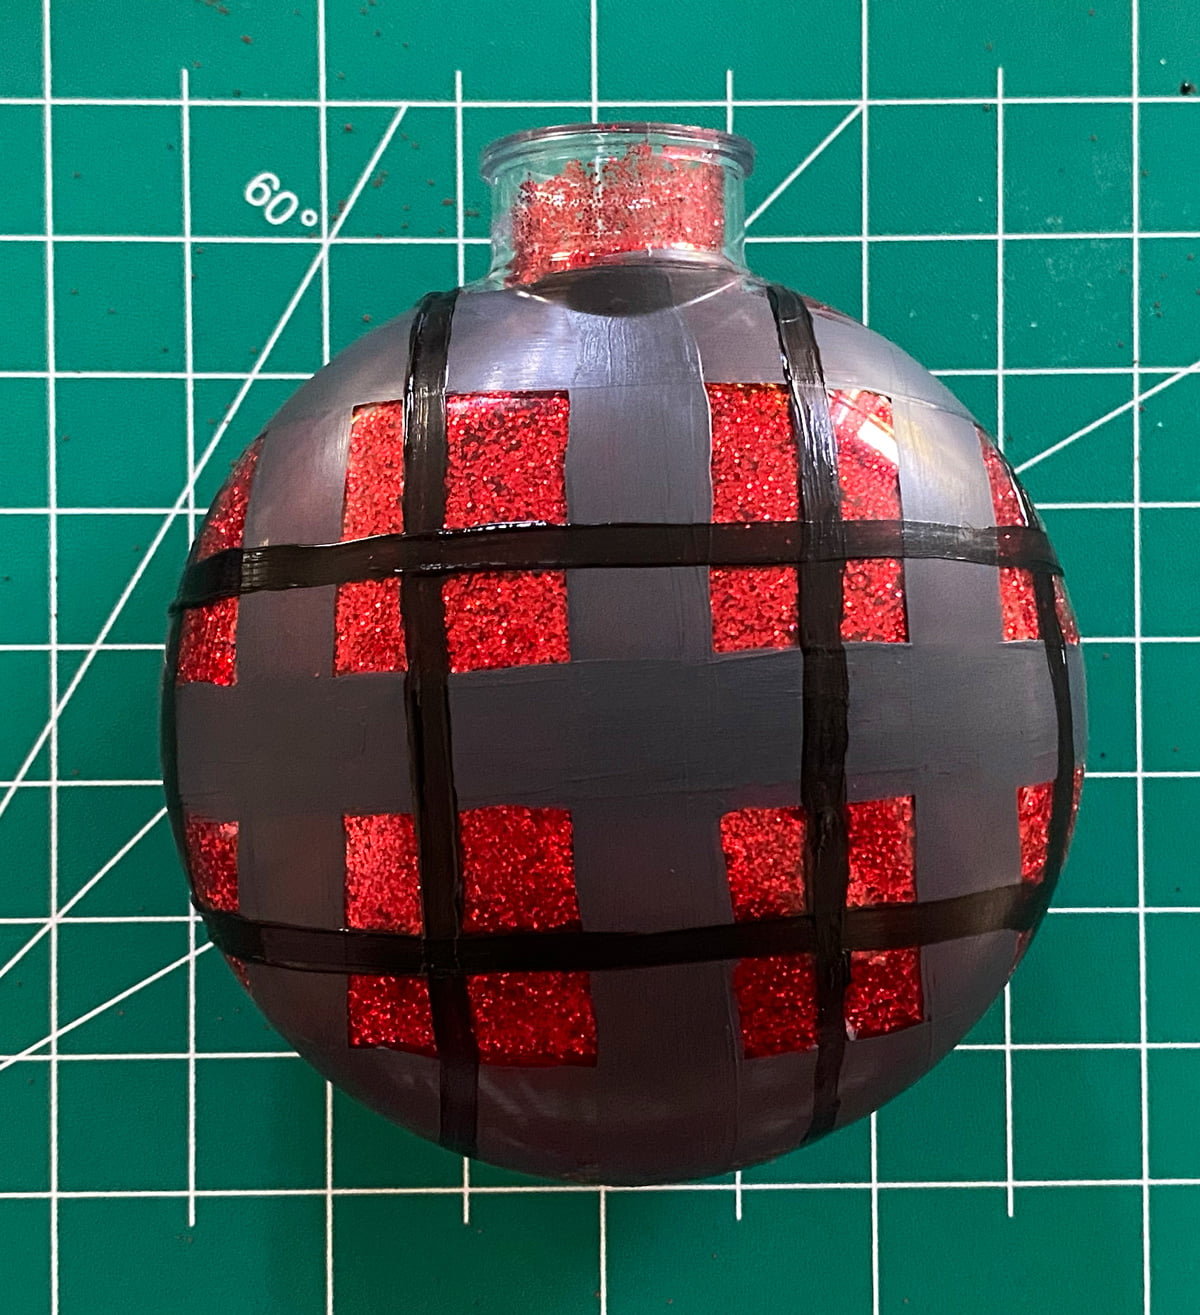
Step Three: Vertical Pin Stripe
Grab your black acrylic paint and your thin detail brush. Paint a thin black pin stripe vertically in between your grey vertical stripes.

Step Four: Horizontal Pin Stripe
You will want to do the same but this time painting horizontal pin stripes.
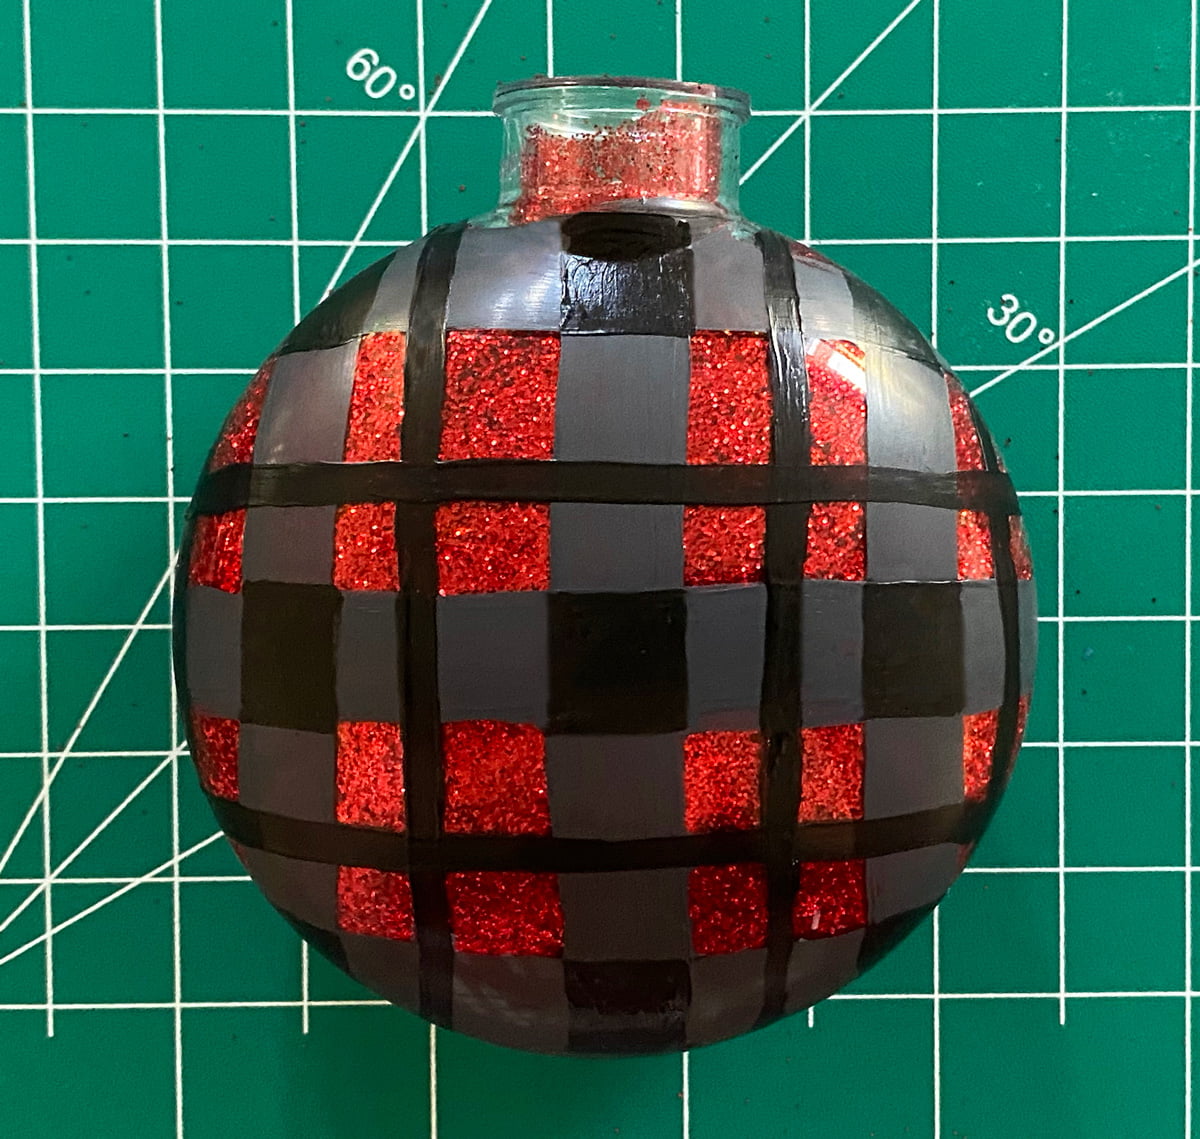
STEP 4: BUFFALO CHECK
Where the two grey stripes cross into a “t” you are going to use a smaller brush to create a square and then fill it in with black paint. Repeat this at every grey cross section.
Let dry and repeat these 4 steps on the reverse side. Connecting your plaid stripes on the side while painting.
Step Five: Finishing Touches
Let dry and then replace hanger. Add a ribbon and adorn your tree! Enjoy your DIY plaid painted ornaments.
Don’t forget! Special offer, just for you!
Beacon Adhesive has given me a promo code for 20% off! Use code WEEKENDCRAFT20 for 20% off ALL craft glues on their website. Limit one coupon per customer, per transaction. Not valid with any other coupons and orders over $300.00 and is valid until December 31st at 11:59 PM EST. Coupon only available to residents who live in the continental USA.


4 Comments