This post contains affiliate links, please read our disclosure policy.
Welcome to Day Three of #HolidayCraftParty! Holiday Decor
It’s day three of Holiday Craft Party from Simply Kelly Design and myself. We are so excited to share with you guys come some holiday decor ideas for Christmas. And don’t forget to stick around to the end for the chance to win a $25 Michaels Gift Card.
Did you miss day one and two? Check out the ornaments here and the gift tags here.
We have had such a fun time this week and we don’t want it to end. We would love for you to link up your holiday projects at the bottom of this post. We will be picking our favorites on Tuesday the 25th as well as the winner of our Michaels giveaway! Hope to see you at our after party!

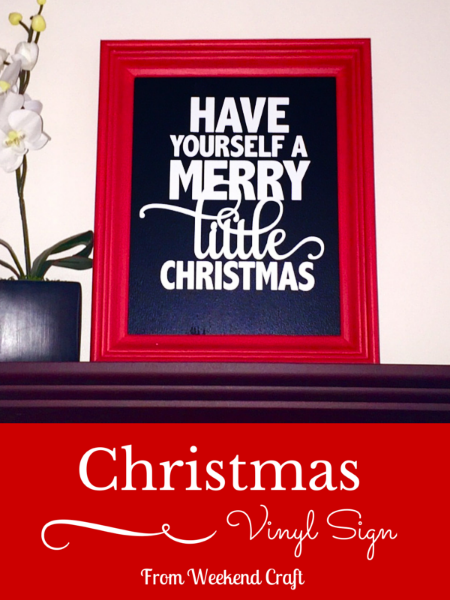
“Have yourself a merry little Christmas,
Let your heart be bright,
For now on,
our troubles will be out of sight. “
If you know me you know that I love Christmas but can’t stand Christmas music. I think it was all those years of working retail and listening to Christmas music starting at the end of October beginning of November. One of the only songs that I actually love is “Have yourself a merry little Christmas” the Frank Sinatra version.
Last year I made a chalkboard Elf sign which was a huge hit. So when I saw the “Have yourself a merry little Christmas” cut file in the Silhouette store I knew what I needed to make!
What you’ll need:
• Frame
• Cabinet Paint Roller
• Chalkboard Paint
• Paint Brush
• Paint
• Silhouette
• White Vinyl
• Hook tool
• Transfer Paper
• Scraper
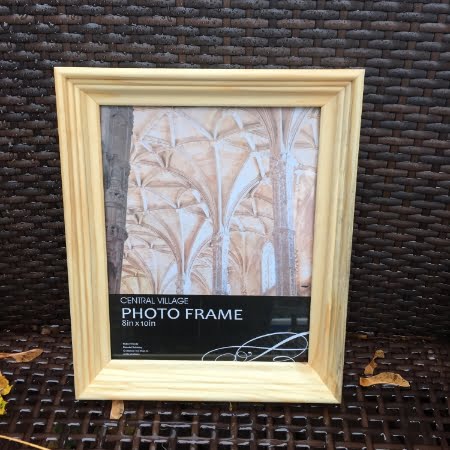
I make these chalkboard signs a couple times a year as gifts and let me tell you it is hard to find a solid wood frames. So many frames out there are now plastic. So when I see a few (for a deal)I tend to buy a couple (or eleven).
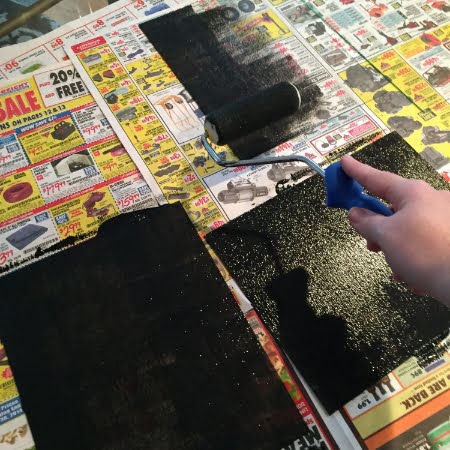
Start by taking the glass out of the frame. This is going to be your chalkboard background. Lay down a drop cloth or newspaper and place the glass on it. Next you want to pour chalkboard paint into the rolling pan and get your roller saturated. Now your ready to roll the paint onto the glass evenly. To get the desired effect it will take about three coats. Let the chalkboard paint fully dry between each coat.
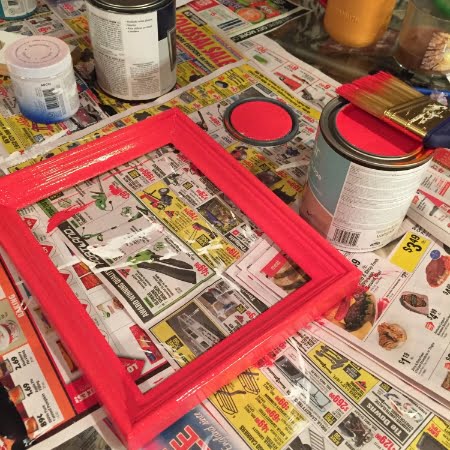
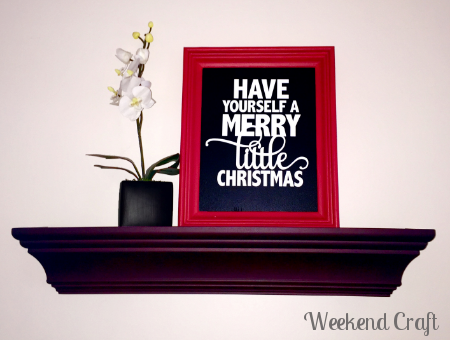
Paint two coats on the frame. I chose red (I swear its red not pink). Red will stand out against the black and the whit of the chalkboard and vinyl lettering.
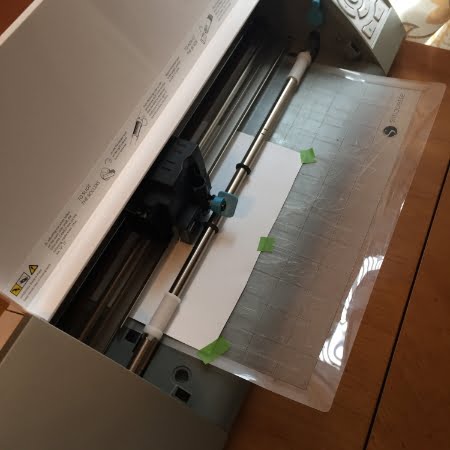
Once you purchase the cut file size it a little bit smaller than your frame. In this instance my frame is 8×10. Once you have it sized set the cut setting to vinyl and sit back while your machine works its magic.
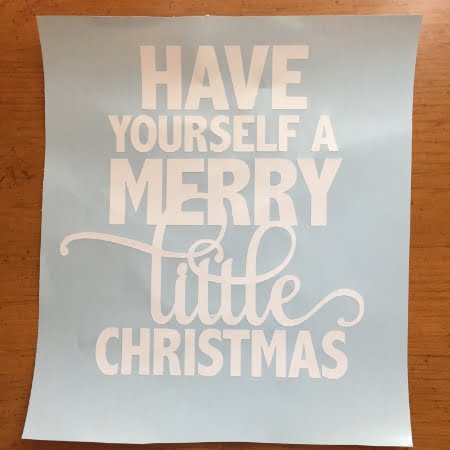
Once your design is cut weed out the background. The hook tool is going to be your best friend.
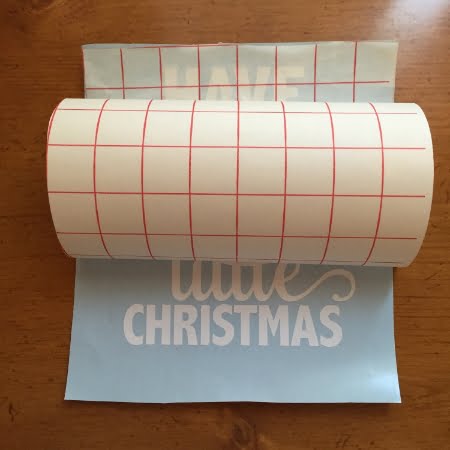
Cut transfer paper to size and place it over the vinyl using the scraper tool rub on the transfer paper and peel back.
Place on the frame. You may want to use a ruler or measuring tape to make sure the vinyl lettering is straight. Once you have it straight use the scrapper tool to rub the vinyl into place. Peel back the transfer paper keeping it tight and low. Go very slow and make sure the vinyl is taking to the chalkboard.
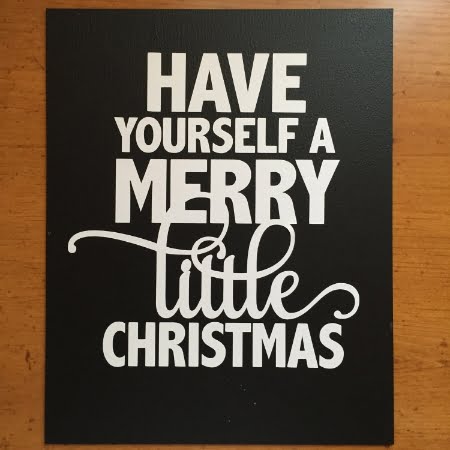
How cute is this? There is just something about white vinyl and a fun saying on a chalkboard sign. This sign is sitting pretty up on my shelf in my living room basking in the glow of my Christmas tree (and yes my Christmas tree is up before Thanksgiving ::gasp:: ).
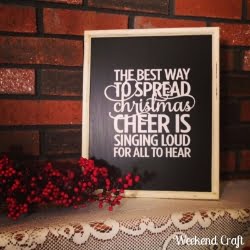
Make sure you check out Simply Kelly Designs Christmas Glass Block.
We have had such a fun time this week and we don’t want it to end. We would love for you to link up your holiday projects you’ve been working on. We will be picking our favorites on Tuesday the 25th as well as the winner of our Michaels giveaway! Hope to see you at our after party!
Some links in this post are affiliate links. If you do purchase from these links I receive a small percentage which allows me to put it towards future projects to continue provide quality content to Weekend Craft readers.


Such a fun party, loving all the craft inspiration!
I really, really need to buy a silhouette! And thanks for hosting the link party!!
I am glad that we finally got to team up Michelle! Love your chalkboard sign. I think I need to make some. 🙂
Michelle, Of course I would buy more DIY craft supplies for blogging fun! 🙂 Thank you for the opportunity, Karen Marie D&LP
Thanks for hosting Michelle – I love your sign!
Thanks Michelle! So many creative posts. Thanks for including me!
Lots of cute ornaments here. I haven’t even started my Christmas crafts yet. I would probably buy some ornament making supplies with the gc.
I love that you buy a couple (or eleven)!!! I do the same!! I just love this chalkboard frame! Love the inspiration I find here!!
Is the chalkboard paint more cost effective than the chalkboard vinyl?