This post contains affiliate links, please read our disclosure policy.
This is a sponsored conversation written by me on behalf of Cricut. The opinions and text are all mine.
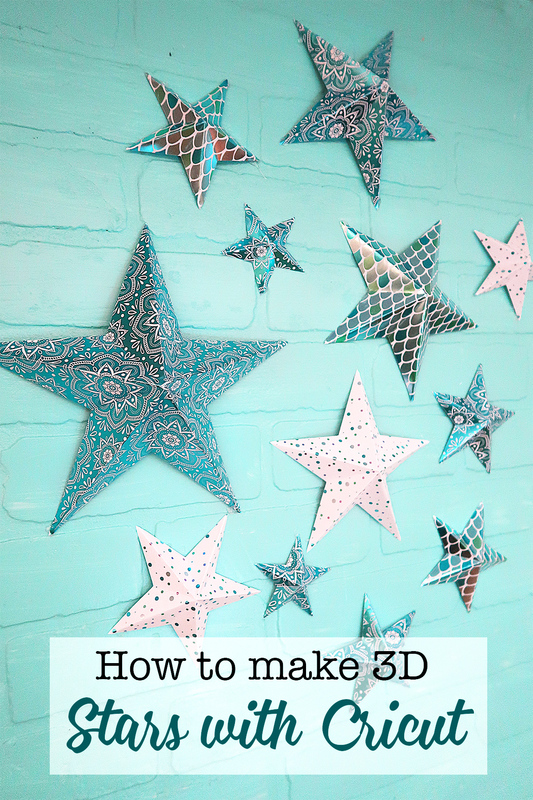
Make 3D paper stars with your Cricut Maker and scoring wheel. Perfect diy wall art for your craftroom.
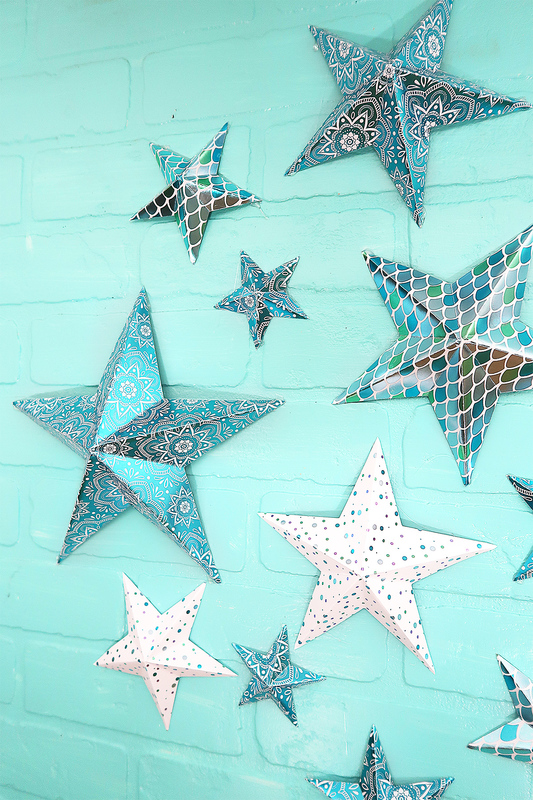
When you think of paper crafts often time you think of flat creations, such as cards. Today I want to show you that you can make 3 dimensional sculptural pieces with your Cricut Maker using the scoring tool. In my craft room I have some fun and colorful backdrops that I wanted to use to make the space seem more fun and whimsical. I decided to make 3D paper stars.
Now your Cricut is great to cut but what I was really excited about with the Cricut maker was the addition of the scoring wheel. Learn more about the scoring wheel here.

What’s a scoring wheel?
The scoring wheel is part of the Cricut Maker’s adaptive tool system that allows you to switch out tools to score, deep cut, cut fabric and more. The scoring wheel is great for adding score or fold lines to be able to have sharp and crisp folds.
What can I make with the scoring wheel?
- Boxes
- 3D Structures
- Wall Decor
- Cards
- Gift Tags
- Jewelry
- Party Decor
Let’s make some 3D Paper stars with your Cricut Maker.
This post contains affiliate links
What you’ll need

Design
Open up the design space file here. Now if you have never created your own designs before this was really simple. I searched for a star shape and then I knew I had to add scoring lines. You can add scoring lines by clicking shapes, on the left tool bar, and selecting score line.
You can adjust the size of the stars in the file. If you want to change just one star make sure to select detach. Once you are done resizing select all on the page and attach. By attaching the stars together that will keep them on the same cutting mat.

Score and Cut
For the first time I used deluxe paper foil embossed. I was really impressed with the quality and patterns of this paper. I loaded my mat up with the deluxe paper.
Now you are going to want to follow instructions in design space. Make sure to choose your material before placing in your mat. Next you will want to insert your scoring tool into side B you are now ready to load your mat and hit the blinking C. Now once the Cricut is done scoring do not unload the mat. You are going to replace the scoring wheel with the fine point blade. Then the Cricut will cut the shape out.

Weeding
Remove the excess paper and use the spatula tool to get the stars off of the mat.

Fold
If you look closely at your stars you will see the indentations. These are called score lines. These lines help guide you on where to fold. Fold your stars along these lines to give them dimension.

These stars are so fun. Using the scoring wheel gives them such dimension but the metallic and pattern of the foil paper makes them feel more heightened and chic. Now they are ready to go on the wall.
Theres a few ways you could put these on the wall. I actually just used some low temp hot glue another option would to hang them with some fishing line.
I absolutely love how these came out and I am very happy I stuck with a monochromatic color palette. Any guess to what my favorite color is?!


How many pack of the deluxe Cricut paper did you use?
would this work with the Cricut explore 2?
You could use the scoring stylus instead of the scoring tool on the explore air 2
Would you put the scoring tool into the machine itself or use it after the stars are cut?
The tool goes into the machine.
Hi
I love the look of these. I’m getting a Cricut Joy in the next few days and know it doesn’t have a scoring wheel.
Why would you suggest I use with a ruler I use to score the lines?
Thanks for all your amazing videos. I feel like a pro and I haven’t even got my machine yet.
Theres something called a bone scorer. They are usually like $6 here is one from amazon https://amzn.to/319bXK6
I think that would work for you.