This post contains affiliate links, please read our disclosure policy.
This is a sponsored conversation written by me on behalf of Cricut. The opinions and text are all mine.
How to make paper rosettes with the Cricut Maker scoring wheel.
Let’s learn how to use the Cricut Maker scoring wheel. I’ve had my Cricut Maker for awhile but now I have all of the adaptive tool attachments. So today I wanted to share with you how the scoring wheel works by making paper rosettes.
What’s a scoring wheel?
The scoring wheel is part of the Cricut Maker’s adaptive tool system that allows you to switch out tools to score, deep cut, cut fabric and more. The scoring wheel is great for adding score or fold lines to be able to have sharp and crisp folds.
What can I make with the scoring wheel?
- Boxes
- 3D Structures
- Wall Decor
- Cards
- Gift Tags
- Jewelry
- Party Decor
What’s the difference between the scoring stylus and the scoring wheel?
The scoring stylus can be used on the Cricut Explores and Cricut Maker. The scoring wheel can only be used on the Cricut Maker. It applies 10x more pressure than the stylus which creates more crisp lines. The scoring wheel comes with two different housing which allows you to create one or two scoring lines.
You will want to use one scoring line for things like cardstock and two scoring lines for thicker materials that tend to crack.
For an avid crafter with a Cricut Maker the scoring wheel is definitely the way to go.
How to make paper rosettes with Cricut Maker and scoring wheel
So, let’s dive right into a project with the scoring wheel. I decided I wanted to make something that was more sculptural for the walls of my craft room. I have made rosettes in the past but they were very time consuming to fold by hand and not always perfect.
I opened up design space and was pleased to find the Cricut had an array of rosettes available as part of Cricut Access.
What you’ll need
- Cricut Maker
- Scoring Wheel
- Cardstock
- Hot Glue Gun
- Design Space Rosette File
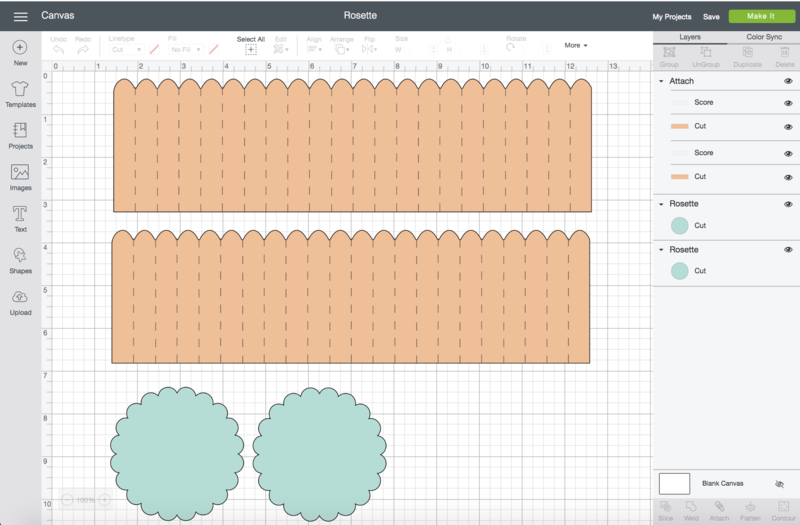
Once you have the rosettes loaded in design space you will notice on the right-hand side that the long orange piece is both set to score and cut. When you go to make this project, the scalloped pieces will be on a separate mat.
Now we are ready to make our project. Go ahead and select make it and be sure to select what kind of material you will be using. My cardstock was 80lbs.
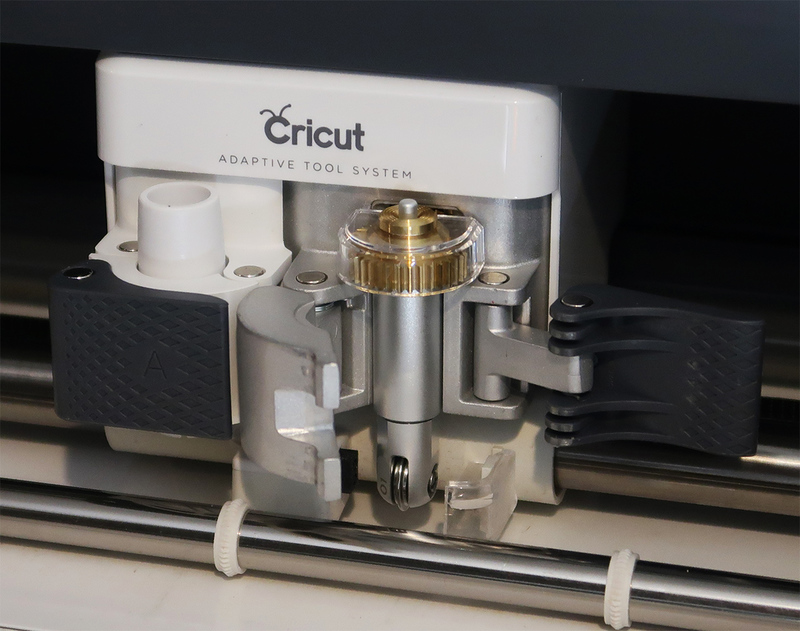
Now before I loaded my mat I opened the B (right) side of the adaptive tool system and removed the fine point blade and placed the single scoring wheel into the system. You want to make sure the gear is facing in towards the machine and the plastic casing is facing out.
Now you are ready to load your mat. You will find that you score first and then cut.
Once the scoring is finished you leave the mat loaded and switch the scoring wheel for the fine point blade.
Scoring lines are surprisingly hard to photograph but they are there if you look closely. I was impressed with how crisp and clean they were.
Insert your mat with complimentary paper to cut your scalloped circle.
As the scalloped pieces are cutting start folding the paper on the scoring lines using an accordion fold.
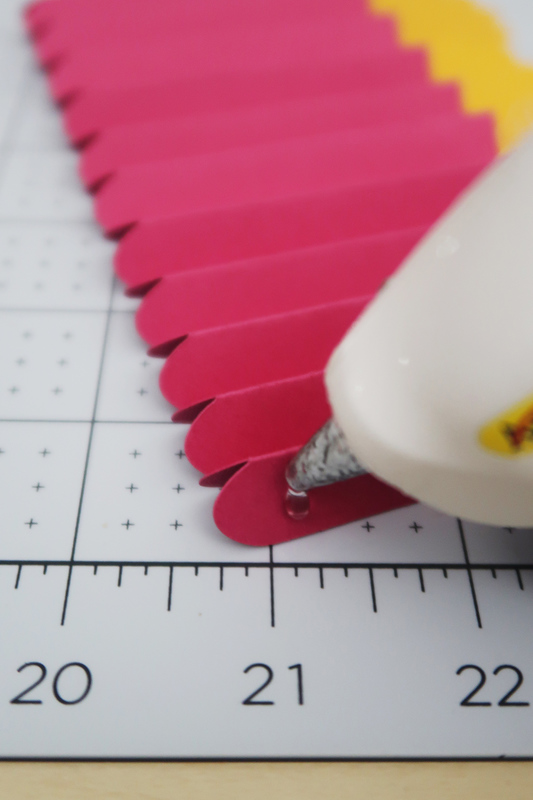
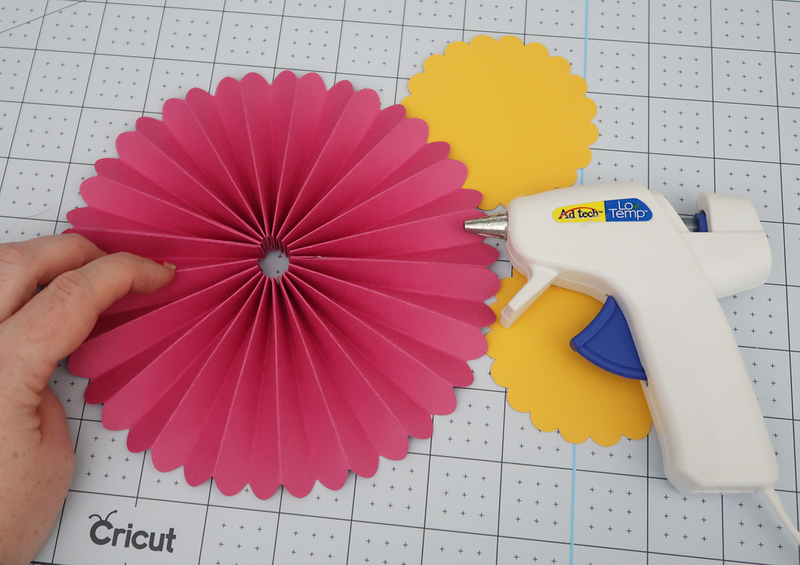
Use your hot glue gun to attach the two folded pieces.
Take the remaining two sides and glue them together completing the circle or fan.
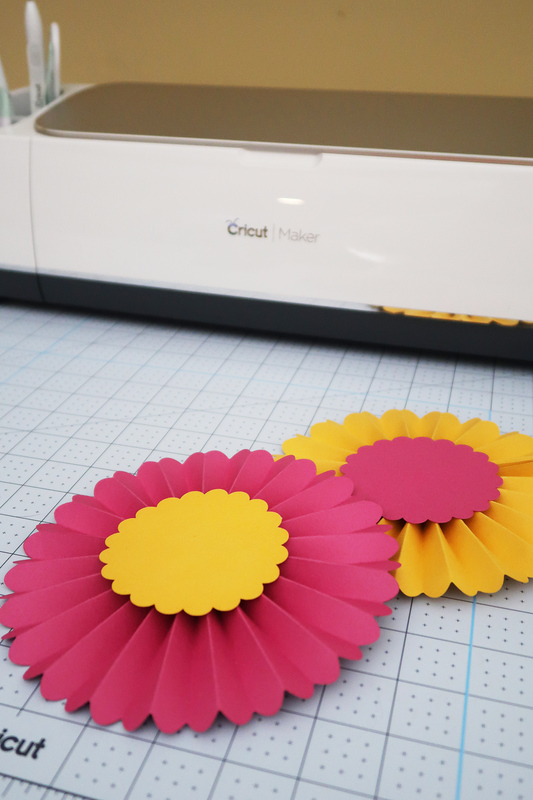
Now this fan will not stay in place without putting the scalloped circle on to the middle of the fan on both the front and back. Hot glue the pieces on to the fan.
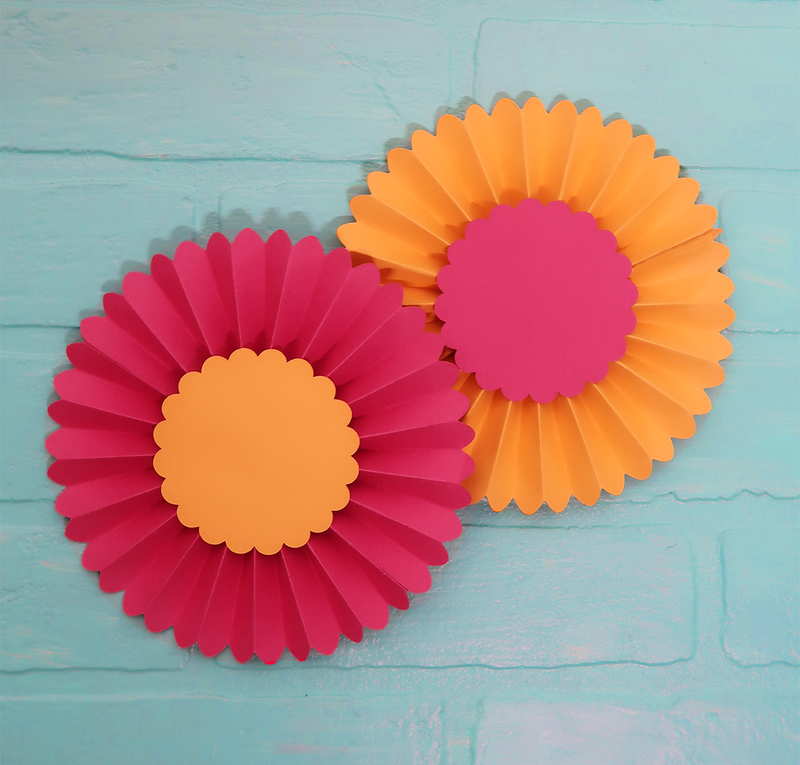
I cannot believe how long it used to take me to make these by hand. I would have no problem doing a whole wall now. They came out so professional looking.
Now that you learned the scoring wheel have you tried my favorite Cricut Maker tool, the knife blade? If not check out how I used my Knife blade to cut chipboard here.
Looking for more Cricut projects? Check them out here.







I love your rosettes! I have so many ideas of where to use them. I can’t believe how easy they are to make with the Cricut! Thanks for the help. 🙂
So easy I can’t even believe I used to make these by hand!
This is so cool! I need one.
Cricut Maker is now the most used tool in my craftroom!
What a fun tool! I do a lot of paper crafts and have always used my manually scoring tool. This looks like a time saver and it makes all the scoring even and just the right depth. I love your insight into the Maker!
Such a time saver I don’t think I’ll be using my bone scoring tool anymore.
Every time I read one of your posts, it makes me really want the Maker! You can do so many cool things with it! I wonder…does it score leather?
Thanks for the inspiration Michelle!
What a sweet message! Thanks for always reading. It does score leather…. Oh the possibilities 🙂
Oh, the possibilities!! I will be hosting at least one bridal shower this summer and this scoring wheel will come in very handy!!
I see alot of rosettes in your future!