This post contains affiliate links, please read our disclosure policy.
Table of Contents
- How to use Cricut watercolor cards and watercolor makers with your Cricut Maker, Explore or Joy machine. Get a watercolor effect with your Cricut.
- Cricut Watercolor Cards
- How use Cricut watercolor markers
- Let’s make a watercolor card using the Cricut watercolor markers.
- Design your watercolor card in Cricut Design Space
- Cricut Card Mat
- Load Cricut Watercolor Markers
- Cricut Watercolor Brush
- Watercolor Cards FAQ
How to use Cricut watercolor cards and watercolor makers with your Cricut Maker, Explore or Joy machine. Get a watercolor effect with your Cricut.
This post is sponsored for Cricut but all opinions are my own. This post contains affiliate links.
Cricut has come out with watercolor cards and watercolor markers! They are so good I had to share. Cricut machines are known for cutting but did you also know that they can draw? There is a line of Cricut pens, markers and infusible ink pens. And now there is a line of watercolor markers and cards.
Watercolor has always been one of my favorite paint mediums and card making is actually how I got into crafting as an adult. It’s my two favorite crafts combined.
Want to learn more about Cricut materials check out what materials you can use with your Cricut.
Cricut Watercolor Cards
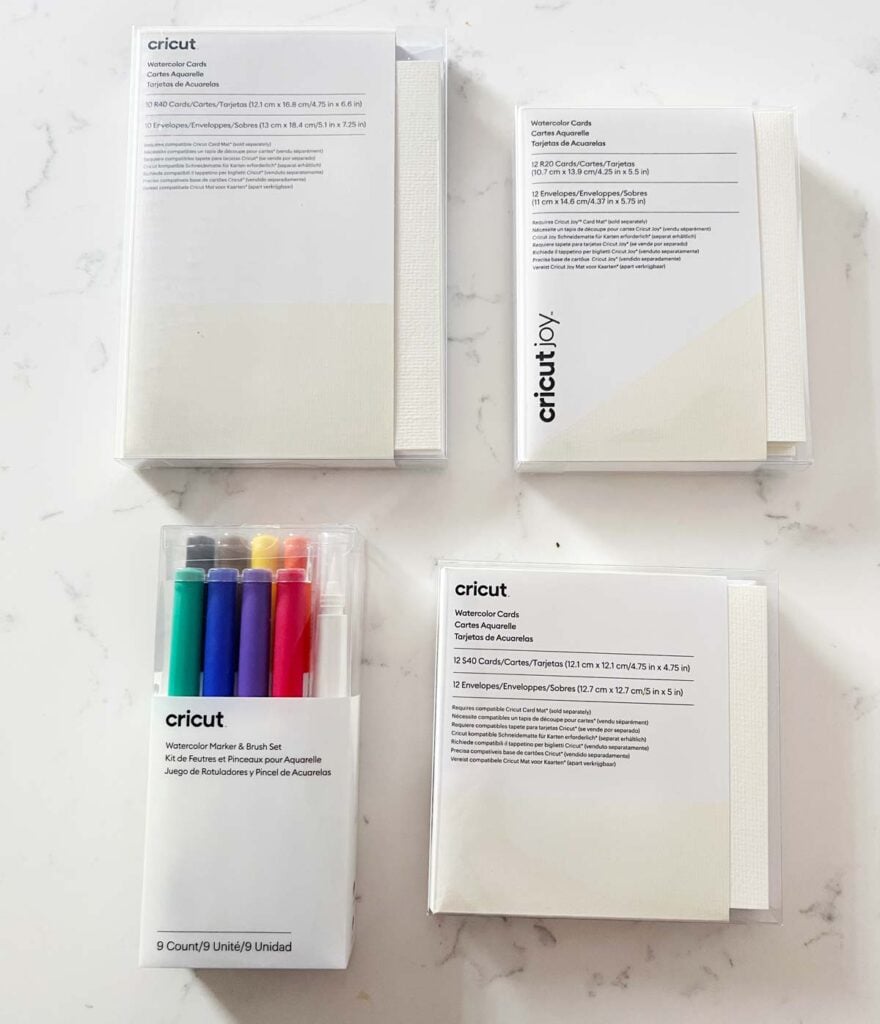
The Cricut Watercolor cards are made with cold-pressed paper and are 140 lb watercolor paper. Use them with the Cricut watercolor markers and brush set to turn a card into a work of art. The watercolor cards are compatible with Cricut card mat on the Maker, Explore and Joy machines.
What sizes are available in the Watercolor Cards?
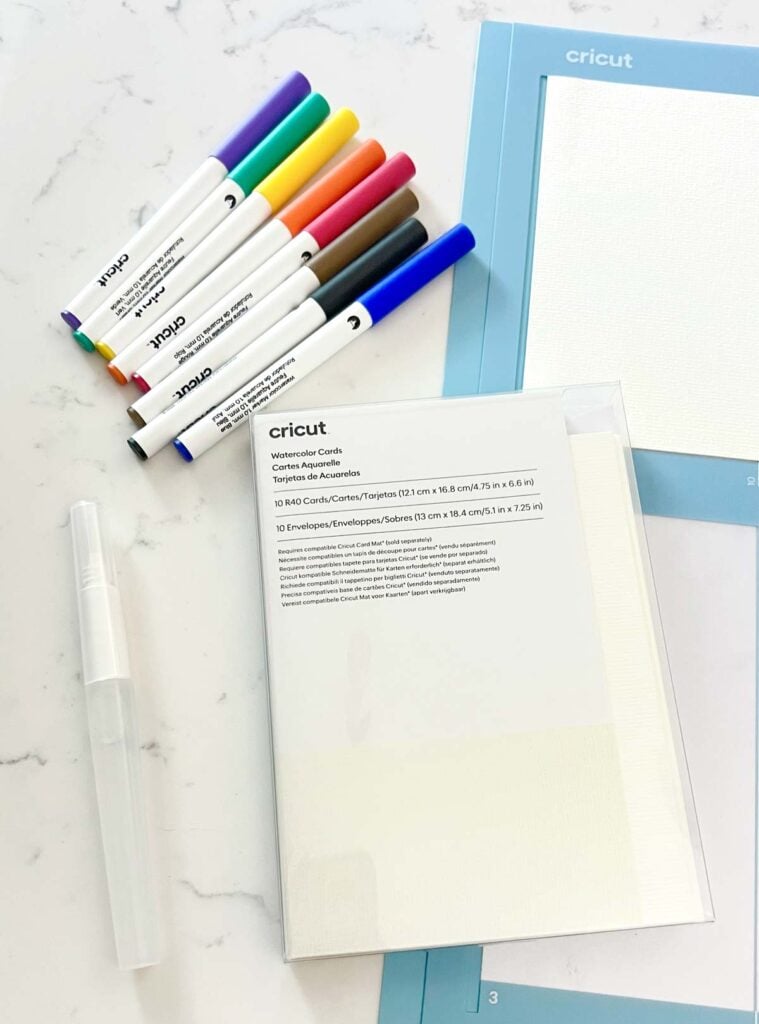
The Watercolor Cards are available in R20 (4.25in x 5.5in) for Cricut Joy using the Cricut Joy Card Mat. The R20 cards can also be used on Explore and Maker machines using the Cricut Card Mat 2×2. Additionally, R40 (4.75in x 6.625in) and S40 (4.75in x 4.75in) cards are available for Explore and Maker machines.
How use Cricut watercolor markers
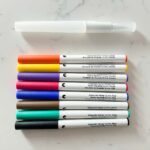
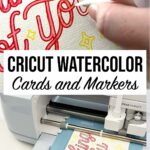
The Cricut watercolor markers are very similar to the Cricut pens and markers. To use the watercolor markers open auxiliary clamp A on your Maker or Explore. Remove the cap from the marker and insert it into clamp A. Push down on the watercolor marker until it clicks and close the clamp.
Note: if your marker is not drawing check to make sure it is “clicked” in. If you have a Cricut Joy make sure you buy the Cricut Joy watercolor markers and the markers insert into the same clamp as the blade.
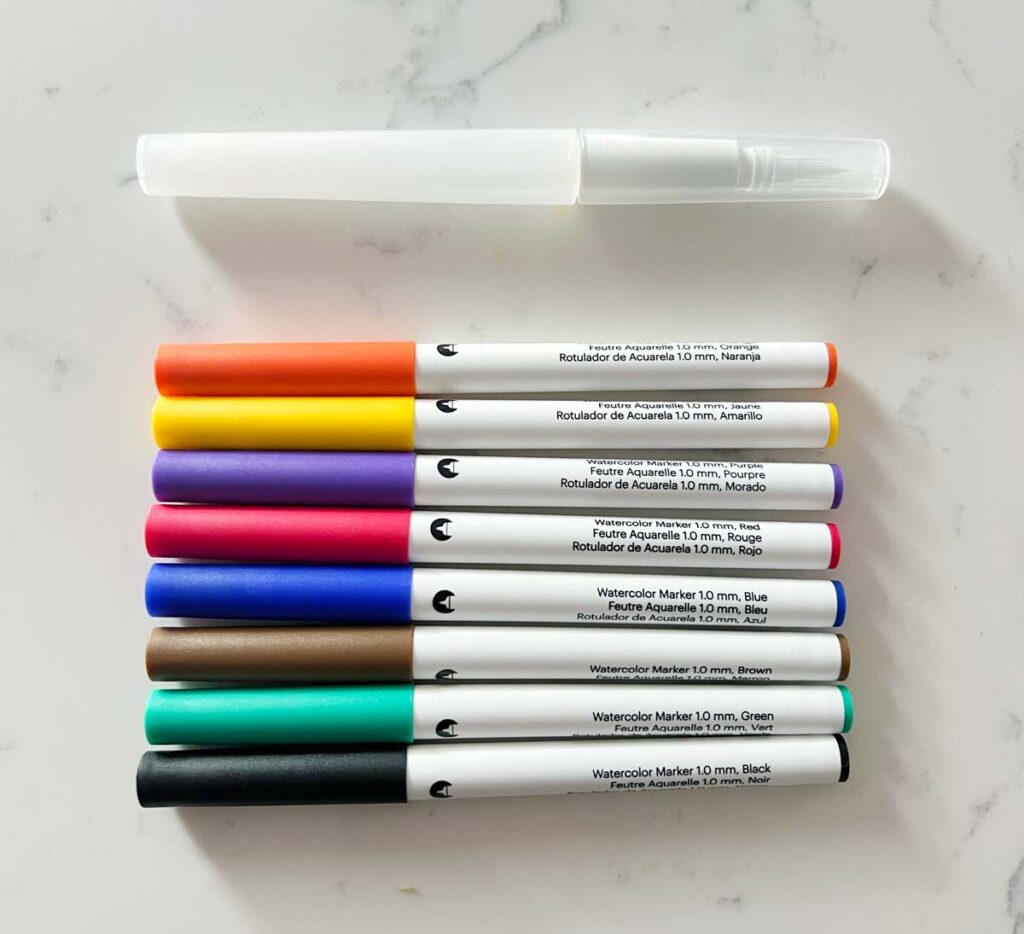
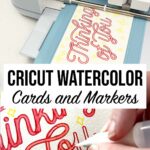
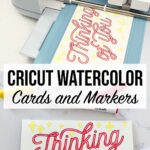
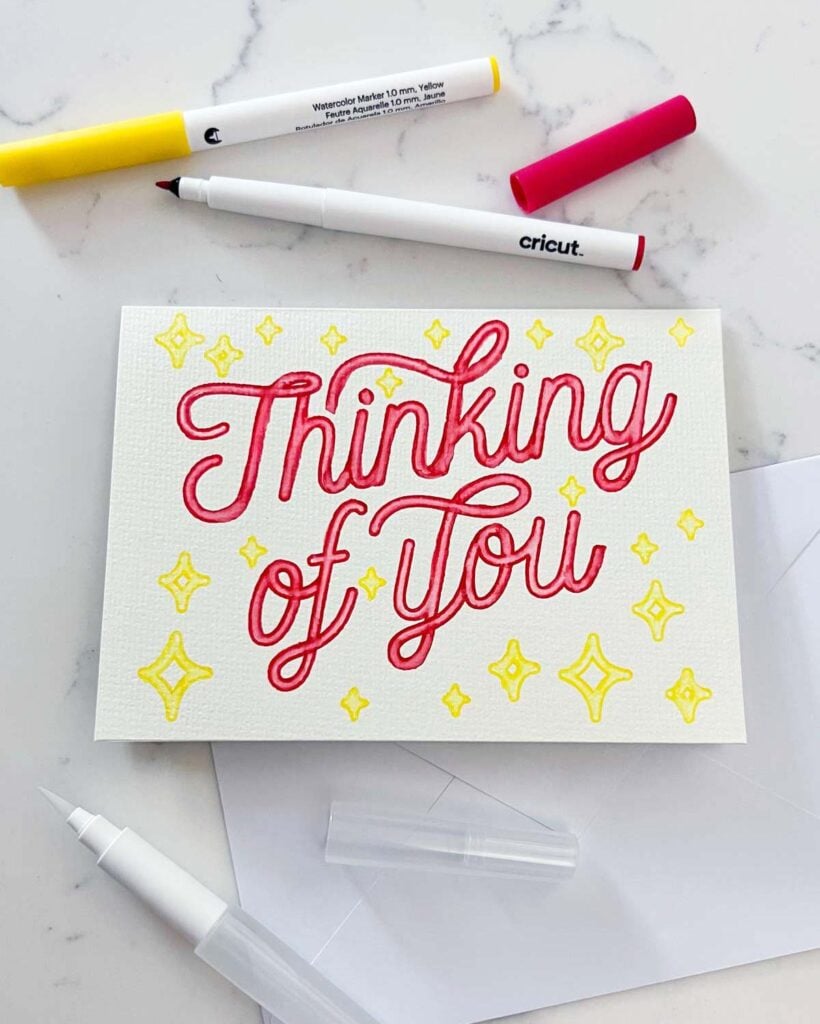
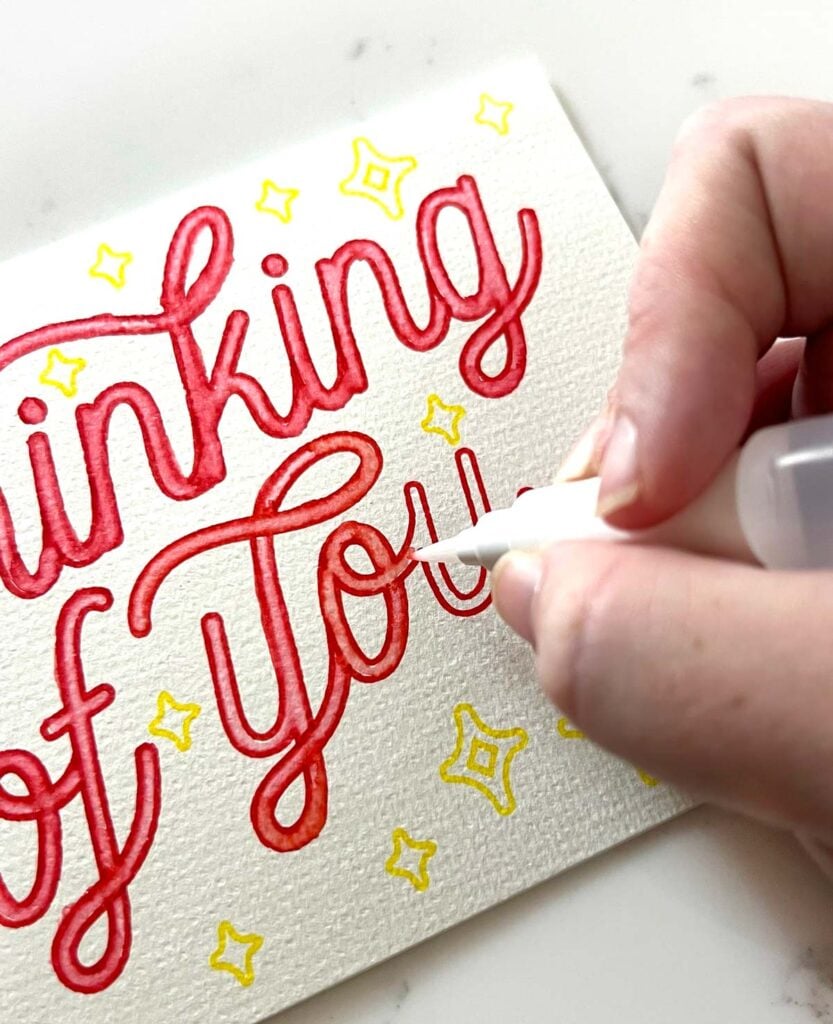
The watercolor markers will draw an outline of your design. The marker set will come with a watercolor brush. Unscrew the top of the brush and fill with water. On a paper towel or scrap piece of paper brush a few times until the brush tip becomes wet. Now you can start to paint on your watercolor card.
I liked using this technique with text specifically a font that could look hand lettered. Once the front is painted with the watercolor brush it looks as if you could have lettered it yourself. Next I can’t wait to try some floral designs.
Let’s make a watercolor card using the Cricut watercolor markers.
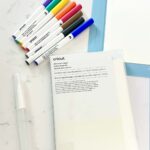
Supply List
- Cricut Maker, Cricut Explore or Cricut Joy
- Card Mat
- Cricut Watercolor Cards S40
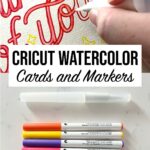
- Cricut Watercolor Markers & Brush
- Cricut Design Space FileCricut Watercolor Markers & Brush
Design your watercolor card in Cricut Design Space
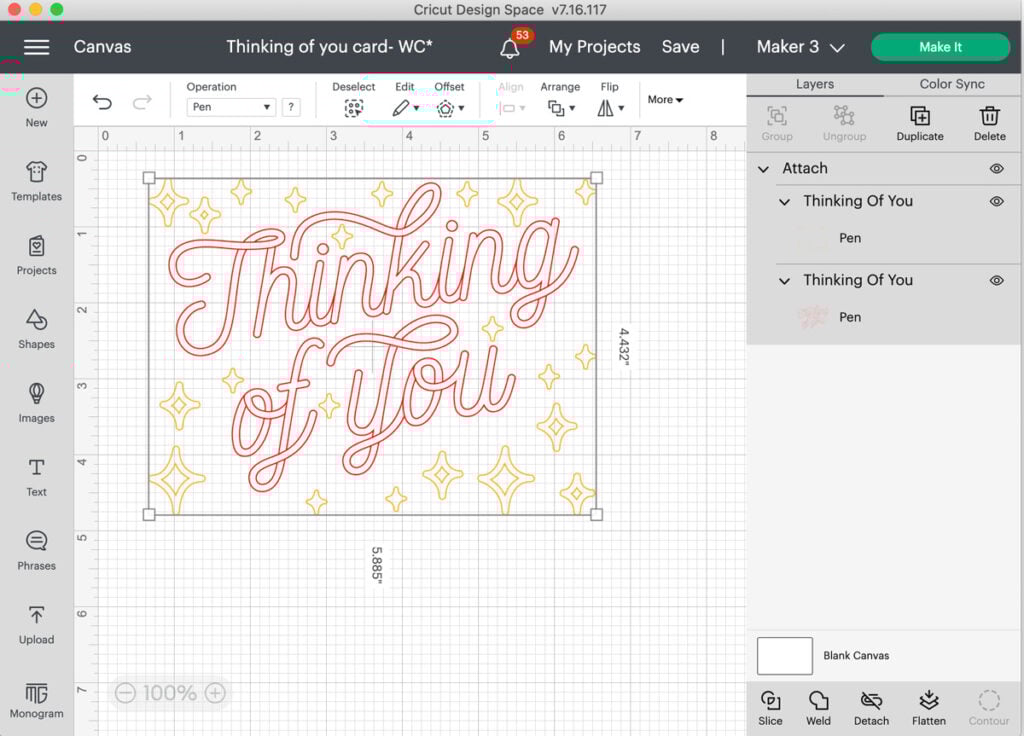
First you will want to either design your card in Cricut Design Space or pick a card from the ready-to-make projects. Today I am going to be designing my own. I used images from design space and filtered them by operation type > draw only when I was searching.
If you are designing your own card make sure to coordinate the colors with the markers you are going to use. By selecting these colors in design space your machine will prompt you to switch pen colors.
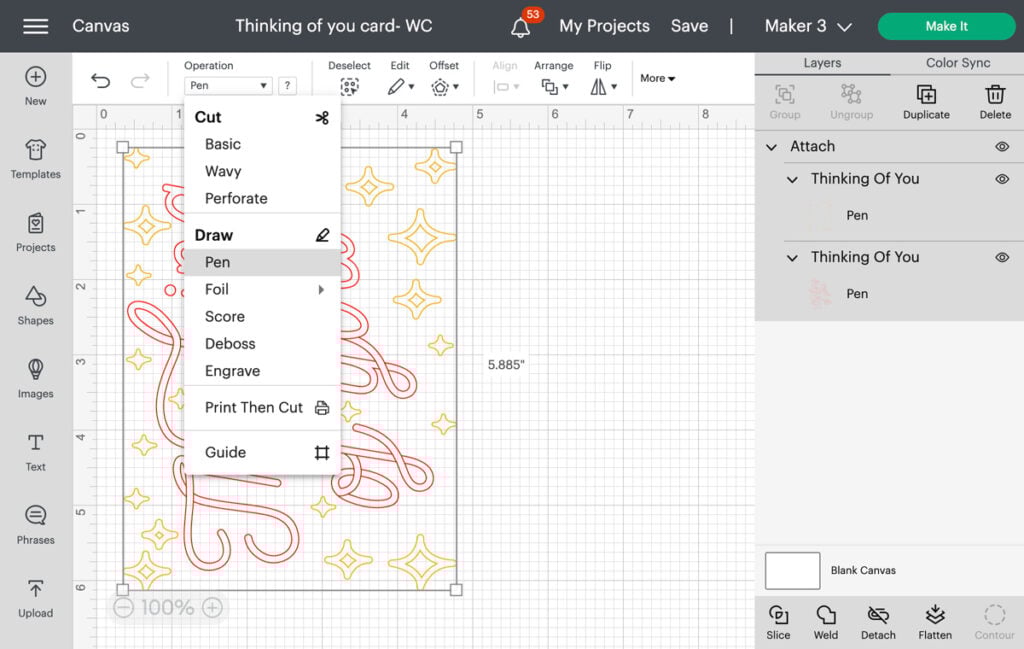
You will want to make sure that your design is set to draw > pen. This can be found on the top navigation bar under operation.
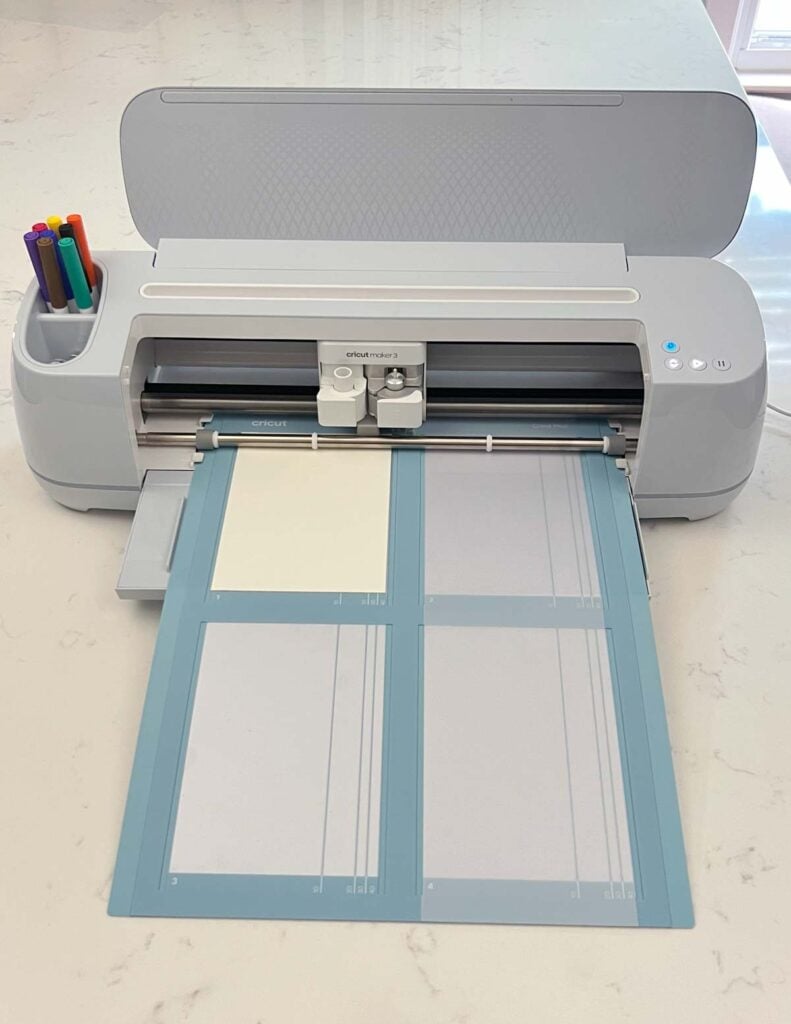
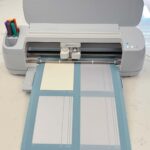
Cricut Card Mat
The Cricut card mat is a double layered mat that allows you to insert up to 4 pre-folded cards to cut or draw with your Cricut Maker or Explore. The Cricut Joy also has a card mat that holds one card. If you are cutting with the card mat the double layer allows you to cut the front of the card without cutting through to the back of the card.
To load your watercolor card into the card mat lift the top layer and slide the inside of the card under the layer of the card mat.

Once you click make it in Cricut design space you will want to select Card Mat for pre-folded cards. On the left hand side you will be able to select your card size. Today I am using an R40 or 4.75 in x 6.625.
Select continue. Next select your material. You will want to search for watercolor cards. Place your card mat under the guides and use the arrow button to load the mat.
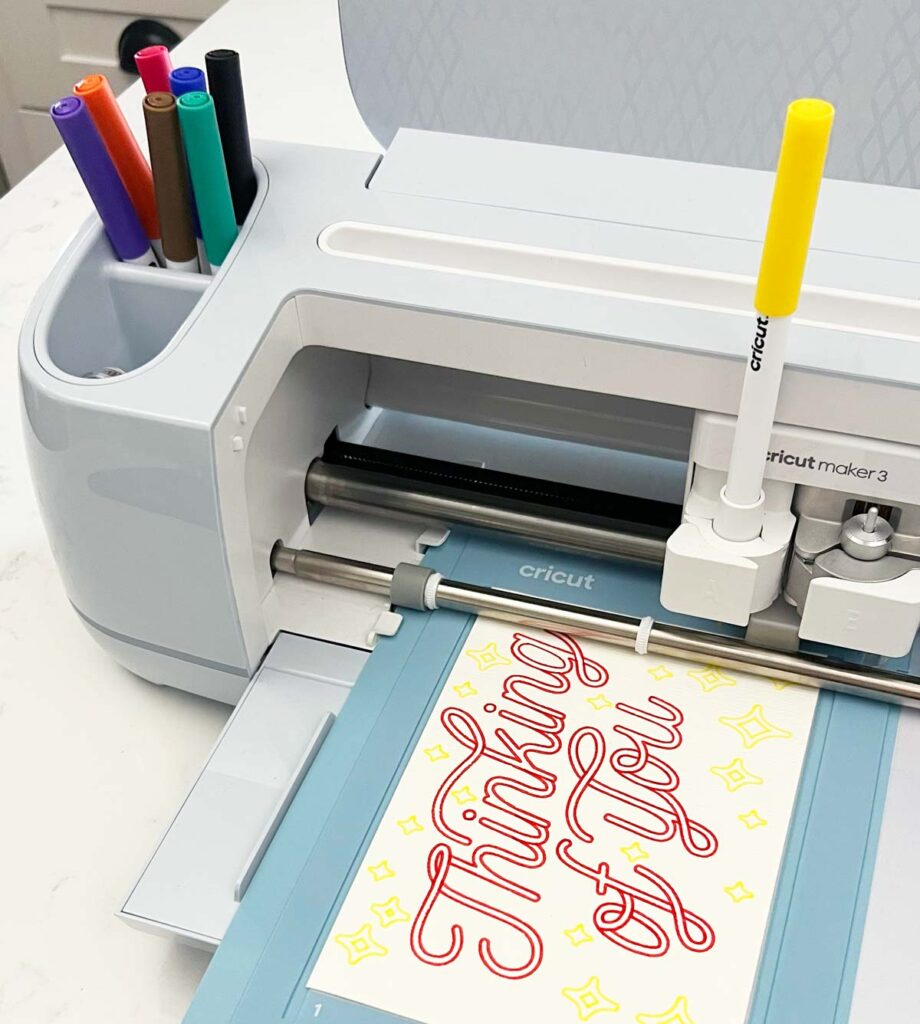
Load Cricut Watercolor Markers
Remove the cap from the watercolor marker and open the auxiliary clamp A on your Maker or Explore. Insert the marker into clamp A. Push down on the watercolor marker until it clicks and close the clamp.
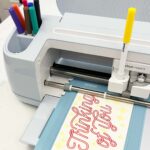
Once the card mat is loaded press the play or “c” on your Cricut. Your machine will prompt you to switch pen colors as it finishes drawing each part of your design.
Once its done drawing unload your mat and card from the card mat. DO NOT load the watercolor brush into your Cricut.
Do I need to remove my card from the mat before using the Water Brush?
Removing a wet card from the mat can cause curling, so remove the card before adding water or leave your card on the mat overnight after blending until it is dry.
Cricut Watercolor Brush
The watercolor brush is designed to be filled with water. Unscrew the top of the brush and add water. Having a water reservoir in the brush will allow you more control when you start to paint. Rather than having to dip a paint brush into water.
On a paper towel or scrap piece of paper brush a few times until the brush tip becomes wet. Now you can start to paint on your watercolor card.
A little water goes along way don’t oversaturate your design. Start with lightly using the tip of the brush and working in sections. Let each color dry to avoid smudging and clean your brush on a wet paper towel in between colors.
Do I need to use the Water Brush within a certain time after drawing?
You can use the Water Brush right away or let your cards completely dry before blending.
Overall I am very impressed with the ease of use with the watercolor markers. I cannot wait to not only make more cards but to use the watercolor markers to create artwork. With 140 lb watercolor paper and the Cricut mat it would be easy to make other artwork.
Watercolor Cards FAQ
Can I use both sides of a Watercolor Card?
Sure! Just let the card dry completely before writing on the inside.
Do I load the Water Brush into the machine?
Nope! The Water Brush is a freehand tool you can use on your Watercolor Cards once you draw with your machine and remove the Cards from your mat. The Water Brush lets you blend to your own personal preference.
How can I find images or projects for creating a Watercolor Card?
Look for “watercolor marker” in the “Search Images, Projects, and Profiles” box in Design Space. If you are on the Canvas, you may also search for “watercolor marker” in the “Projects” or “Images” tabs. Additionally, there is a filter for watercolor markers.
What type of art can I draw with Watercolor Markers?
Simple line art with multiple colors works best. Try to find artwork where lines of different colors don’t touch, or your colors may bleed when blending. You can filter images by “Draw” or “Cut + Draw.” You can also change cut lines to draw lines if you have a favorite image. Tip: in Cricut Design Space, select a 1.0 marker of the correct color to see how your line art will draw. Marker lines are wider than pen lines, so very intricate art won’t work as well.
What kind of bristles are on the Water Brush?
The Water Brush uses synthetic bristles in a round brush tip. The brush is 4.0mm at its widest but pressing lightly will result in a thinner line.
Can I use Watercolor Cards in a Cricut machine?
Yes! Use the cut setting for Watercolor Cards if you’d like to add cuts to your cards after drawing.
How can I blend close areas without bleeding into nearby sections?
Work in sections and let each section dry before moving on.