This post contains affiliate links, please read our disclosure policy.
How to make a Valentine’s Day sign using a Cricut and adhesive gold foil.

Valentine’s day is around the corner and my front door was looking a bit bare so I decided I needed to decorate it for Valentine’s day. Now a trick I have used over the years to jazz up my wreaths is to add a sign in the middle. Now I have had this pomegranate and red berries for years. In fact I bought it when I used to work at Restoration Hardware. Now the wreath was part of the Christmas collection but easily translates to Valentine’s day and this sign will help with that.
Can you believe a month has gone by? It’s another Craft and Create with Cricut, myself and a few of my favorite crafty bloggers are sharing Valentine’s Day projects made with our Cricuts. Make sure to stay until the end to see all the other projects.

This post may contain affiliate links.
Here’s what you’ll need
-
Chalk sign (this one is from Target)

Now you can choose to use this design space file or use a different font and create the file yourself in design space. Keep in mind to measure the width and height of your sign at their smallest points and consider this when laying out your design.
I have had a roll of Cricut adhesive foil for a whole now but I was not sure what I wanted to do with it. I don’t necessarily love Valentine’s Day so I wanted to do something that wasn’t pink or red so naturally gold metallic foil seemed like the way to go.
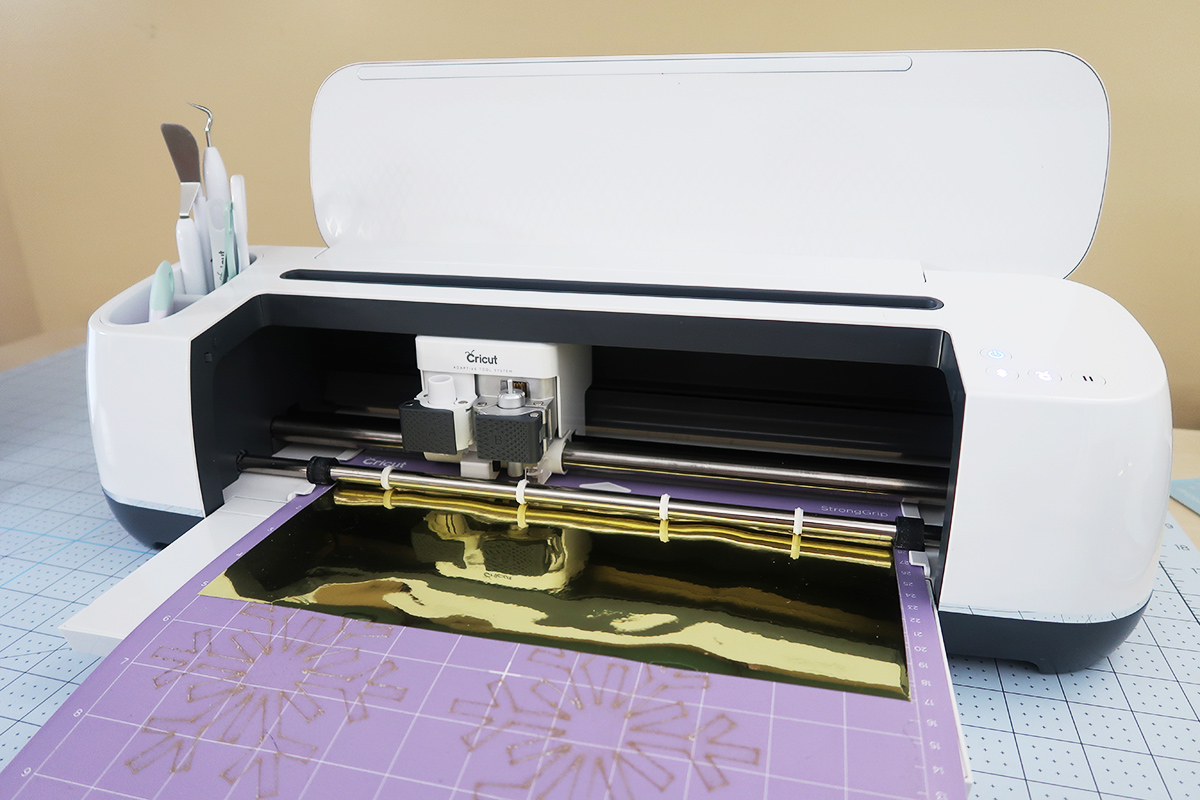
According to the instructions on the foil we should use a strong grip mat. In your design space file you are ready to “Make It,” select your machine and then the type of material you are using. (Tip: you can search for your materials instead of scrolling through them all). Once the material is selected load your mat and touch the blinking button and watch your design come to life.
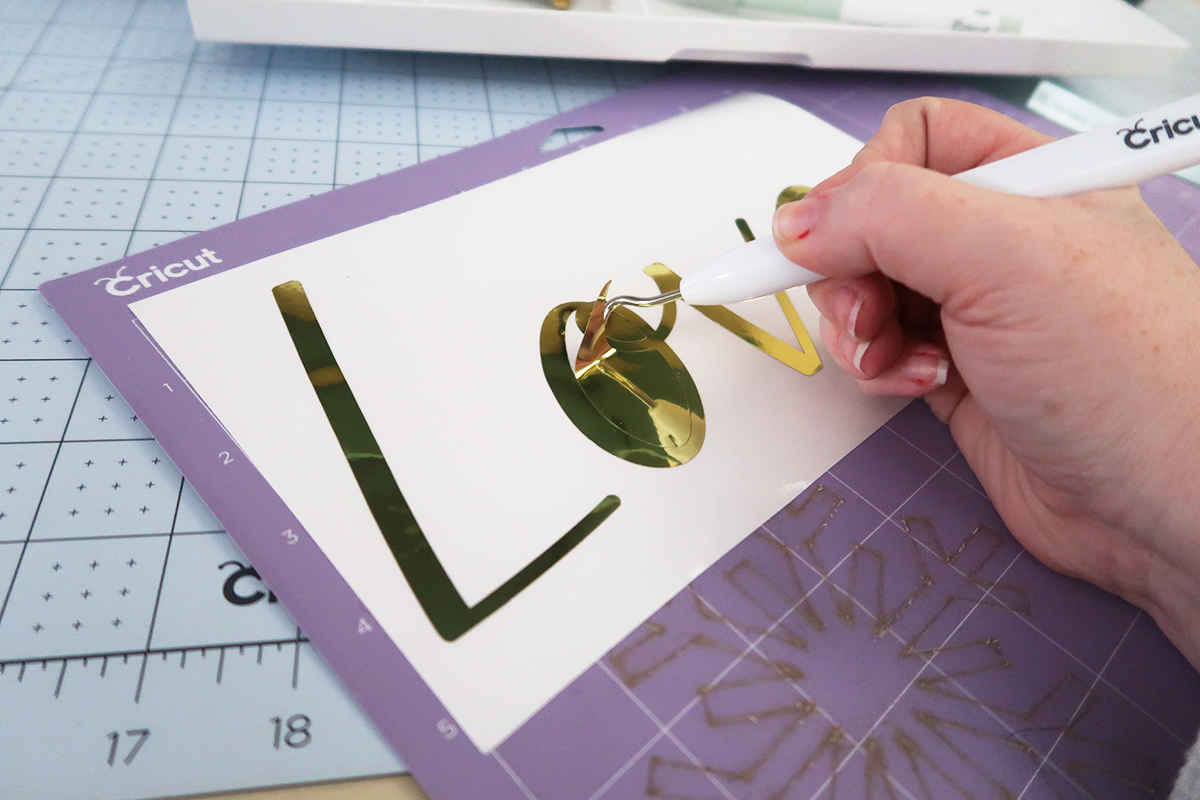
Once the Cricut is done cutting remove the mat and start to weed your excess foil. You should just be left with your lettering.
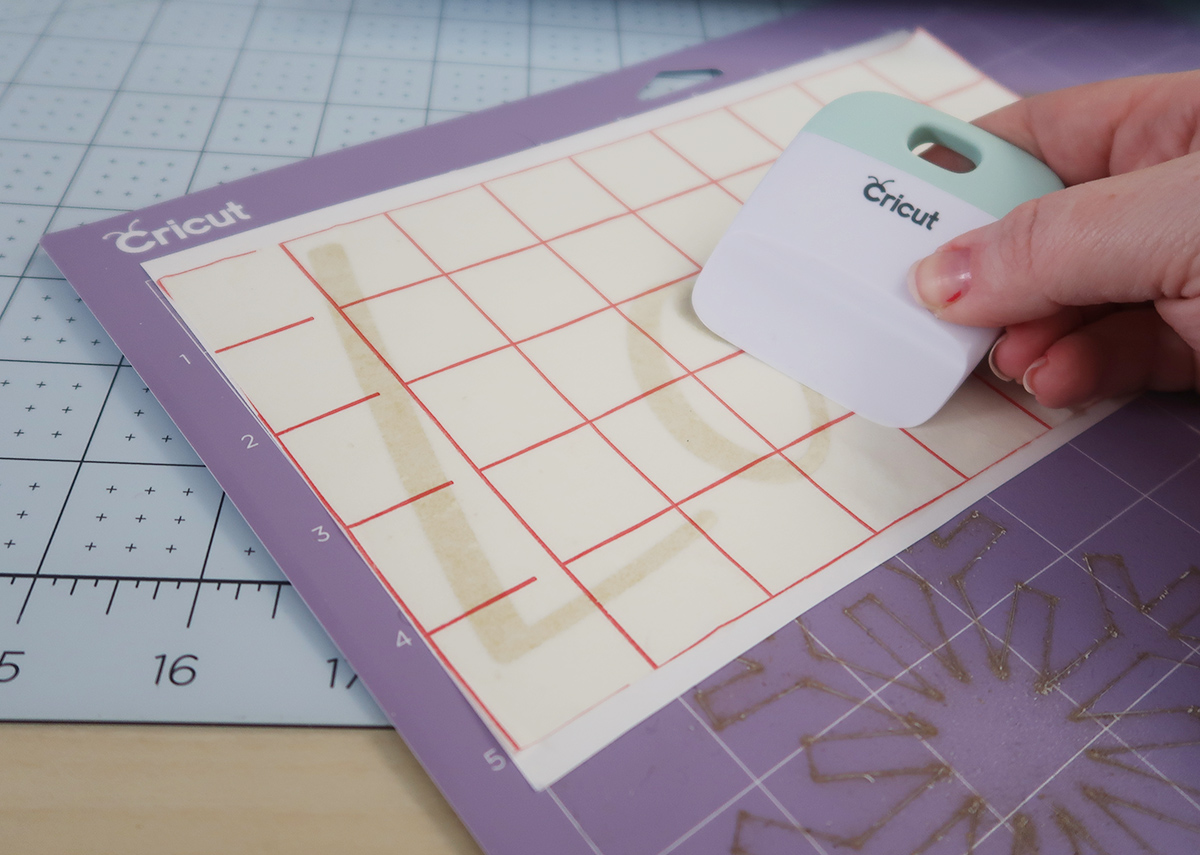
Cut a piece of transfer tape to size and using your scraper tool or credit card rub the adhesive foil on to the transfer tape. Peel back the backing the white sheet of backing.
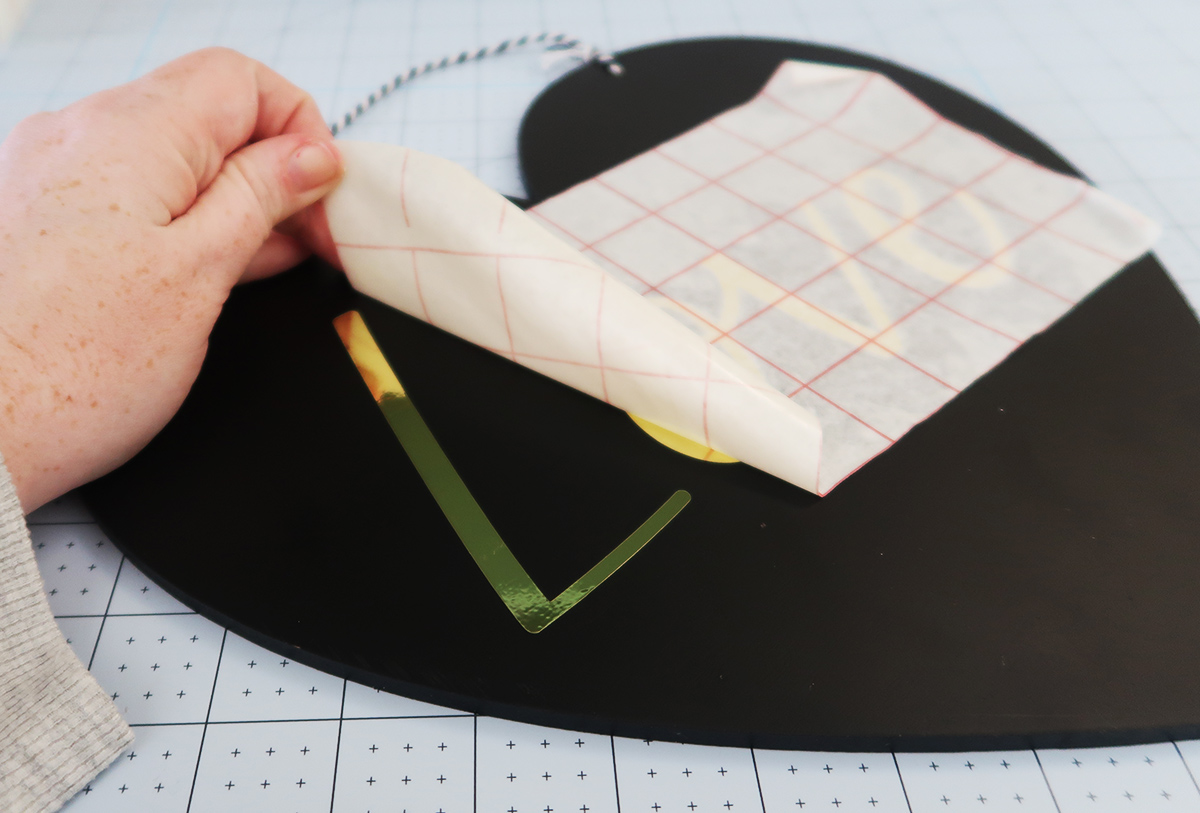
Place the design on the sign. I use gridded transfer paper this helps you lay the design straight. Once it is in the desired position use your credit card or scraper too to transfer the foil on to the sign. Peel back the transfer tape. I like to peel it back low and slow making sure the vinyl is sticking to the sign.

I absolutely love how this came out. In fact I have more than one place this would look great in. For now I am going to layer my wreath over it creating the perfect Valentine’s Day door.
It even looks great with these DIY conversation hearts mason jars. Learn how to make those here.

6 Valentine’s Day Cricut Projects

DIY Valentine’s Day Sign / Patterned Paper Heart Banner (Print Then Cut Tutorial) / Be Still My Heart T-Shirt / Star Wars Valentine’s Cards / I Love You More than Coffee / Emoji Valentine’s Day Shirt


Such a pretty way to welcome guests and I love the "bling" factor!
That looks stunning with the red wreath! Really makes the sign pop. I guess it is time to take down my Christmas wreath and make something fresh and new!
Those hearts from Target are perfect!! And how much do you love your Cricut Maker?! So jealous! Love this project<3