This post contains affiliate links, please read our disclosure policy.
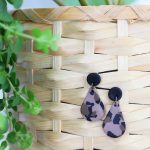
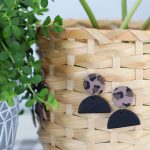
How to make leopard print polymer clay earrings. An easy tutorial on how to make a leopard print Clay slab and turn it into stunning polymer clay earrings.
Over the last year I have been loving the polymer clay jewelry trend. I’ve even spent a pretty penny on some earrings from Etsy and Instagram. I decided that I really wanted to learn how to make polymer clay earrings for myself. Coming into some more time at home why not start a new hobby and save some money while I am at it. In fact these earrings came out so great I could probably make money selling them!
What is polymer clay?
Polymer clay is a modeling clay that can be hardened by baking it. It is usually used in arts and crafts. Polymer clay remains workable until it is cured when baked. Polymer clay won’t melt when baked it will retain it’s shape. It’s available in a variety of colors and colors can easily be mixed. The most common brand for polymer clay is Sculpey.
Sculpey has a few different types of clay but today we are going to be using Sculpe Souffle. I find that it’s easy to use and has a matte finish.
Interested in starting this hobby? Check out what to buy to get started with polymer clay.

How to make clay earrings
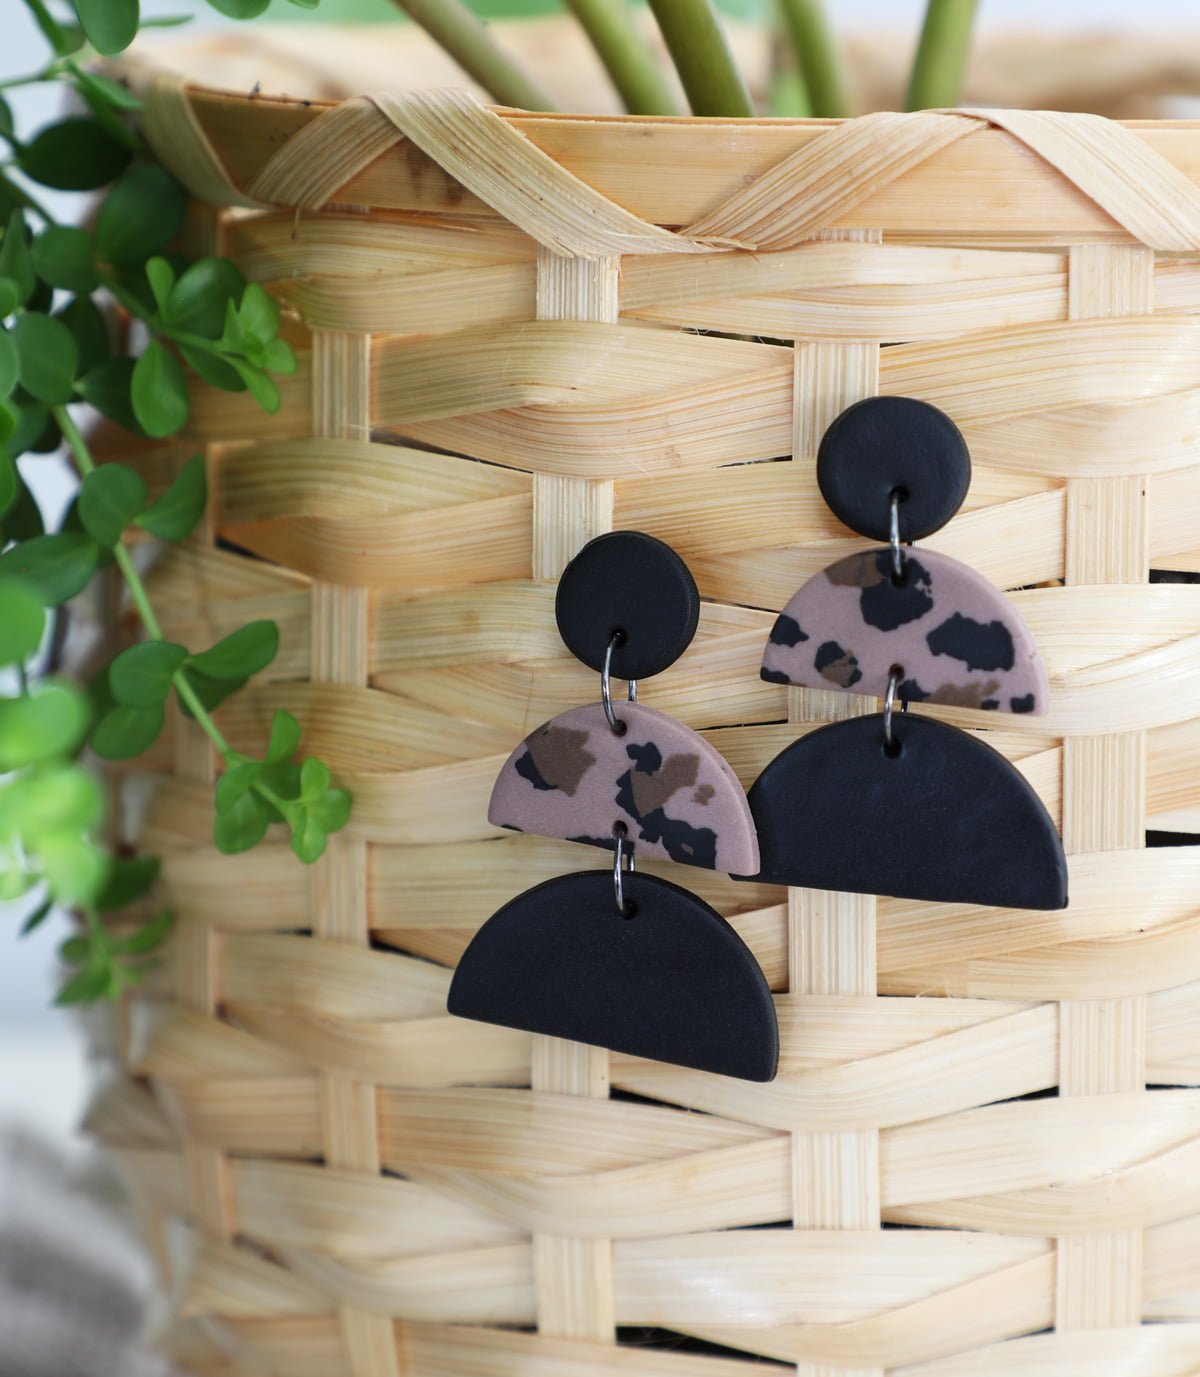
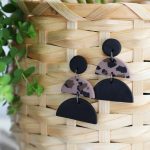
Today I want to show you how to make these leopard print polymer clay earrings. Not only will we be going over the basics on how to make clay earrings but also how to make this easy leopard print pattern on our clay slab.
Essentially the process for making polymer clay earrings is broken down into rolling your clay, cutting it, baking it and assembling your earrings. While this blog post may seem long I assure you that making these earrings were way easier than I had anticipated once I had the right supplies and technique.
This post contains affiliate links
Supply List
- Sculpey Souffle Clay
- Acrylic Roller
- Clay Press or Pasta Machine (optional)
- Glass Mat or Ceramic Tile
- Clay Blades
- Leather Punches
- Dotting Pen and other tools
- Parchment Paper or Silicone Baking Pad (optional)
- Micro Mesh Sanding Pads
- Jump Rings
- Pliers
- Earring Posts
- Loctite 60 Second Universal Glue
- Baby Wipes
Rolling Clay
To start out break off about half of a row of your polymer clay. I like to work it in my hands first kneading it. This conditions the clay making it a bit warm. You want your clay not to be cold but at about room temperature.
You are going to want your work surface to be glass, ceramic or parchment paper. Something the clay won’t stick to. I like to clean my surface with baby wipes.
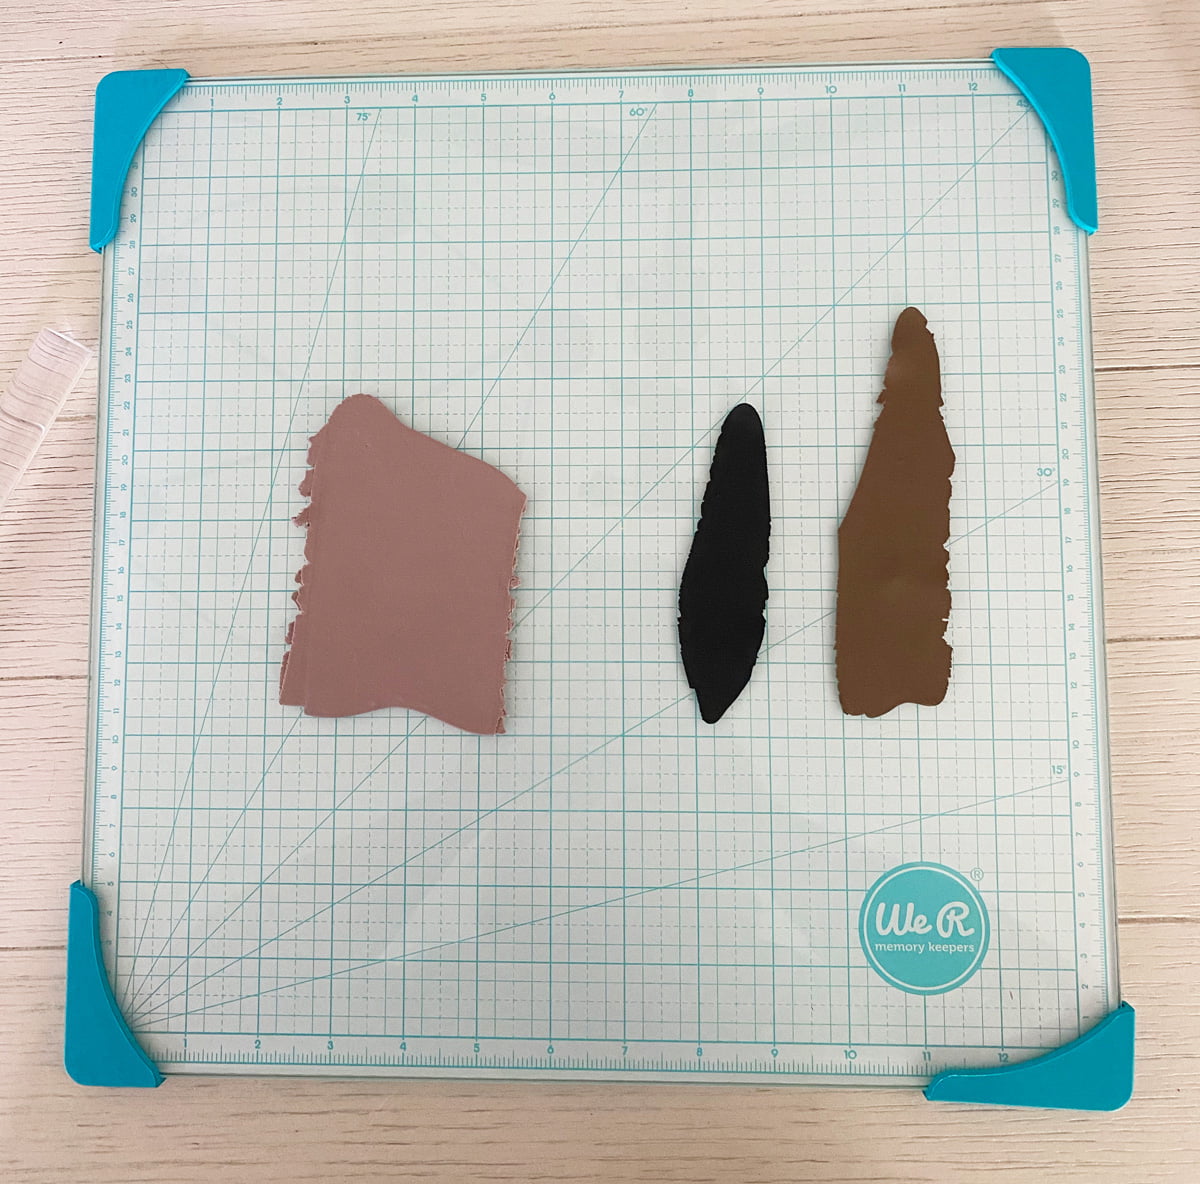
For the base of my leopard print earrings I am using the color mocha.
Now there are two ways to roll out your clay. Either with an acrylic roller or my favorite a clay press. The clay press is just like a pasta roller. For my base piece I set my clay roller to a 5. I work the clay through the roller a few times to make sure it’s conditioned. I always start with my lightest color just incase any residue is left on the rollers. I also run a baby wipe through the press in between colors.
How to make a leopard print pattern on clay
Let’s make a leopard print pattern on our base layer of clay. Sounds intimidating or seems complicated? That’s what I thought but it’s actually really easy.
Choosing colors
Pick out two colors for your spots. I selected a brown and black colored clay. I rolled these out paper thin. If you are using the clay roller it was on setting 9. Now I wanted to create an illusion of depth in the leopard print so I am going to use my darkest color first. In this case black.
Making leopard spots
All you are going to do is rip off small pieces of your thin clay. Rip it with your fingers instead of a blade or a knife. This will give you more of an organic shape. Repeat this over and over filling in your clay slab.
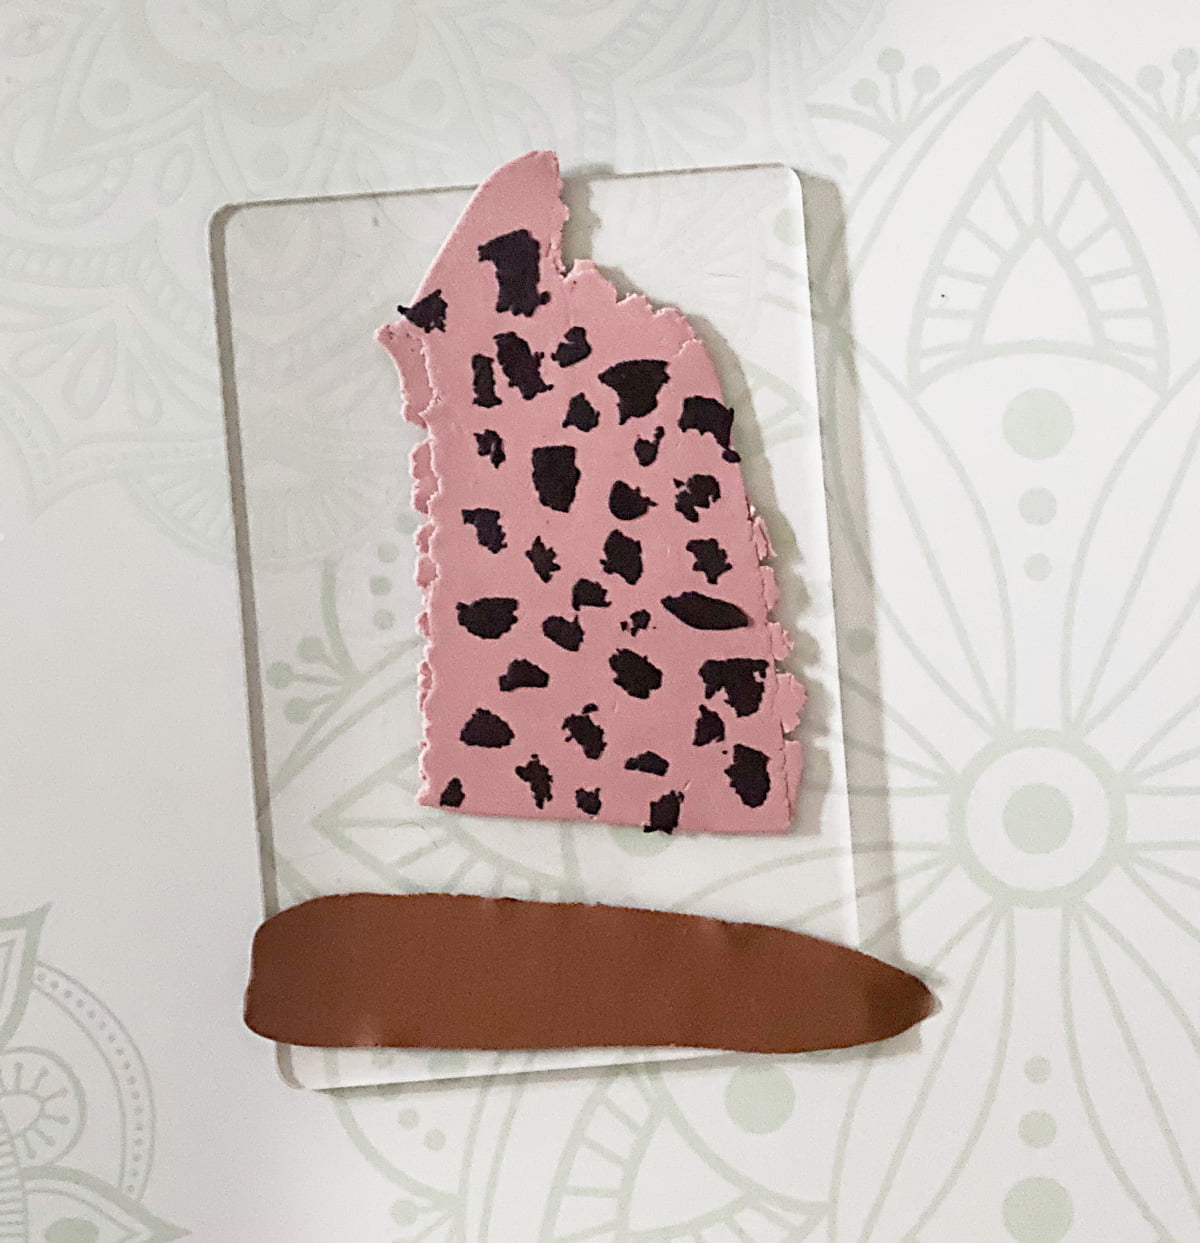
Next we are going to add our second color. I rip these pieces slightly smaller than the black pieces. I like to over lap them on the black spots letting a portion layer over the base layer.
As you’re laying your second color don’t be afraid to fill in some gaps with black. Remember your earring punches are small so you want condensed areas of the pattern.
Flattening your layers
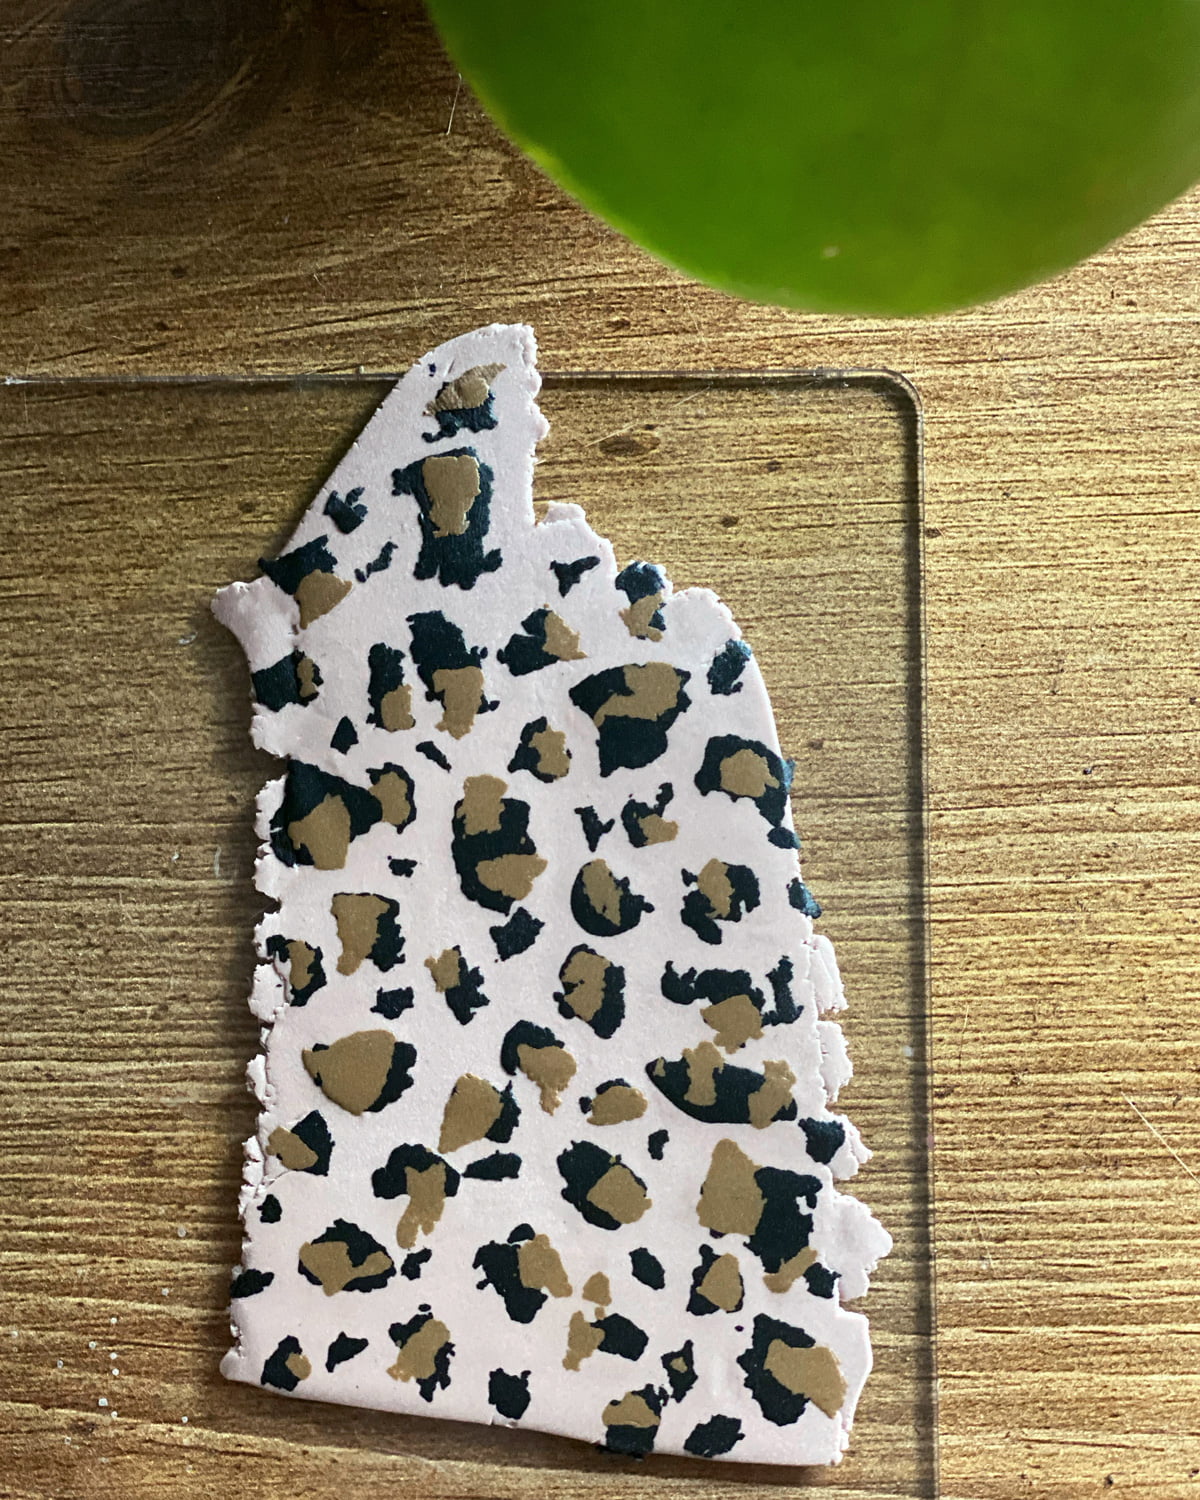
Now that you have created your pattern you will noticed it is raised from the base layer of clay. Let’s make it more even. Grab your acrylic roller. Gently roll all the layers of the clay. I start off really lightly and repeat. Increasing pressure if needed.
Now wasn’t that easier than it looked? You have a leopard print clay slab. You can use this same method to make all different patterns.
Cutting earring shapes
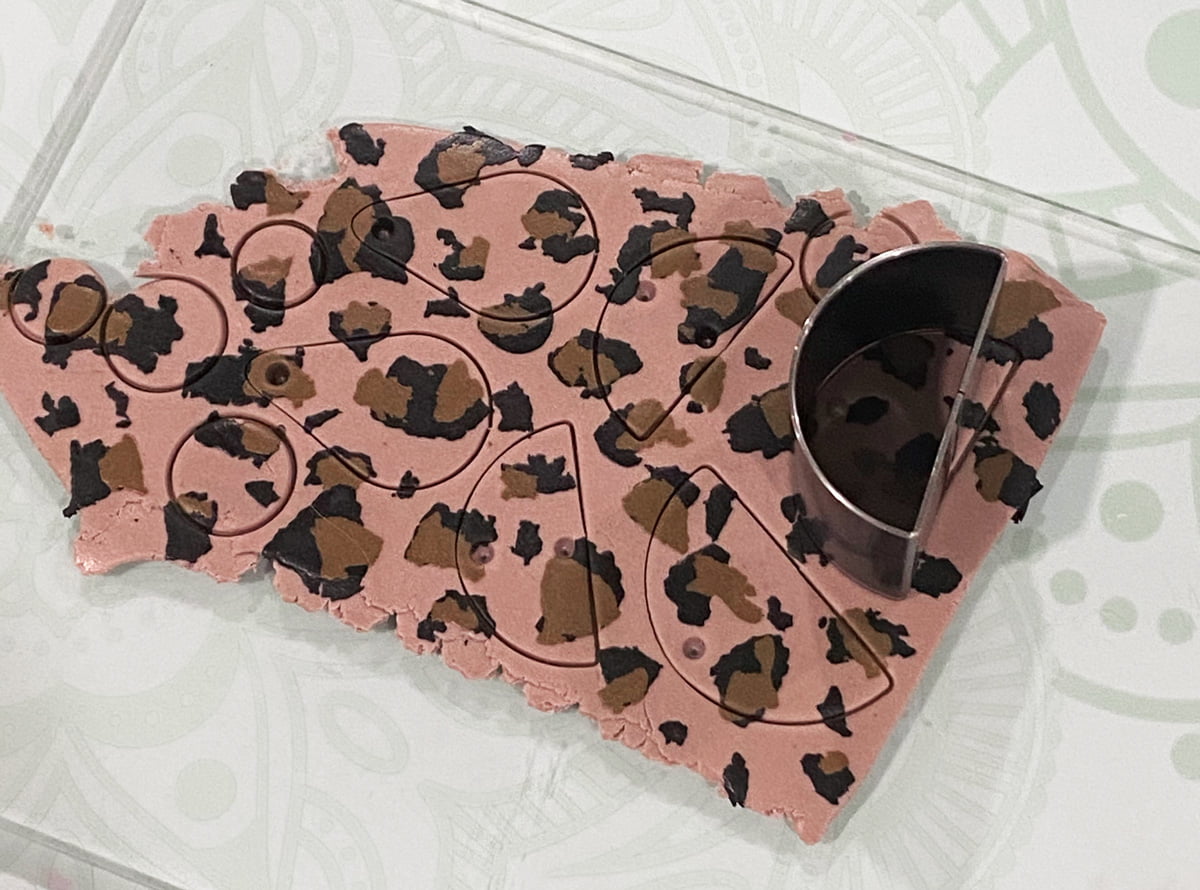
Now that we have our pattern it’s time to cut our clay into shapes to make our earrings. There are multiple ways of doing this. From using and exacto knife and creating your own shapes, mini cookie cutters, fondant cutters and leather punches. Today I am using a set of leather punches.
I like to use the punches and figure out an earring design before cutting the clay. That way I have a plan of what sizes and shapes I will need.
If you have ever cut out cookies then you can do this! Making the cuts close to each other to get the maximum amount of cuts out of the clay. I also cut some extra shapes just incase.
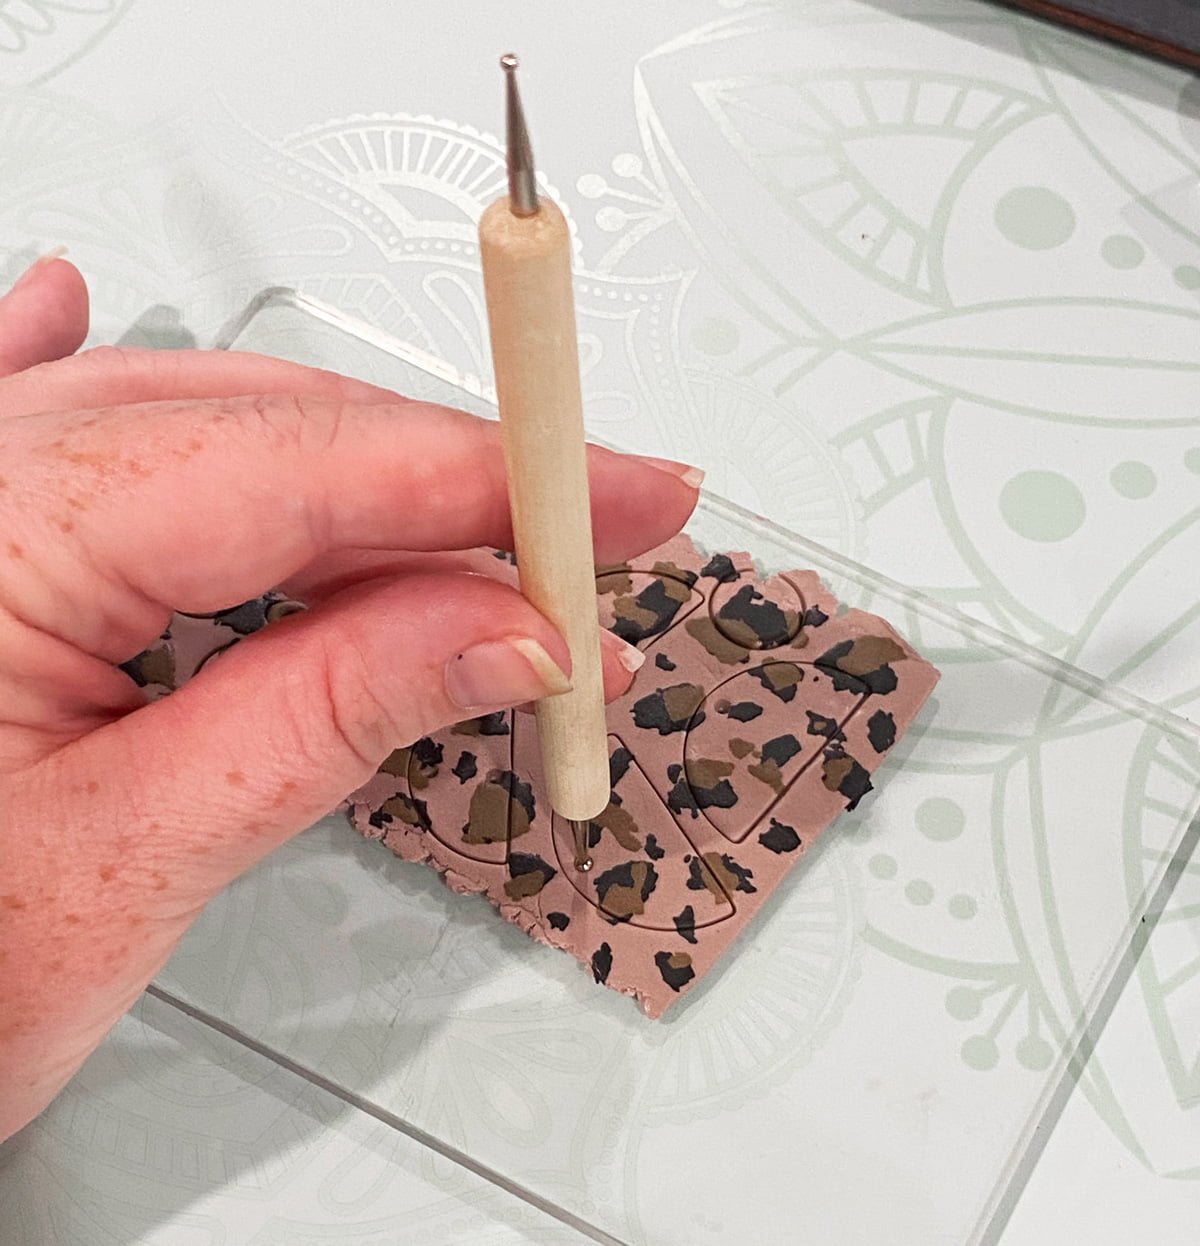
Jumpring hole
Once you cut your clay you are going to want to use a dotting pen to make holes. This will be where the jump ring connects your clay pieces. This is important to pre plan some pieces may need one hole or two.
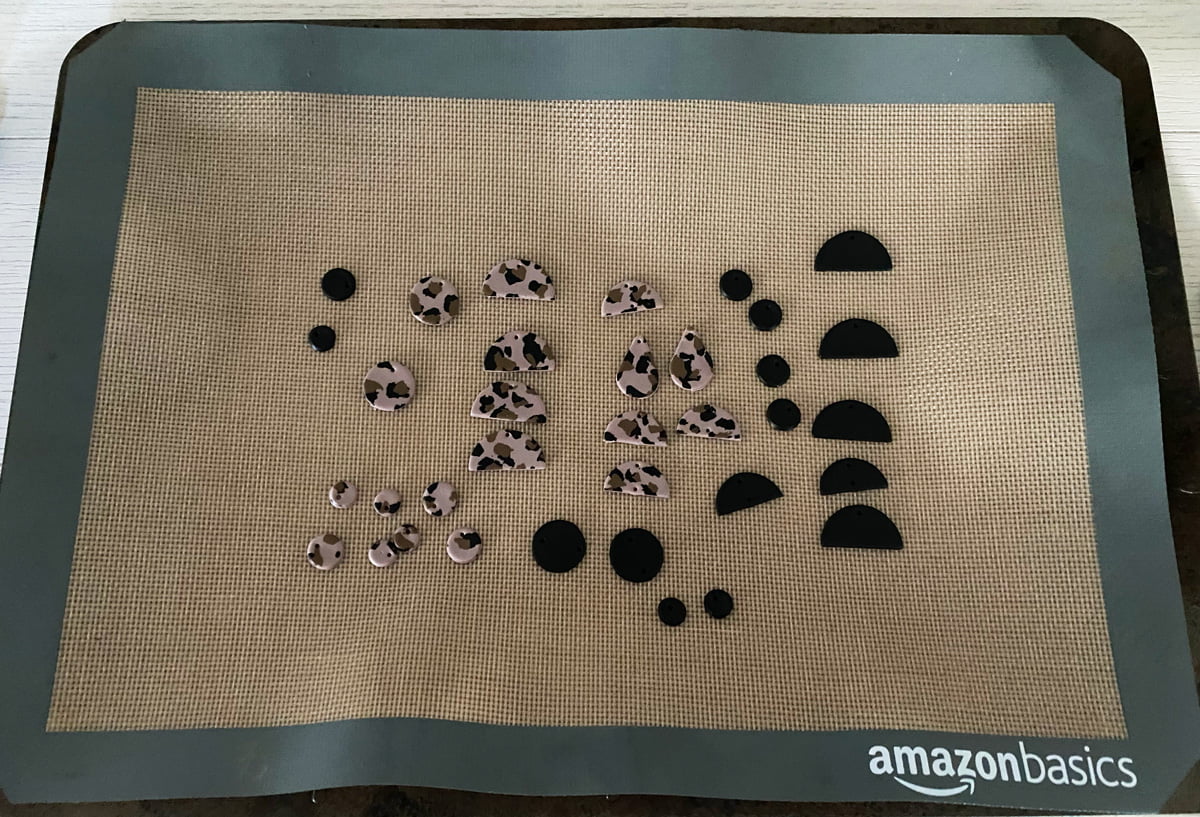
 Let’s get ready to bake. Now how do you transfer your clay to a baking sheet? Thats the question I had. I tried a few different ways in order to find the best. First remove the excess clay around your shapes.
Next using a clay blade slide it under the shapes and transfer to your parchment paper or silicone pad on a baking sheet.
I also decided to compliment the leopard print to also create the same shapes in black. Just repeating the process above without the pattern.
 How to bake polymer clay earrings
 How to bake polymer clay earrings
Baking polymer clay is pretty simple. Just follow the directions on the back of the packaging essentially. Here is how I like to bake the Sculpey Souffle clay. I place the pieces on a cookie sheet on top of a silicone mat. I layer a piece of parchment paper on top and rest another cookie sheet on top. This ensures a more even bake and your clay pieces will remain flat. I also turn the oven off and leave the pieces inside the oven while it’s cooling.
Typically for the Sculpey Souffle I bake it at 275 for 35-40 minutes. If you are using other clay check the recommended heat settings they can vary.
Sanding and Buffing Polymer Clay
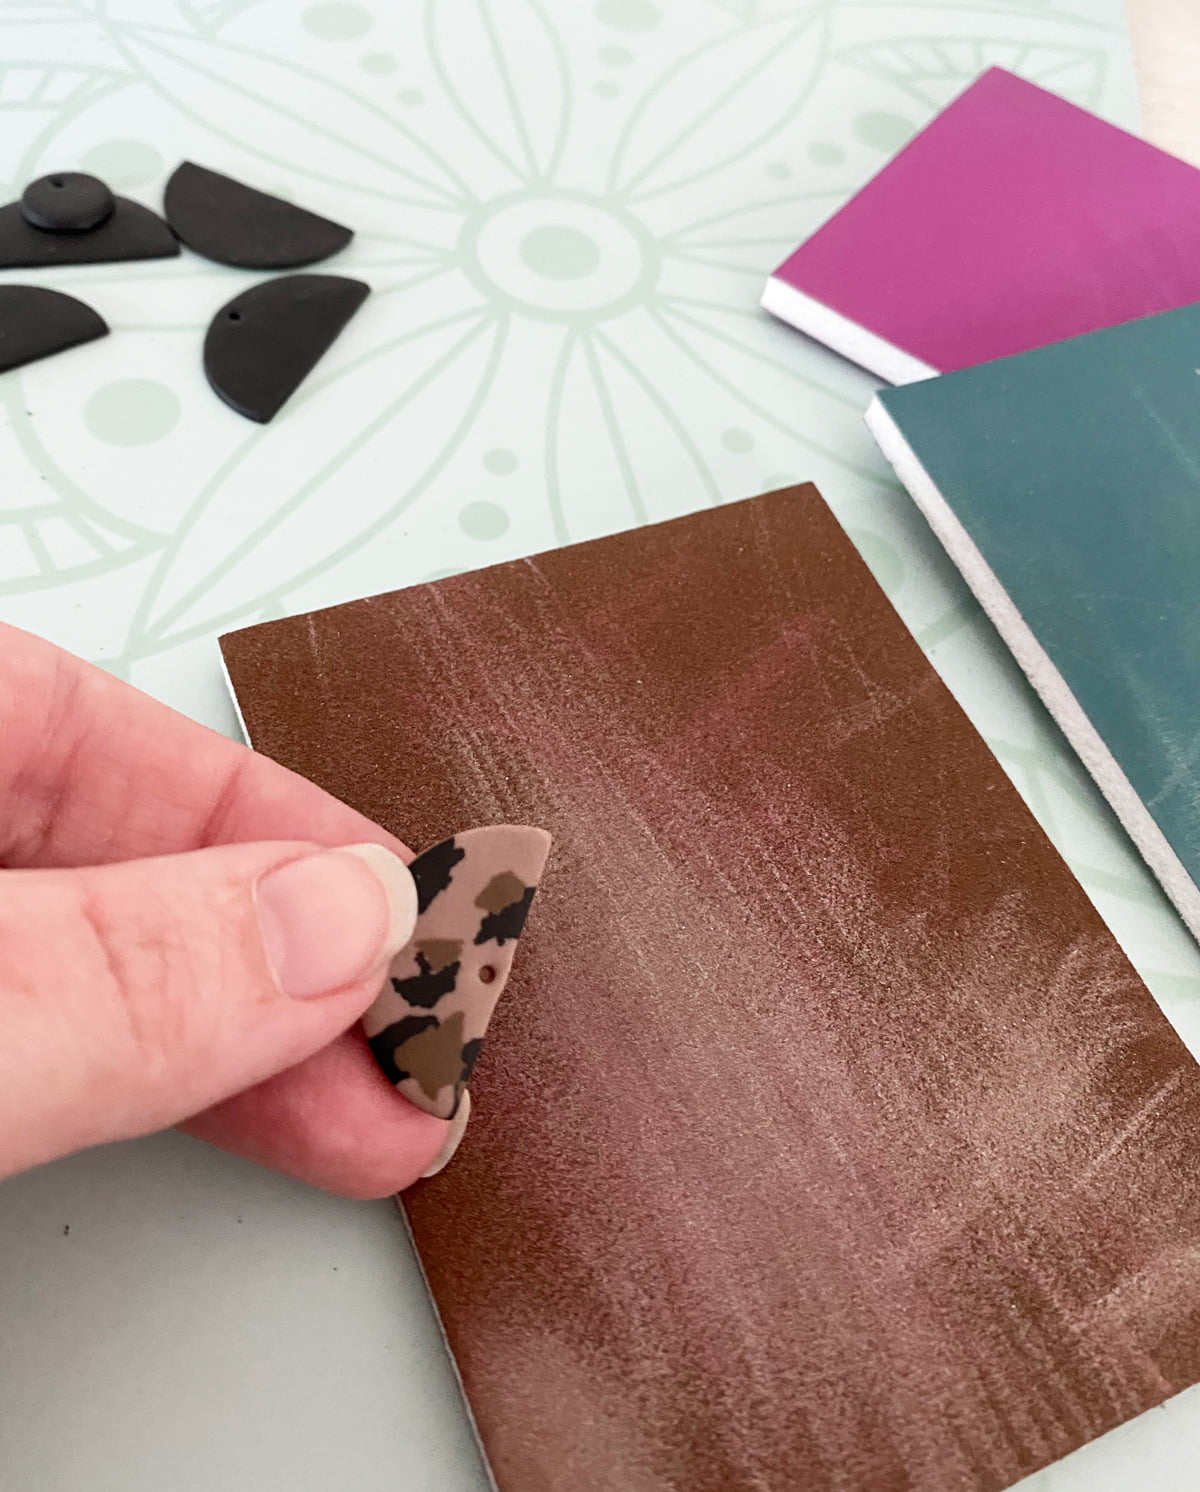
After they clay pieces have cooled it’s time to finish them. To get a finished look they need to be sanded and slightly buffed. I have tried a few methods including using a Dremel and micro mesh sandpaper. The easiest and budget friendly way I found was using these micro mesh sandpaper.
I start out with the coarsest grit to sand the sides of the the earring pieces. Then work your way up to a finer grit. The smoothest mesh pad will start to buff your earrings. Now I like a matte finish so I buff just enough for a smooth surface but not a shine. I use 4 different grits to sand and buff my earrings.
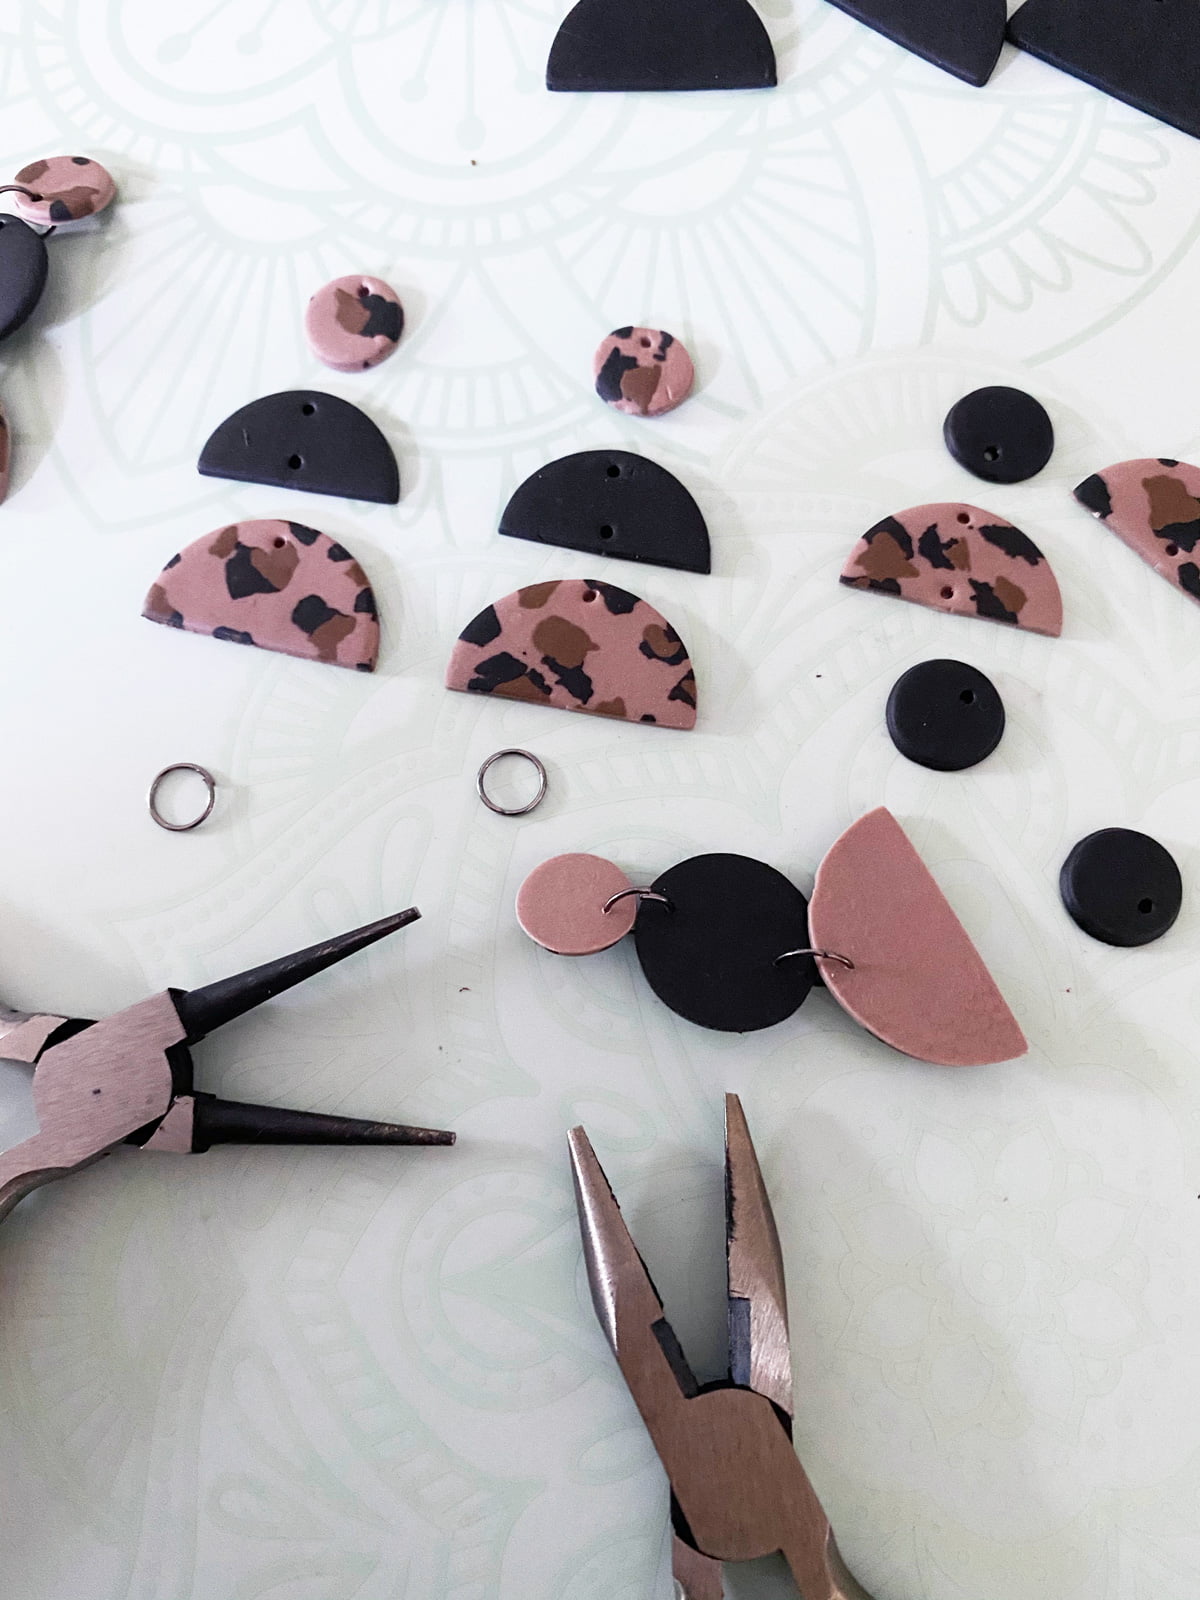
Assembling the earrings
We are almost done! Time to assemble the polymer clay earrings. For this grab your jump rings. I am using these 8mm 21 gauge jump rings and 2 pairs of pliers.
Holding one of the jump rings with needle nose pliers I use my second pair of pliers to pull and open the jump ring. Now you don’t have to open these too much just enough to loop it through your earring piece.
Are you finding the hole in your earring might have slightly closed up? Use the dotting pen again to open the hole up. Guide the jump rings through the holes connect the earring pieces. Make sure the opening is in the back of the earrings.
Use your pliers to close the gap in your jump rings.
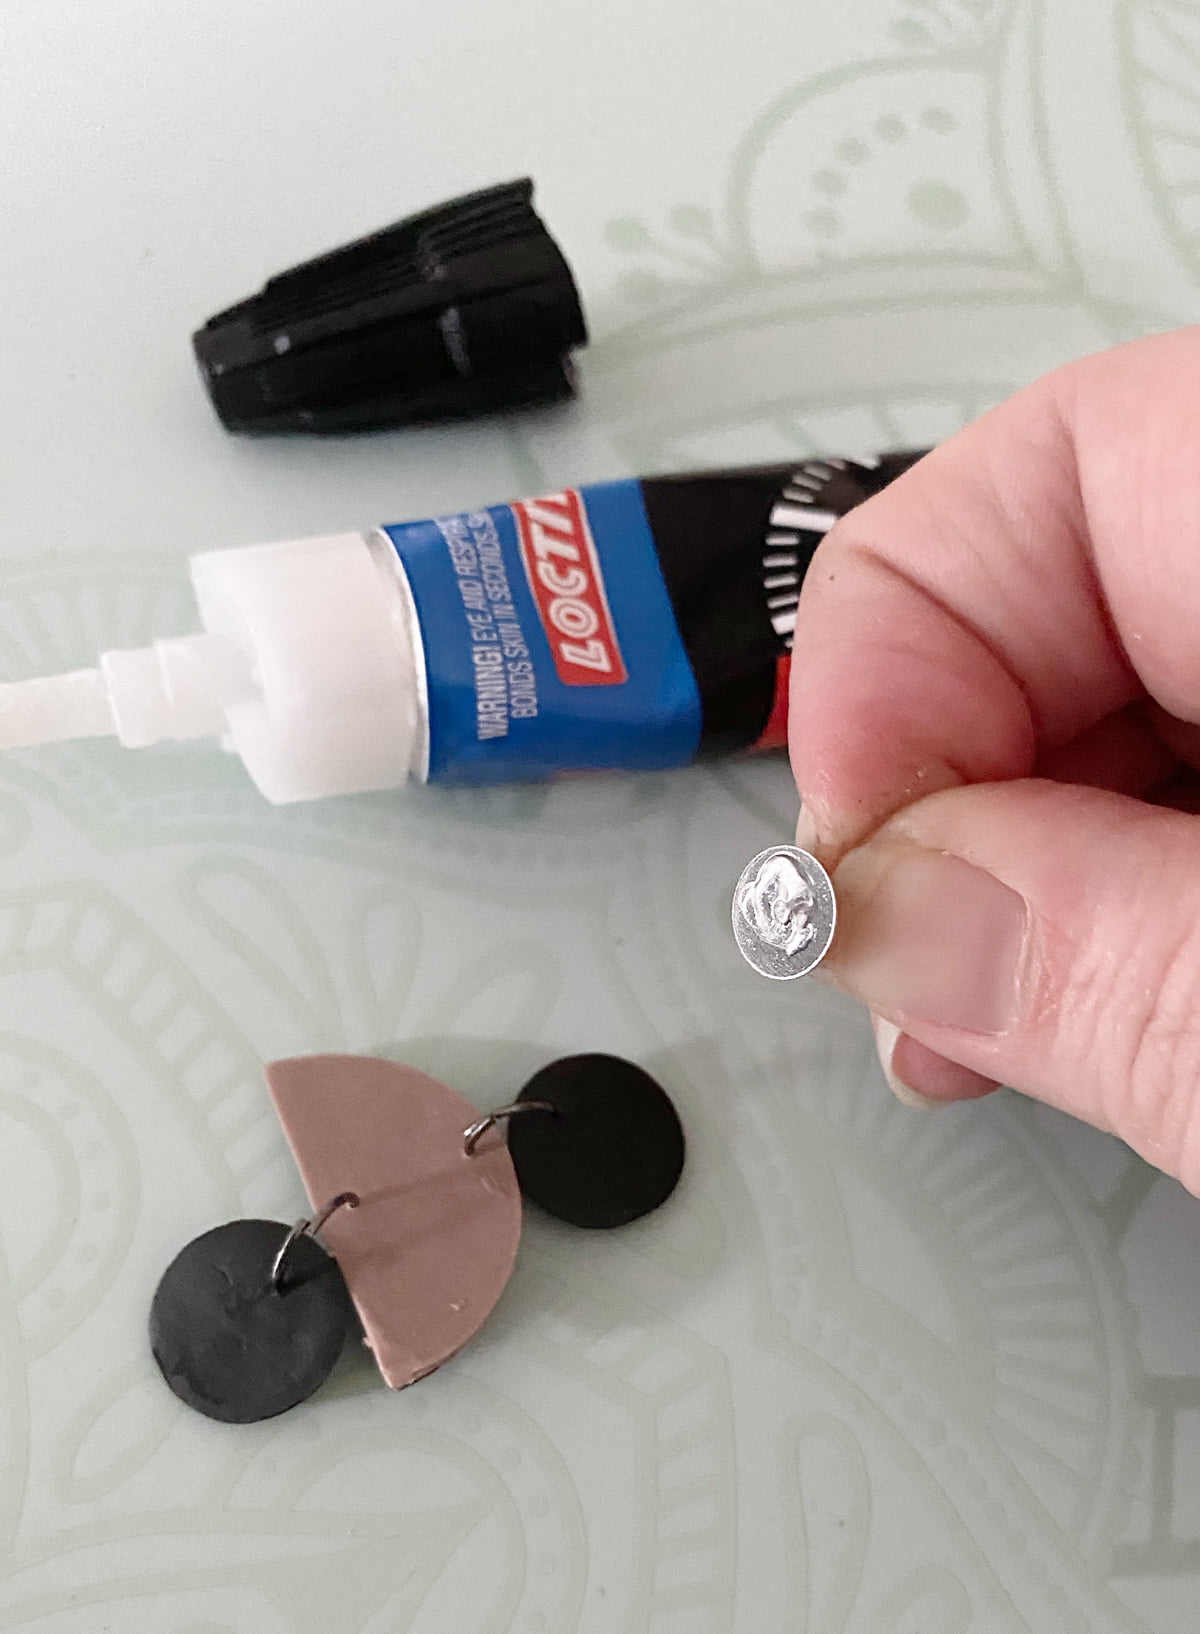
How to attach earring posts to polymer clay
Now I like to use and earring post instead of a hook. It’s just a preference for how you want the finished earring to look on your ear. Adding the earring post is really simple. I use Loctite 60 second universal glue to attach the post to the back of the clay. I suggest to get a few different size posts. That way you have a few to choose from with the different shapes you create.
Now this adhesive does dry in 60 seconds but let your earrings dry overnight before wearing them. If you’re impatient like me they might stick to your ears. Whoops.
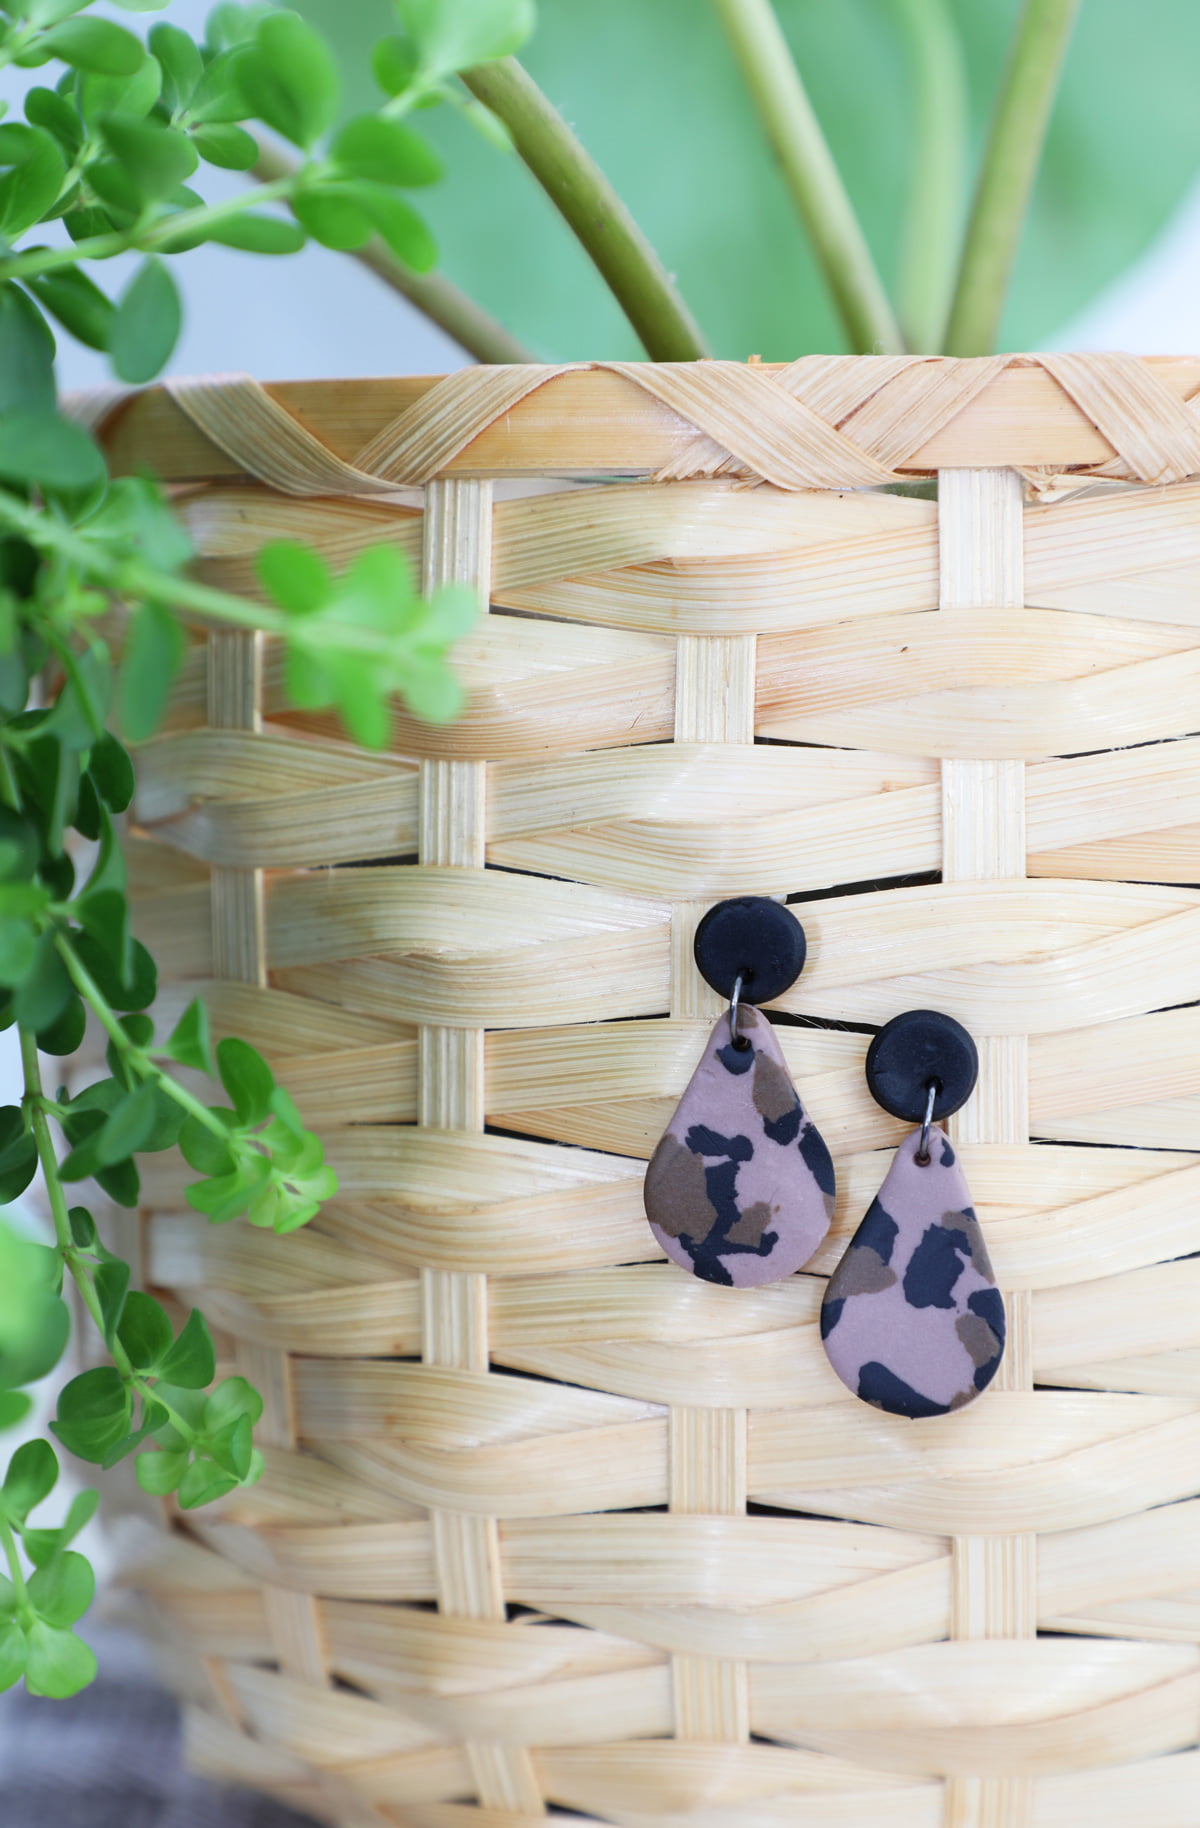
Can you believe how professional these look! Now this was a long tutorial but I promise you they are easy to make. In fact I am quite addicted to making them. I am trying out new clay patterns using fondant cutters and gold gilding. I can’t wait to share with you what I learn as I embark on this new obsession. If you want to see more projects in real time follow me on Instagram I am always sharing different techniques in my stories.


2 Comments