This post contains affiliate links, please read our disclosure policy.
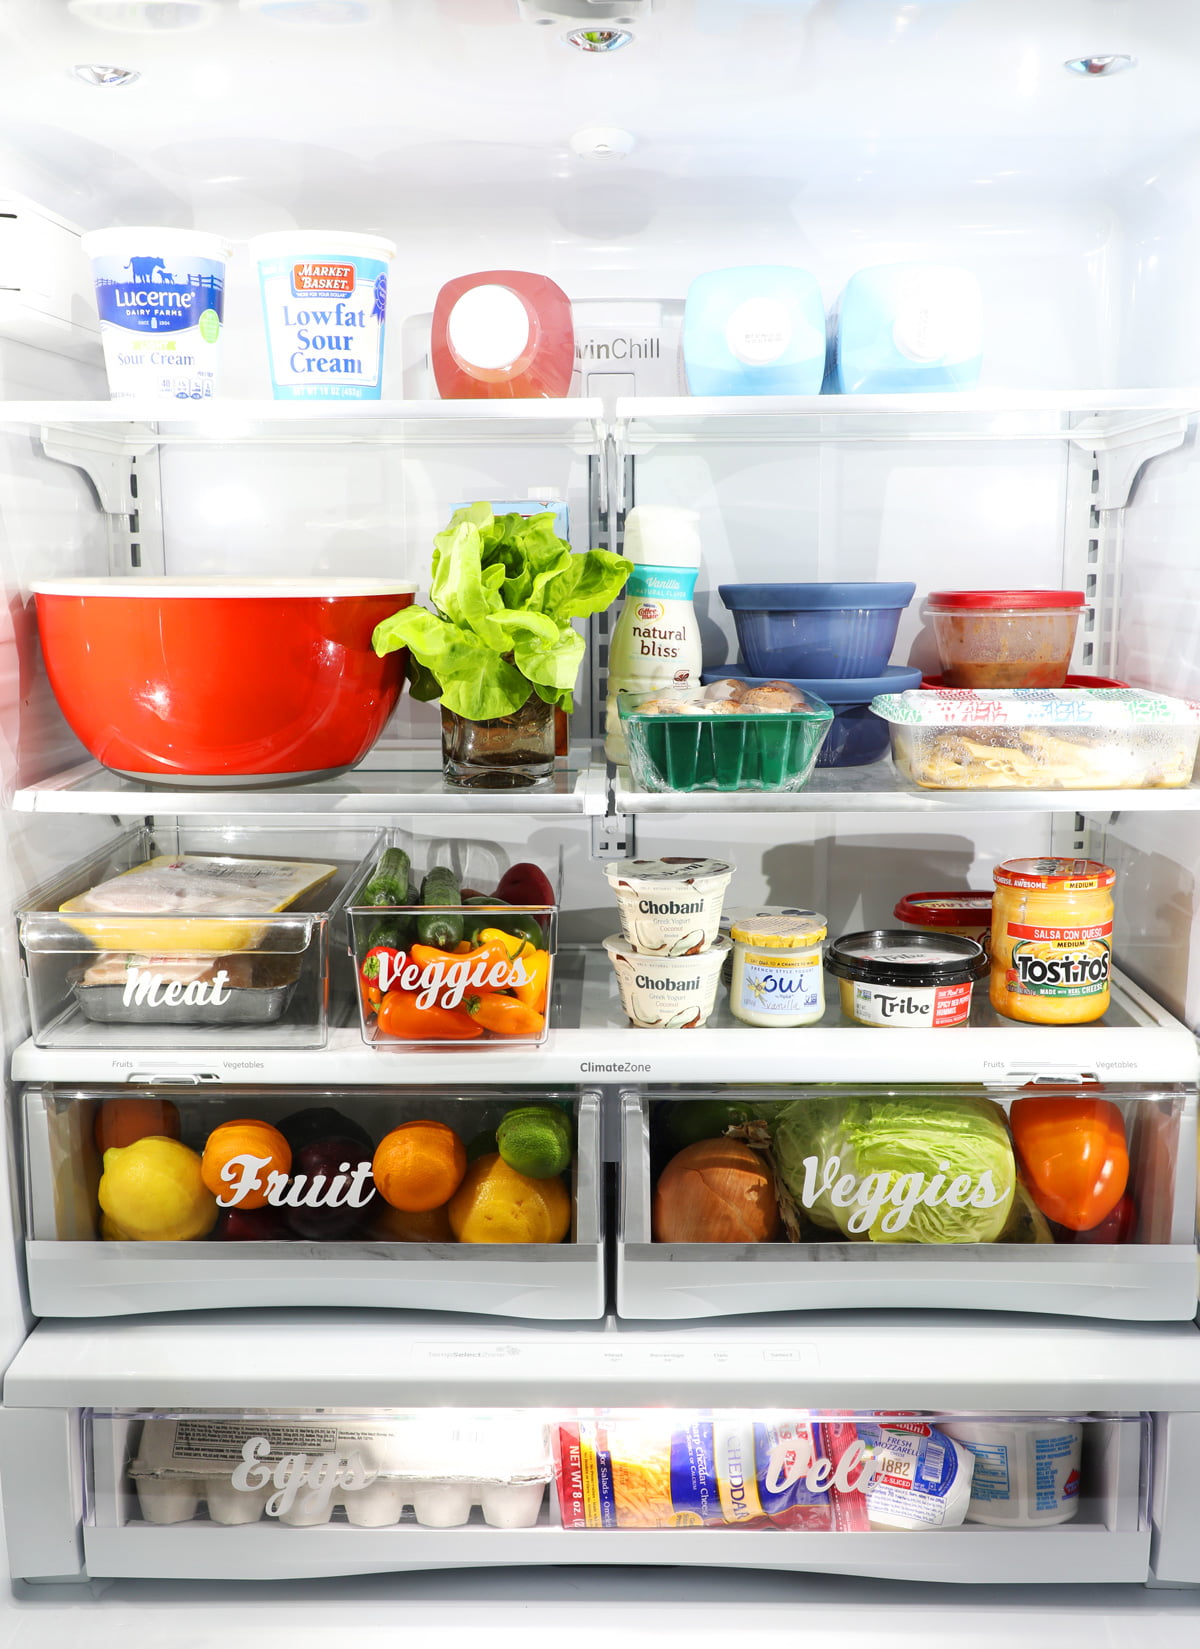
How to organize your fridge by creating refrigerator labels with a Cricut and some vinyl.
Now maybe I am spending a little too much time at home or maybe I have watched too many episodes of The Home Edit but one day out of boredom I decided I needed to tackle the refrigerator and get it organized. Now I had just made pantry labels with my Cricut Joy so I figured why not create refrigerator labels.
Food storage labels help define a space or make sure that everything has a home. If I know where to put something back I am more likely to stay organized. So let’s make some labels with our Cricut.
Have you seen my kitchen since we finished renovating it? Check out the kitchen renovation here.
This post contains affiliate links.
Here’s What You’ll Need
- Cricut Joy, Cricut Maker or Cricut Explore Air 2
- Cricut Premium Vinyl or Cricut Smart Vinyl (Joy only)
- Cricut Joy Standard Grip Mat
- Cricut Transfer Tape
- Hook tool and Scraper Tool
- Design Space Files
- Clear containers
Don’t want to DIY your own. Check out these labels from The Home Edit. Also check out these storage containers you could personalize yourself.
Step One: Fridge Label Design Space File
Grab your fridge labels file here. Measure the container or drawer your are placing them on and resize files accordingly. If you are looking for more labels just create your own in design space using the font
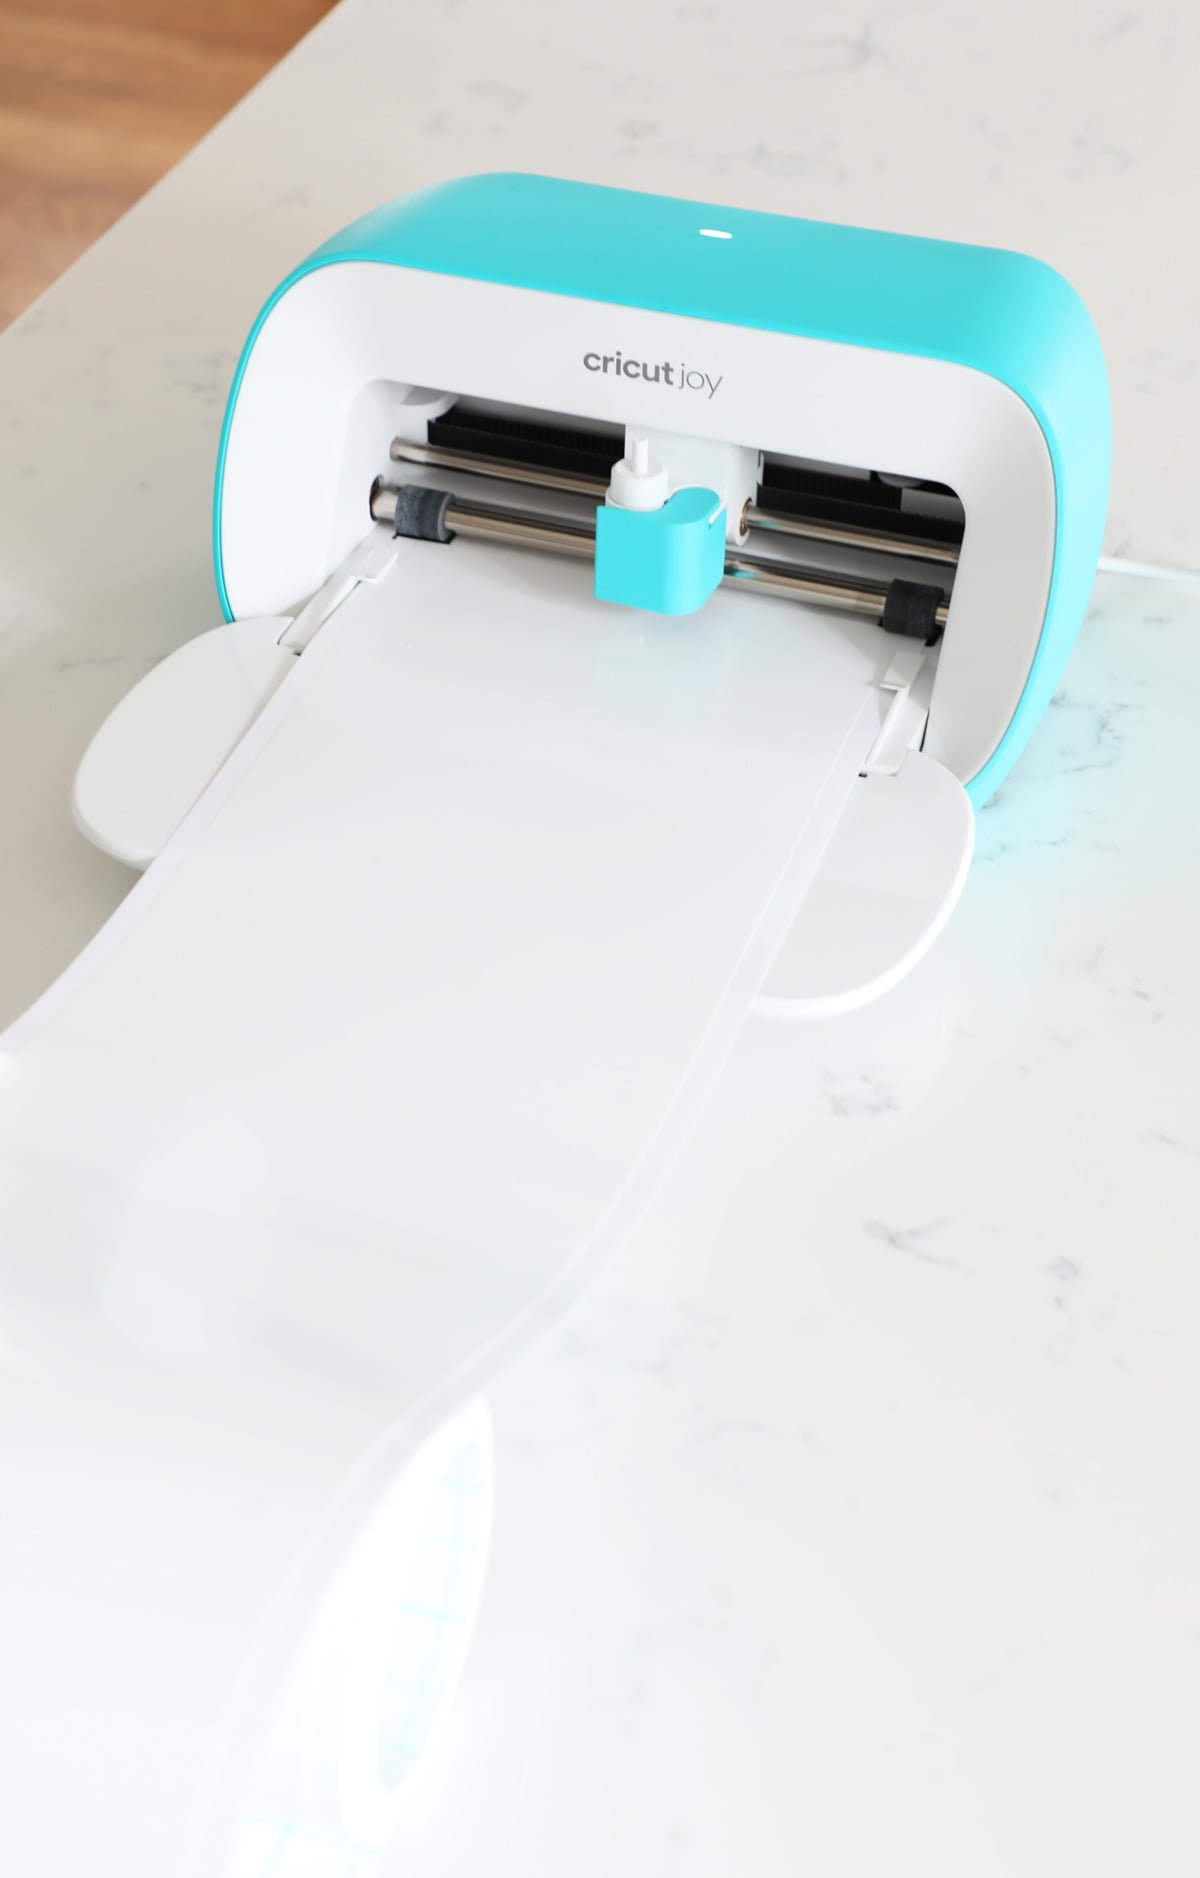
Step Two: Cutting Vinyl
Now that you have your designs sized correctly click make it in the top right corner. Now select your machine if you are using the Cricut Joy you will need to select how you will load your material. Since I am using vinyl on a mat I am going to select “On Mat.” If you were using smart vinyl you would select without mat. Click Done. Select continue. You will be prompted to load your mat on the Cricut Joy. It will load automatically and select go. If you are using another Cricut load your mat with the blinking arrows. The “c” button will light up select it when you are ready to cut.
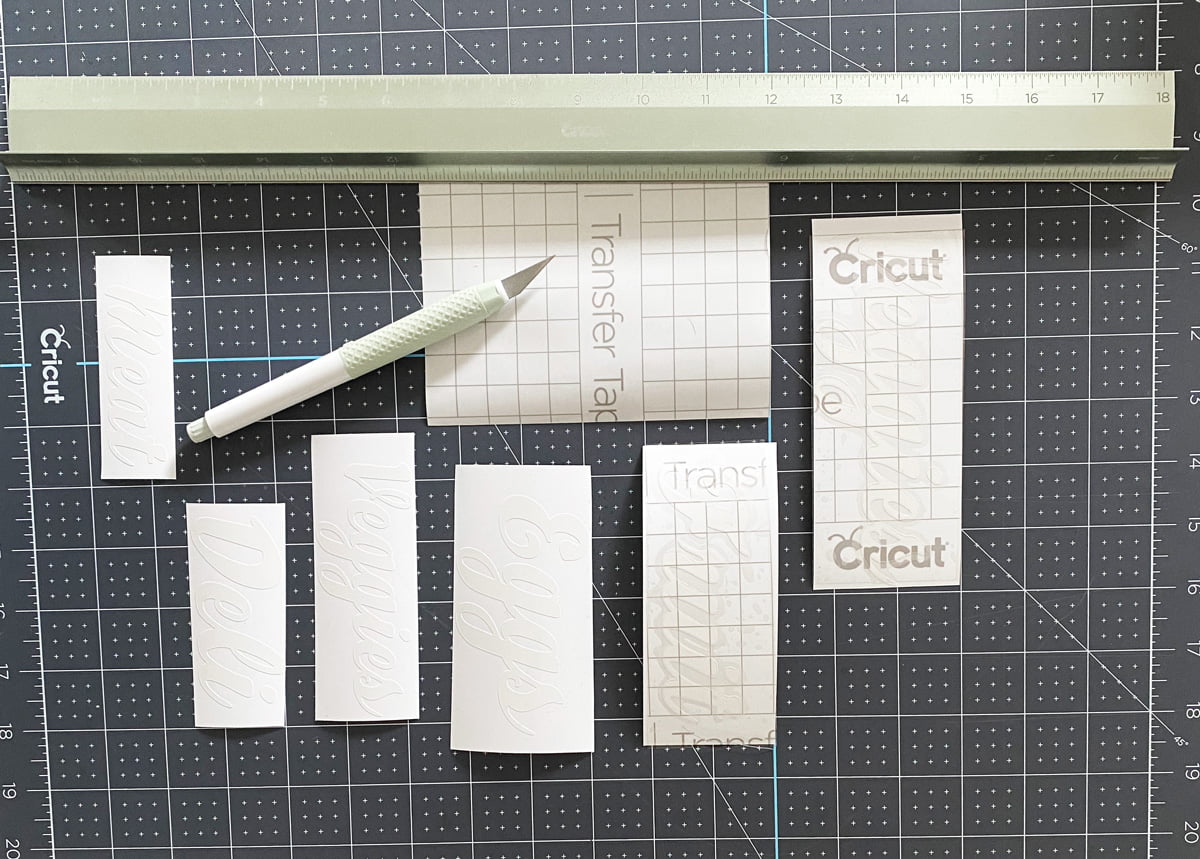
Step Three: Weeding
Once the Cricut is done cutting remove the mat and start to weed your excess vinyl. You should just be left with your lettering and embellishments.

Step Four: Transfer Tape
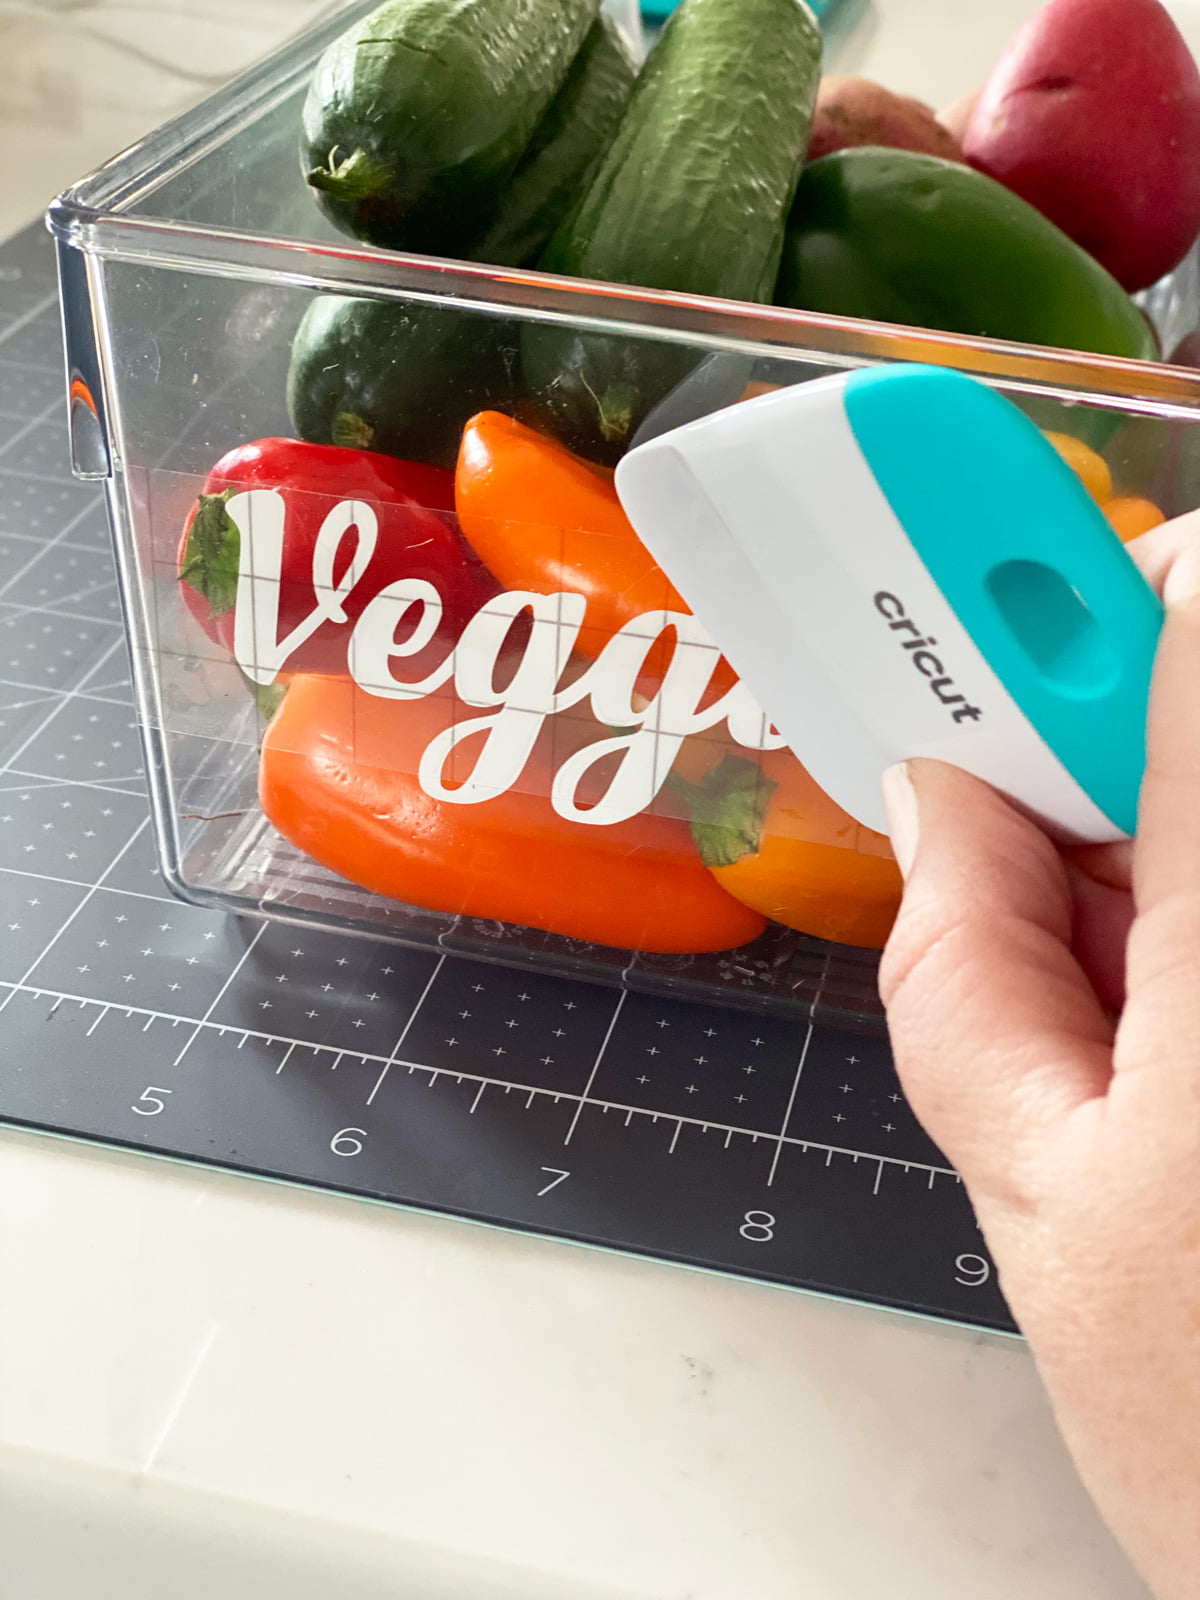
Cut a piece of transfer tape to size and using your scraper tool or a credit card rub the vinyl on to the transfer tape. Peel back the backing the white sheet of backing.
Place the design on the drawer or container. I use gridded transfer paper this helps you lay the design straight. Once it is in the desired position use your scraper tool to transfer the vinyl on to the canister. Peel back the transfer tape. I like to peel it back low and slow making sure the vinyl is sticking to the plastic.

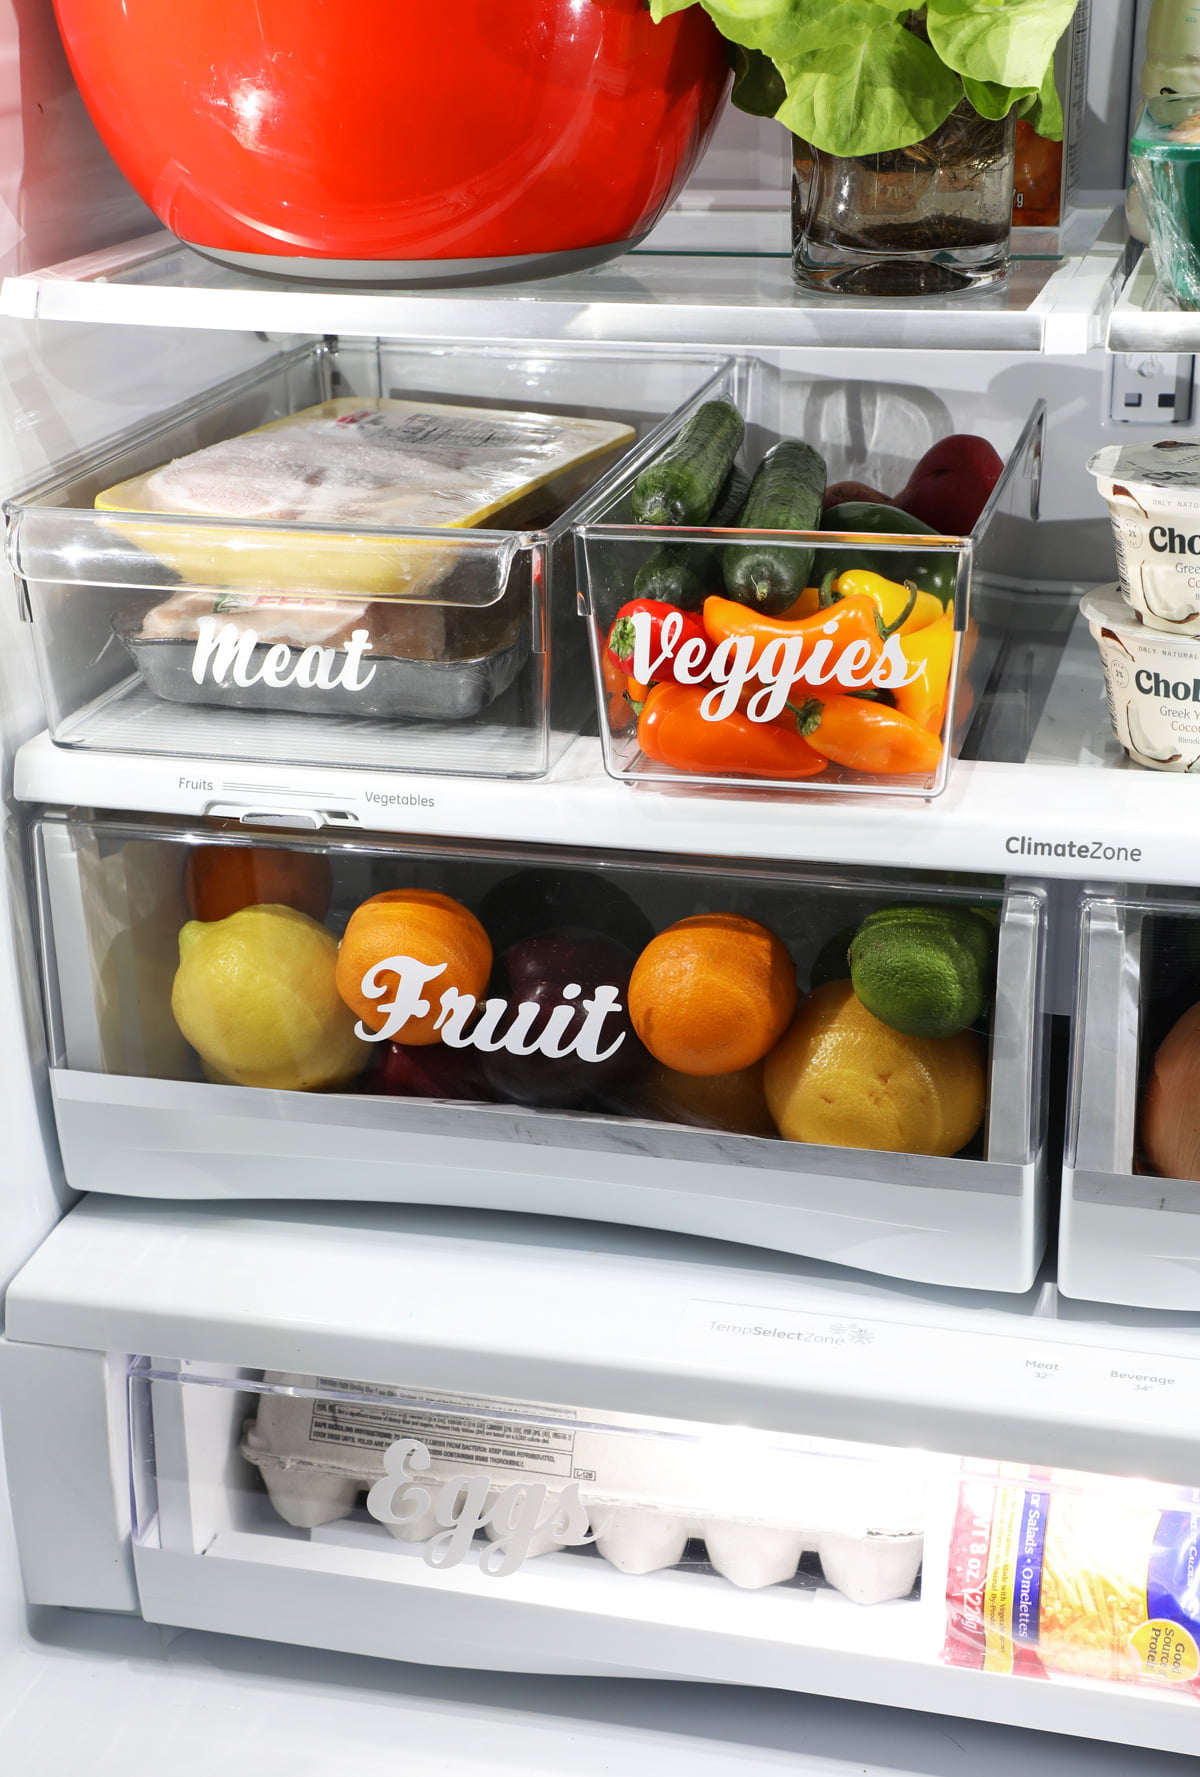
Not only did I decide to label the drawers in the fridge I also decided to buy containers to create space for excess vegetables and also to have a separate section for meat.
Step Five: Enjoy Your Organized Fridge!
Now I am not usually the most organized person but since the renovation I am finding myself organizing and cleaning a lot more. I am proud of the space and have really been enjoying creating systems that work for myself. I hope this helps you get organized as well.


What font did you use?
I love your fridge labels! What font did you use? I’m having a hard time finding a match.