This post contains affiliate links, please read our disclosure policy.
A guide to get started in Cricut Design Space. What is Cricut Design Space and how does it work?
This post is sponsored by Cricut but all opinions are my own. This post contains affiliate links.
So you’ve got a Cricut or are thinking about it and want to learn a little bit more about Cricut Design Space. Whether you have a Cricut Maker, Explore Air 2 or a Joy you will need to use Design Space in order to use you machine.
What is Cricut Design Space?
Cricut Design Space is Cricut’s design software. It lets you design and cut wirelessly. You can create projects from scratch or browse thousands of images and fonts. The software can either be used on your computer or on you phone or tablet.
Cricut Design Space works with the Cricut Joy, Cricut Maker, Cricut Explore, Cricut Explore Air and Cricut Explore Air 2.
Is Cricut Design Space free?
Cricut Design Space is free! You can upload your own files or designs with in the app. Design Space is free to use for all file types. There is no subscription required to cut your own images. Upload and cut your .svg, .dxf, .bmp, .jpg, .png, and .gif files absolutely free.
How ever Cricut does offer a paid subscription service called Cricut Access.
What is Cricut Access?
Cricut Access is a monthly or yearly subscription to the Cricut Image Library of over 100,000 non-licensed images, thousands of ready-to-make projects, and 500+ fonts. It also provides savings on products, designs, and shipping!
How does Cricut Design Space work?
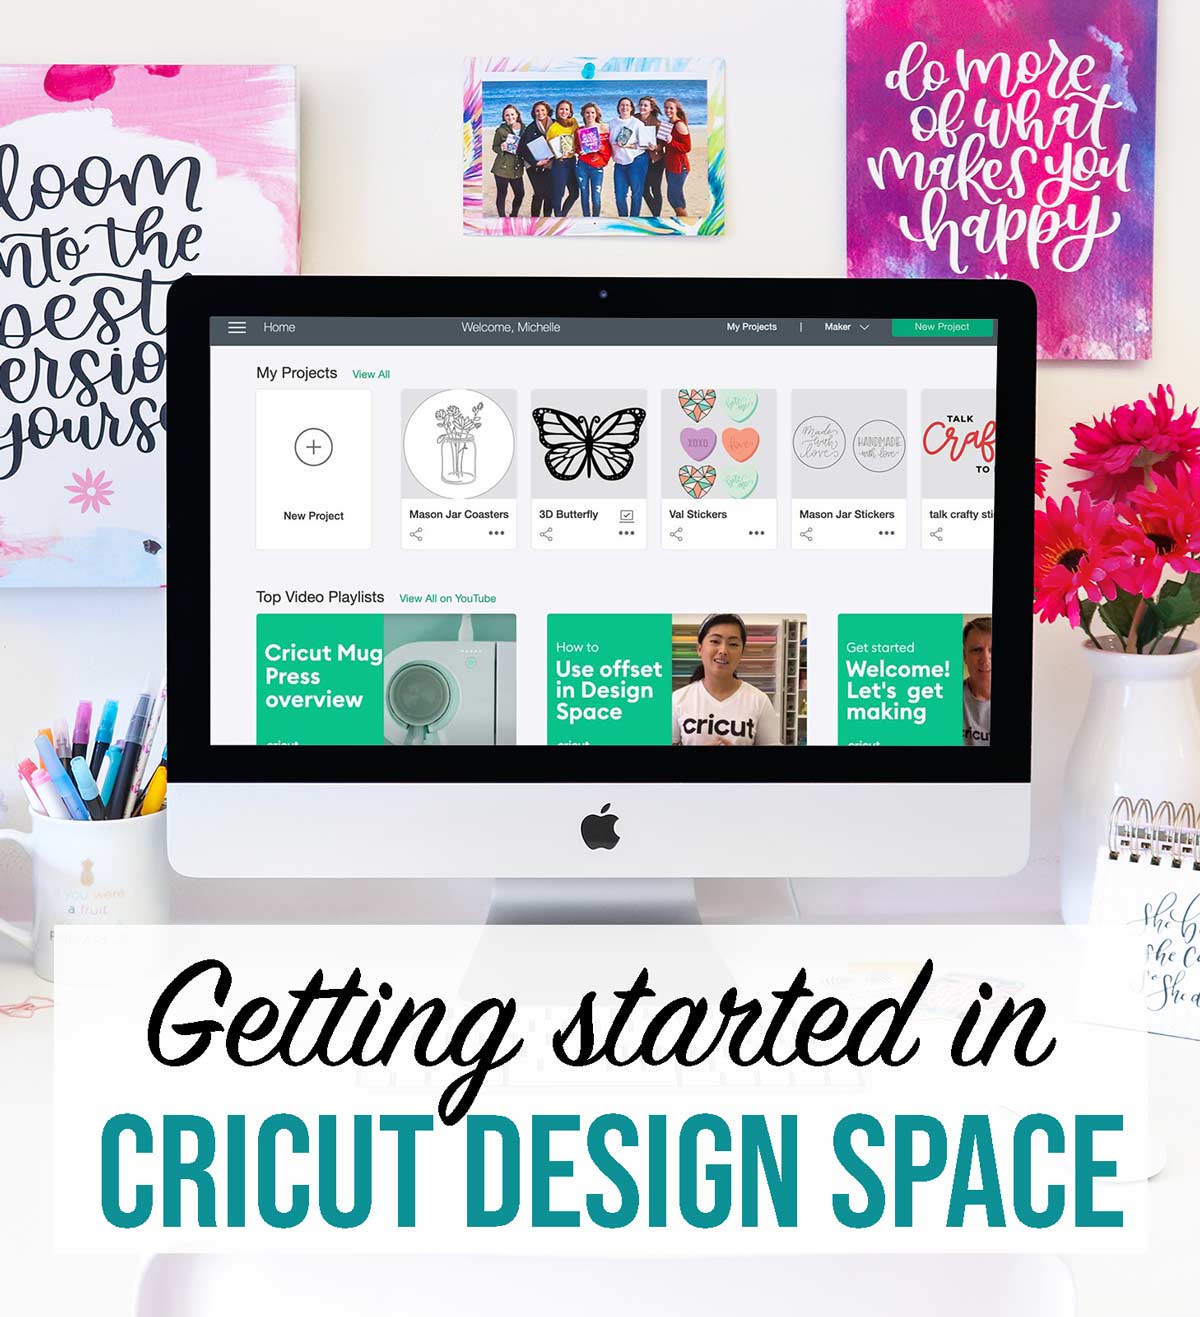
Cricut design space works on your computer, phone and tablet. Keep in mind that not all features are available on the mobile and tablet app. When you open Design Space on your computer you will start off on a screen similar to the one below. If you are looking to set up a new machine click the 3 lines on the top left and select “New Product Setup.”
Once your machine is set up you are ready to start your first project.
How to start a new project in Design Space
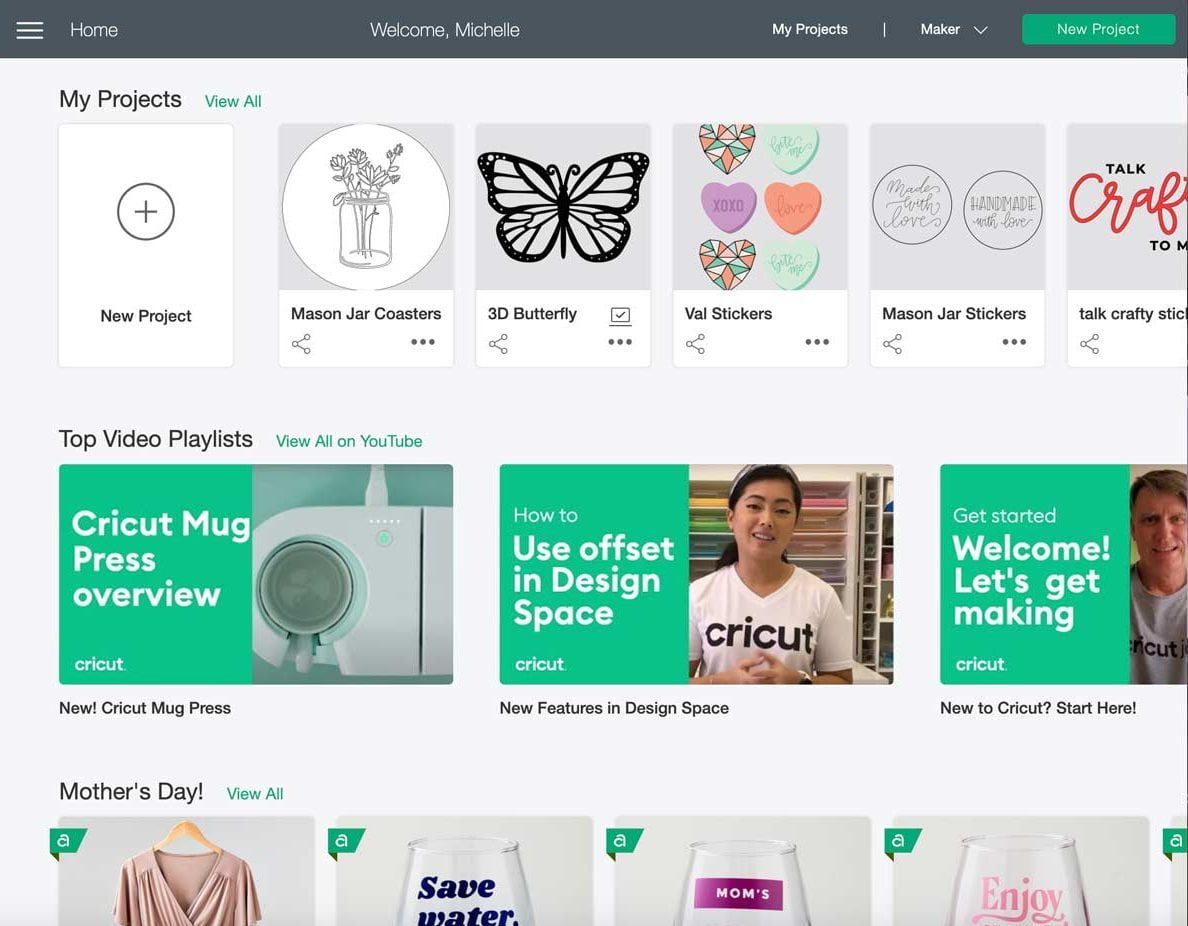
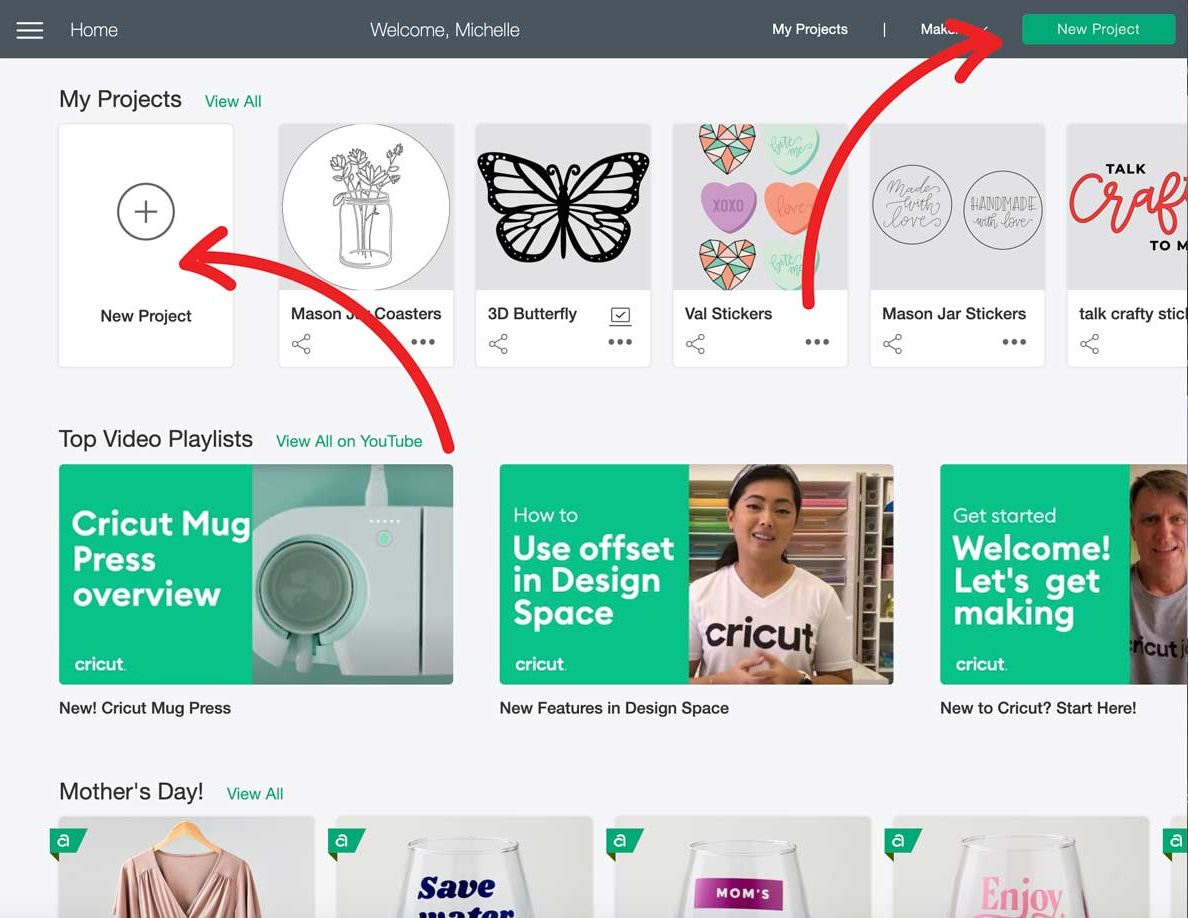
There are 2 ways to create a new project from you home screen. On the top right hand side there is a green button that says New Project or under “My Projects” select the plus sign to create a new project.
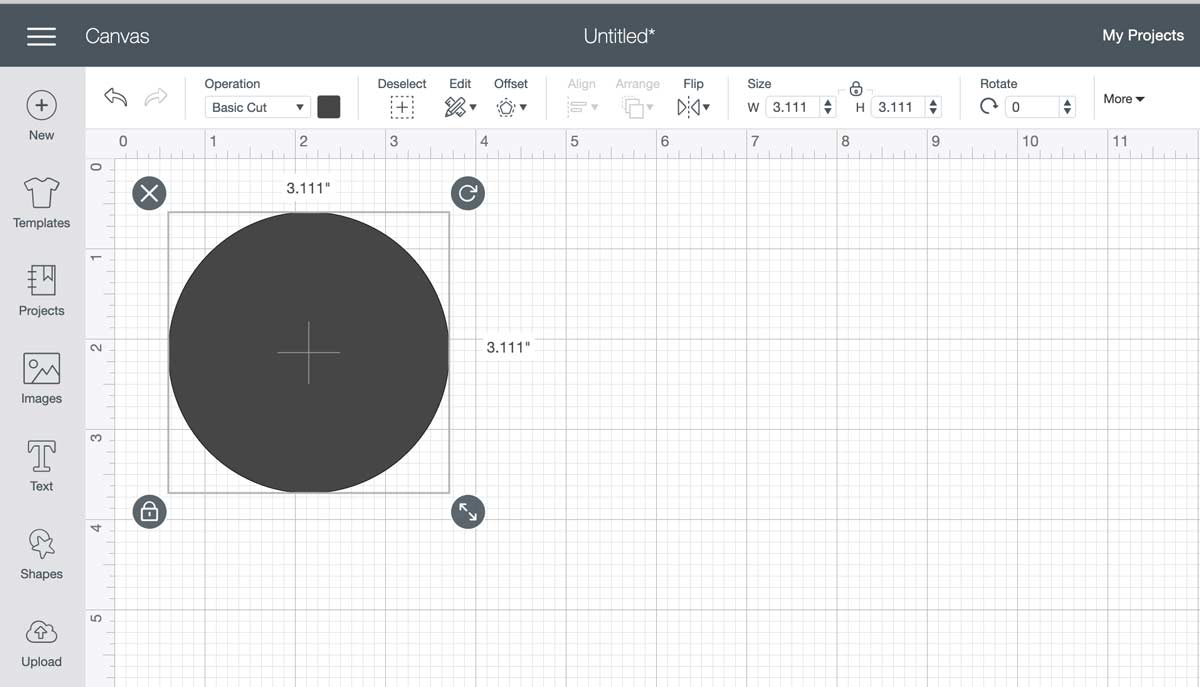
This will open up your canvas. Canvas is the workspace where you will design your projects. It shows up as a gridded background. The larger squares are 1 inch x 1 inch which match your Cricut mats. On the canvas, you can add and edit projects, images, and text.
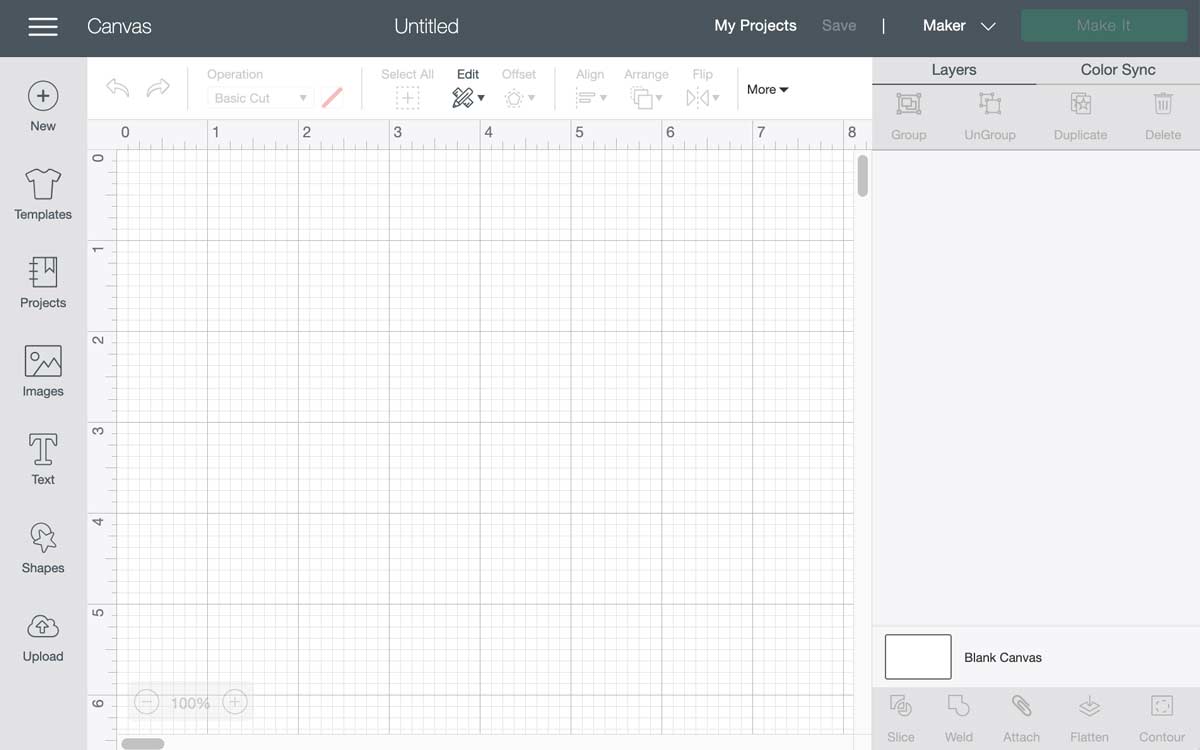
Toolbar
You will see you have a tool bar going down the left hand side of your window.
- New- Create a new project
- Templates– Select a template to help visualize your projects before creating them. I like to use the T-shirt templates. They even have a drop down for T-shirt sizes so you can make the design the correct size.
- Projects- This is where you will find ready make projects that are a part of the Cricut Access subscription.
- Images- Browse Images to insert into your project here. Cricut has over 100,000 images to choose from. Any image with a green A on it is an access image.
- Text- This opens a text box where you can start typing words you would like on your design.
- Shapes- Select 10 different shapes to add to your design.
- Upload- Upload your own images and designs using .svg, .dxf, .bmp, .jpg, .png, and .gif files
The menu across the top of design space
- Operation (formerly linetype)– This is where you select an action or line type. Cut, Draw or Print then Cut.
- Select All/Deselect– just as it sounds selects and deselects parts of your design
- Edit- Cut, Copy and Paste your objects.
- Offset- Create an offset path or shadow layer. Often used for print than cut. Check out how to use this feature here.
- Align- Select multiple objects and align them (centered, left or right) or distribute (space) them evenly either horizontally or vertically.
- Arrange- Send object to back, backwards, front or forward. This will bring an object infront or behind another object on the canvas.
- Flip– flip horizontally or veritcally
- Size- type in the size of the object. The ratio is locked if you wish to unlock it click on the lock icon. I use this technique to turn a square into a rectangle and circle into an oval.
- Rotate– type an amount to rotate your selected object.
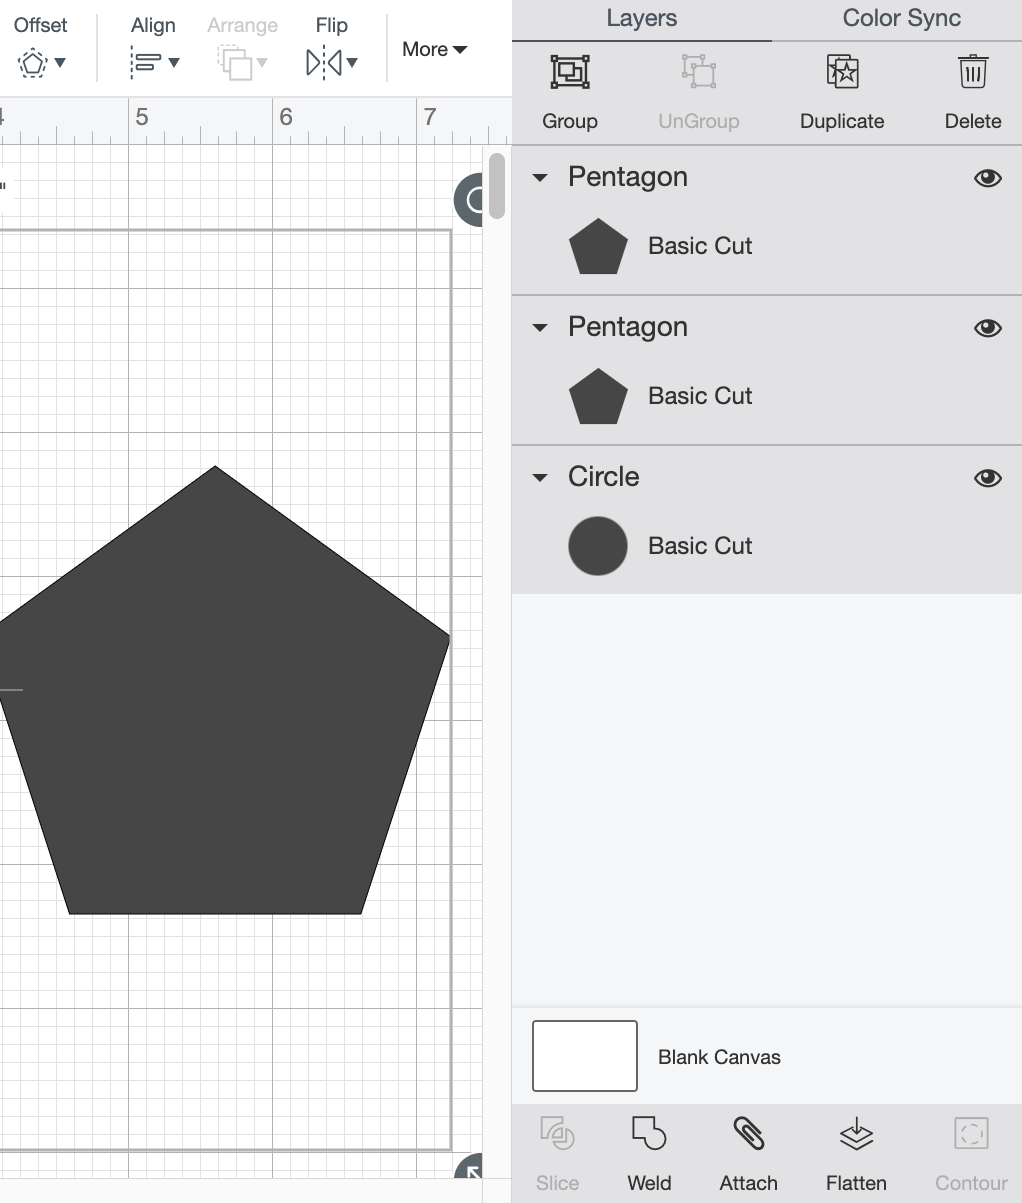
Layers Panel
The layers panel is located on the right side of design space. It allows you to select, group, ungroup duplicate, delete and hide objects.
Along the bottom of the panel you will find
- Slice- Cuts one shape from another shape or deletes part of the object.
- Weld- joins shapes together to create a single image. It removes any overlapping cut lines. This is often used with script fonts to keep the letters connected. It can also be used to combine shapes to create new designs.
- Attach- used to hold your cuts in the same position on the mat and canvas. It also is used to keep Draw, Score, or Foil, to a Cut layers in place.
- Flatten- Combines layers into one print then cut layer.
- Contour- allows you to hide a portion of an image layer by removing any unwanted cut lines.
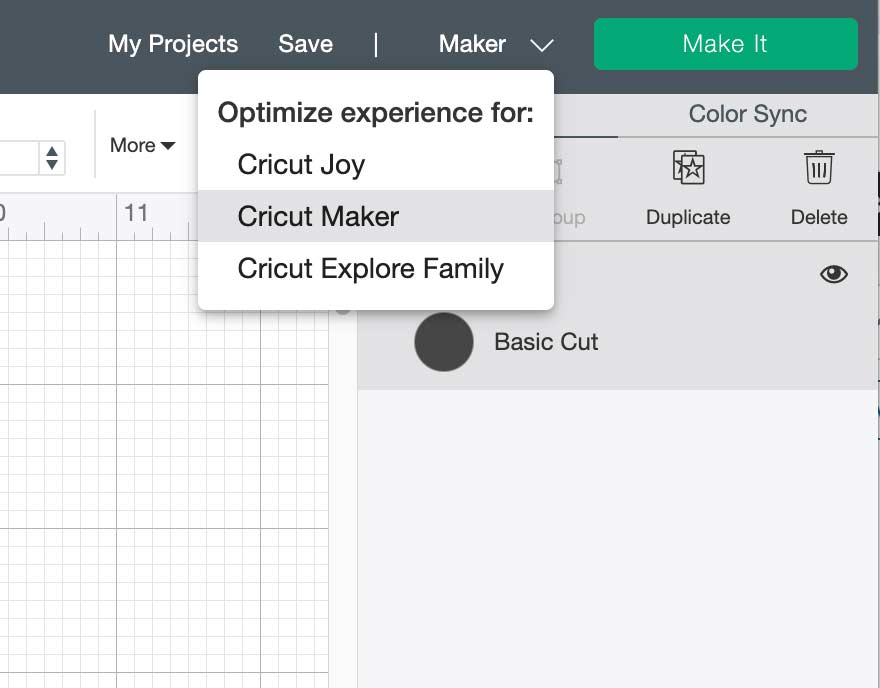
How to select which Cricut machine you are using.
Before you are ready to make your project select which machine you will be using. At the top right of Design Space in the dark grey bar (next to make it) you will see a drop down menu. From here you can select Joy, Maker or an Explore machine. If you have more that one machine it is important to choose the correct machine since the machines capabilities do vary.
Once you are ready to make your project select the green make it button and follow instructions. Want more information on Cricut materials? Check out this guide to Cricut materials here.