This post contains affiliate links, please read our disclosure policy.

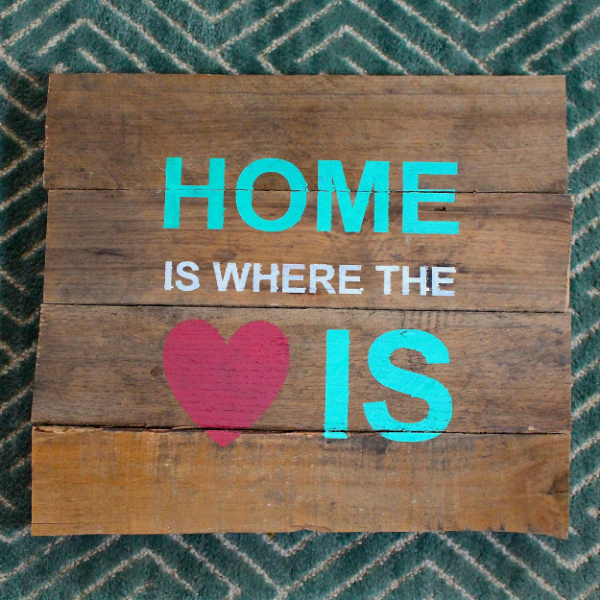
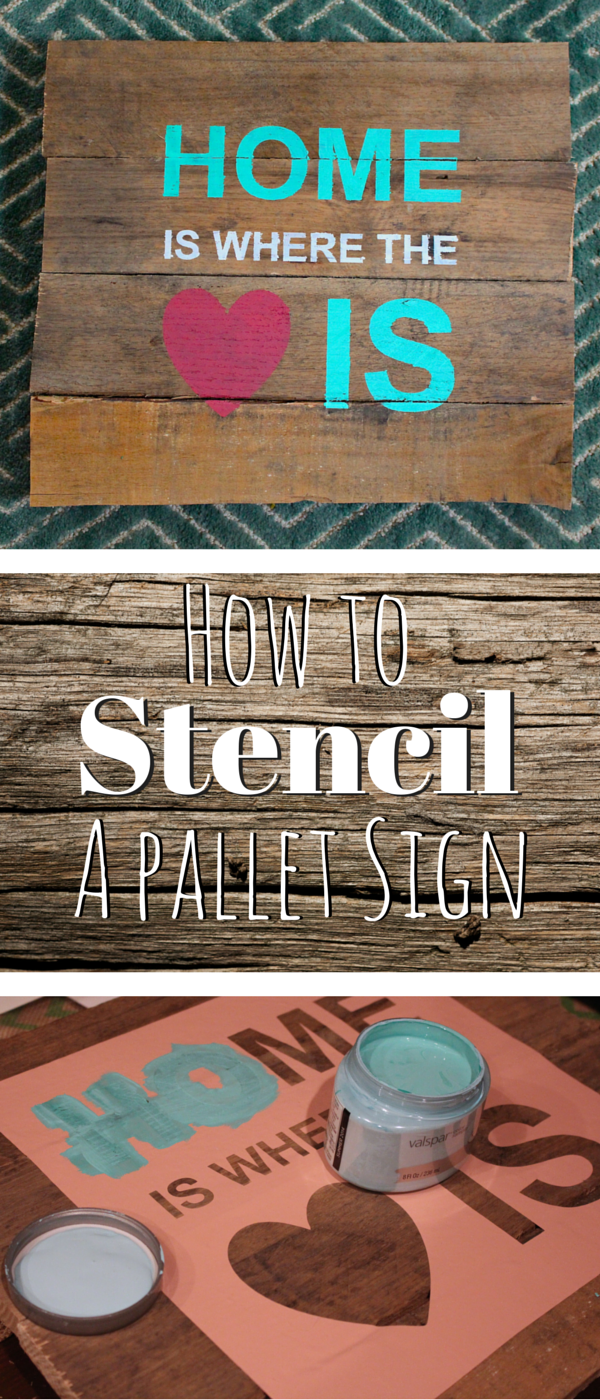
Pallet signs sure have been popular on Weekend Craft the past few months. So I thought today I would show you how I stencil pallet signs. This was also great timing because it’s Silhouette Challenge time and this month’s theme was home decor with the added bonus of using wood. Needless to say this month’s challenge was right up my alley. Now I get requests all the time from family and friends to make them a project that they have seen on the site and this was one of those occasions. You may have seen this sign before here when I was getting ready to head to Brimfield.
Now I always get asked how I make the signs since the lines are so crisp and I can customize the sign to whom I am making it for. I use the Silhouette Cameo to cut out a vinyl stencil that I either design with Silhouette Studio or using Adobe Illustrator and Silhouette Connect. Now you may see some signs use vinyl as the actual lettering but I like to use it as a stencil because paint is more of a permanent medium.
What you’ll need
• Pallet wood
• Vinyl
• Silhouette Cameo (or other cutting machine)
• Latex paint (paint samples from the hardware store work great)
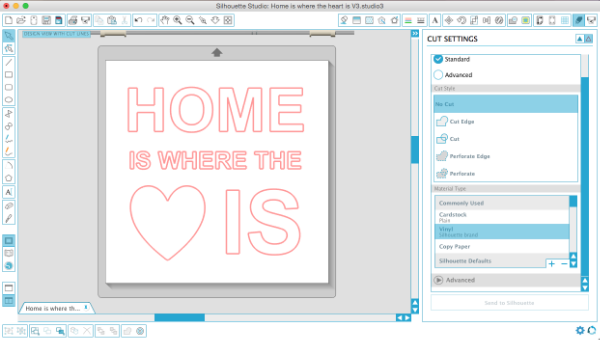
In Silhouette Studio I created the Home Is Where the Heart is Design. Which you can download the free cut file too for both V3 and V2.
Download the V3 Studio file here. Still haven’t updated? Download the V2 Studio file here.
Once your design is set make sure you change your cut settings to vinyl. I use these settings. Speed> 8 Thickness 9 > Blade 2.
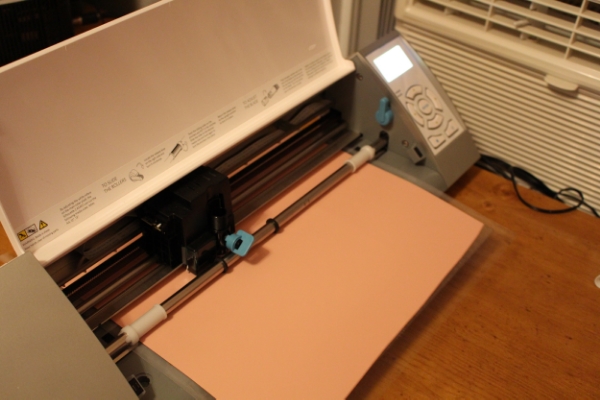
And you’re ready to start cutting. Have you read this far and really still have no idea what this machine is? Basically it is a machine similar to a printer but instead of printing the cartridge is a blade and it cuts.
Tip: To prevent sliding I always cut my vinyl on a cutting mat.
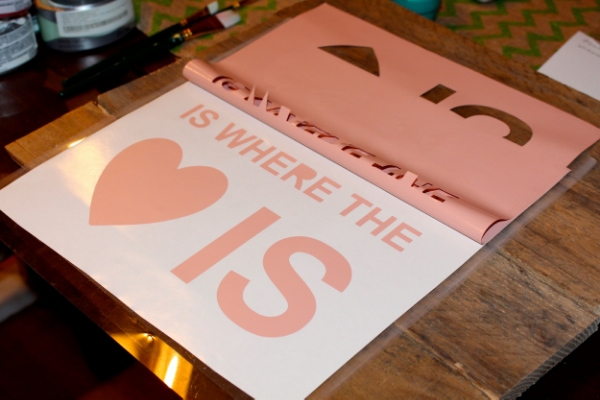
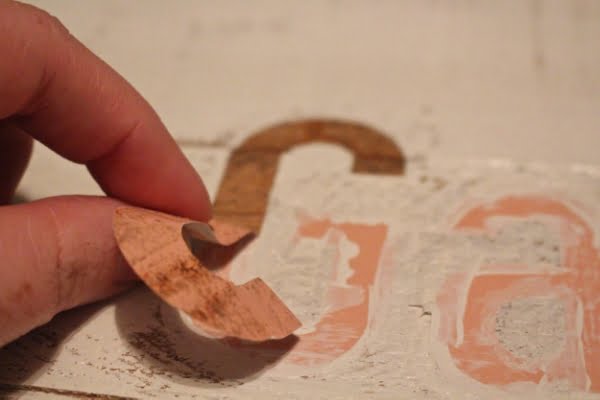
Now that your vinyl is cut there are two ways to stencil with vinyl. One you transfer the letters using transfer tape to the pallet then paint over only to pull them off to show the color or wood beneath it. The second way is to use the outline to fill in with paint. Now most tutorials I have seen weed out the excess vinyl and use transfer tape but me I have to be different. I hate wasting materials so I always try to make two stencils out of one cut.
How do I do this…. very carefully. My technique is quite simple I pull the vinyl back keeping to low to the table. Low and slow is the way to go. You want to make sure not to let the adhesive side touch the vinyl because it is very hard to remove without damaging it. I learned this the hard way a few Christmas’ ago.
Now make sure to hang on to this. You can easily make another sign!
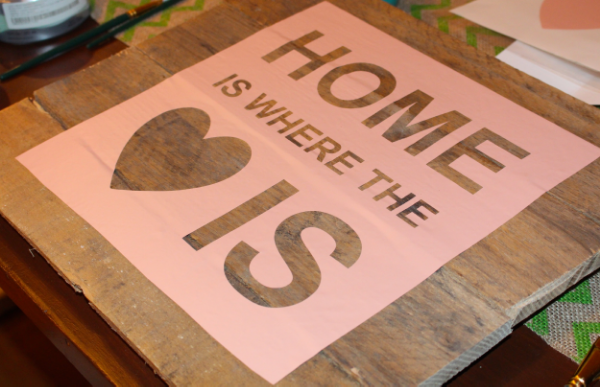
Now carefully lift and place the stencil on the the pallet boards you have already assembled (if you don’t know how to do that yet check out this tutorial here). Now when I place the stencil down I always try to see where the lettering falls in relation to each blank. Often I move the vinyl stencil a few times before it is in place. Make sure to use a ruler or measuring tape to center the stencil. Using the scraper tool that came with the silhouette or a credit card use it to smooth out the vinyl. This will get rid of air bubbles and create a tight seal.
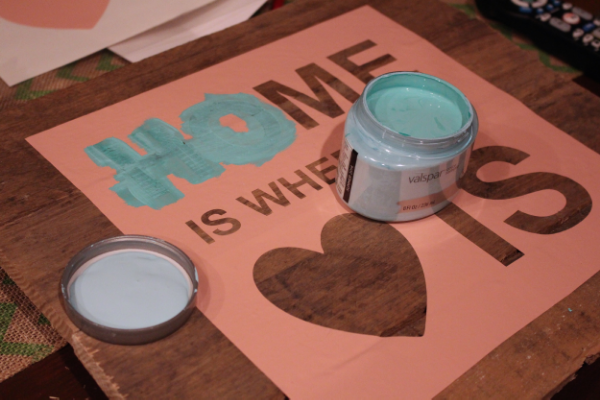
Now here comes my favorite part. Let’s paint! If you follow me on instagram you will see almost every Friday night after a long week at the office I am painting. It is so therapeutic whether it is a piece of furniture, a pallet sign or some watercolor I love to relax by painting. Whenever I am at Lowe’s or Home Depot I always grab some small paint sample cans. At this point I have them in about every color and they work great for painting signs.
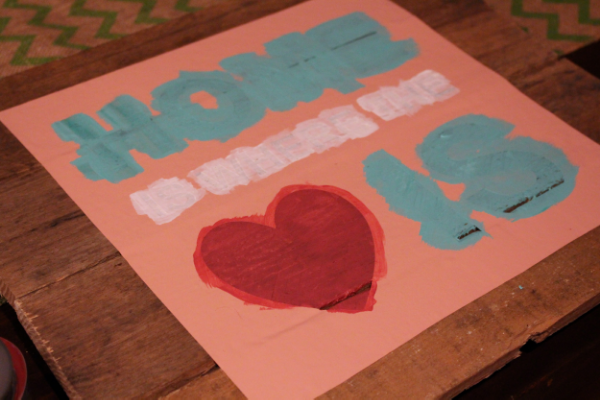
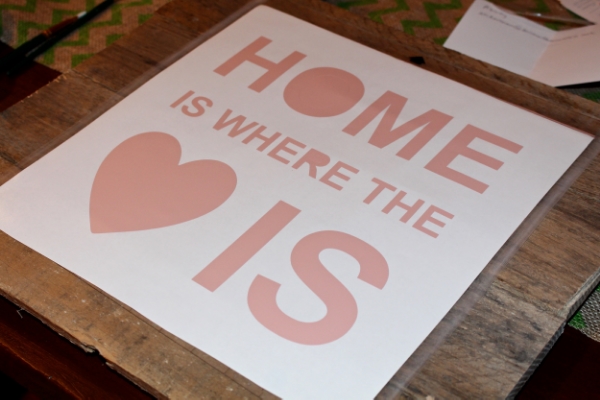
Now no need to over saturate while painting a little bit goes a long way and it’s less likely to bleed through the stencil. Once the paint is semi dry. Just a few minutes carefully pull back the vinyl and Viola! You have a custom made pallet sign! Now that wasn’t too hard was it?!
Want to Check Out More Silhouette Projects?
My Silhouette Challenge buddies and I are all sharing projects on our blogs today, so peruse the projects below for a wealth of Silhouette inspiration!
1. Whatcha Workin’ On? // 2. Two Purple Couches // 3. Made in a Day // 4. Ginger Snap Crafts // 5. Architecture of a Mom // 6. Simply Kelly Designs // 7. Crafty Bonds // 8. Practically Functional // 9. DailyDwelling // 10. DIY Just Cuz {Sam} // 11. unOriginal Mom // 12. Decor Adventures // 13. Creative Ramblings // 14. My Paper Craze // 15. Where The Smiles Have Been // 16. Get Silvered // 17. DIYJustCuz {Brittany} // 18. Weekend Craft // 19. Create & Babble

Love the sentiment of your pallet sign. Thanks for sharing your project. I stumbled and pinned. 🙂
You’re stencil is gorgeous Michelle! Love how great it turned out! I need to get on it with the pallet signs!
You are a brave, brave woman for not using transfer tape…. I tip my hat to you ma’am because now I must try to do this because I also HATE wasting vinyl.
Cute sign! Thanks for sharing your process. And, Michelle, two stencils from one cut—genius. I’m usually so excited to get to the painting part that that possibility doesn’t even cross my mind. I must slow down and think of these things. Thanks!
Beautiful! I love the colors you used and also that you were able to make two stencils! I’m kicking myself for always wasting my excess. Yet another great palette project! Pinning!
Great tutorial, Michelle! I have yet to try making my own pallet signs, but I have two pallets sitting in the garage that are just begging to be made into some cute decor like yours 😉
Can you put the vinyl on painted wood? When you peel it off does it take the paint with?
Hi Kessy,
I do put vinyl on painted wood. You just have to be careful let the wood dry fully and avoid doing it on humid days. Other than that it works like a gem. Patience is key!
How do you assemble the sign itself? Is there a tutorial somewhere? Thank you.
Hey Jennifer, Thanks for asking. You can see how I assemble them on this post here. Hope that helps!https://weekendcraft.com/journal/where-the-wild-thing-are-pallet-sign
Did you use 651 or 631. I have read so many things about preparing the wood and sanding and sealing. If this works as you did it does not seem so hard!
Hey Jen,I really don’t do a lot of prep to the pallets. If it’s really rough or splintering I will sand but most of the time it’s just good to go. Honestly I use whatever’s on hand for vinyl usually 631. If you do use 651 don’t let the vinyl sit to long because it has a stronger adhesive. If you are painting a base color for the pallet then stenciling words on top of that I would use 631.
What is the name of the blue paint color? I LOVEEE IT!
Hey Chelsea I am actually not sure! I got it in the opps section of Lowe’s but it’s definitely a favorite.