This post contains affiliate links, please read our disclosure policy.
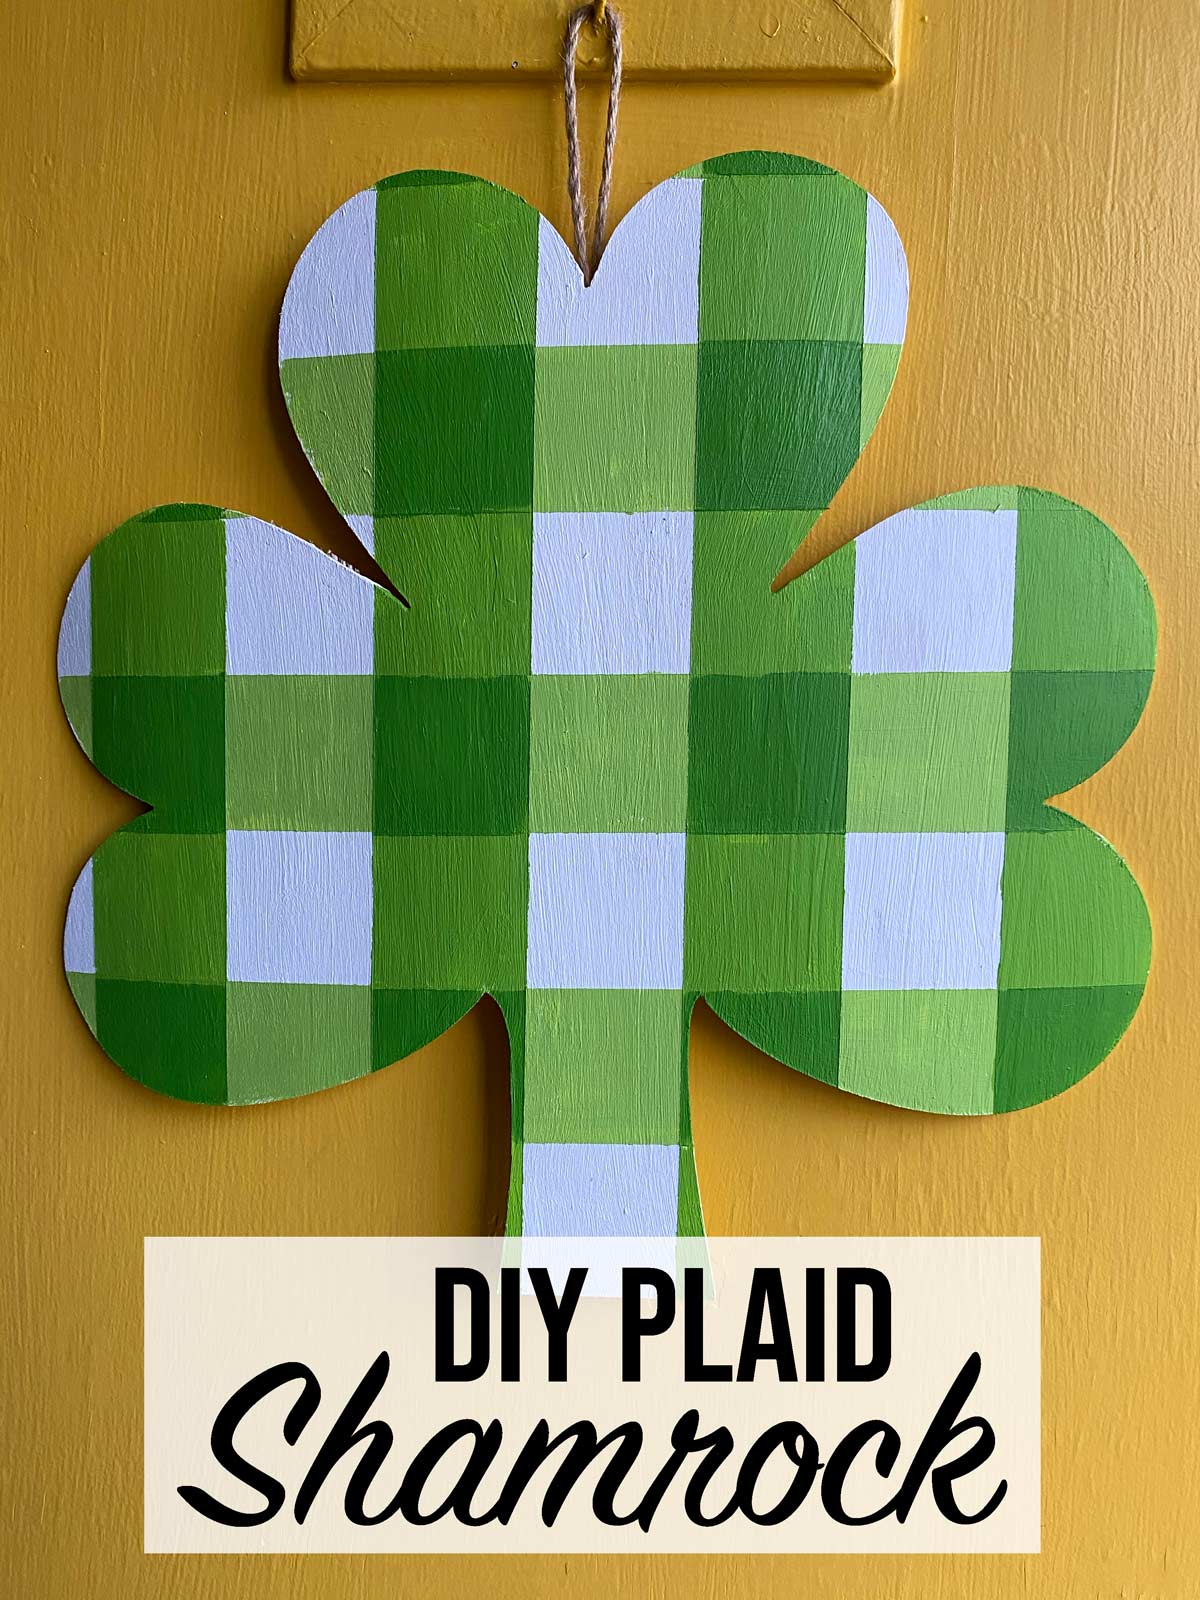
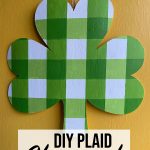
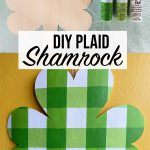
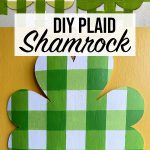
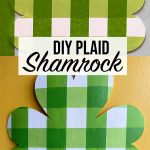
An easy tutorial on how to paint green buffalo check plaid with painters tape. This DIY plaid shamrock is the perfect DIY St. Patrick’s Day Decor Craft.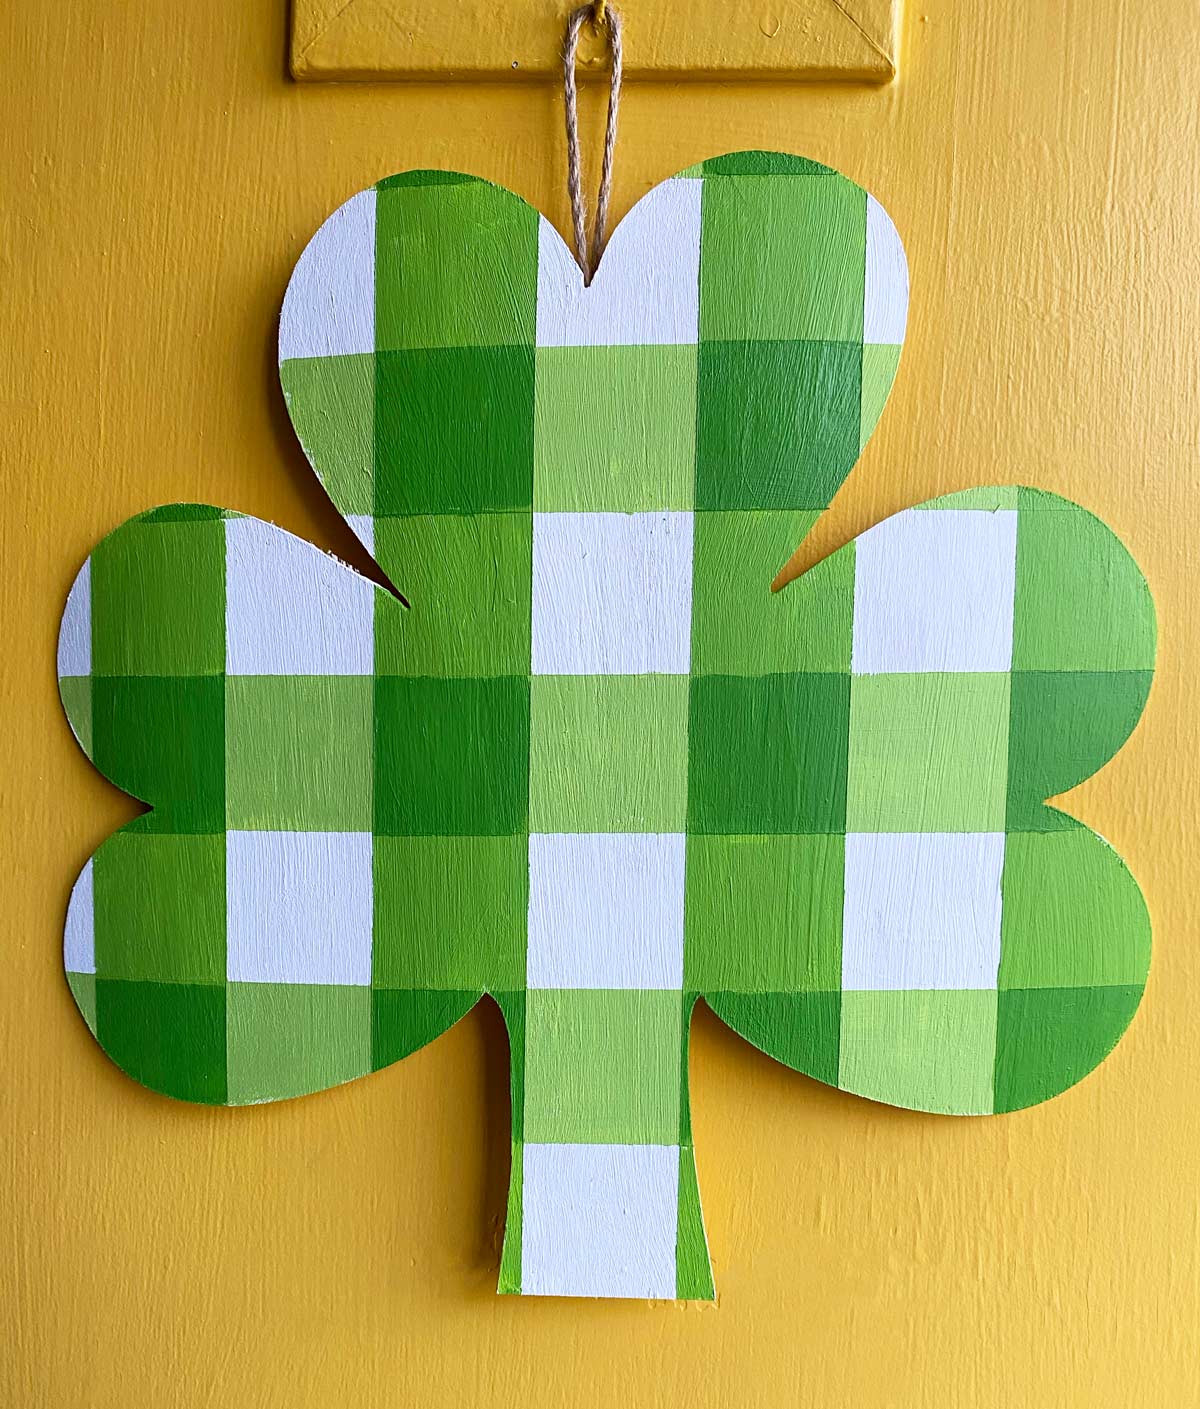
For St. Patrick’s Day decor I knew I wanted to incorporate green buffalo check but I couldn’t find anything. So I decided why not paint green buffalo check plaid shamrock. I don’t typically decorate for St. Patrick’s Day but this DIY plaid shamrock is too cute not to hang from my door instead of a wreath
Now I may have red hair but I am not Irish. It’s a common misconceptions so I’ve just decided to embrace St. Patrick’s Day every year. In fact I can’t help to bake my mom’s Irish bread to celebrate.
I got out my Cricut Maker and cut a shamrock out of basswood. Check out how to cut basswood here. Don’t have a Cricut not to worries there are some precut shapes you can purchase.
Table of Contents
How To Paint Green BuffaloCheck Plaid
I have painted buffalo check plenty of times before. So I grabbed my Frog tape and paint and started crafting.
Check out this DIY buffalo check sign, pumpkin buffalo check door hanging and this heart shaped pink buffalo check door hanging.
This post contains affiliate links.
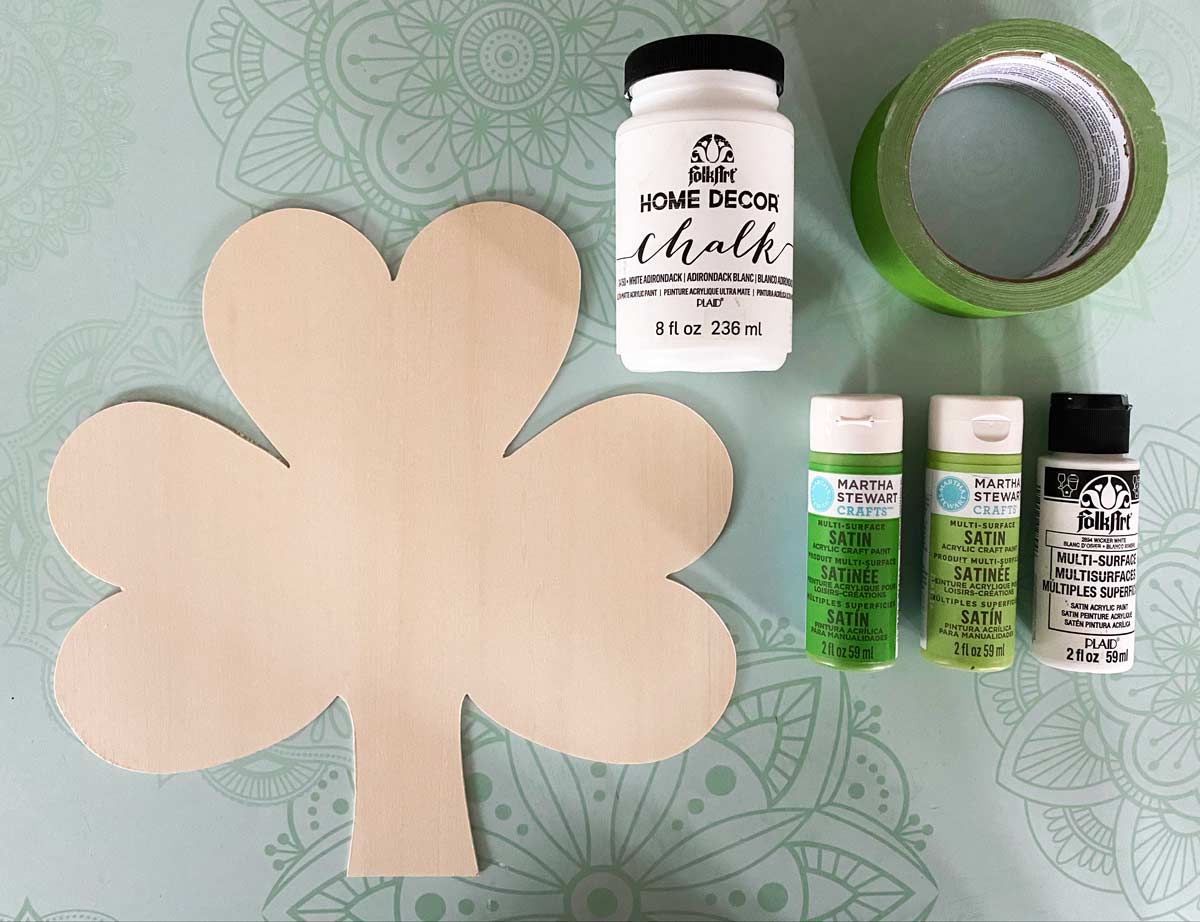
Here’s What You’ll Need to make a DIY plaid shamrock
- Wooden Shamrock
- Frog Tape
- White Chalk Paint
- Light Green, Medium Green, Deeper Green and White Acrylic Paint
- Paint Brushes
Let’s paint some green buffalo check plaid. All you really need is some painters tape, paint brushes and paint. Now I will tell you the best tape to use is Frog tape. The paint blocking technology is just superior for crisp lines.
Mix Paint Colors
Now you are going to need 3 colors to make this green buffalo check plaid. A light green, medium green and a deeper green. Now you can do this by purchasing all the colors or mixing your own.
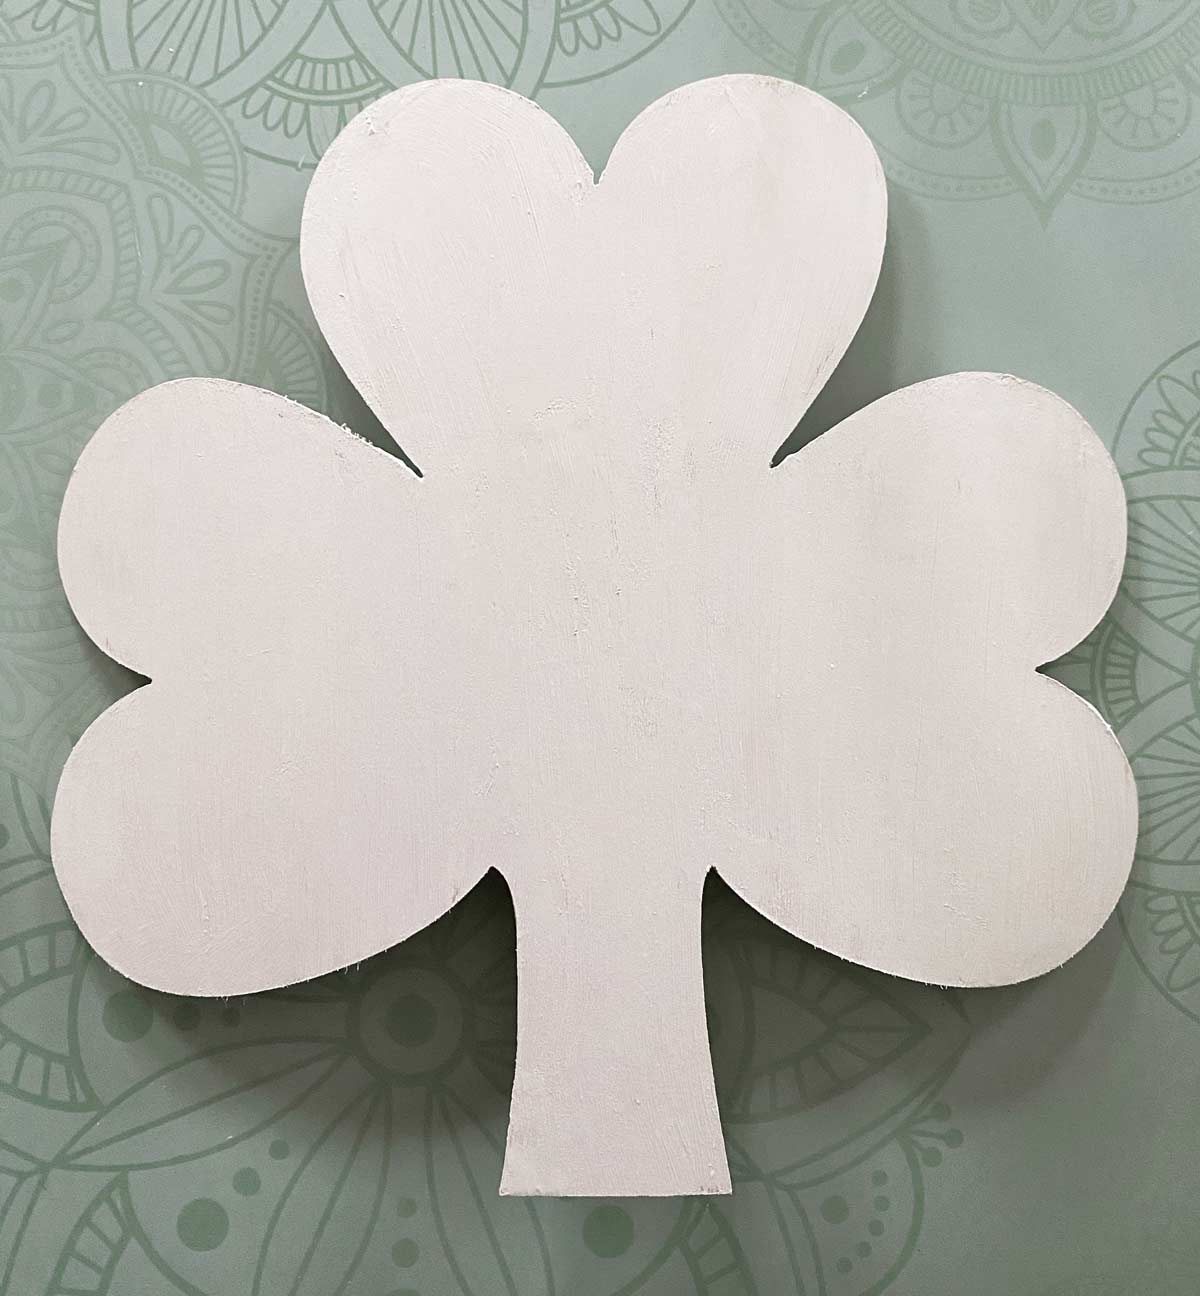
Base Color
We are going to start by painting the base of your sign white. When painting buffalo check I always use a chalk paint for the base of the sign. This helps with the paint not peeling up with the painters tape.
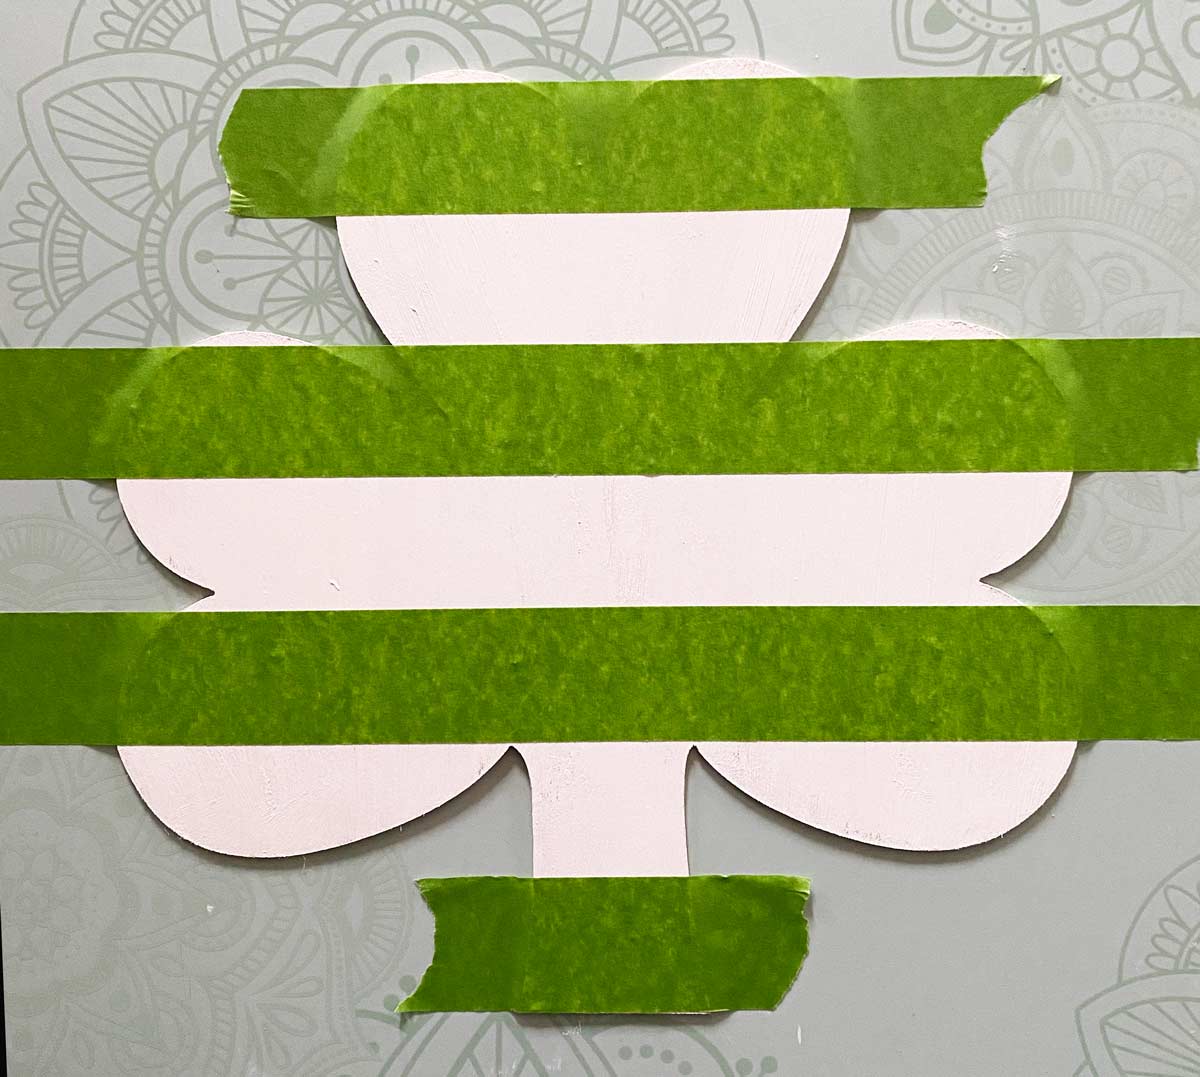
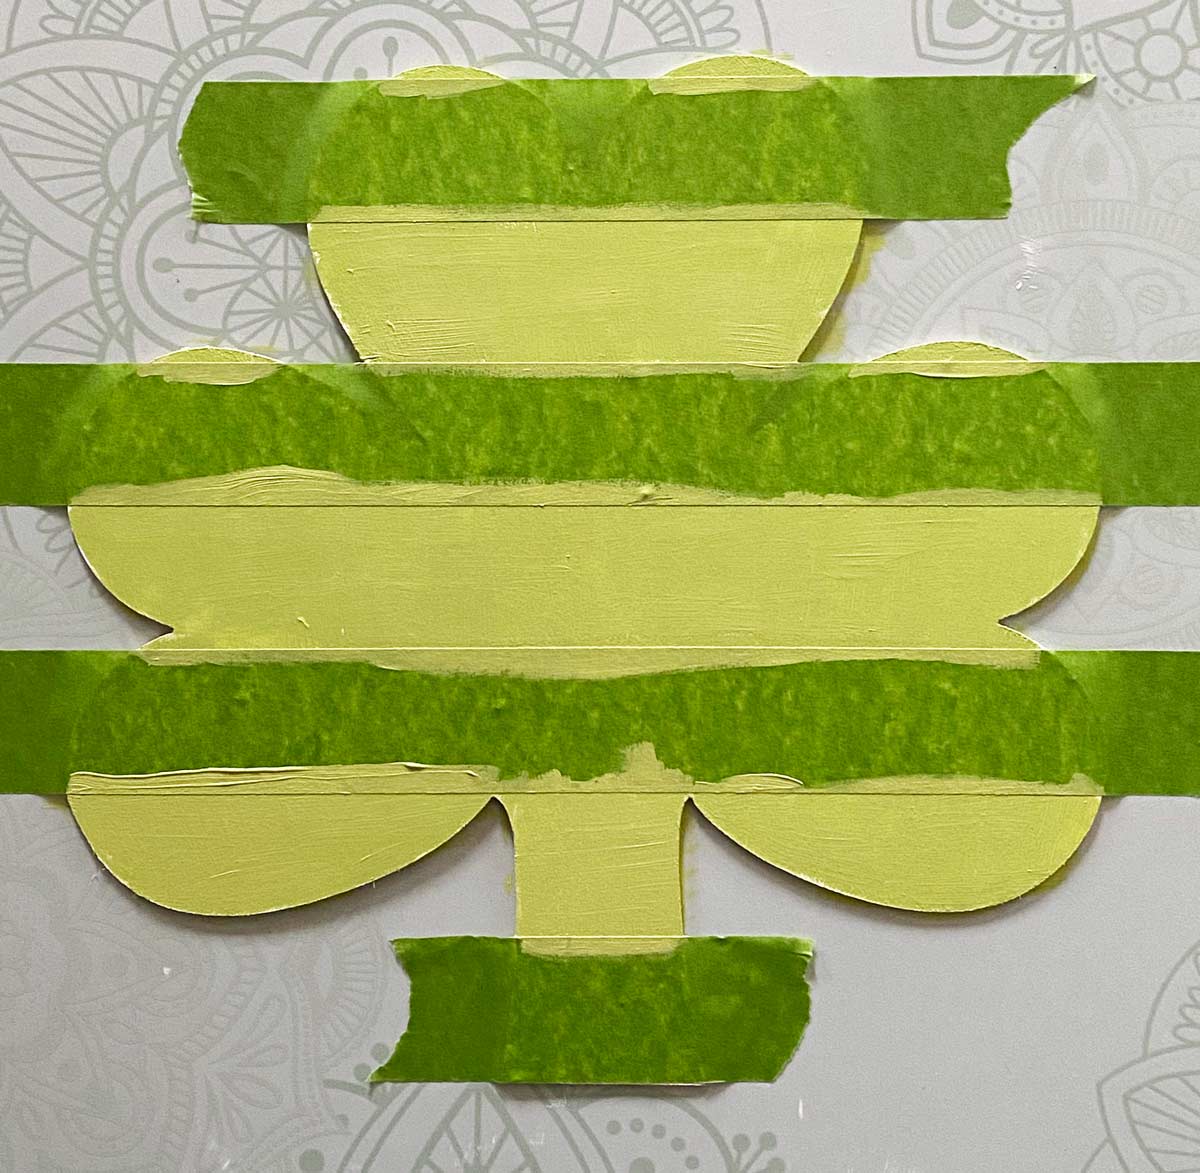
Tape Off Horizontal Stripes
Starting at the bottom of your sign tape horizontal stripes. Pressing them down smoothly on the wood to create a seal. Use a piece of tape as a spacer in between stripes. This is more efficient than measuring and marking spaces with a pencil.
Paint Horizontal Stripes
Using your lightest green paint the horizontal stripes. Be sure not to over saturate your paint brush. A few light coats can help with bleeding. Check out this technique for painting crisp lines.
Remove Tape
Remove painters tape while it’s still a bit wet.
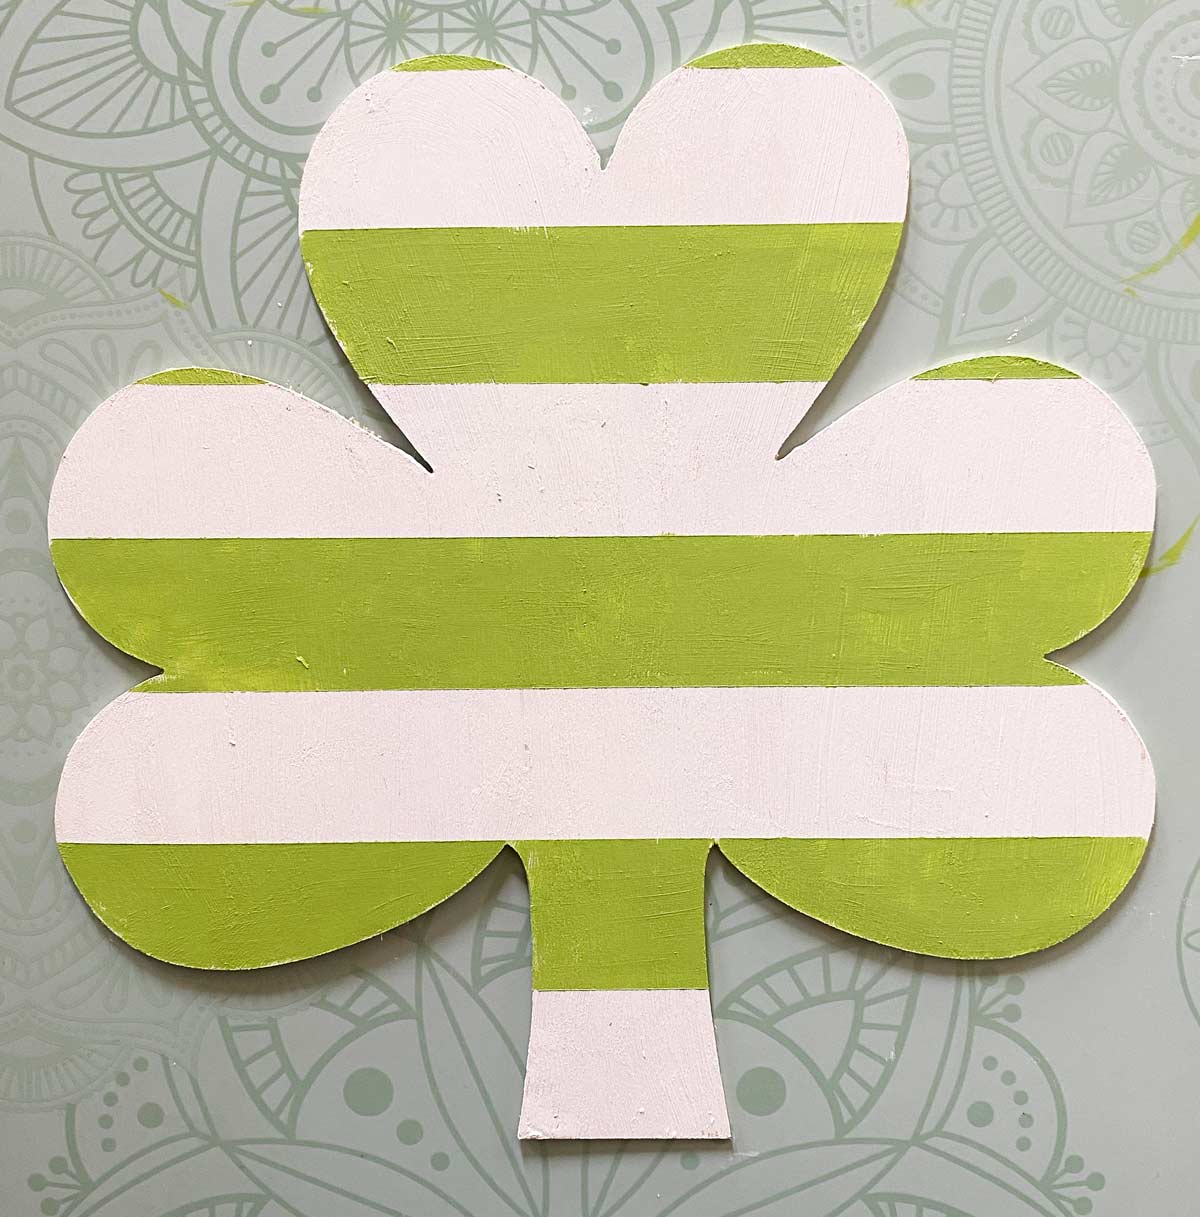
Tape Off Vertical Stripes
Starting at the far right side use your space tape flush against the side. Then start to tape your vertical stripes.
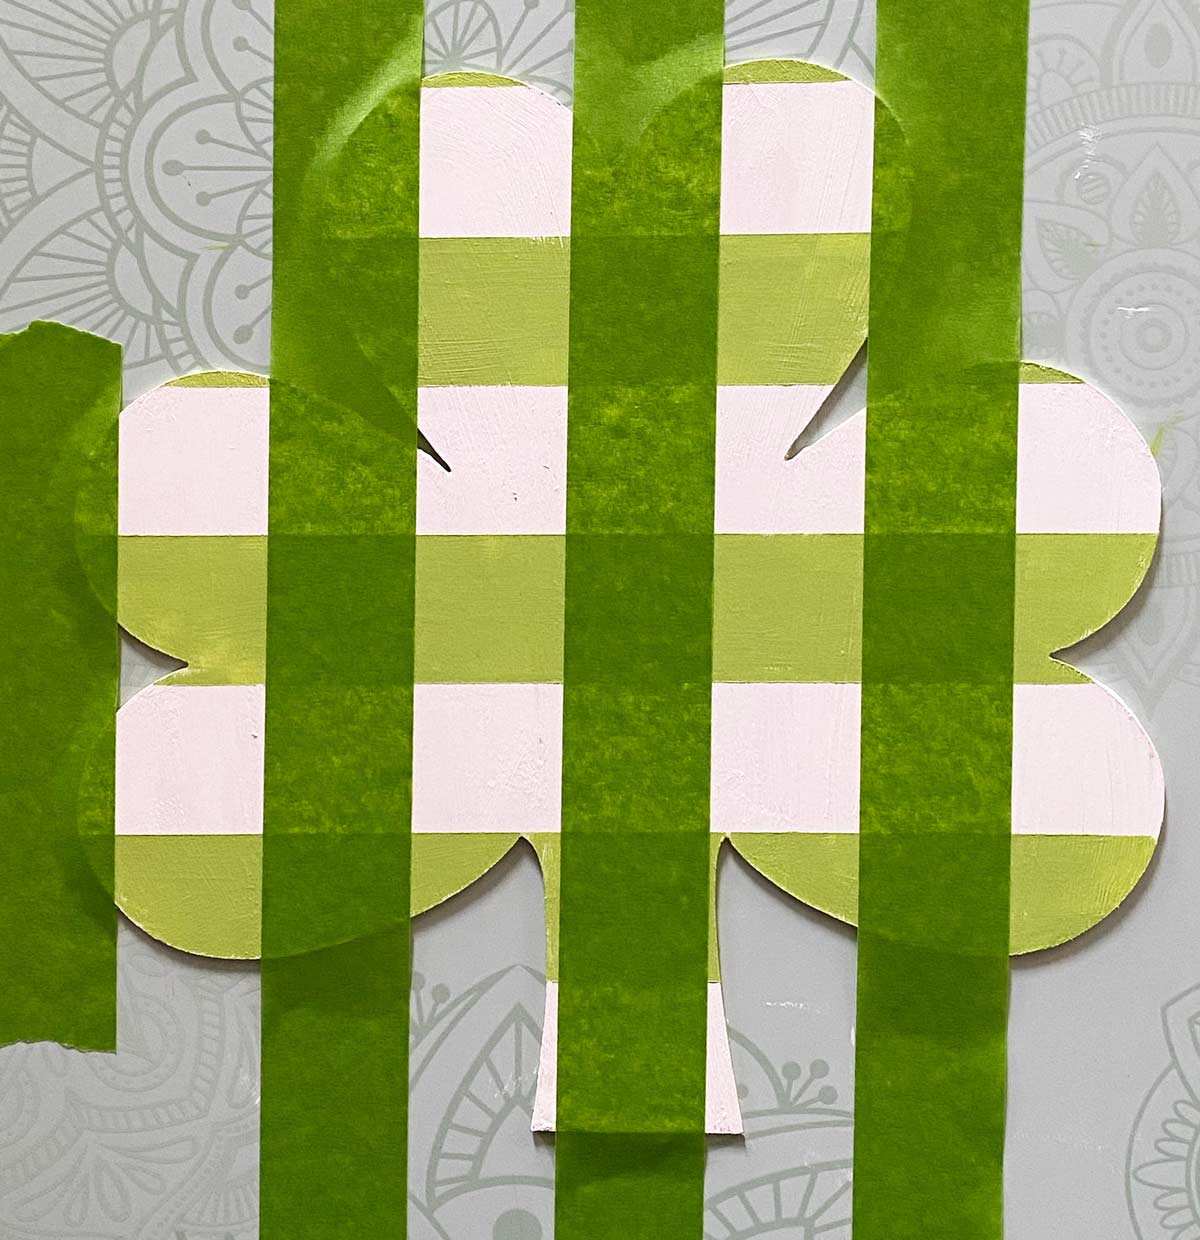
Paint Vertical Stripes
Using the medium green start to paint your vertical stripes. DO NOT remove the painters tape. Let paint dry completely.
Tape Horizontal Stripes
Starting at the bottom of the sign start to tape your horizontal stripes.
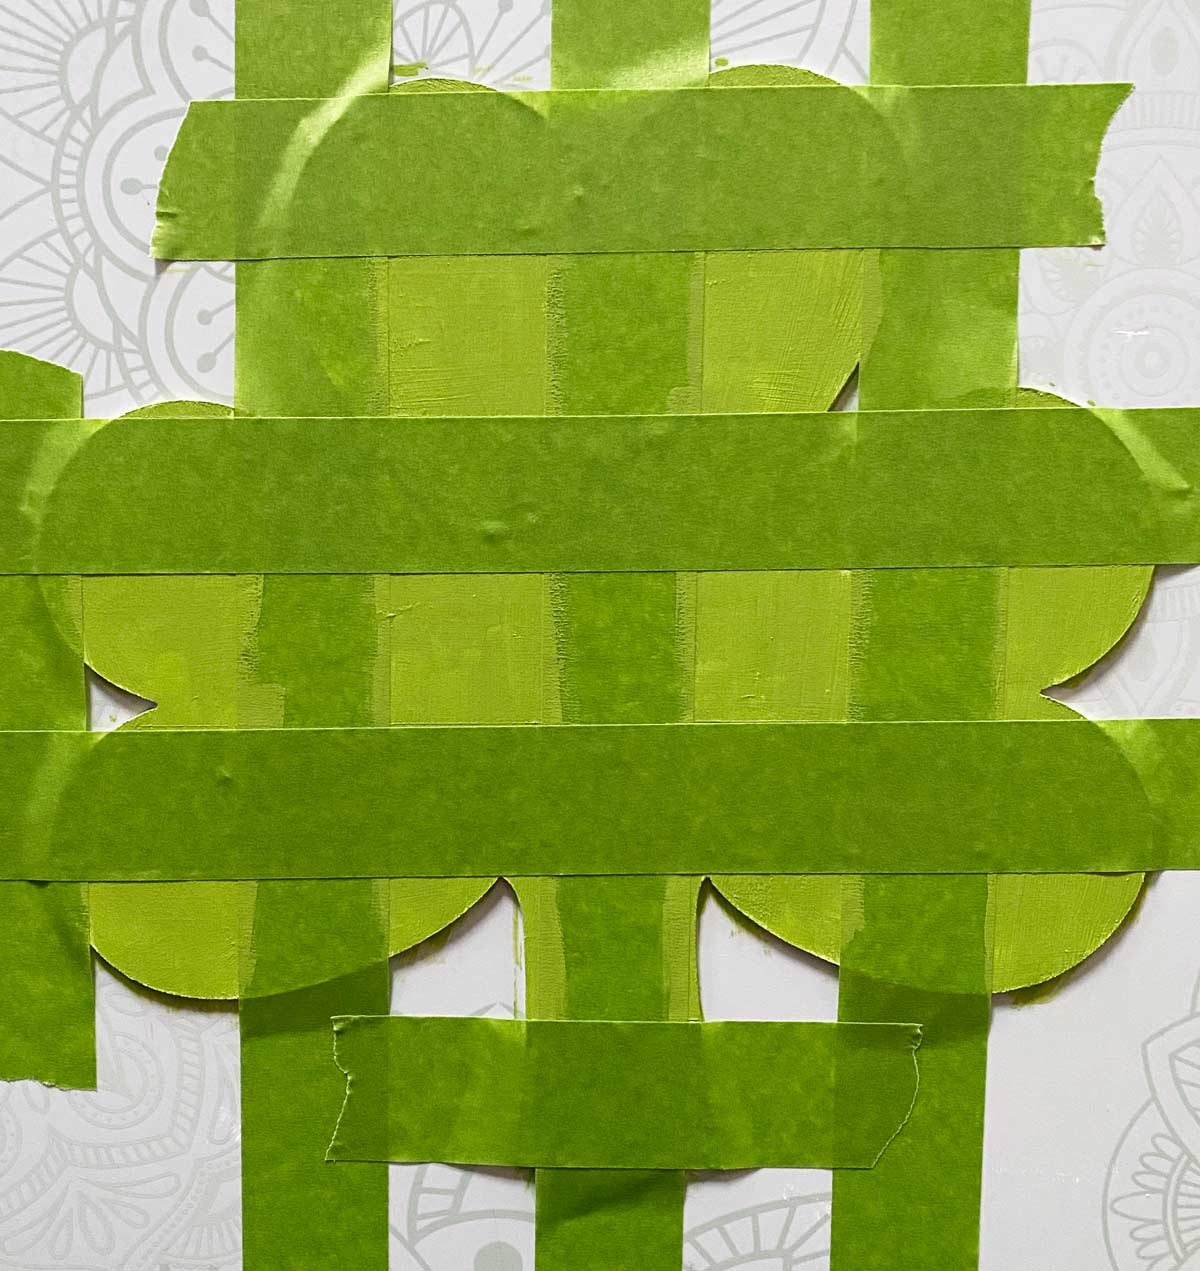
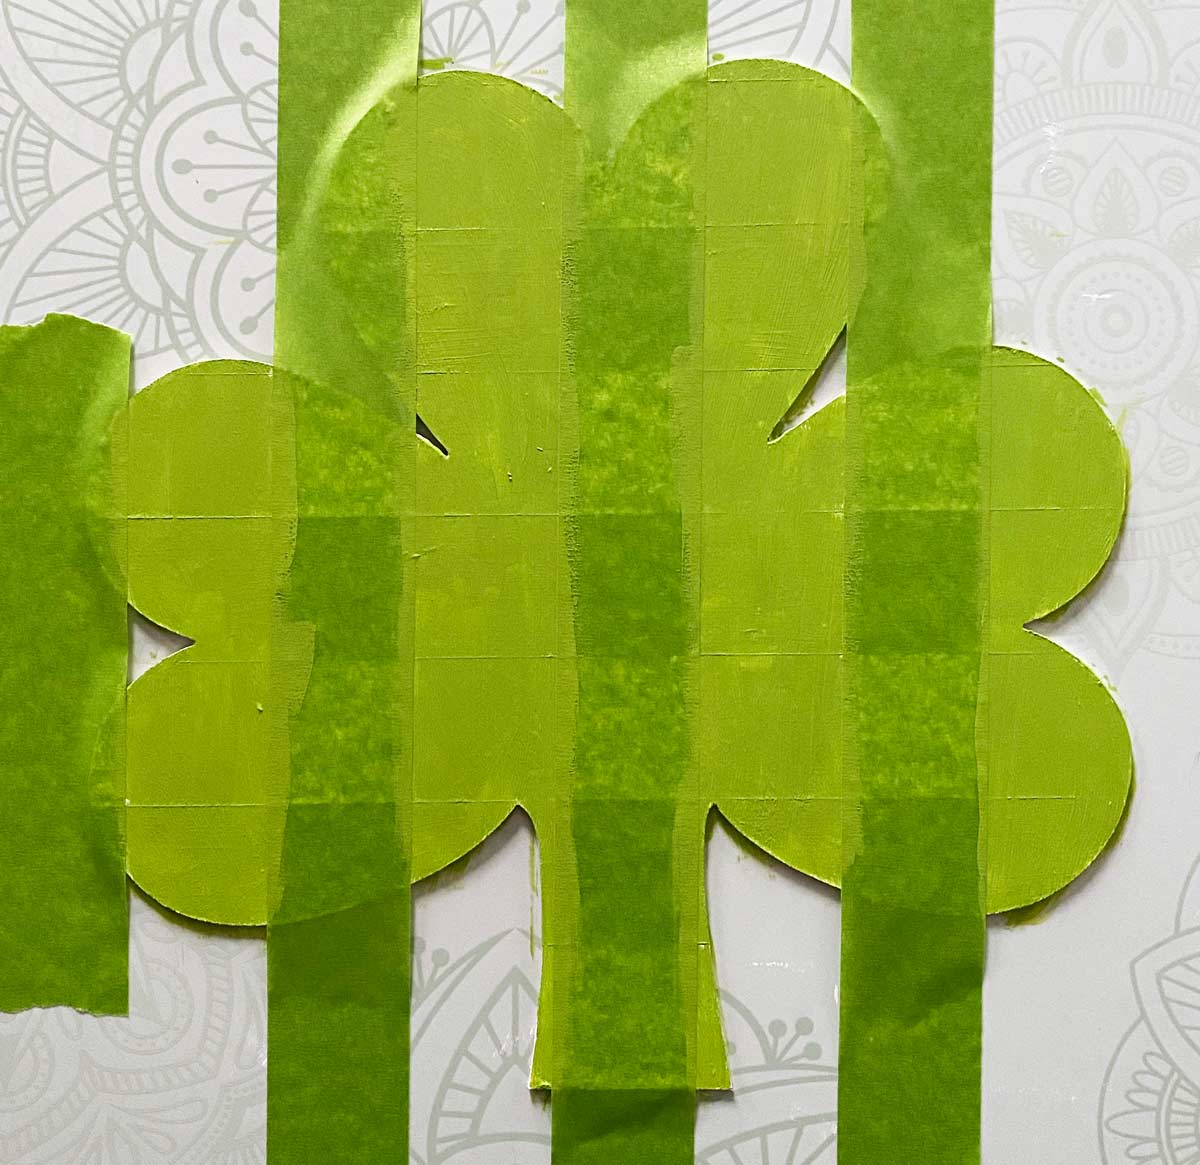
Paint The Check
With a thin amount of green paint on your brush start painting the open squares on your sign. Apply two thin coats of the green paint.
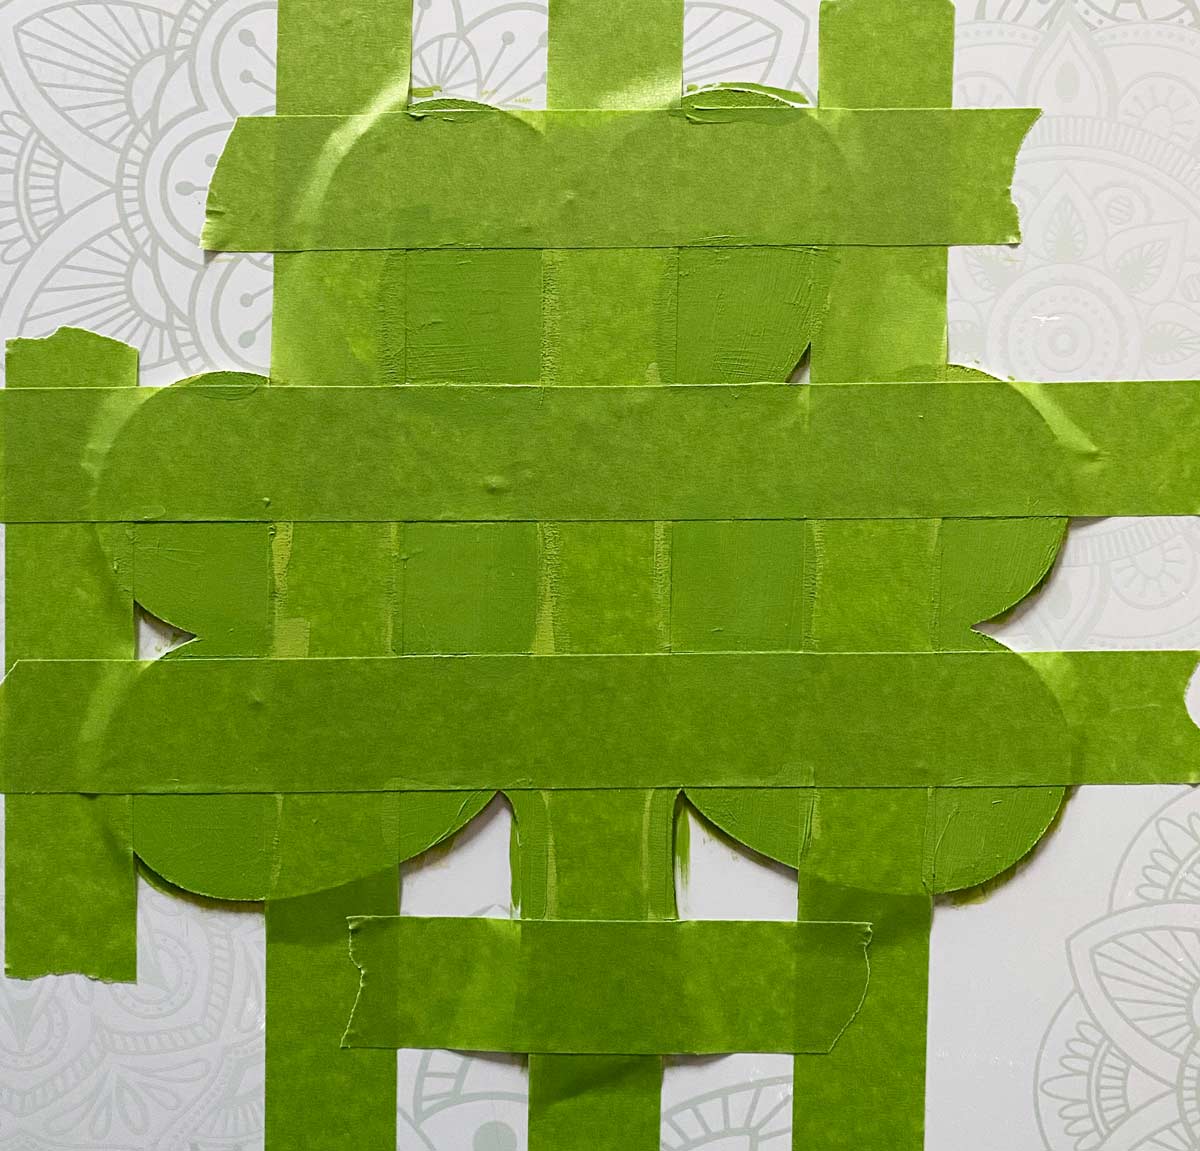
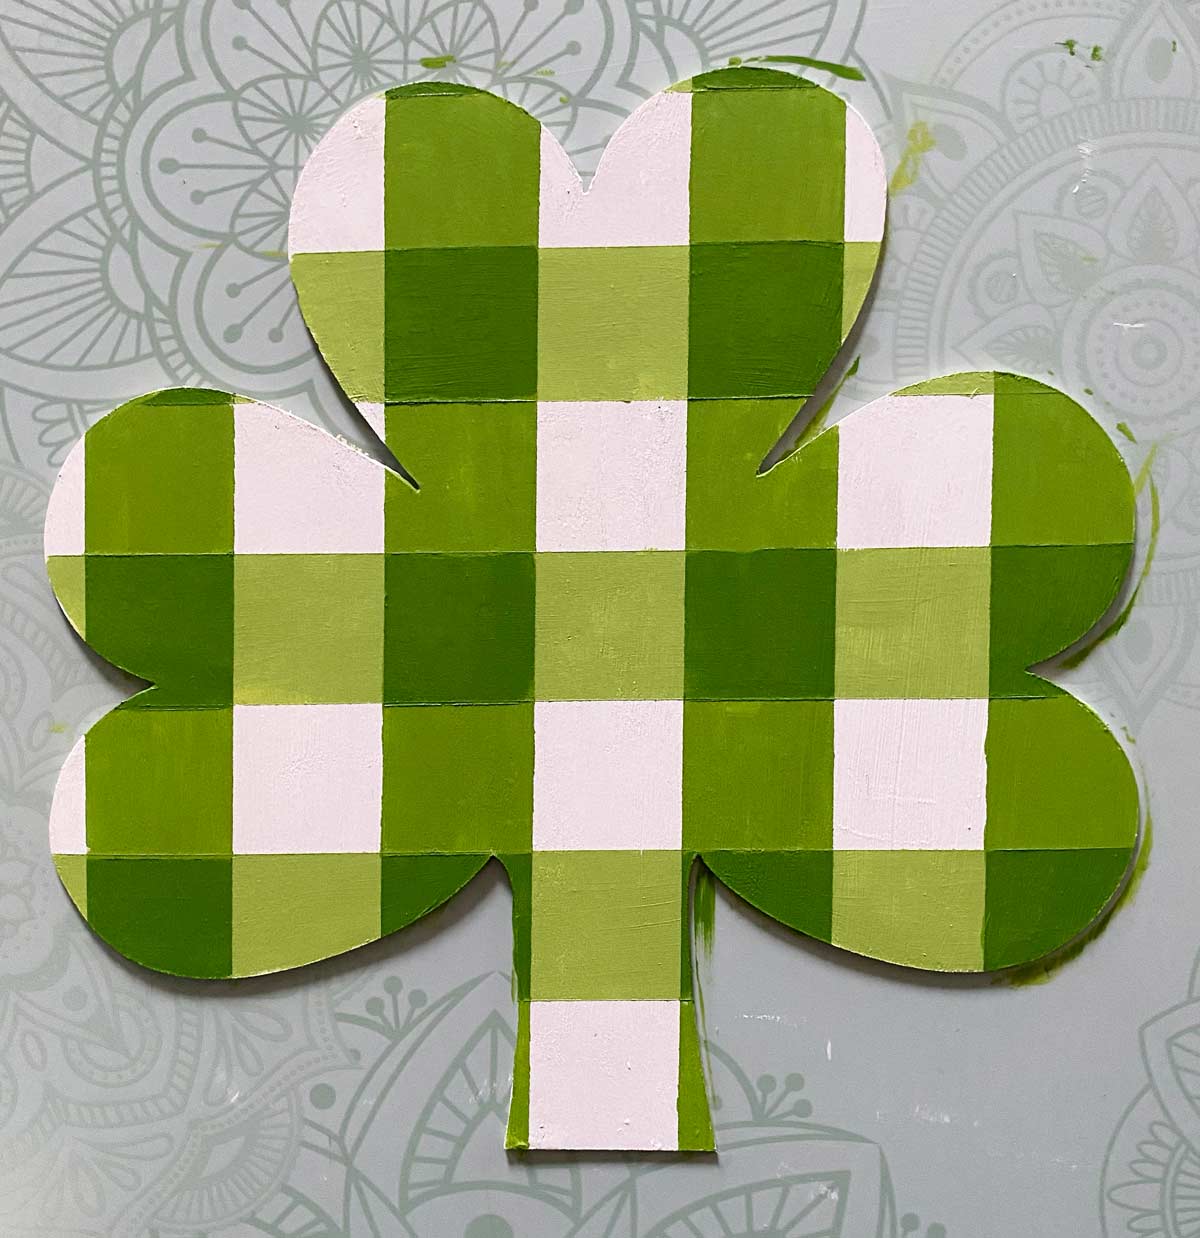
Now here is to see if we did it correctly. Peel back all of your painters tape. And just like that you have created your own buffalo check sign. Did any paint bleed through? Don’t worry once it’s fully dry just use some extra paint to touch it up with a small detail brush.
I added a bit of twine to the back of the wooden shamrock with some hot glue. This makes the perfect St. Patrick’s Day “wreath.”


2 Comments